Games
Workshop: Version Control for Games Design
Workshop exercise: Clone, commit, pull, push
Getting started
Step 1: Get yourself on Github! Go to https://github.com/ and make yourself an account, if you don't already have one.
Step 2: Click HERE and leave a comment on the issue (include your name so I know who you are, please). This is just so I know your Github username and I can add you as a collaborator. This is important - because even though you can see all the code right now, you won't be able to push any of your changes until you've been added.
Setting up the git user
Before we can start using git, we have to tell it our name and email address. Weirdly, this isn't actually related to your Github account - it's just an identifier that it will put next to your commits (you know, so your friends know who to blame when the project breaks!).
Open Git Bash if you haven't already. This will give us a command line interface - it's a text-based way of navigating our folders and running programs. To run a command, you type it and then press enter.
To set the user name, use this command:
git config --global user.name "Replace this text with your name"
Don't forget to replace the text in quotes with your actual name! For example, I would put:
git config --global user.name "Delia Hamwood"
Then set the email address. This can be any address you use, it doesn't have to match your Github account:
git config --global user.email replacethis@example.com
Replacing the fake email with your real one. Mine would look like this:
git config --global user.email d.hamwood@lcc.arts.ac.uk
Cloning the project
Now git knows who we are, we need to navigate to the folder we want to put the documents in. Let's put this one in our Documents folder. Type this and press enter:
cd Documents
Now you should be in the Documents folder - we're ready to to clone the project. Here's the command:
git clone https://github.com/creativetechnologylab/LCCUnityGitWorkshop.git
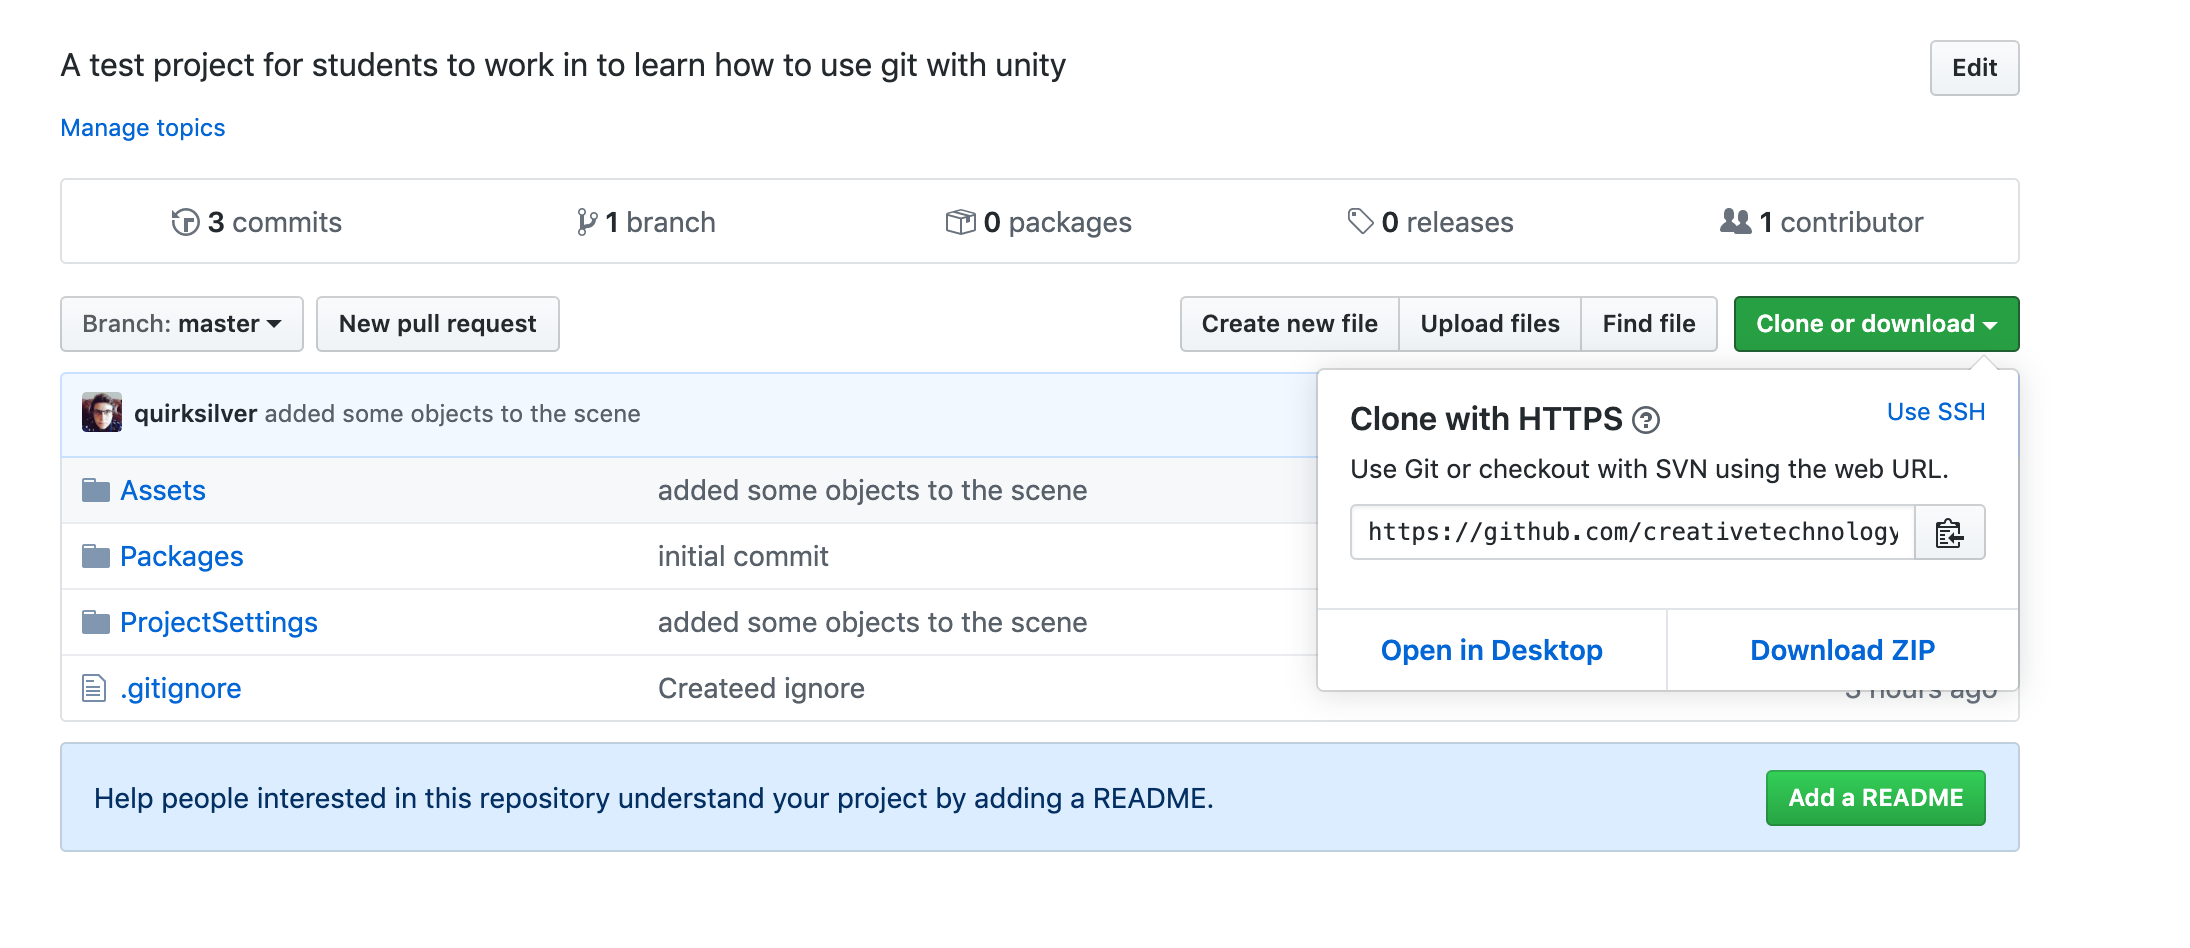
Wondering where I got that URL? There's a button on the project page for "clone or download" which gives you the link - you can get the clone URL for any project that's publicly available on Github, even if you aren't a collaborator!
Making changes and committing them to the local repository
Now you can open the project like normal in Unity and make some edits! It's pretty empty at the moment - maybe create some scripts or assets. But remember, you should only work on the Main scene file if you have the merge token.
Once you've changed some files, you can use these commands.
git status will show you all the changes you've made since the last commit. Filenames in green will be saved as a version in the local repository if you make a commit. Files in red have changed, but won't be sent to the repository unless you add them. If you're happy with your changes, the command git add -A will "stage" them all, ready to be committed to your local repository.
Then you're ready to commit!
git commit -m "Replace this text with a descriptive commit message that explains what files you have changed"
You always have to put -m followed by a message in quotes. Git won't let you commit without sending a message. Try to make it something sensible that explains what work you've done. This helps your collaborators, but most of all it helps future you.
Syncing up with the remote repository
You can do this any time, but remember with lots of people working it could get messy. If you've only added your own files (and not edited anyone else's), you can go ahead and do this. Or if you've changed the Main scene and it's your turn with the merge token, go ahead.
You need to pull down other changes first. If somebody else has made a change, git won't let you push yours until you're up to date.
git pull will fetch and merge anyone else's changes that are already online. If you get a message about a merge conflict, ask for help! Otherwise it should be safe to do this:
git push
And this will send your changes up to the remote repository.
You can have a look at the project commit history here to see all the changes we've made: https://github.com/creativetechnologylab/LCCUnityGitWorkshop/commits/master
Additional resources:
- Tutorials and cheat sheets from Github: https://try.github.io/
- Download and install git for your laptop or home PC: Git downloads page
- GUI applications for git:
- Fork
- Github Desktop
Bonus round: putting an existing Unity project into git
First up! We need to make sure our Unity project is configured correctly. In the project, go to Edit > Project Settings > Editor and check that your settings look like this:

Open up the command line. This will be Terminal on Mac OS, on Windows you should use Git Bash.
If you're not familiar with the command line, the way to use it is to type a command, and then press Enter to run that command.
The command looks like this: cd "path/to/your/unity/project" but you need to replace "path/to/your/unity/project" with the actual filepath to the top level folder of your project!
If you don't know the path, you can copy it from Finder or Windows Explorer. On a Mac, hold Option and Right-click the folder and select "Copy as Pathname".
On Windows hold Shift and Right-click and choose the command "Copy as Path".
You can paste the path directly into the command line after typing "cd". If you're on Windows, you can't use the normal Ctrl+C shortcut in Git Bash - use Shift+Insert instead.
Then we can set up our repository with this command:
git init
Now there should be a folder called .git in your project. You may need to show hidden files to see it (Shift+Option+. on Mac, in Windows Explorer click 'View' and select the "Hidden Items" checkbox).
Type git status and press Enter - you should get a list of all the folders git can see in your project. None of these have been added to the repository though.
Don't commit anything yet! Unity has a lot of weird crap in it which we don't want to keep track of. We need a gitignore file, we're going to create an empty one using this command.
touch .gitignore
Here's the .gitignore content we want to use - this is the list GitHub uses. Open your .gitignore file in a text editor (such as NotePad on Windows or TextEdit on Mac) and copy-paste this.
IMPORTANT: On Windows your .gitignore file will look like a text file with no name in the top level folder of your project.
[Ll]ibrary/
[Tt]emp/
[Oo]bj/
[Bb]uild/
[Bb]uilds/
Assets/AssetStoreTools*

# Visual Studio 2015 cache directory
/.vs/

# Autogenerated VS/MD/Consulo solution and project files
ExportedObj/
.consulo/
*.csproj
*.unityproj
*.sln
*.suo
*.tmp
*.user
*.userprefs
*.pidb
*.booproj
*.svd
*.pdb

# Unity3D generated meta files
*.pidb.meta
*.pdb.meta

# Unity3D Generated File On Crash Reports
sysinfo.txt

# Builds
*.apk
*.unitypackage
if you're working on Mac, you'll want to add this to it too:
# ============ #
# OS generated #
# ============ #
.DS_Store
.DS_Store?
._*
.Spotlight-V100
.Trashes
Icon?
ehthumbs.db
Thumbs.db
Don't forget to save your text file before closing! Now we're ready to start adding things to the repository.
git add .gitignore
This stages the gitignore file to be committed. We need to commit this before anything else, or git won't know what to ignore.
If you type git status it should show you that .gitignore is staged to commit, but your other files aren't.
git commit -m "Adding gitignore"
You can use a different commit message if you like but this one is pretty clear.
Try git status again. It shouldn't show you the Library folder in the list of unstaged changes now. So you're safe to commit everything else, like this:
git add -A
This command will 'stage' all of your files. This means it marks them as ready for commit.
git commit -m "Initial project commit"
This command will commit all of the files you staged in the previous step from your working copy into your local repository.