Metahuman Creator
A guide to the basics of how to create Metahumans and digital copies of real people.
- What is the MetaHuman Creator?
- 3D Scanning a face for MetaHuman
- Additional Resources for Metahuman Creation
What is the MetaHuman Creator?

Unreal Engine, developed by Epic Games, has introduced an incredible tool called the Metahuman Creator. This tool revolutionizes the process of creating virtual humans, making it easier and more realistic than ever before. Let's explore how the Metahuman Creator is changing the game for students and creators alike.
Unleashing Realistic Characters:
The Metahuman Creator is a powerful tool that lets students and creators design digital humans that look and behave just like real people. With Unreal Engine's advanced graphics technology, users can create characters with incredible detail, from their facial features and expressions to their body movements. This means virtual humans can now look more lifelike and realistic than ever.
Endless Customization:
One of the coolest things about the Metahuman Creator is how customizable it is. Users have complete control over every aspect of their virtual humans. They can adjust parameters like facial features, body proportions, and even create unique animations. This flexibility allows for a wide range of characters, ensuring diversity and representation in virtual worlds.
Easy Integration and Animation:
The Metahuman Creator seamlessly works with Unreal Engine's animation system. This integration makes it easy for students and creators to bring their virtual humans to life. They can import their creations into Unreal Engine and apply pre-made animations or create their own. This saves time and effort while maintaining high-quality visuals.
Real-Time Abilities and Accessibility:
The Metahuman Creator is designed for real-time applications. This means virtual humans created with this tool can be rendered in real-time, allowing for interactive experiences and dynamic storytelling. Additionally, the tool is user-friendly, making it accessible for both experienced creators and beginners. It's a tool that empowers students to bring their ideas to life, regardless of their level of expertise.
Future Possibilities:
The Metahuman Creator has implications beyond gaming. Its realistic virtual humans can be used in film, television, virtual reality, and augmented reality. This means it opens up new opportunities for storytelling and immersive experiences in various industries.
3D Scanning a face for MetaHuman
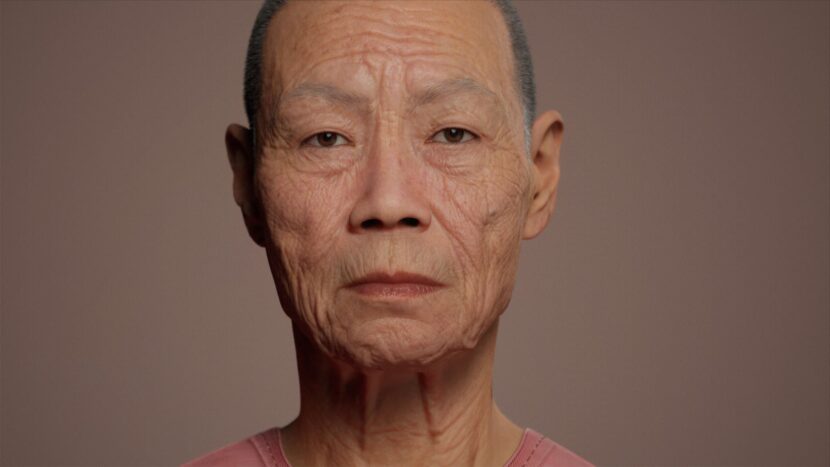
This guide will show you how to create a realistic copy of yourself into a MetaHuman for you to use in digital content. This guide assumes you have a basic knowledge of 3D modelling but will cover most of the steps required.
The approach we are going to use to create the MetaHuman is called Mesh to MetaHuman. This involves us creating a mesh model of the face and then relying on Unreal Engine to match the facial features of the scan to a new digital subject.
1. Using the Reality Scan app.
Download the Reality scan app on your phone. After launching the app, you should be able to create a new project. This will open your phone camera.
2. Prepare your subject and lighting.
You will get the best results when scanning in natural, neutral lighting with no harsh shadows or highlights. Try to brush hair back or use a hairband to hold any hair away from the forehead. Note: This will not work with long facial hair or accessories.
3. Begin your scan.
Once your subject is ready, you can begin the scanning process. The scan works by you taking multiple pictures of the subject from different angles. The software will then build a model from your photographs. Be sure to take pictures from many different angles while holding the phone steady.
- Try to get a low angle so the chin area is captured correctly.
- Get a few wide angle pictures so that the sides are captured correctly.
- It is common for a scan to require 50+ pictures so don't worry if you think you are taking too many. The more pictures you take, the more accurate your scan will be.
- Make sure your subject maintains a neutral expression and does not move. Your scan will not be accurate if your subject moves too much.
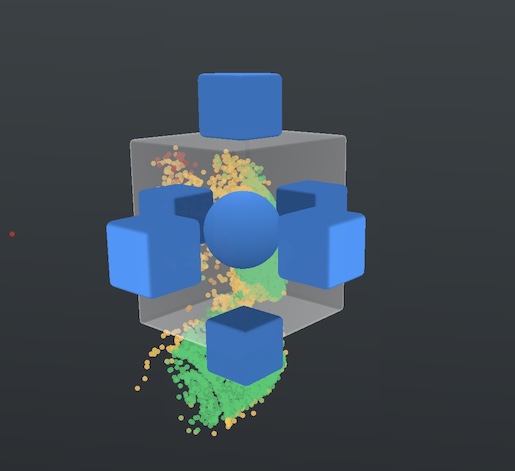
4. Previewing the scan
After you have taken a few pictures, you will start to see coloured points start to appear on the screen. This is the app building the Point Cloud of your model.

As you can probably tell, the dots are green if the pictures have captured a good amount of data.
Yellow dots are alright on the edge of the face because we won't be using the whole model for this process. If any portions of the face are coloured red, you should probably add some more pictures or re-do the process entirely.
We also want to crop our scan to save the processing power for the parts that really matter. You should adjust this crop box to contain the head of your model but not any excess points that were captured.
After this, you should wait for the model to generate. This can take a couple of minutes. You are free to press continue after the model is generated and wait for the processing.
Additional Resources for Metahuman Creation
After attending the Metahuman Workshop, you can choose to make use of the following tutorials to further customise your created Metahuman.
1. Fundamentals tutorial showcasing different third-party tools you can integrate with the Metahuman workflow for clothing and animation.
2. Custom hair for Metahumans with Blender
3. Metahuman Facial Animation
4. Metahuman Third Person Character