Raspberry Pi Image
- How to image a Raspberry Pi
- Raspberry Pi Image: Retropie for Reviving Vintage Games
- Raspberry Pi Image: Video Looper
- How to Configure a Raspberry Pi for the first time
How to image a Raspberry Pi
How to image a Raspberry Pi?
There is an official video showing how if you prefer.
1. Download the Raspberry Pi Imager
Go to the Raspbeery Pi official site to download the software. Choose a suitable version for yourself.

2. Insert your SD card
A CTL Pi kit should contain an SD card. Insert the SD card into your computer. It is always a good habit to format the SD card before imaging it. You need the SD card to be in FAT32 format.
Open Raspberry Pi Imager v1.8.4, you can format the SD card directly.
-
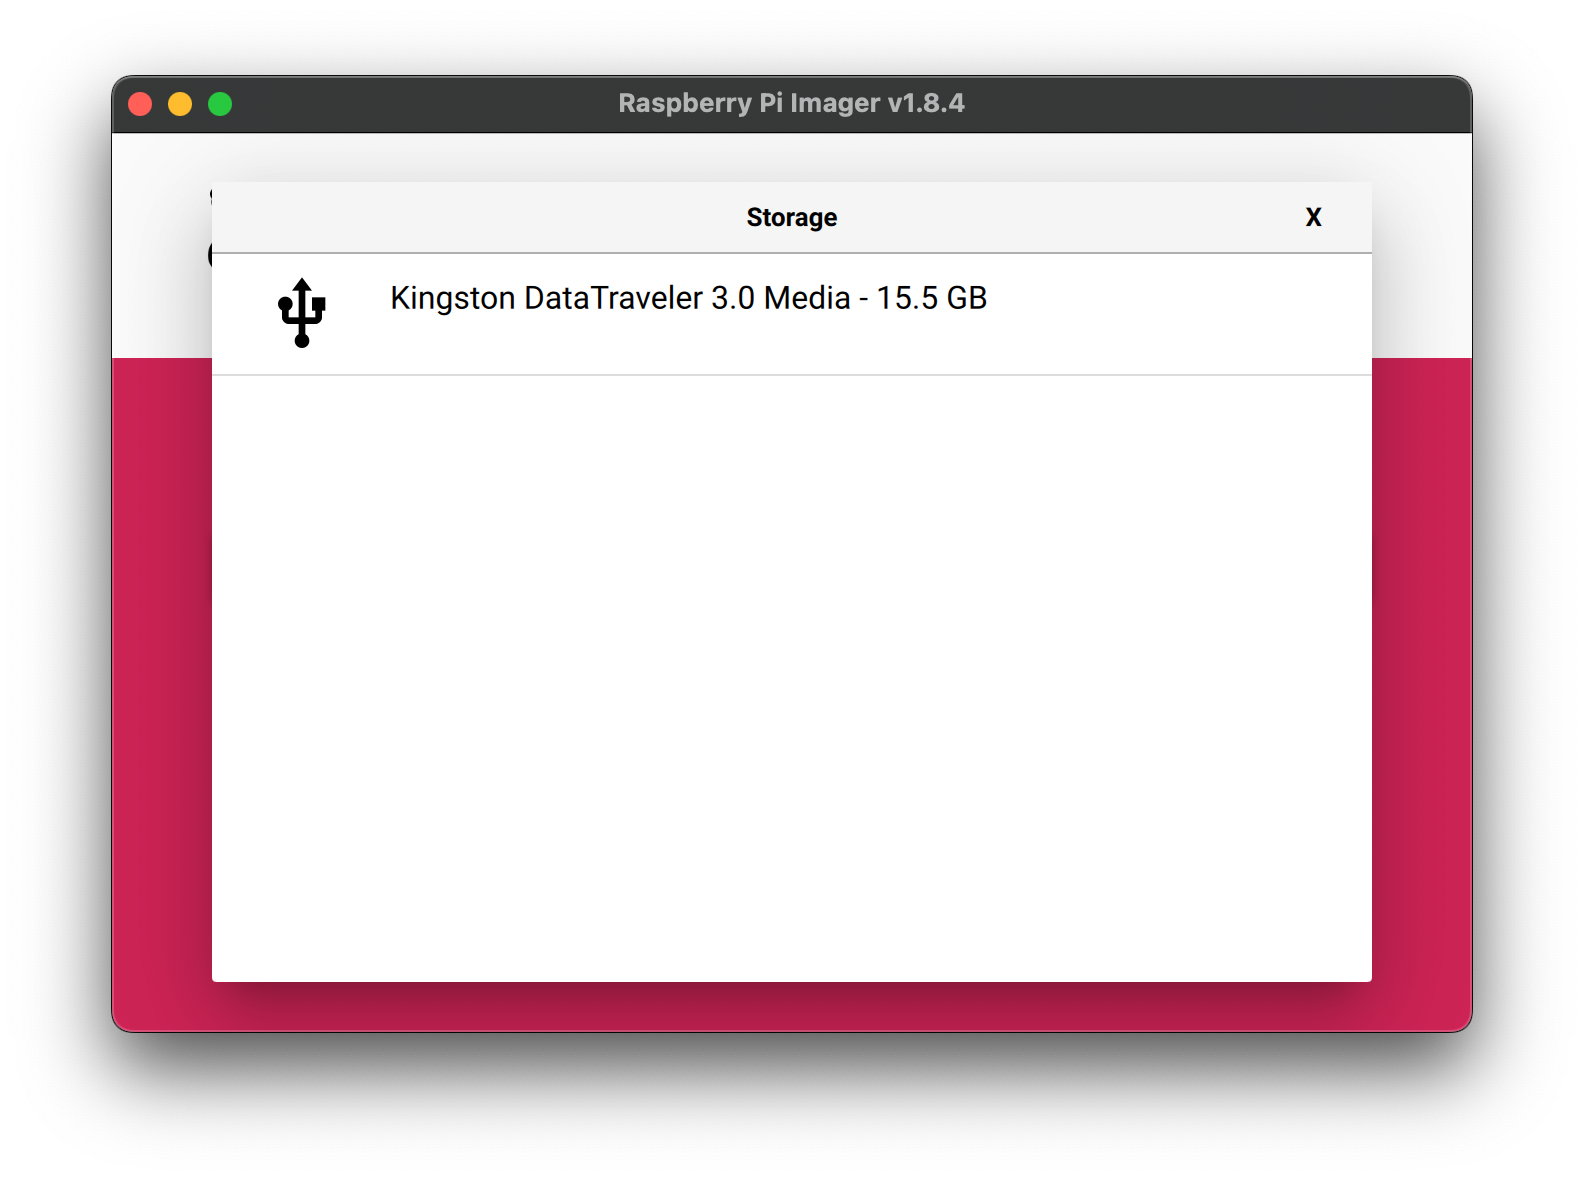
Storage, select the SD card -
Operating System-Erase
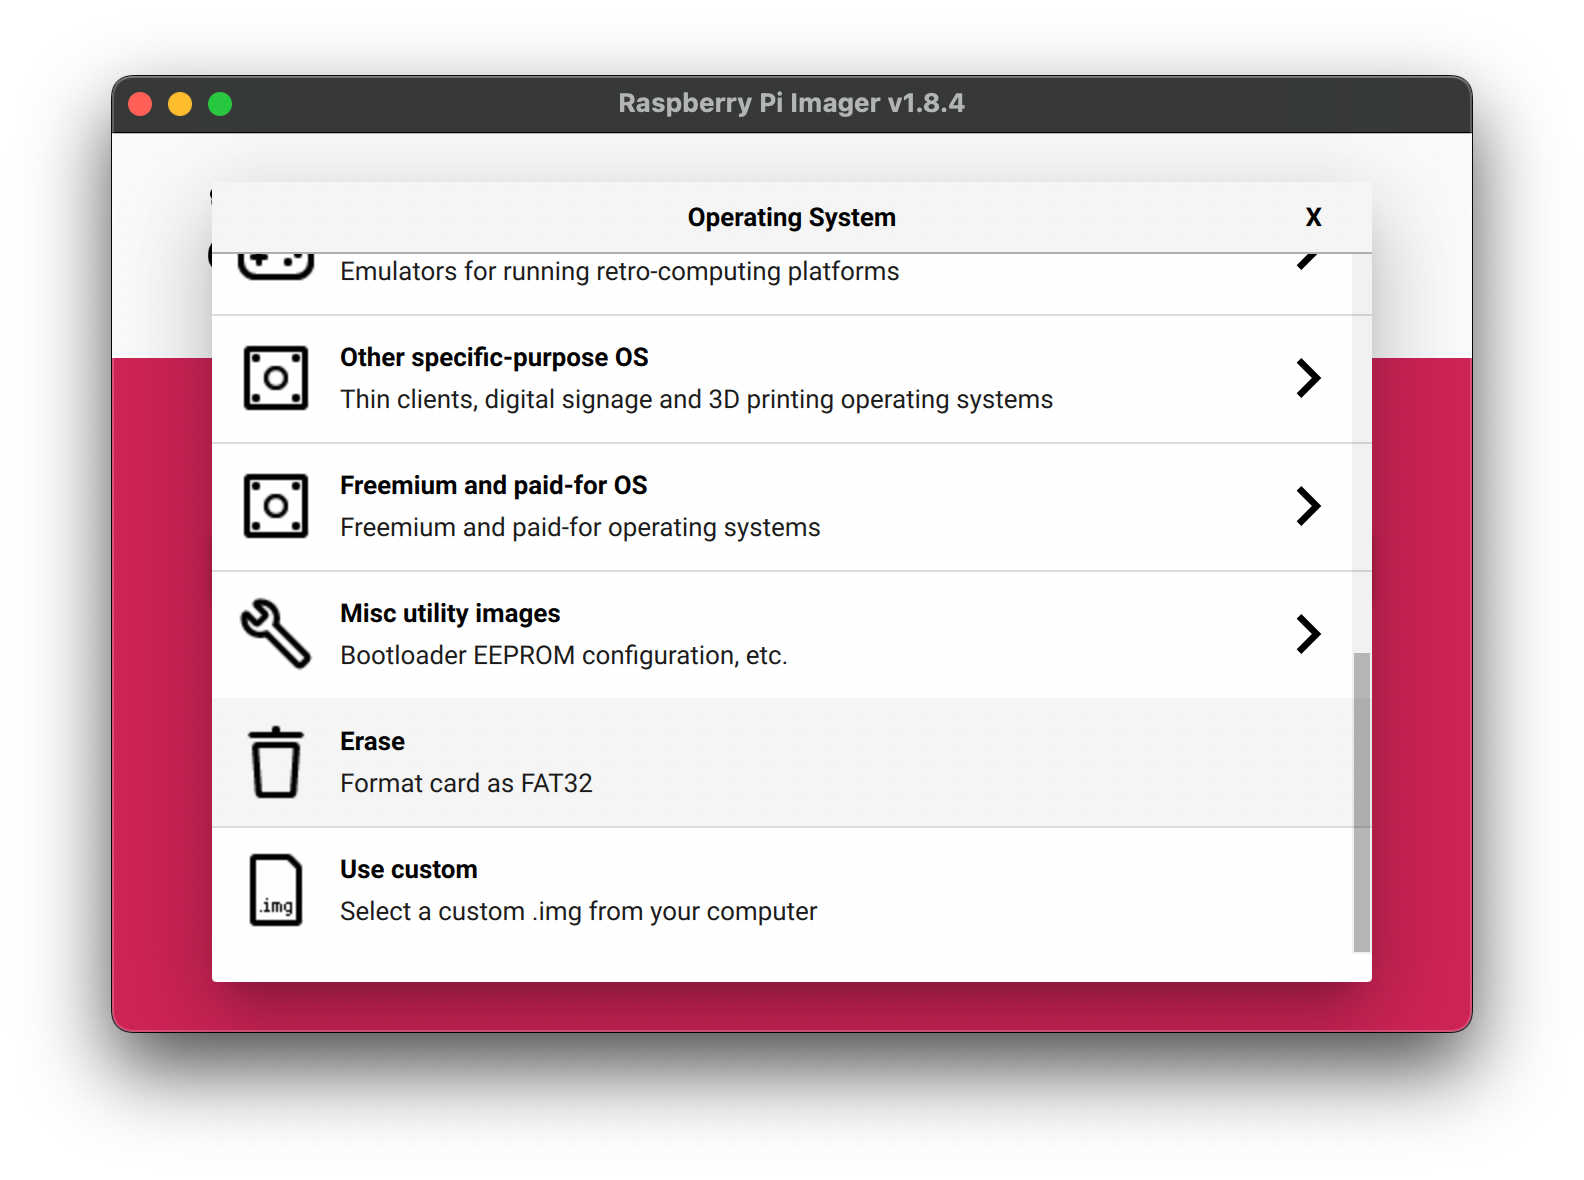
- Click
Nextand wait for it to finish.
3. Image your Pi
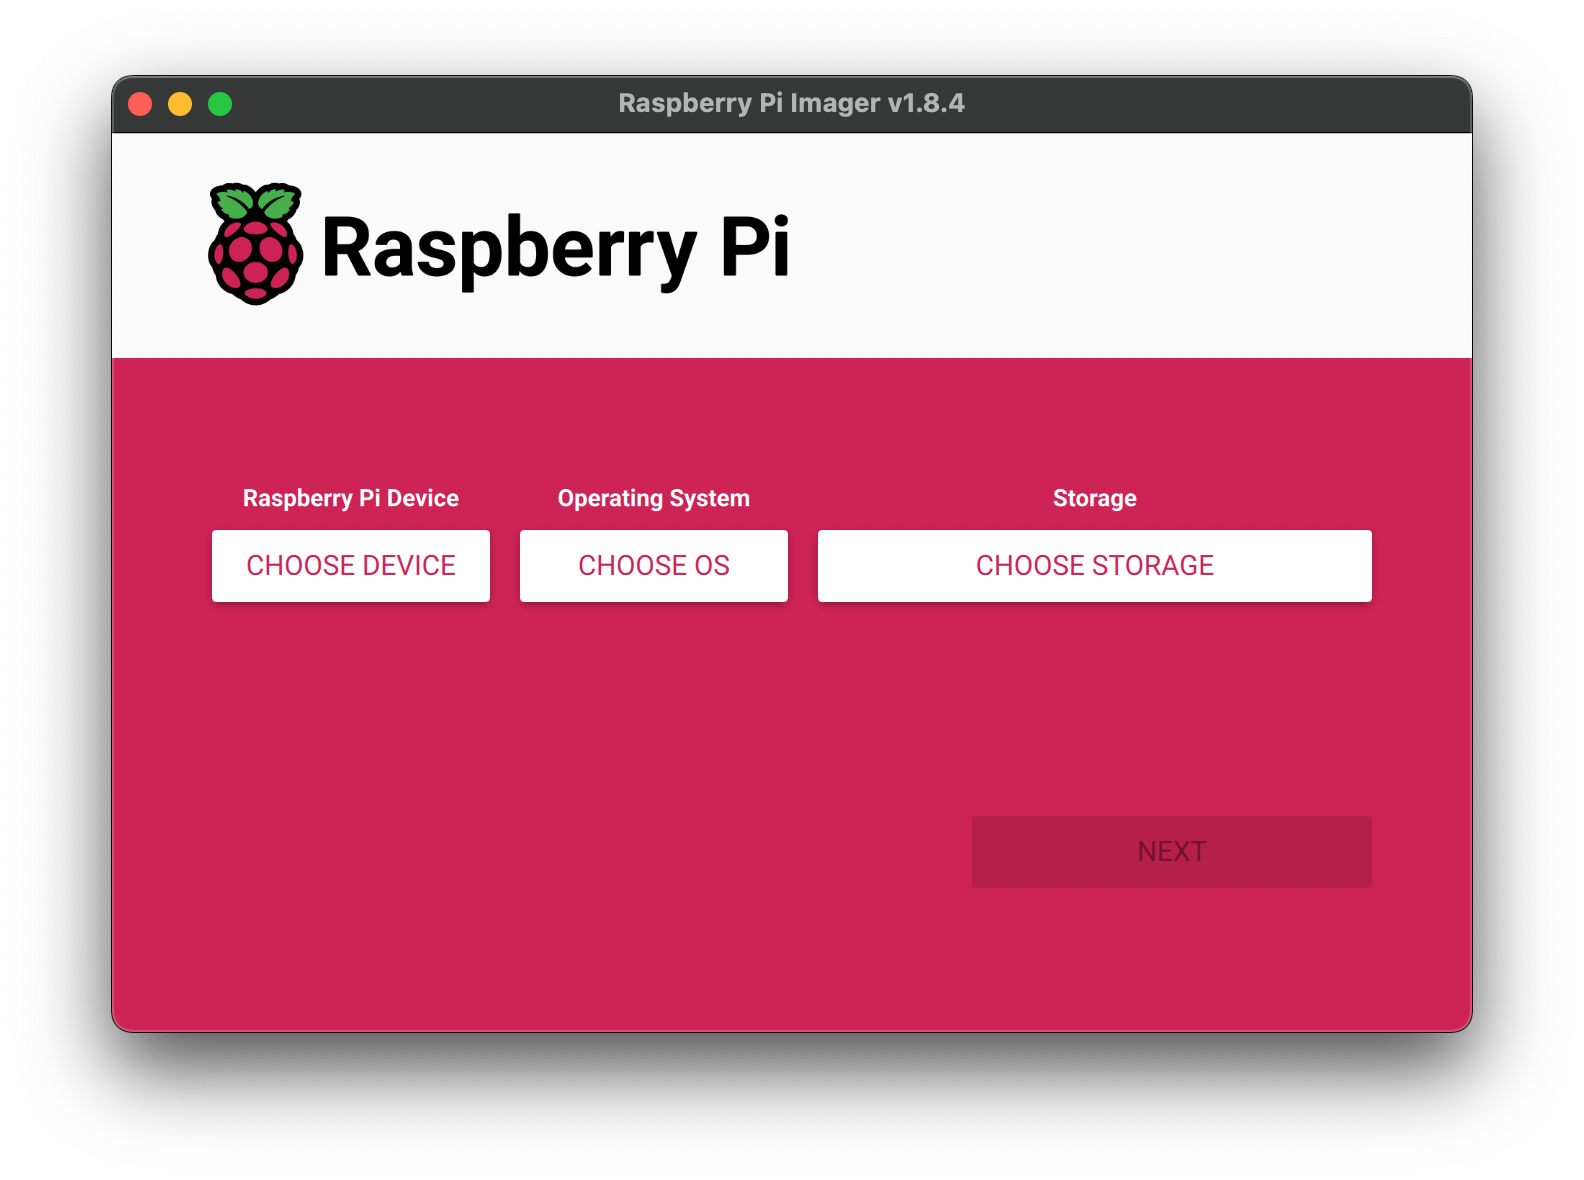
Using Raspberry Pi Imager software to Install the Raspberry Pi OS to the SD card.
-
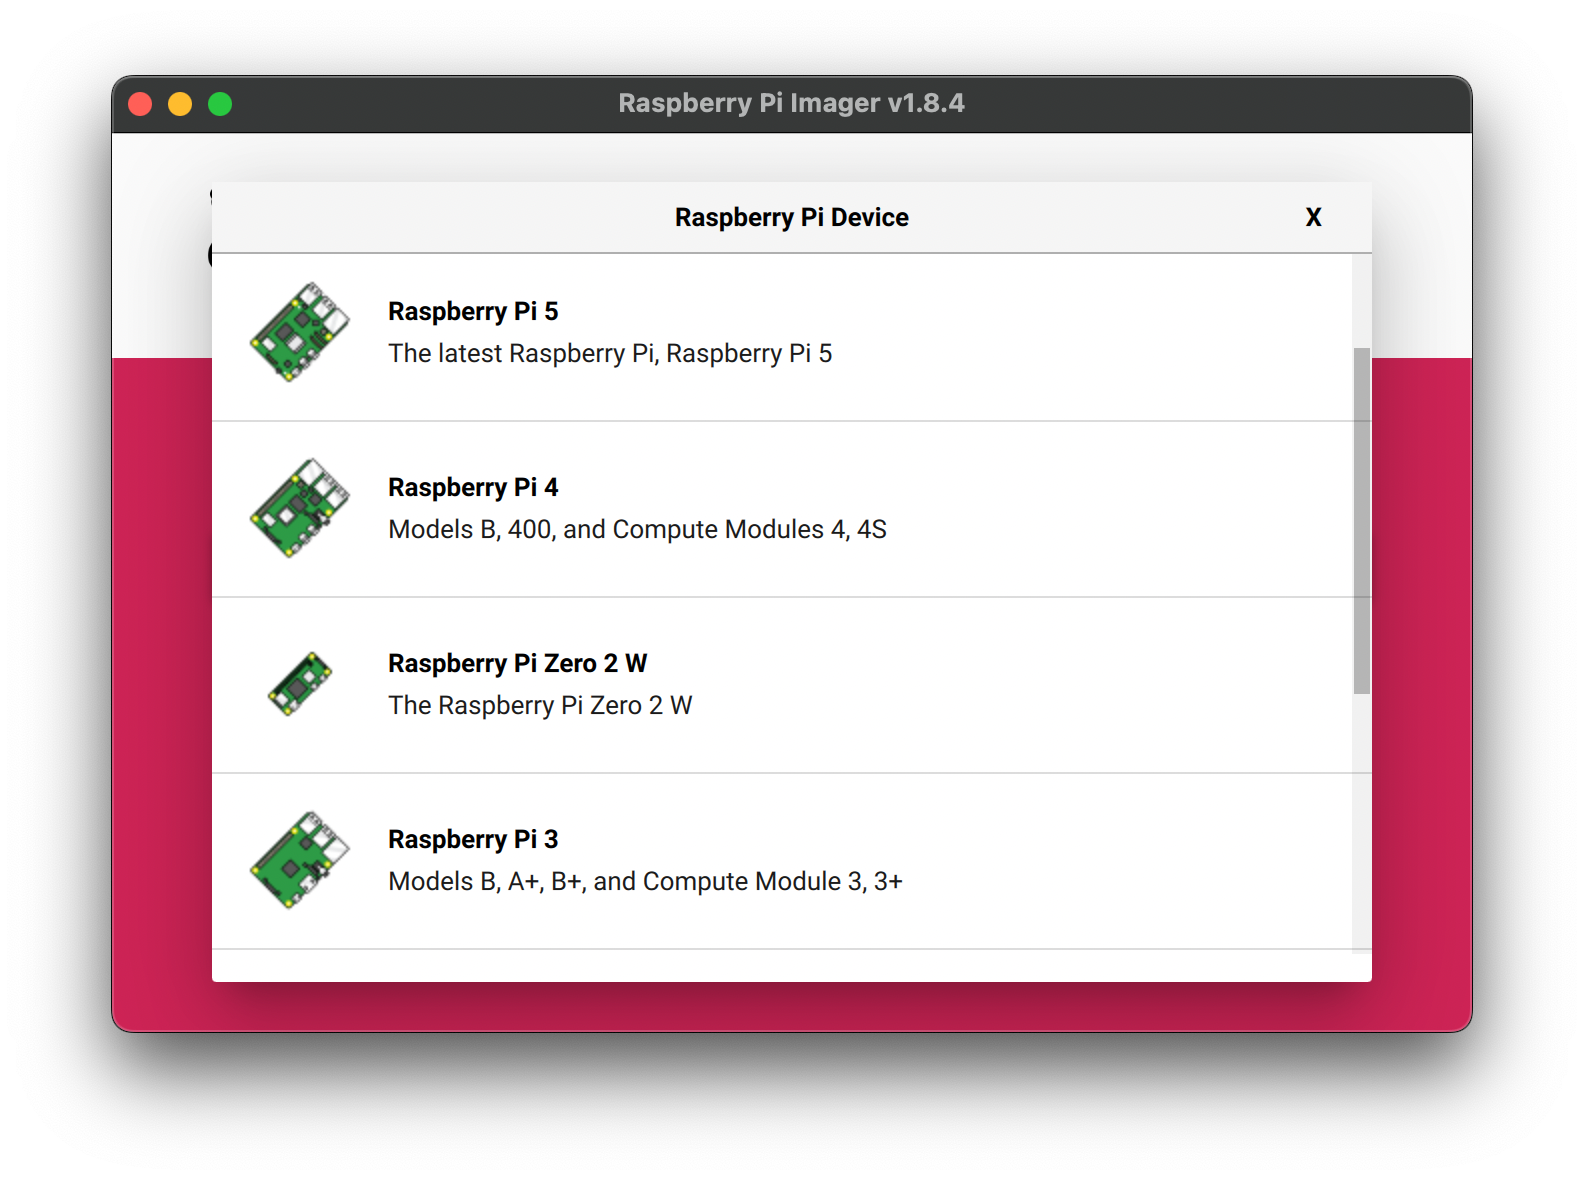
Raspberry Pi Device, select Raspberry Pi Model
-
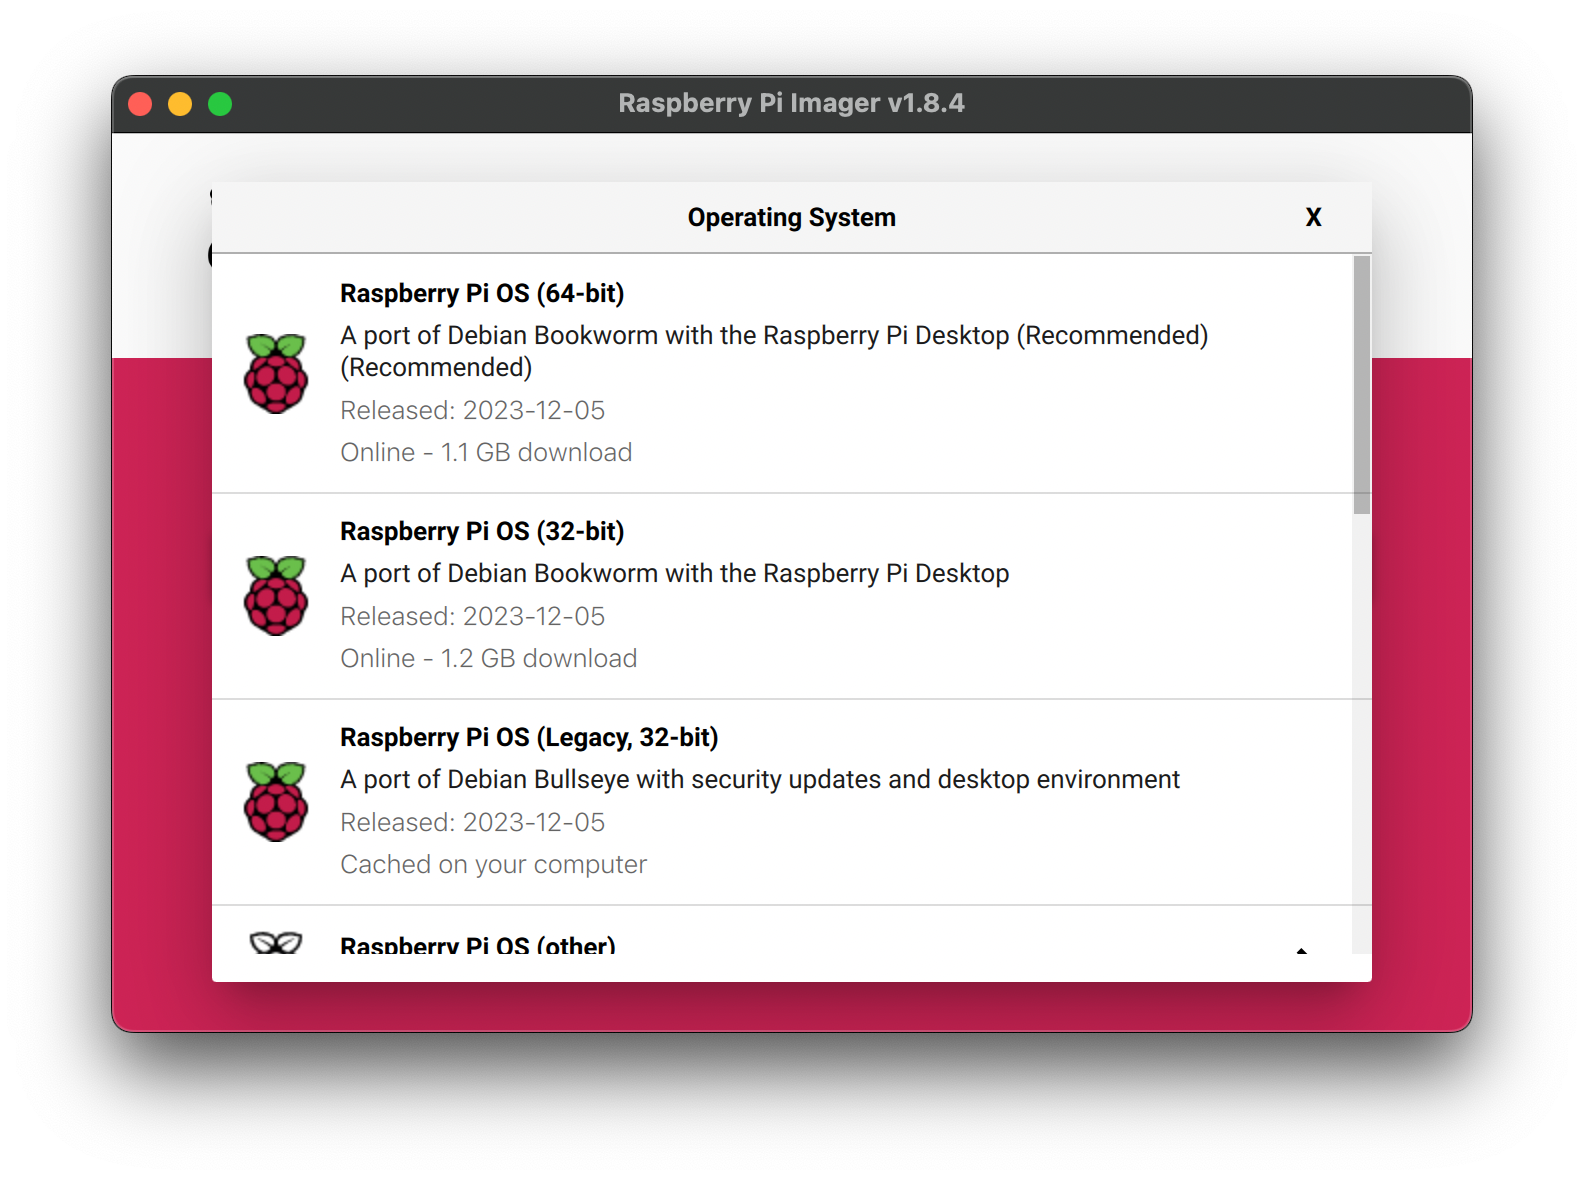
Operation System, select Raspberry Pi OS, if you are not sure which to choose, choose the recommended one.
-
Storage, select the SD card
- Click
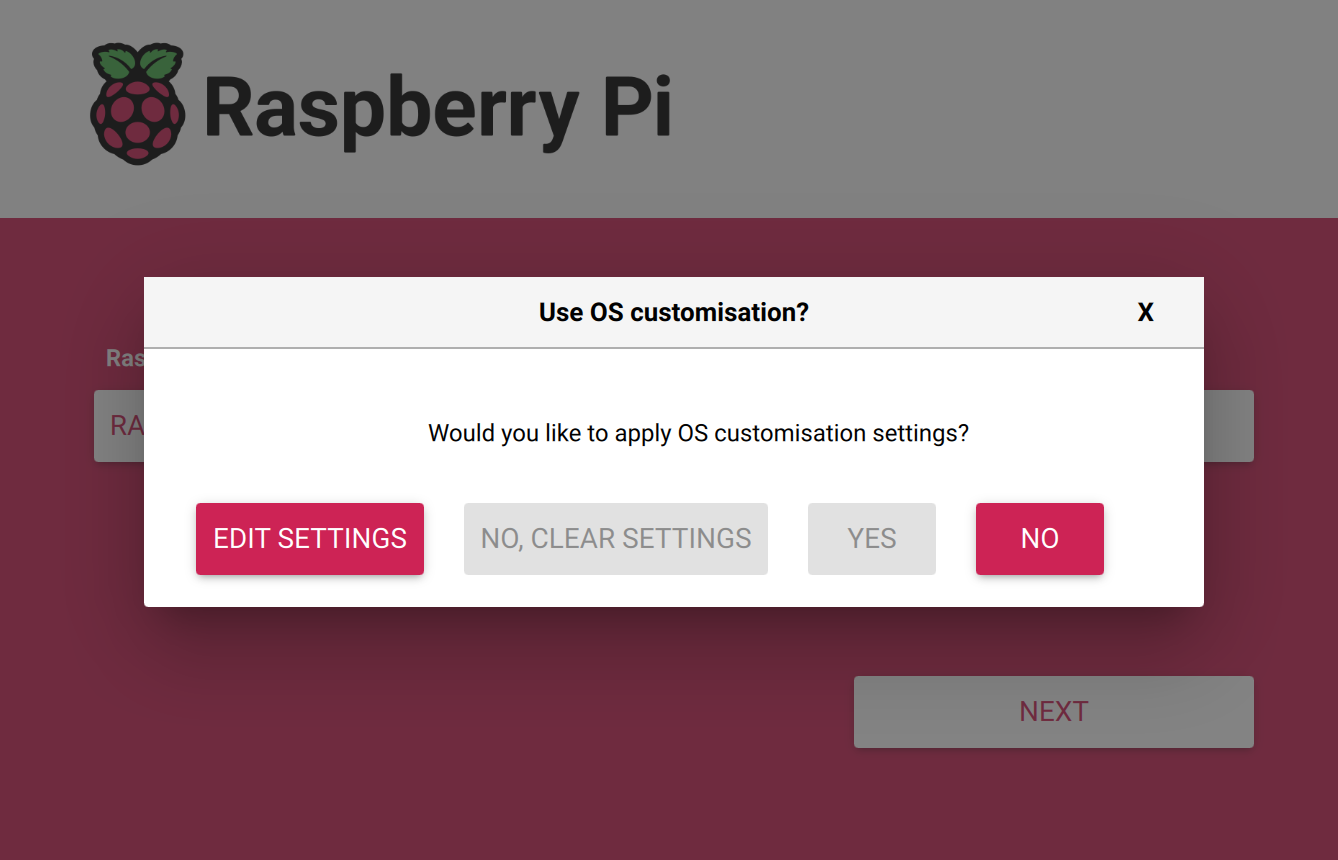
Next, then you will be prompted with "Would you like to apply OS customisation settings?", and chooseNO.
Once the pi is imaged, it is a ready to go mini computer. Eject the SD card from your computer, plug it into the Pi, power the Pi, it's done!
Raspberry Pi Image: Retropie for Reviving Vintage Games
What is Retropie?
RetroPie allows you to turn your Raspberry Pi into a retro-gaming machine. It builds upon Raspbian, EmulationStation, RetroArch and many other projects to enable you to play your favourite Arcade, home console, and classic PC games with the minimum set-up. Learn more.
RetroPie sits on top of a full OS, you can install it on an existing Raspbian, or start with the RetroPie image and add additional software later. It's up to you.
We are using Raspberry Pi Imager. We have a more detailed tutorial for imaging the Pi.
1. Using Raspberry Pi Imager
-
Raspberry Pi Deviceselect Raspberry Pi Model -
Storageselect the SD card
-
Operation System- selectEmulation and game OS- selectRetroPie- select your Pi model

Your Pi is now an emulator ready to go!
2. Controller Configuration
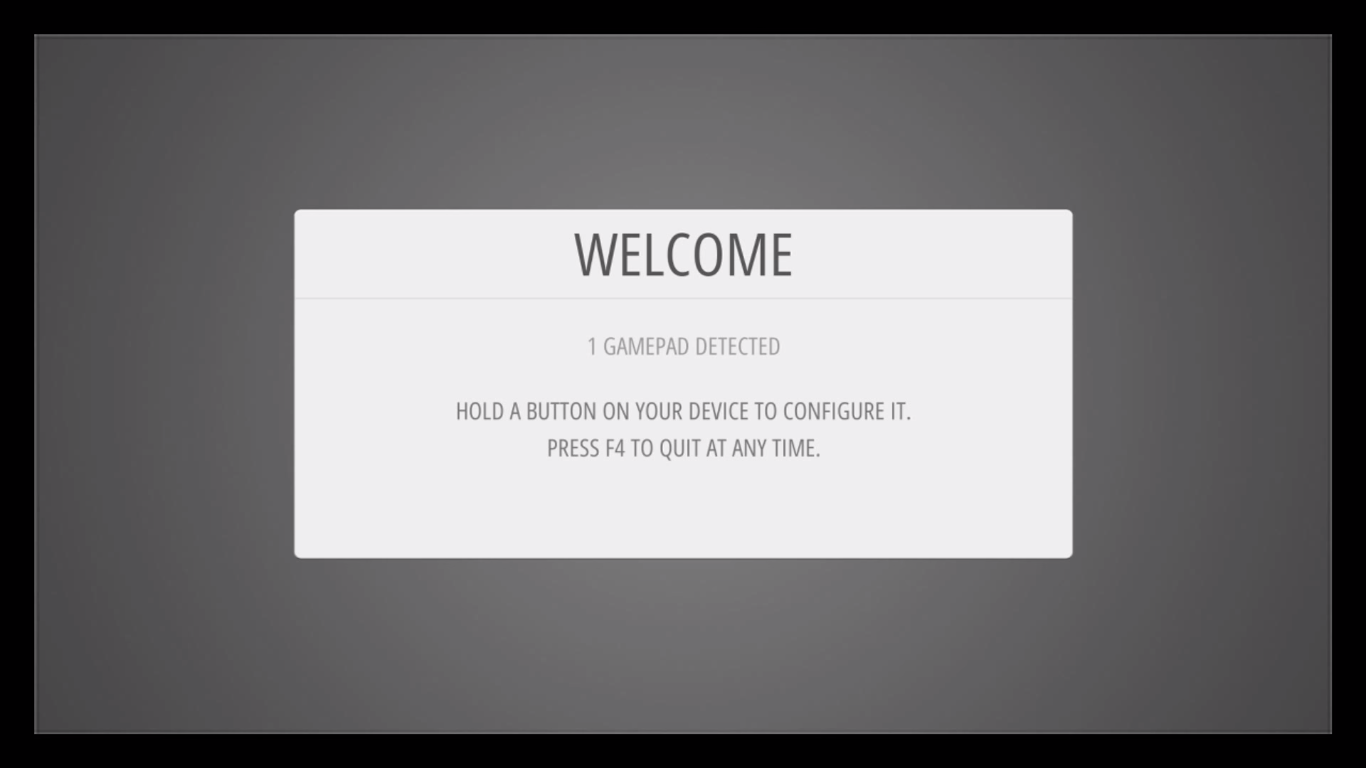
RetroPie can support a range of controllers and even arcade buttons and joysticks. PS5 controller is not supported at the moment(02/2024). You will see the Welcome page, plug in your controller with a USB cable and hold any button on your device.
Press the buttons on your controller accordingly, one by one.
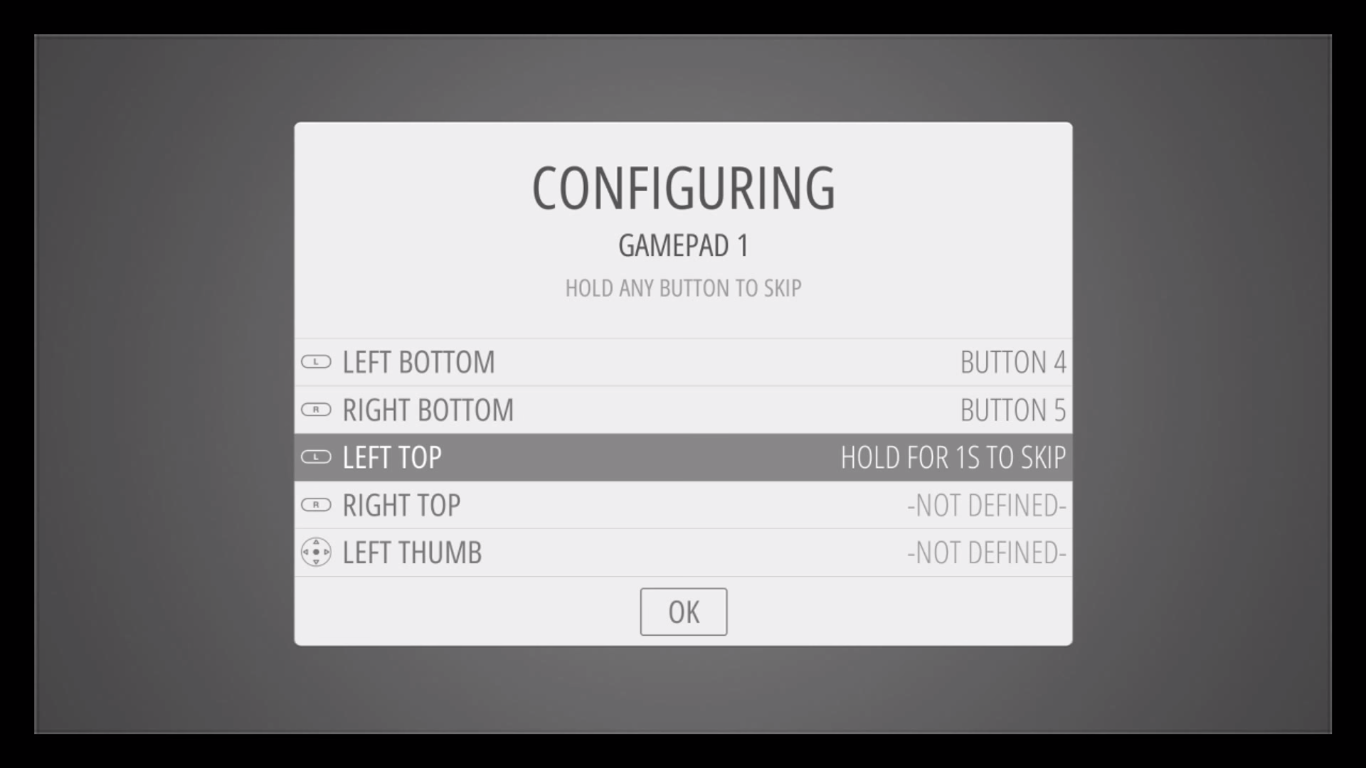
If you want to skip any button configuration, just hold any button.
There are some buttons that you MUST set up, including Hotkey, Start, Select, A and B.
3. Finding Roms
ROM is Read Only Memory, which can be seen as games that can be run on emulators. Thanks to the generosity of some of the original creators of the classic games that MAME® can emulate, several games have been released for free, non-commercial use on MAMEdev. The copyright laws around the use of ROMs are mostly between illegal and grey areas, so no suggestion on where to download ROMs will be provided in this tutorial and no one on our team will answer you in person either.
Different emulators require different file extension so the ROMs can be read properly, such as GBA needs .7z, .gba or .zip. Please see more ROM file formats here.
4. Transferring Roms
Transferring via a USB stick is the most straightforward method. You can find other ways of transferring in RetroPie Docs.
- Format the USB stick as FAT32. (You can refer to #2 of this tutorial.)
- Create a folder called
retropieon the USB stick. - Plug the USB stick into the Pi and wait for 5-10 minutes.
- Remove the USB stick and plug it into your computer.
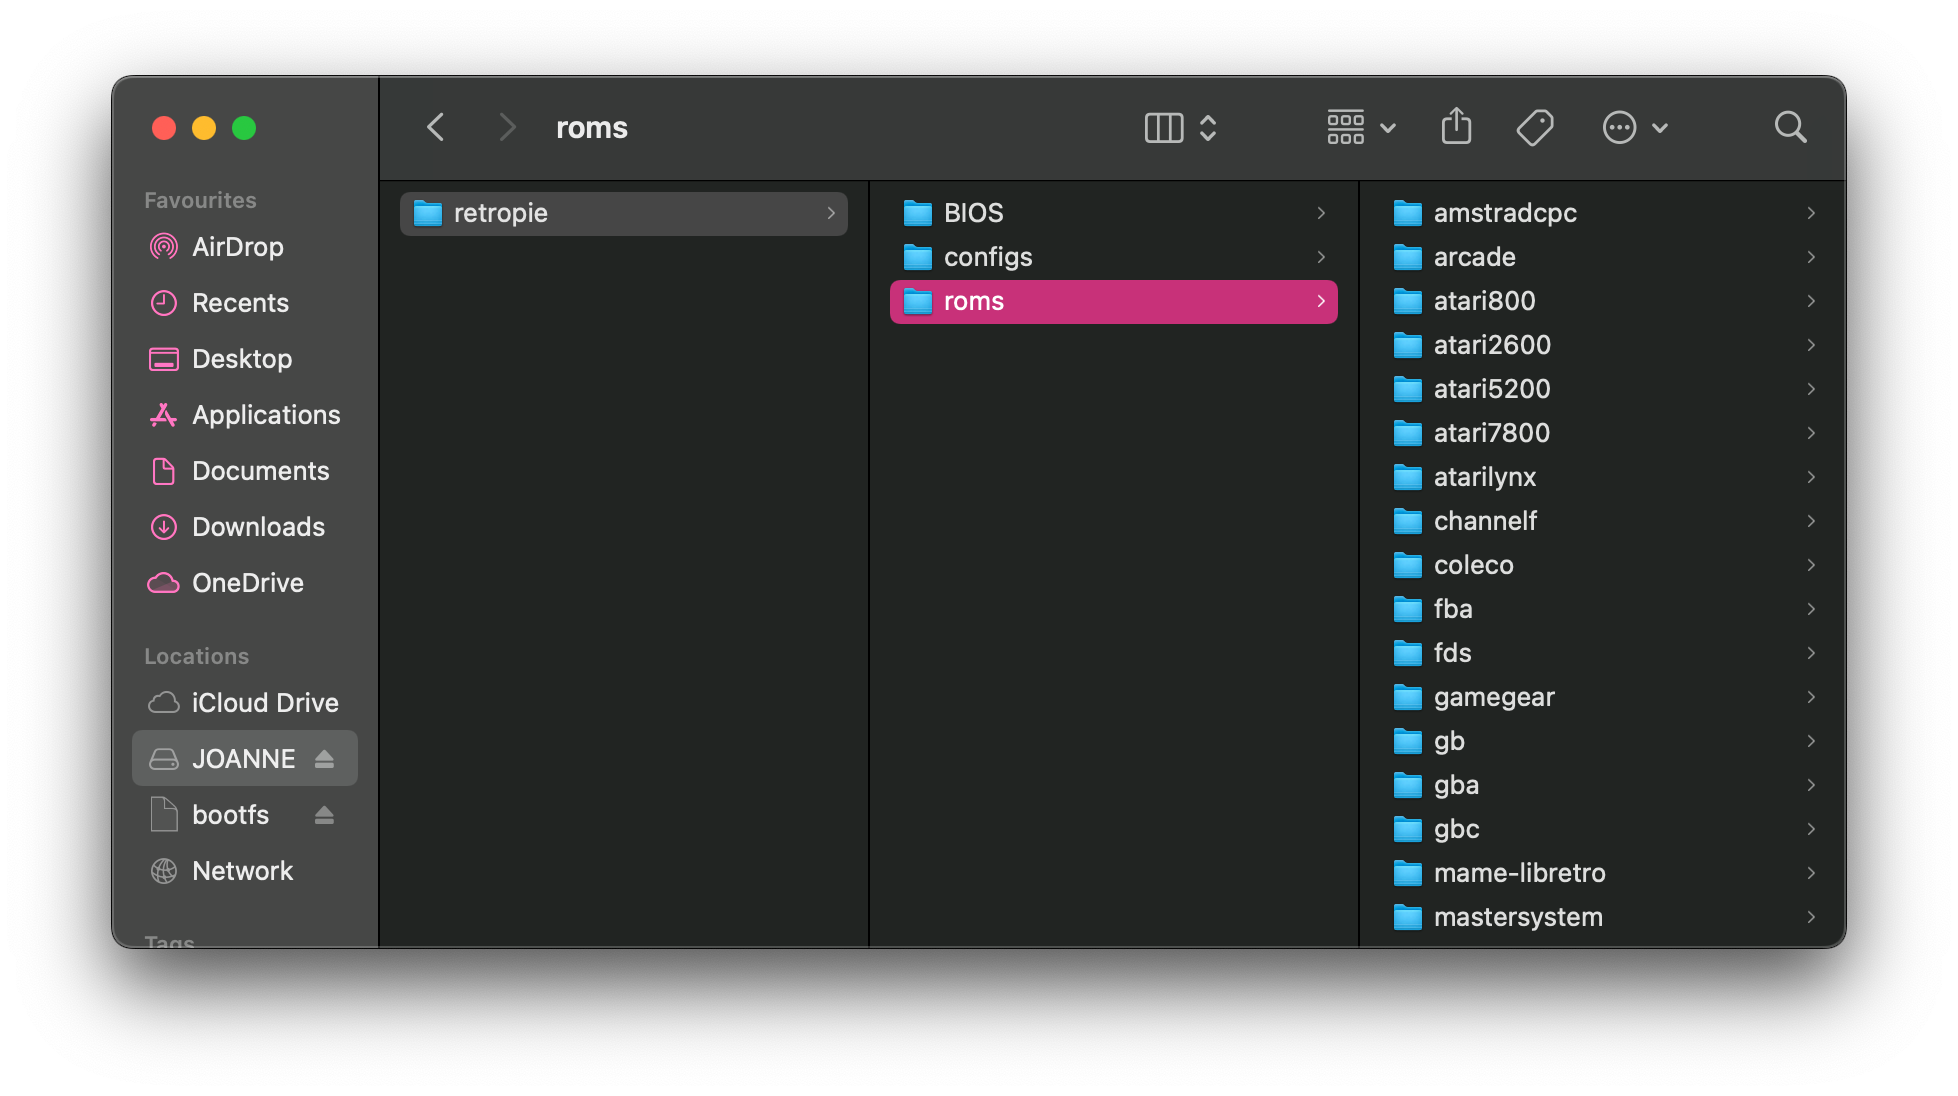
- You should see
retropie/roms/, the Pi has created all the necessary folders for you in the USB stick.
- Copy the ROMs to the according folder. For example, you can copy the MAME ROMs in
retropie/roms/mame-libretro - Plug the USB stick back into the Pi, and wait for 5-10 minutes again.
- Refresh the game listing in EmulationStation by pressing press Start on your controller -
Quit-Restart Emulation Station - Now you should your game showing on the Pi and you can start playing your game!
- If not, please go back to step 7 and do it again.
5. Want more?
RetroPie can be customized to a high extent, including controllers, UI, cheats, shaders etc.
For more detailed documentation, please visit RetroPie Docs.
Raspberry Pi Image: Video Looper
What is Raspberry Pi Video Looper?
Raspberry Pi Video Looper is a simple way to display seamless looping video files, for example in an art exhibition. All you need is a Raspberry Pi, an SD card, a screen and a USB stick.
We are using Raspberry Pi Imager. We have a more detailed tutorial for imaging the Pi.
1. Download the Video Looper Image
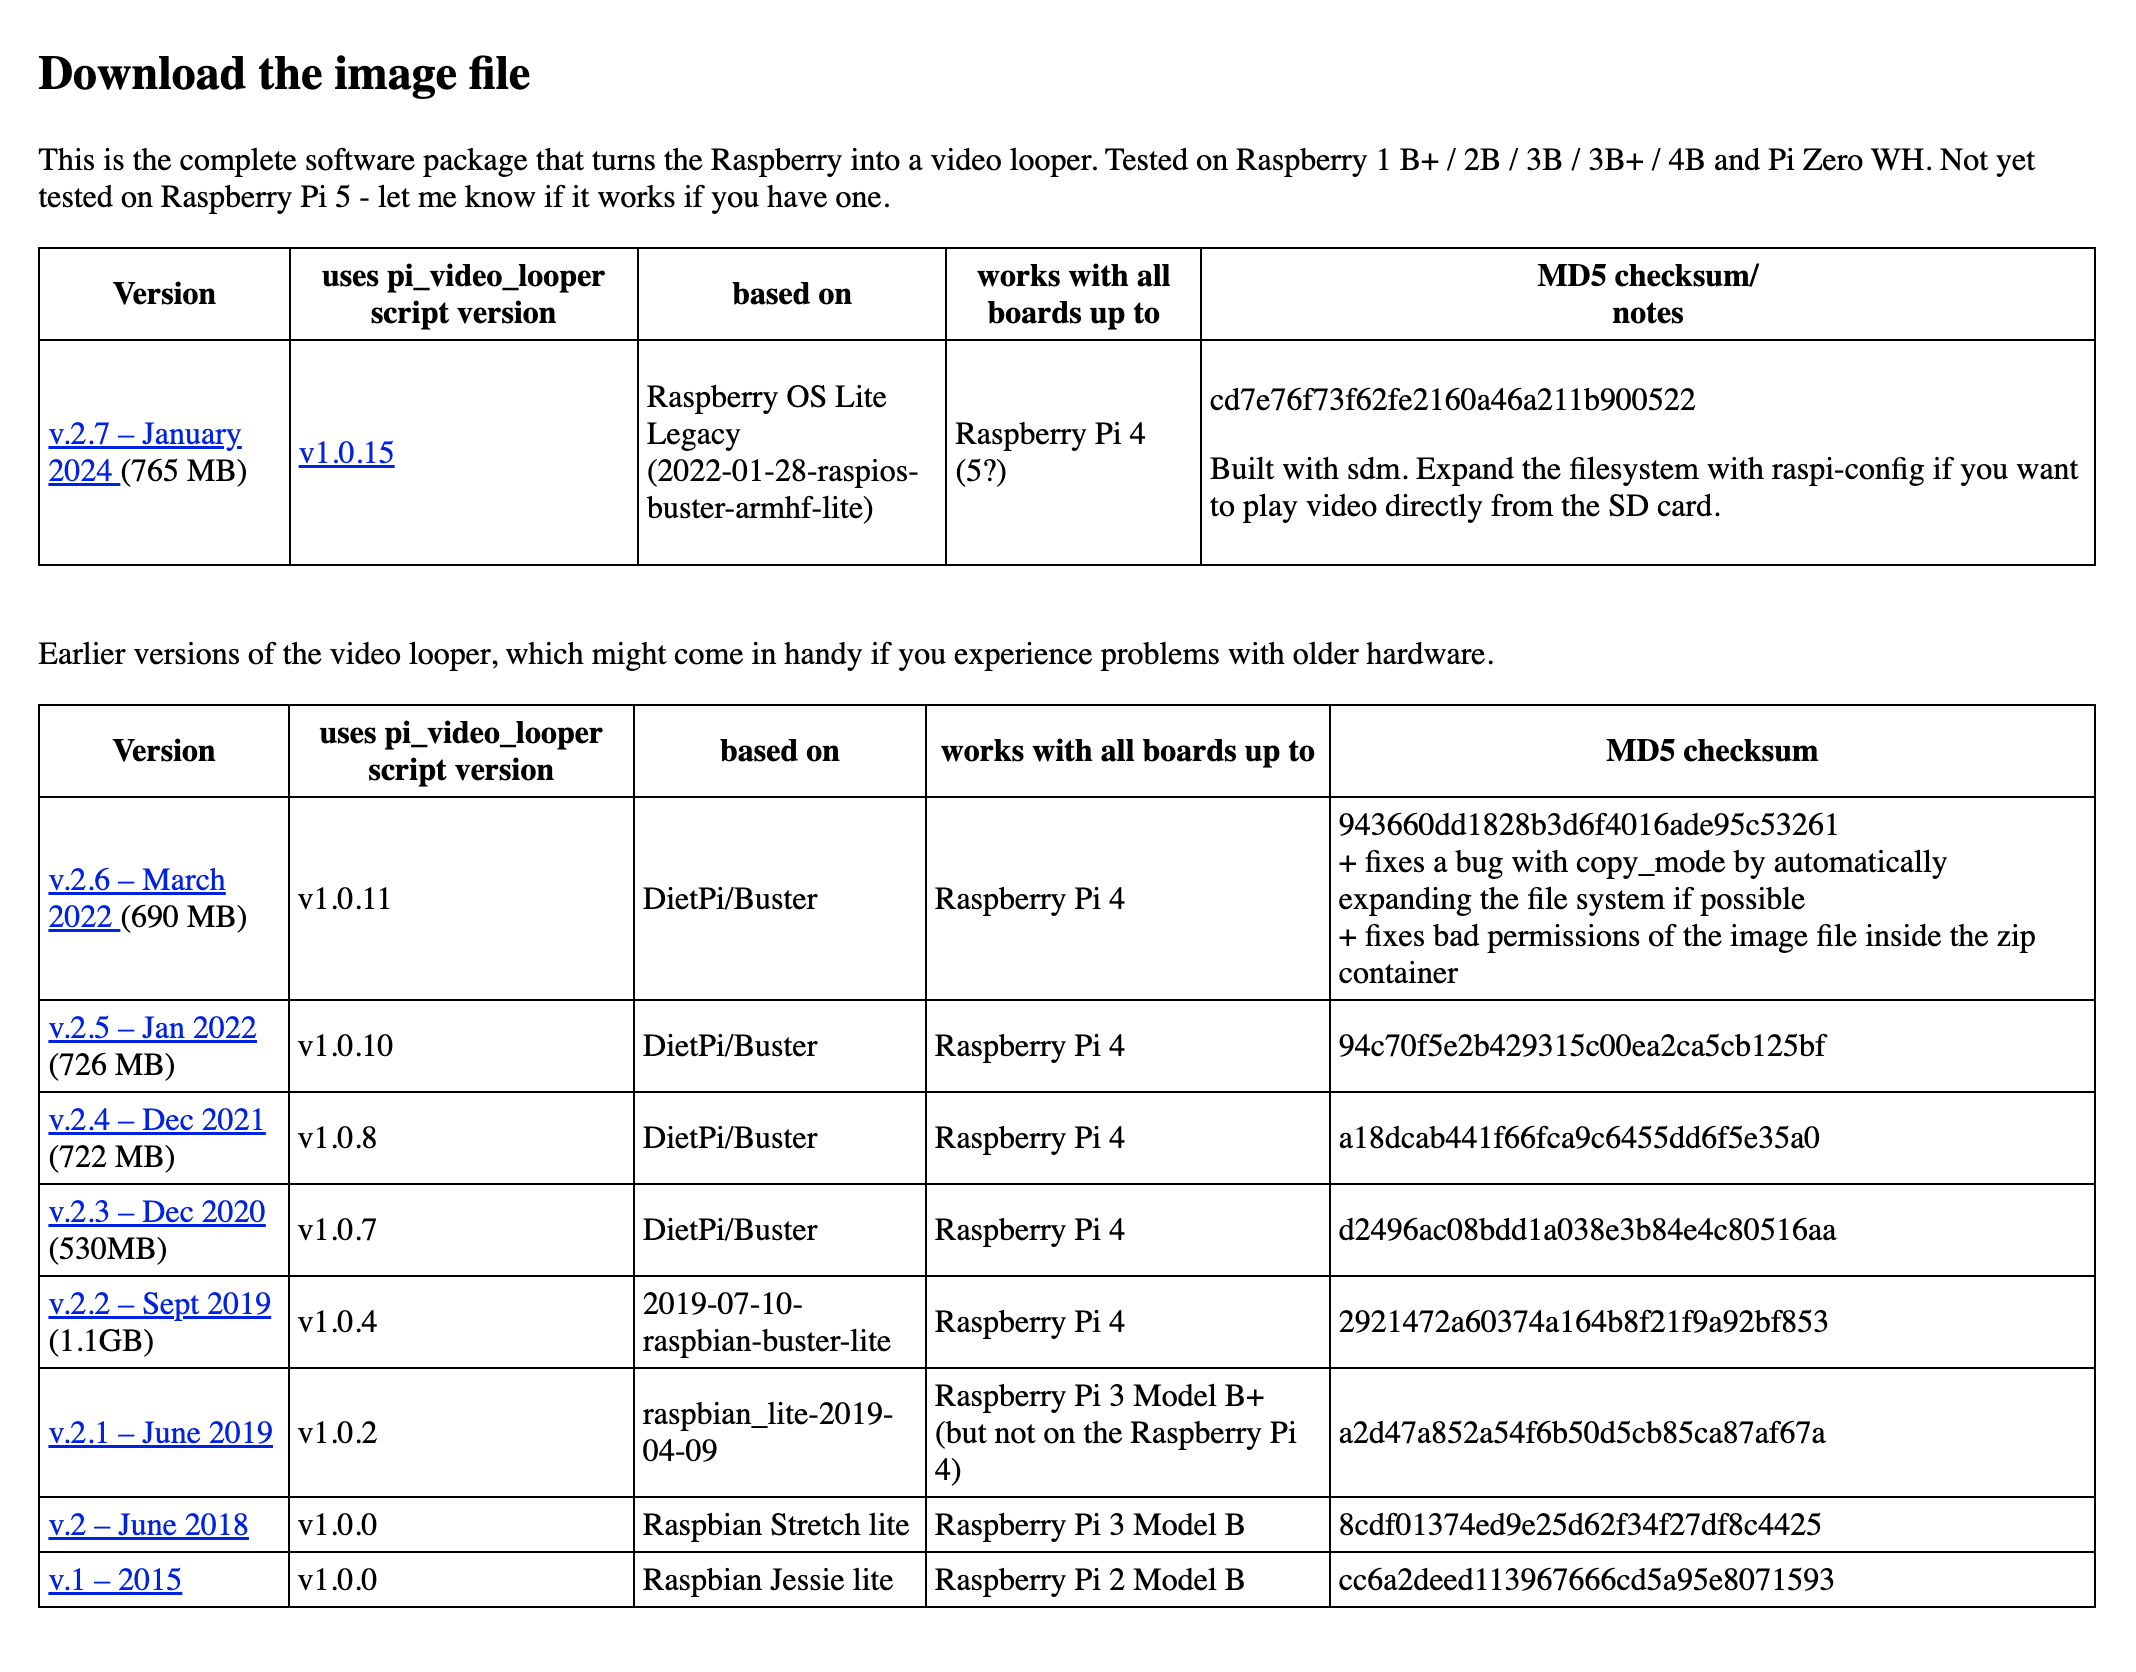
You can download the Video Looper image here. Choose the latest version that is compatible with the Pi model you are using, please refer to the "works with all boards up to" column.
2. Using Raspberry Pi Imager
Raspberry Pi Deviceselect Raspberry Pi ModelStorageselect the SD card
Operation System- selectUse custom- select the newly downloaded Video Looper Image

3. Files Format
Video Looper uses the default video player, omxplayer, which can play most videos encoded with the H.264 video codec and in a video format with an extension like .avi, .mov, .mkv, .mp4, or .m4v.
Try to minimize the size of your files and export the video with the exact resolution of your display for better performance. e.g. You shouldn't use an uncompressed 4K video format on a 1080p HD display.
4. Plug and Play
You can put your video on a USB stick and plug it to the pi. Your video(s) is ready to loop!
If only one movie is available it will play continually in a loop.
If multiple movies are found then each movie will be played in alphabetical order by filename and will loop back to the first video and play all videos again in order repeatedly.
5. Note on Raspberry Pi Monitors

If you are using Video Looper OS with a Raspberry Pi Monitor (shown above) you may notice that the monitor will go to sleep rather than display the video. There is an extra setup step required to fix this.
- Open the MicroSD card on your computer/laptop with the Video Looper OS installed. It should appear as a drive with the name
boot. - Place this config.txt in the top-level folder. There is already a config.txt file in the drive, but this new one has the right settings that will encourage the display to wake up. When you are asked if you wish to overwrite the existing file, click Yes/Confirm.
- Place the MicroSD card back in the Raspberry Pi.
The Video Looper OS should now work with the monitor and run with a 1920x1080p resolution.
How to Configure a Raspberry Pi for the first time
Once your Raspberry Pi is imaged, it is ready to go! We have a more detailed tutorial for imaging the Pi. Now we can move on to configuration when you turn on your Pi for the first time.
1. Power up the Raspberry Pi
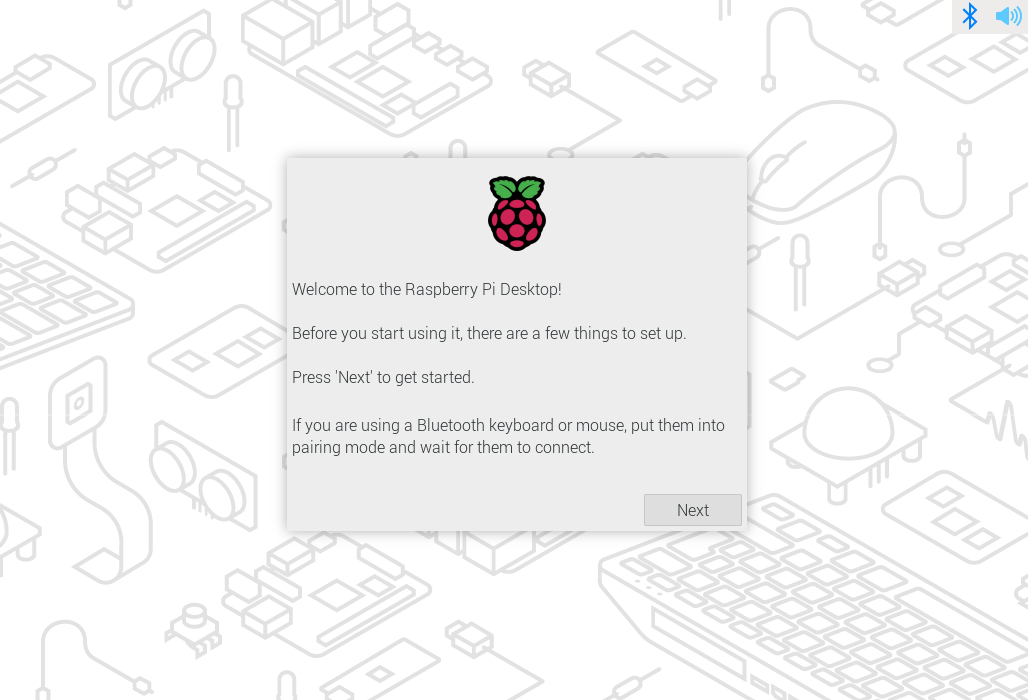
When you plug in the power supply and all other equipment you need, the Pi should start booting automatically. If your Raspberry Pi does not turn on within 5 minutes, check the status LED, and try re-image the SD card.
If everything goes right, you should see this.
2. Locale
You need to set your country, language, time zone, and keyboard layout.
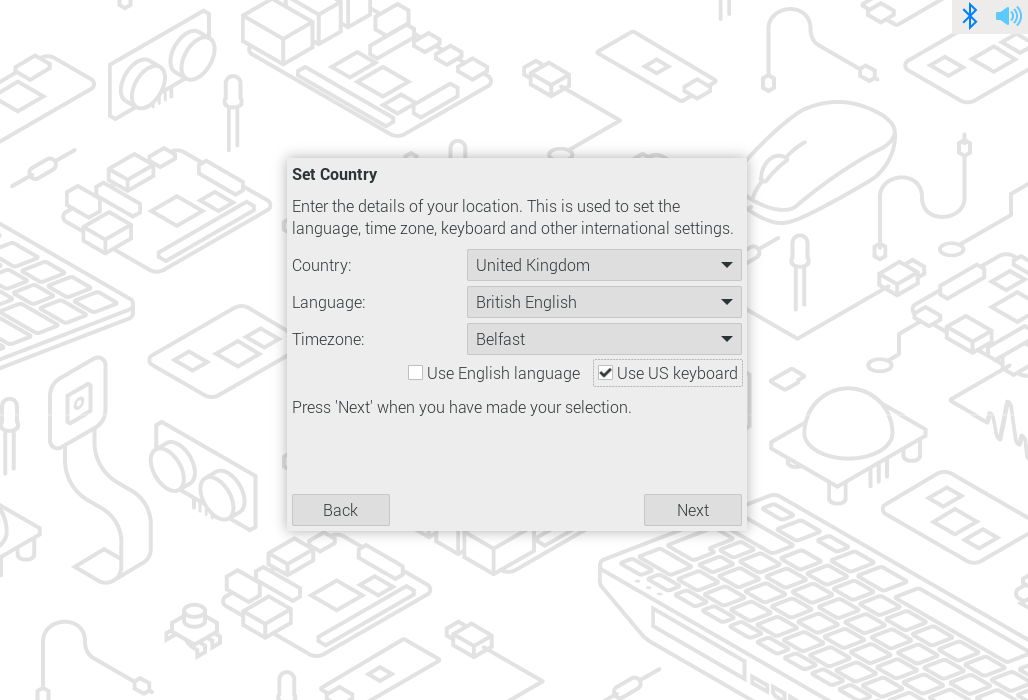
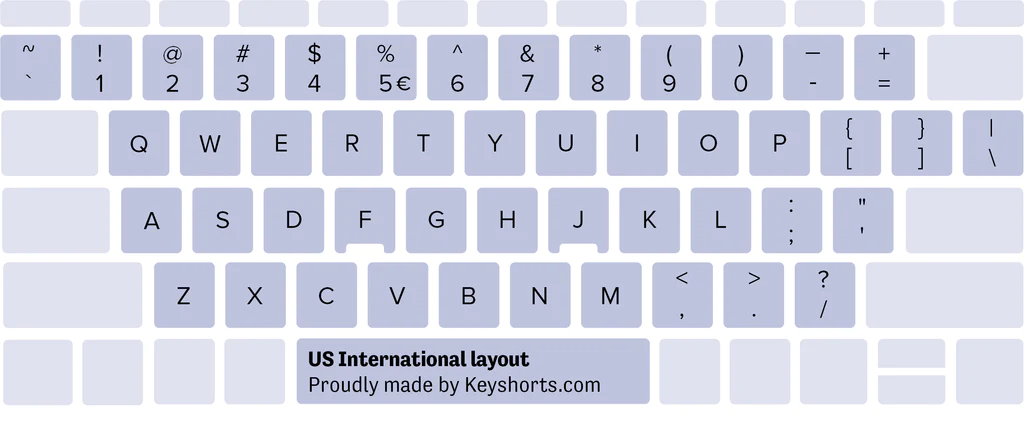
When you are setting up the keyboard, make sure the keyboard is plugged in. If you uncheck the Use US keyboard, it will set up the keyboard corresponding to your Country. The main difference between US and UK keyboards is the positions of @,", £ and #. There are many variants of keyboards, even just for US/UK keyboards. You can change that after the initial setup. Check this tutorial for changing the keyboard layout.

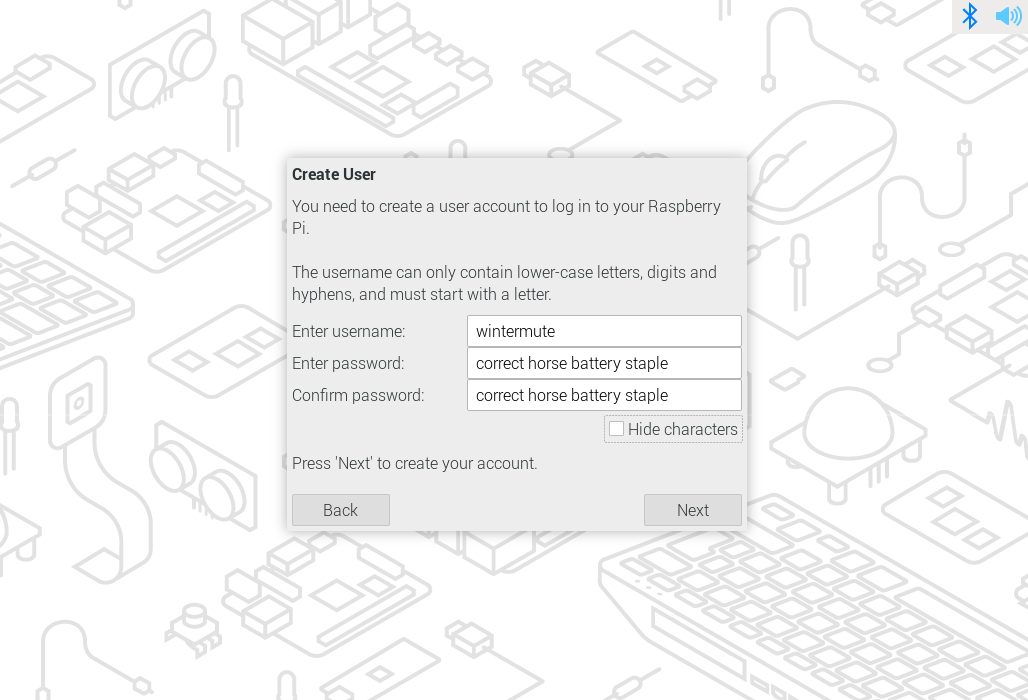
3. User
You can set your username and password here. For some older Raspberry Pi OS, it has a default username and password, which is username: [ pi ] ; password: [ raspberry ].
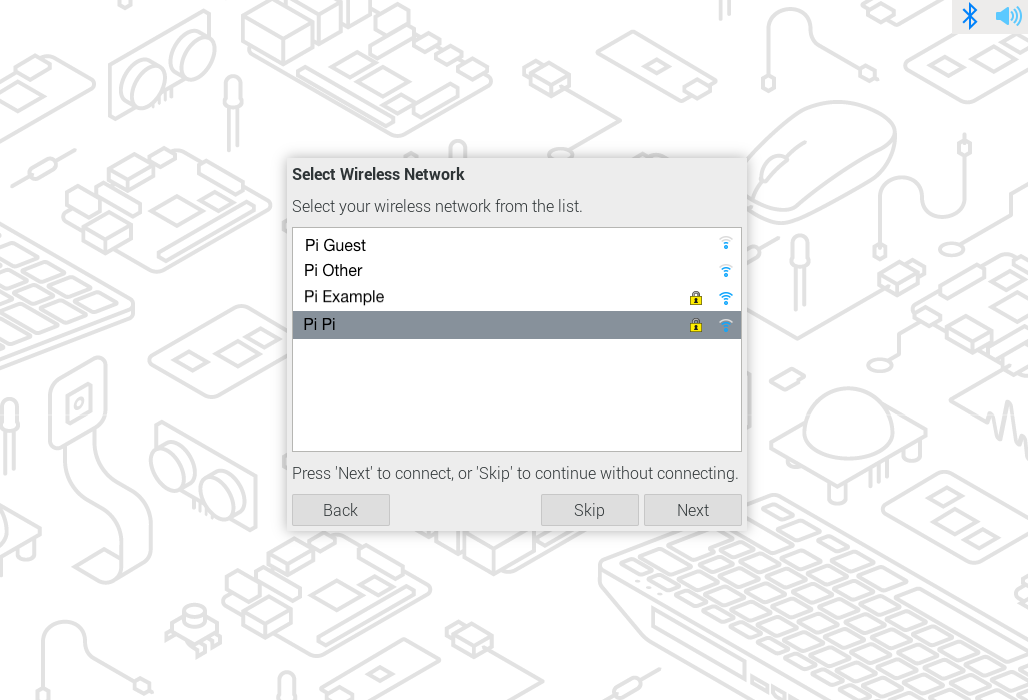
4. Wifi
You can log in to the WIFI as usual with SSID and password. For some networks, such as UAL wifi, you need to sign in with your UAL account, which will not work for most Pi. In that case, you will need an Ethernet cable to access to the internet.
5. Brower
Google Chrome and Firefox are both preinstalled, you just need to choose one as your default browser. You can still access the other run from the start menu.

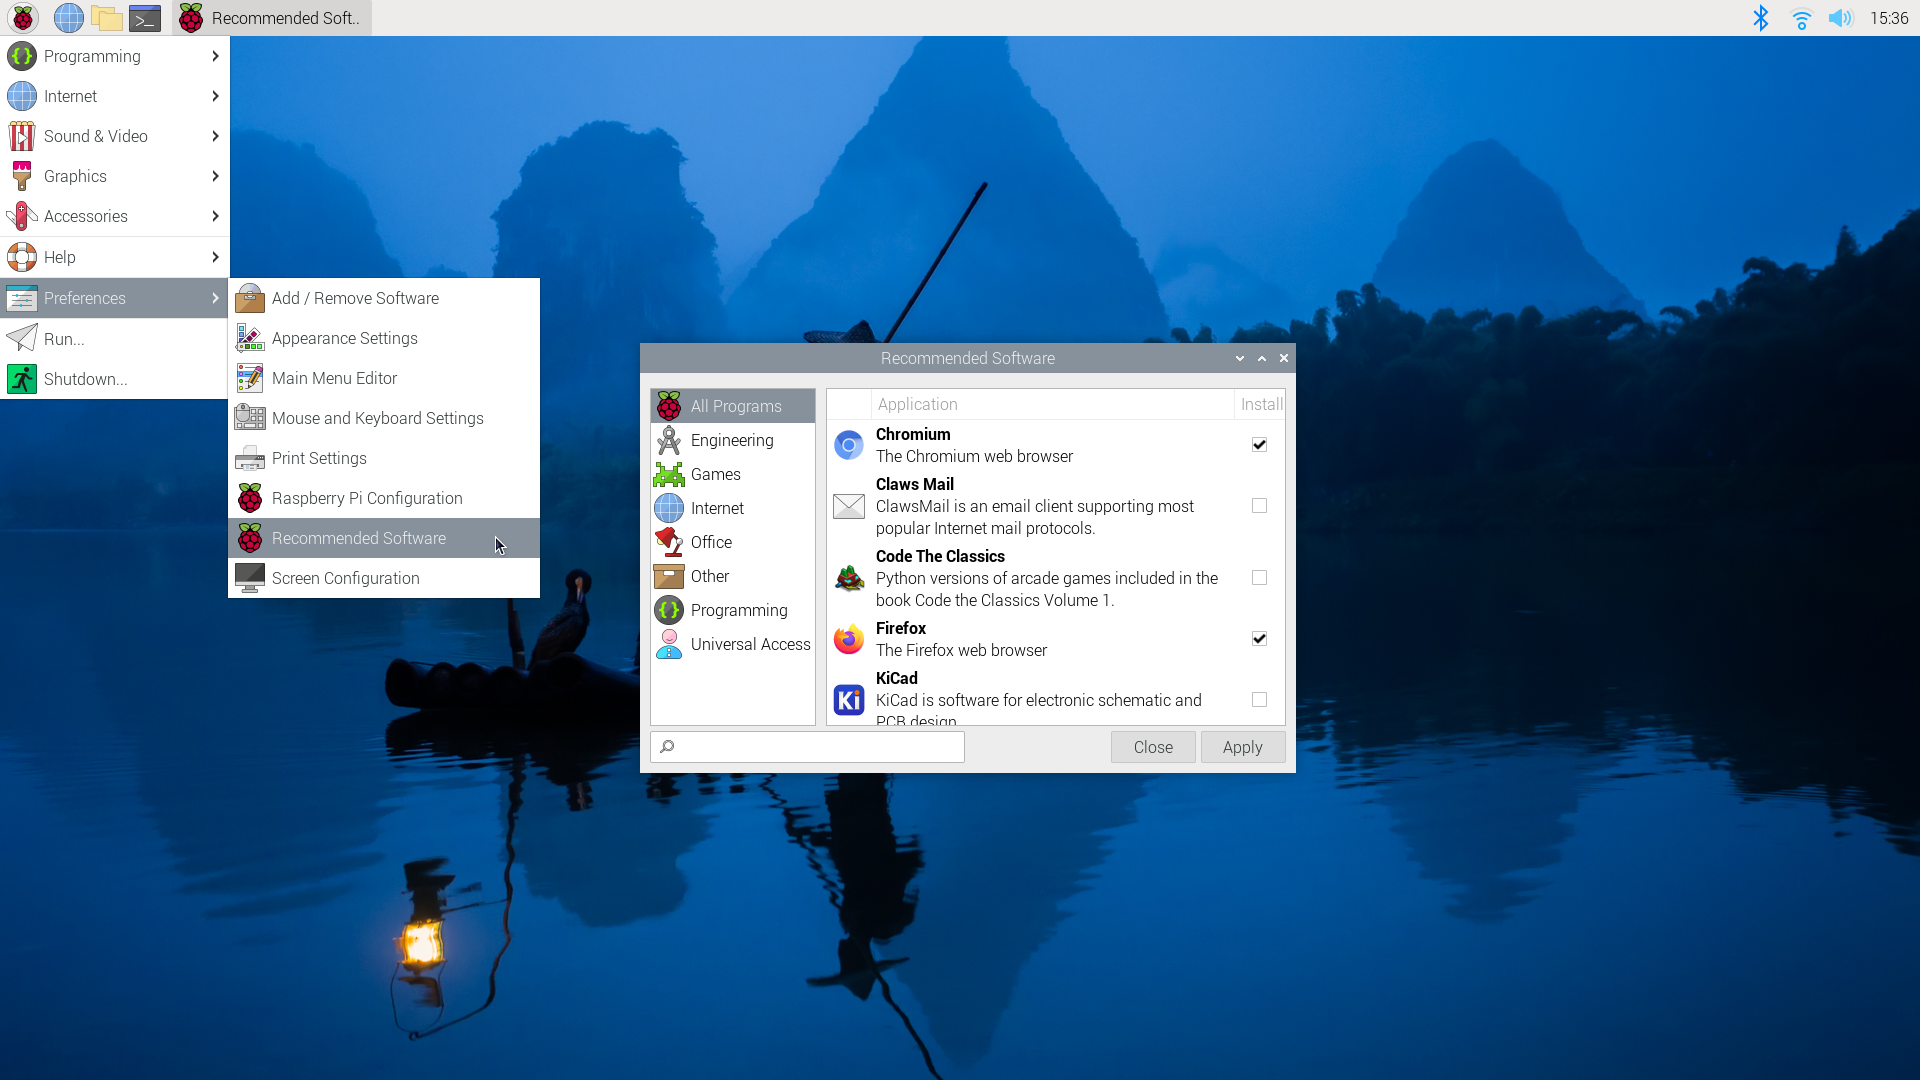
6. Recommended Software
Raspberry Pi comes with many essential applications pre-installed so you can start using them straight away, such as Thonny. You can go to Start - Preference - Recommended Software, explore the list and download the ones you need.