Creating Virtual Worlds
This is a multi-part tutorial on how to build large-scale virtual worlds in Unreal Engine.
This tutorial assumes you have basic knowledge of UE.
Creating a Landscape
This is a multi-part tutorial on creating virtual worls in Unreal Engine. This tutorial assumes you have a basic understanding of 3D work but no prior experience is necessary.
Please contact the Creative Technology Lab for questions or assistance.
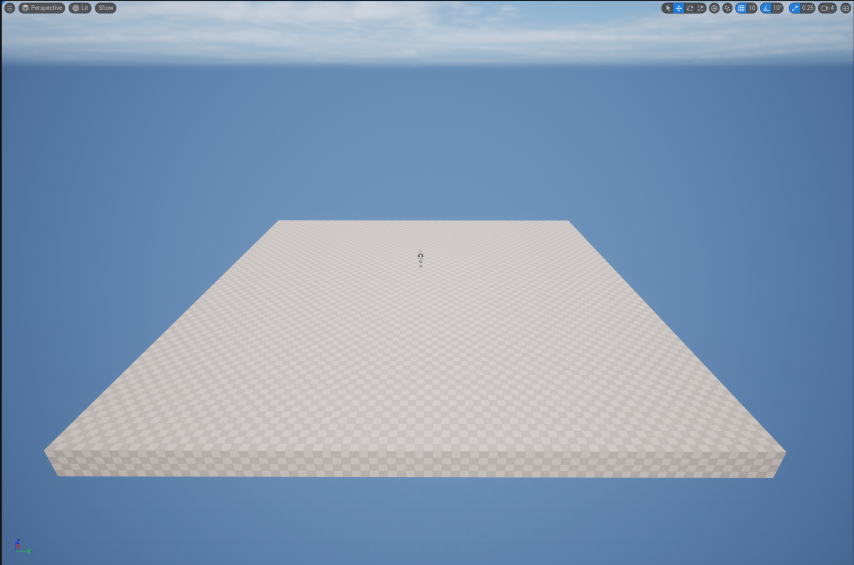
1) Start with a blank level in Unreal Engine.
This will give you a fresh scene with a floor, sky, clouds, and sunlight. We will use this as a base from which we create our scene.
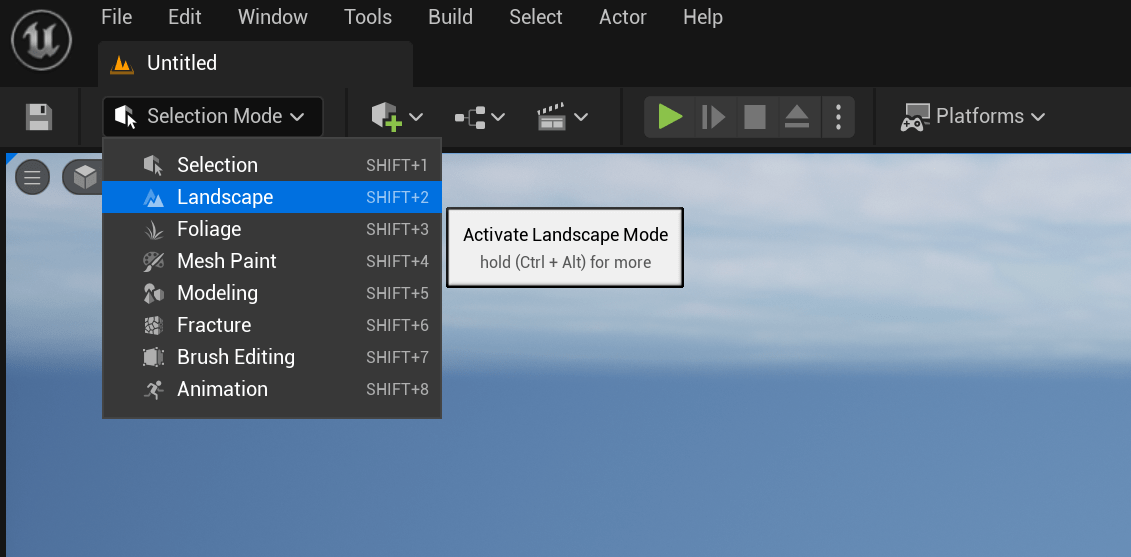
2) Change the editor to Landscape mode.
We will want to change two important settings here.
-
Turn ON Enable Edit Layers. This will allow us to modify our landscape later.
-
Change the Section Size to a smaller size. For this tutorial we will use 31x31 quads. For larger landscapes, you can use a larger size.
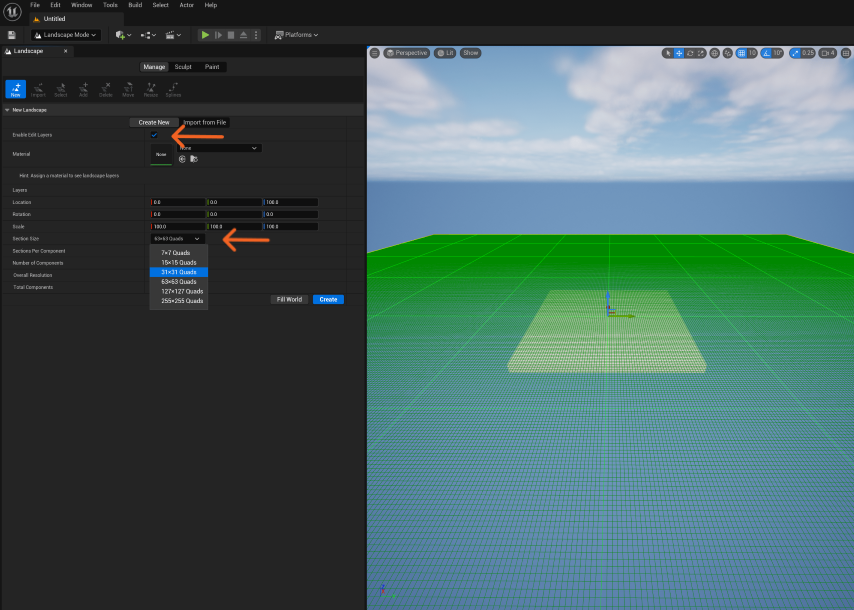
After this is done, you can click create and your landscape will be done.
3) Modifying the shape of the landscape.
Our landscape will look quite flat when we first create it. To add some details, we can use a variety of tools to change it. We will be focusing on the Noise tool.
The Noise tool applies a random height the portion of landscape we paint over. But first, we need to change a few settings with our tool.
-
The Tool Strength should be reduced to 0.04. This will reduce the variation in height that is produced.
-
The Noise Mode should be changed to Add. This will make it so height is added to our existing landscape, not reduced from it.
-
Finally, the Brush Size can be increased so we can paint our whole landscape with one click. This is not necessary if you want to make small adjustments.

After clicking once to paint our landscape with Noise, it should look like this.

As you can see, the height has been randomised, greating a nice ground effect for our scene.
To continue with this tutorial, follow the next article in this series where we will cover Materials.
Using Quixel Materials
This is a multi-part tutorial on creating virtual worls in Unreal Engine. This tutorial assumes you have a basic understanding of 3D work but no prior experience is necessary.
Please contact the Creative Technology Lab for questions or assistance.
Materials and Libraries
Just like in the real world, Materials determine what an object will look and feel like in Unreal Engine.
We can either create our own materials or use materials that have already been created.
Creating our own materials can be easier or more difficult depending on how detailed a material has to be.
Therefore for this tutorial, we will use materials that have been created for us.
A collection of these pre-made materials is called a Material Library.
It is also possible to create libraries for 3D models and assets called Asset Libraries.
1) Using Quixel
Quixel is a Material and Asset Library that is free to use with Unreal Engine. This provides easy access to thousands of pre-made assets for your projects.
We will be using Quixel to select a material for the landscape we already created.
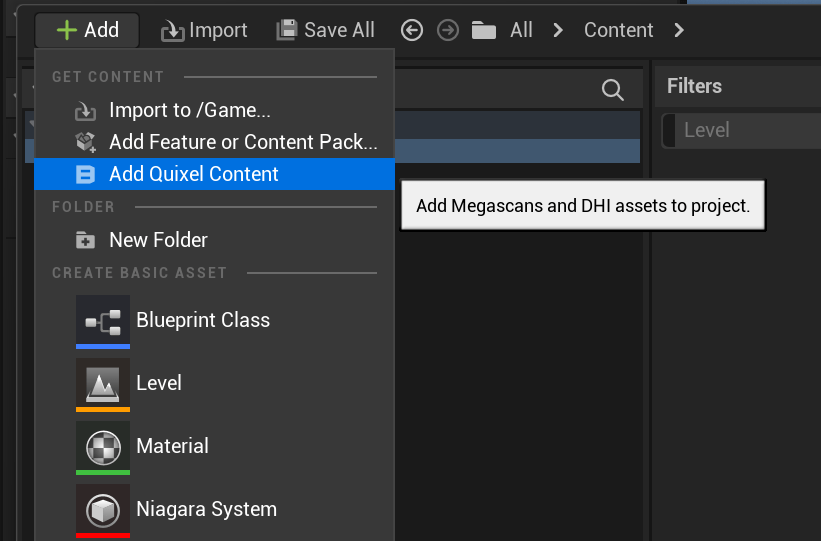
- Open up the Content Bowser in the bottom left corner of Unreal Engine. There, we will select the Content folder so we can add items to it.
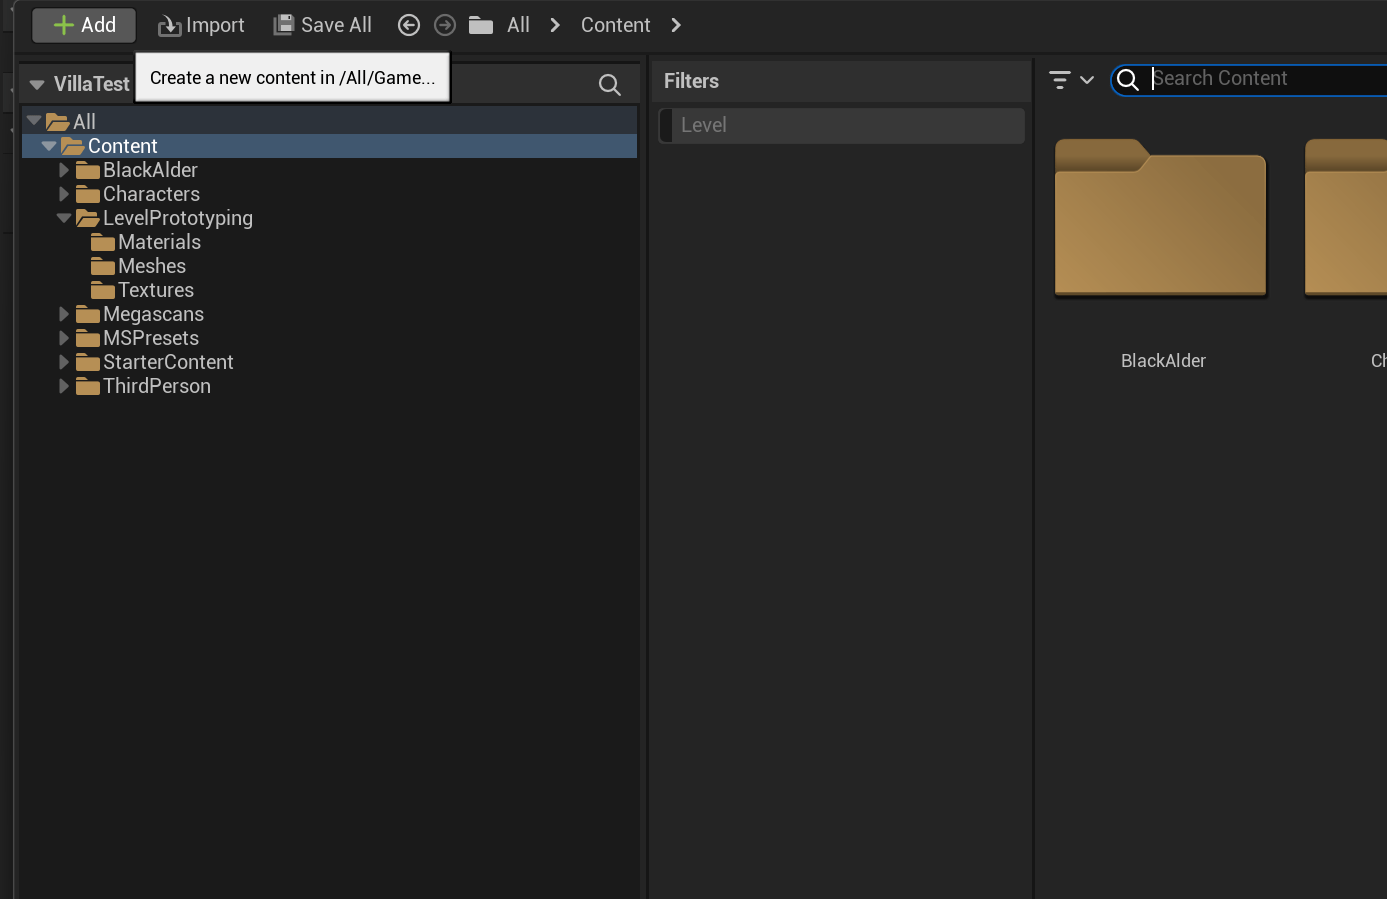
- After clicking on + Add, we can select Add Quixel Content which will open up the Quixel Bridge window.
2) Adding Materials
Quixel contains thousands of assets so it can be challenging to find exactly what we want. It is important to think about what kind of aesthetic we are trying to achieve when selecting a material.
I already know that I am trying to find a grainy ground material so I will search for it and select a material that I like.
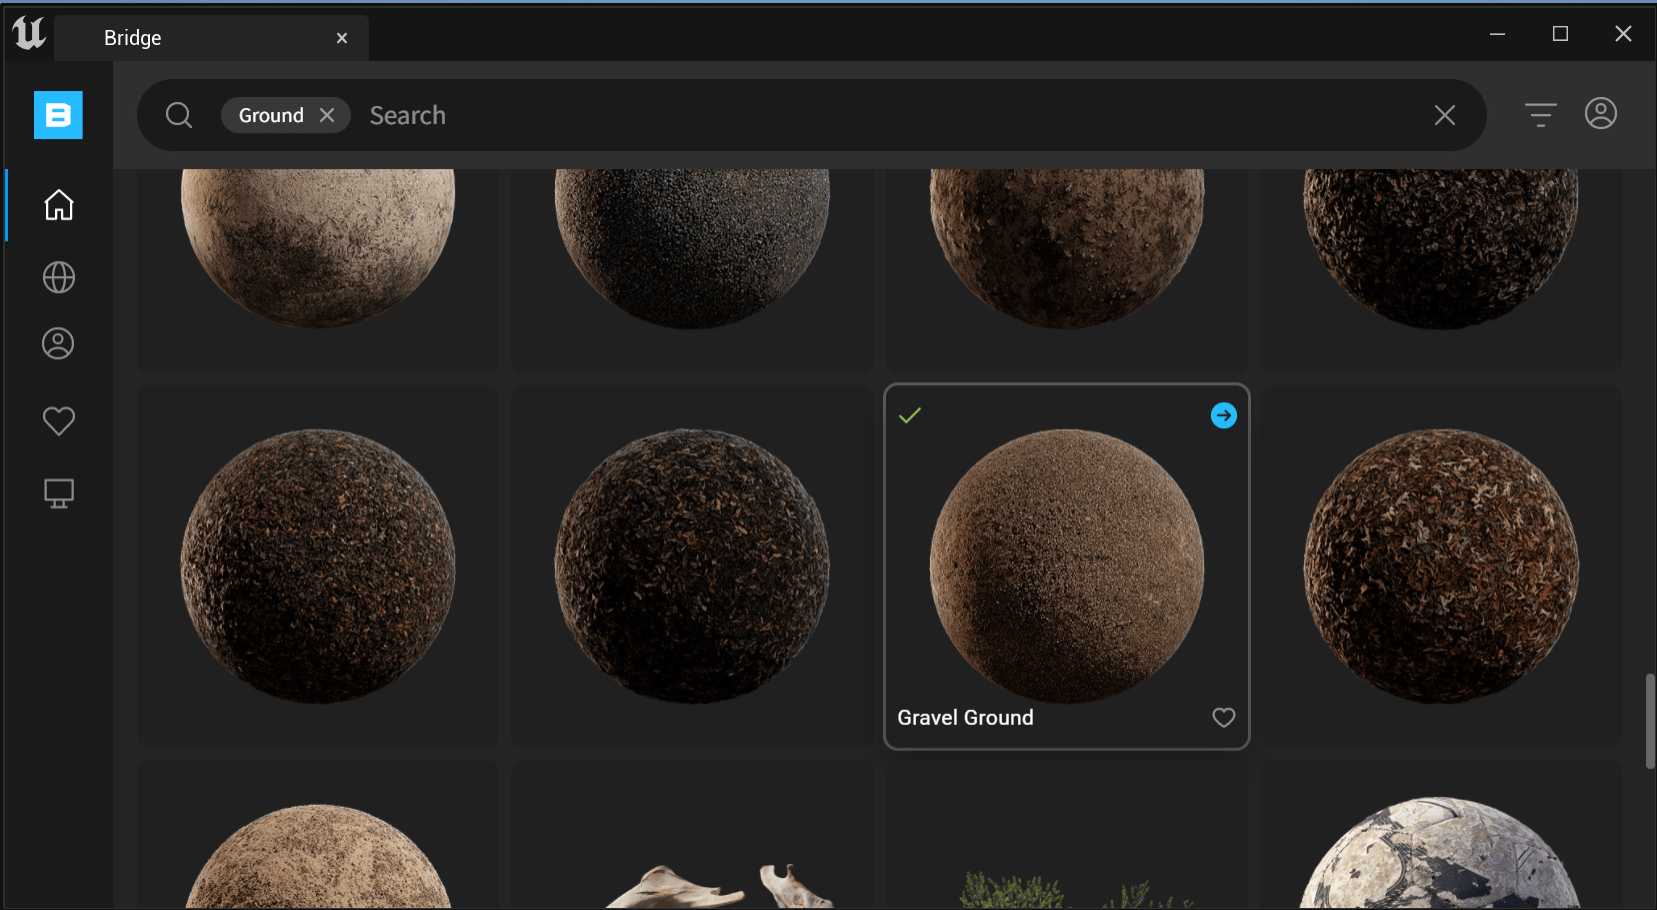
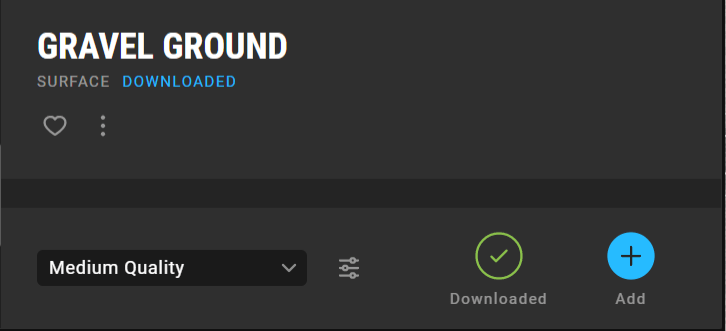
Once you find a material that you want to use, select it, download it, and add it to your project.
Medium quality is suitable for most projects. You can choose a lower or higher quality asset for your needs
You can then close Quixel and your content browser.
After you have added the material to your project, we have to make our landscape use the material.
3) Assigning Materials
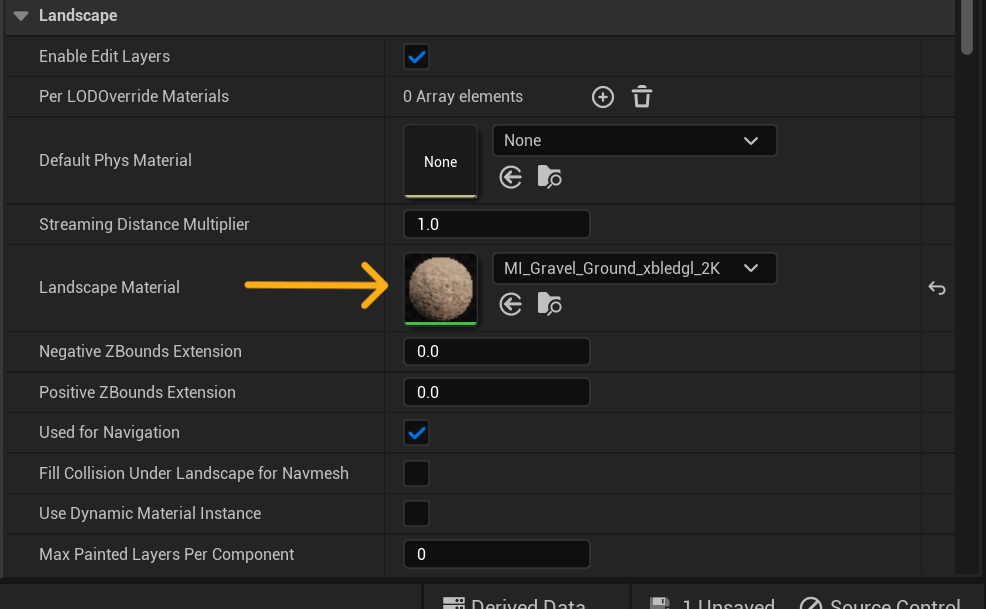
First we should return to Selection Mode on the top left of the screen.

Then after selecting your landscape, scroll down on the Details panel. This panel shows you the properties of the object you have selected. This is where you can see the location, rotation, scale, and other various properties that an object might have. We are interested in the Landscape Material section. After scrolling to this section, we can click on the None bar and search for our material.


4) Modifying Materials
You might have noticed that the landscape has now switched to using the material but it doesn't display correctly. That's because the material doesn't know what size it should be.
When a material is too small for our object (in our case, landscape), it will use Tiles to repeat itself till it fills up the area on our object.
Luckily, we can adjust the tiling on all Quixel materials. To do this, we will first double click our material to open it up.
This will open up our Material Editor where we can tick the Tiling option and change the values. I found the values of 0.05 to be best for my materials.
You can change these values to get the size you want on your project.

After changing these values and saving the material, we will be able to see the material displayed with the correct size on our landscape.
As you can see, I can now see the grains of sand and gravel on my landscape.

To continue with this tutorial, please follow the next article in this series.
Importing and Placing 3D Models
This is a multi-part tutorial on creating virtual worls in Unreal Engine. This tutorial assumes you have a basic understanding of 3D work but no prior experience is necessary.
Please contact the Creative Technology Lab for questions or assistance.
3D Models
3D Models are objects that can be placed in a 3D scene. They can also be called 3D Assets.
You can either create your own 3D model or use models that have been created by others.
We will use a model of a building that can be downloaded from here: UE Workshop Assets
After downloading the Building.fbx, diff, and diff wood files, we can then import them into our project.
Importing Models
-
To import assets into your project, first open the Content Browser and click on +Add. From there you can click on Import to...
Note: you can specify which folder the assets will get imported into by selecting that folder before clicking on Import.. This will make file management easier in the future.

- Select all the files you want to import to your project. For us, that will be the 3 files we downloaded.

- they will show up in your Content Browser like this:

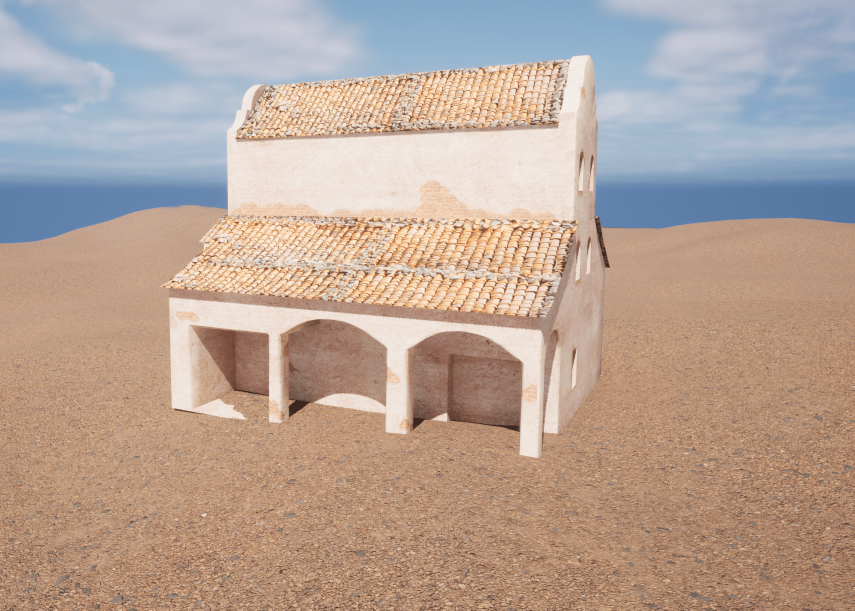
- You can then drag the building asset into your scene and place it wherever you like. Don't worry if the sizing doesn't look right yet.
Manipulating Models
You may have noticed that the model is too small within the scene. We will now change the scale of the object so it looks right in our scene.

After changing these values, you will see that your building will look much better now. If your model is intersecting with the ground too much, try changing different values in the Location & Rotation fields to make it look a little better.
To continue with this tutorial, please follow the next article in this series.
UE Foliage
This is a multi-part tutorial on creating virtual worls in Unreal Engine. This tutorial assumes you have a basic understanding of 3D work but no prior experience is necessary.
Please contact the Creative Technology Lab for questions or assistance.
Foliage Tool
The foliage tool in Unreal Engine allows you to quickly paint sets of assets on a landscape. Like the name suggests, this tool is primarily used for trees and plants, to create scenes which might contain thousands of trees or vast grasslands. This tool saves us the effort of individually placing many assets and automates it for us.
But first we need a pack of foliage assets to use...
Megascans Foliage Packs
Apart from small assets and materials, Quixel also releases megascans, which are large scans of created assets for us to use in Unreal Engine. We will be using one of these packs for our scene.
Open the Epic Games Launcher and to the Unreal Engine window. There, we will go to the Marketplace tab and search the categories for the Megascans.
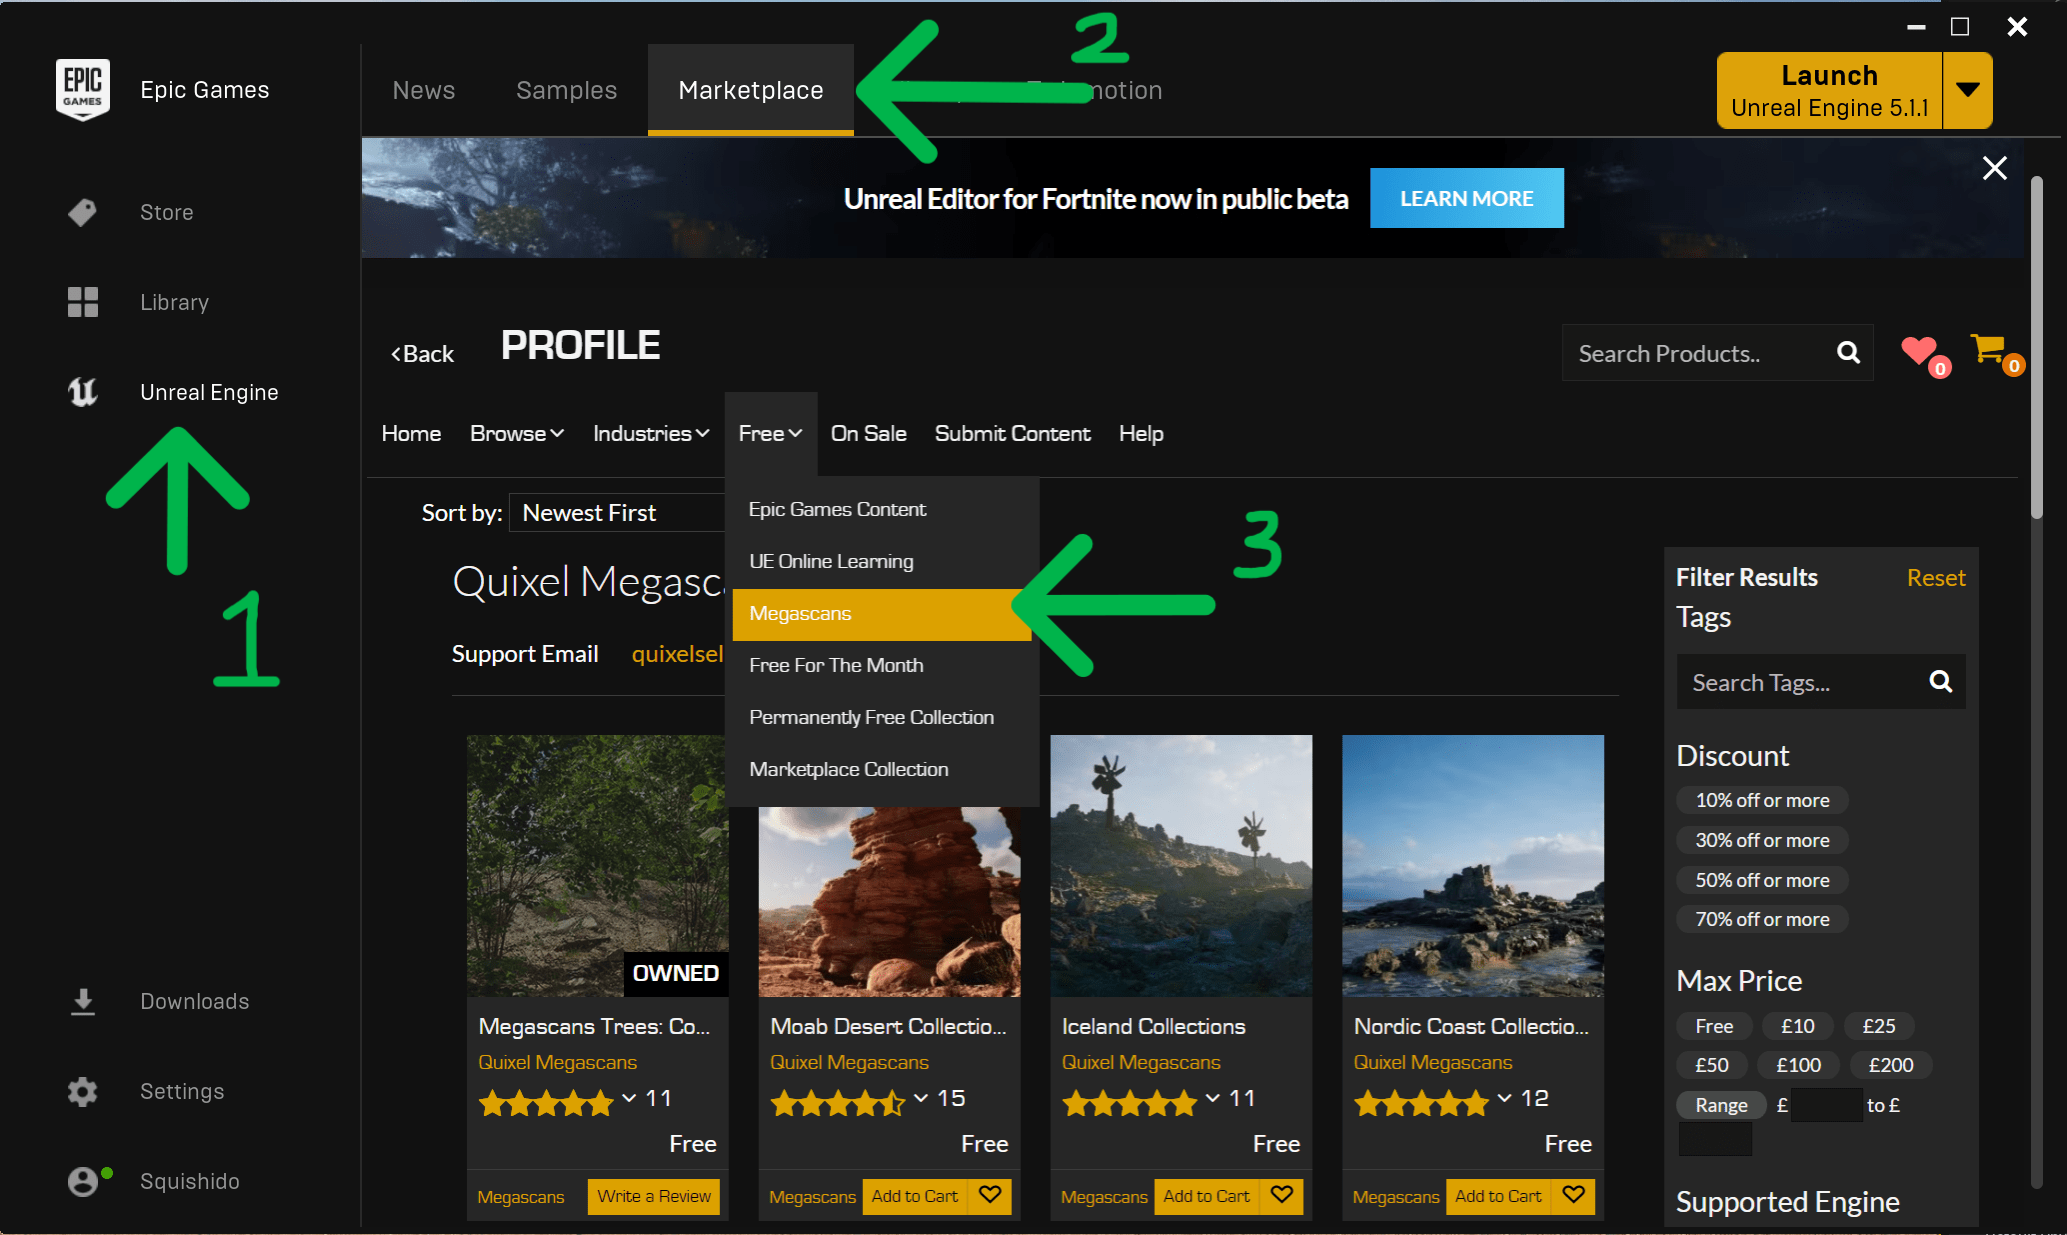
The pack we want to import is called the Megascans Trees: European Black Alder.
Find this pack, download it, and add it to your project.

Foliage Painting
We will now go over the steps needed to start adding instanced foliage.
- To access the foliage tool, first change the editor mode to Foliage on the top left of your screen.
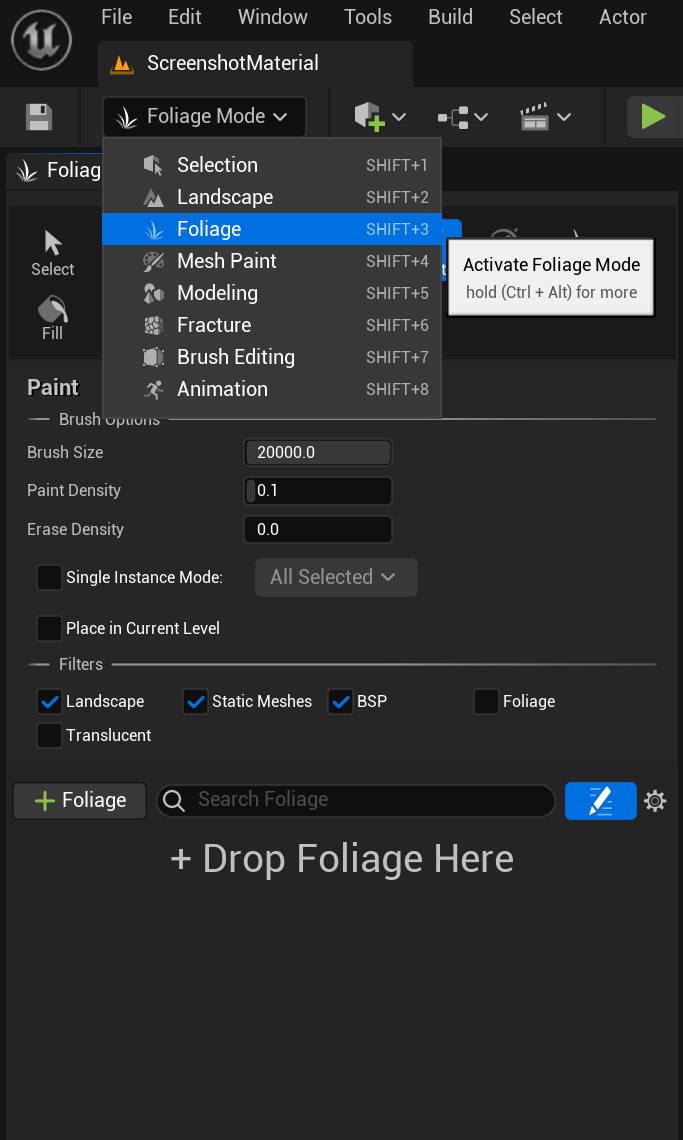
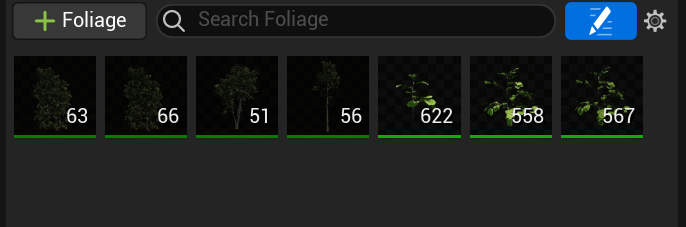
- You have to then specify which trees/bushes/grasses you want to use by clicking the +Foliage button.
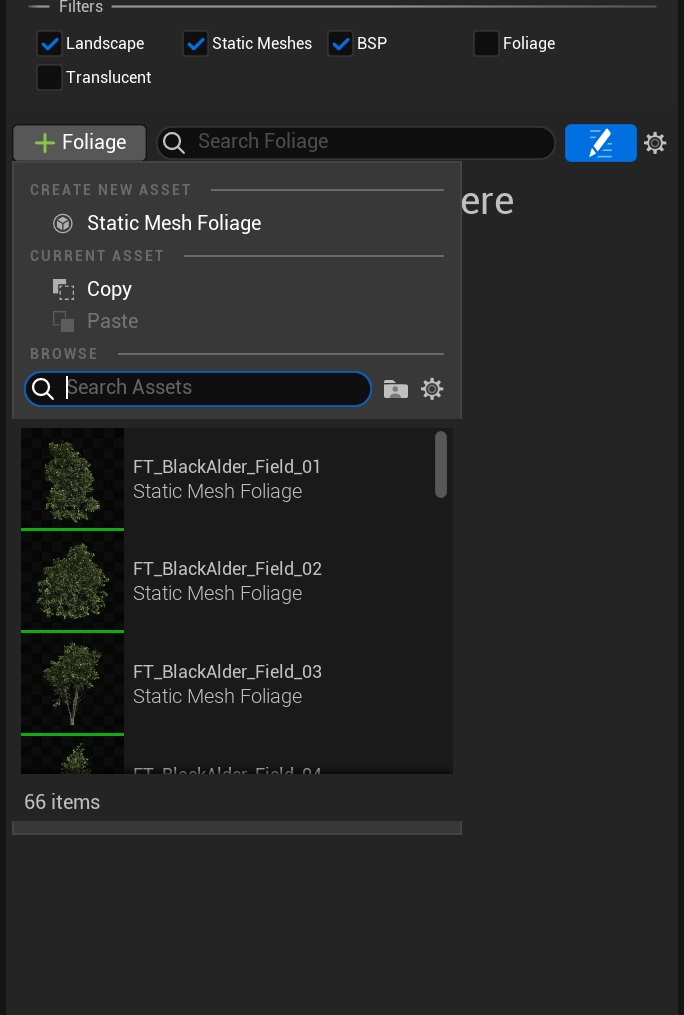
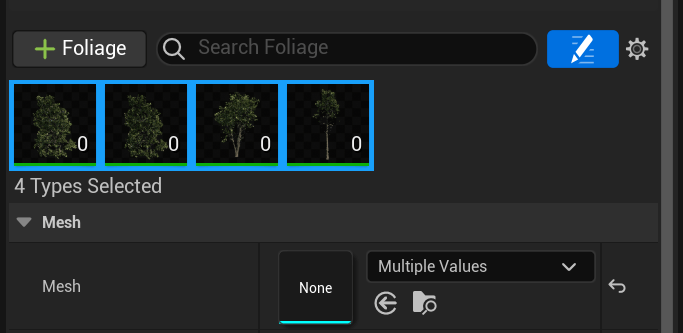
As you can see, I have added 4 types of trees to my selection and ticked all the boxes.
-
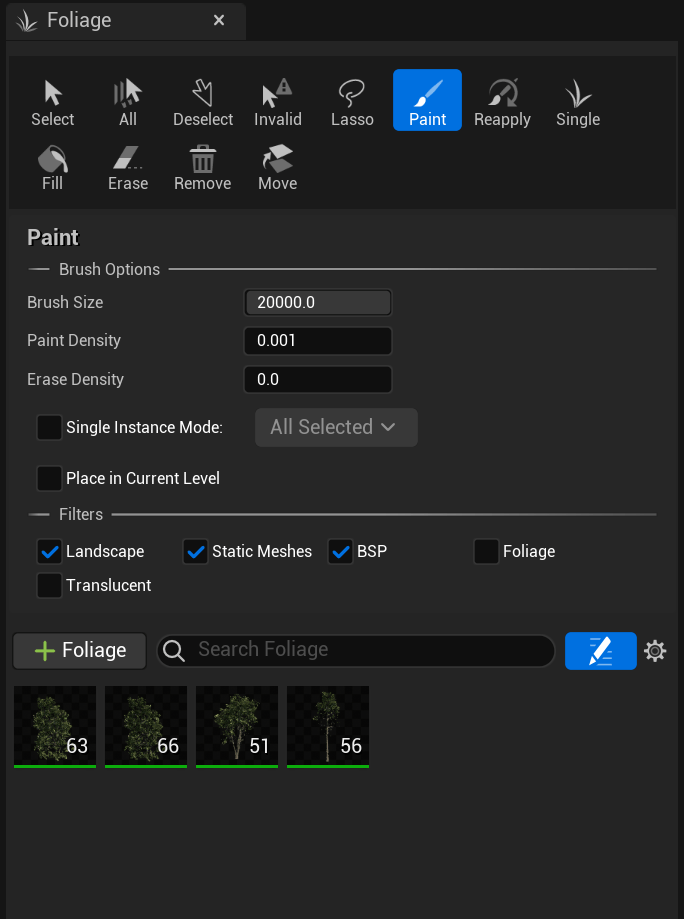
You can then change your Brush size and Paint Density.
-
Brush Size will affect the size of your painting area.
-
Paint Density will affect how densely your foliage is placed. A lower density will place foliage more sparsely and vice versa.


-
Filling your landscape (optional)
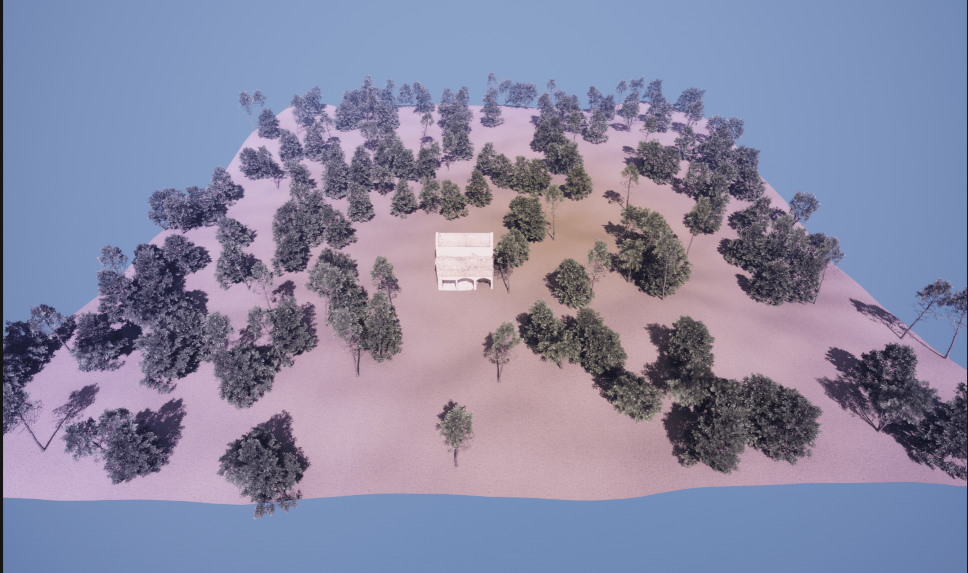
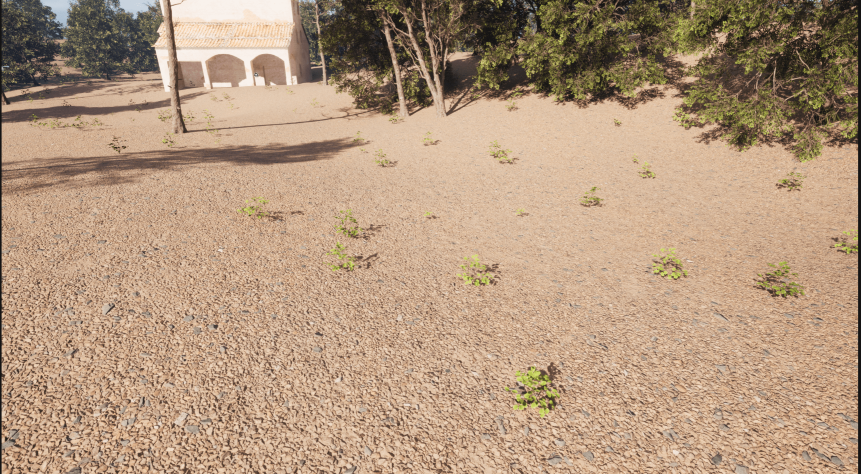
Adding large tree assets is usually enough to make a landscape look realistic. However, if you feel like you want to add more assets to fill out your scene, the foliage packs also contain smaller plants that you can add to your scene.
As shown below, it is possible to add these in and paint your landscape with them to make it look more realistic.
I have added smaller plants and painted them at a higher density, which is why there is more of them (500-600) in my scene.
To continue with this tutorial, please follow the next article in this series.