Unreal Engine Basics
A guide to the basics of Unreal Engine, from first installation to features that can elevate your project.
- What is Unreal Engine?
- UE Installation and Set-up
- Unreal Engine UI Video
- Types of Lighting and Lighting Mobility
- Creating Virtual Worlds
- Building to a VR headset
- How to build a project onto a VR headset
- How to build to a Meta Quest 2
- How to build to a Vive Pro or Vive Pro Eye
- APK Downloads
What is Unreal Engine?
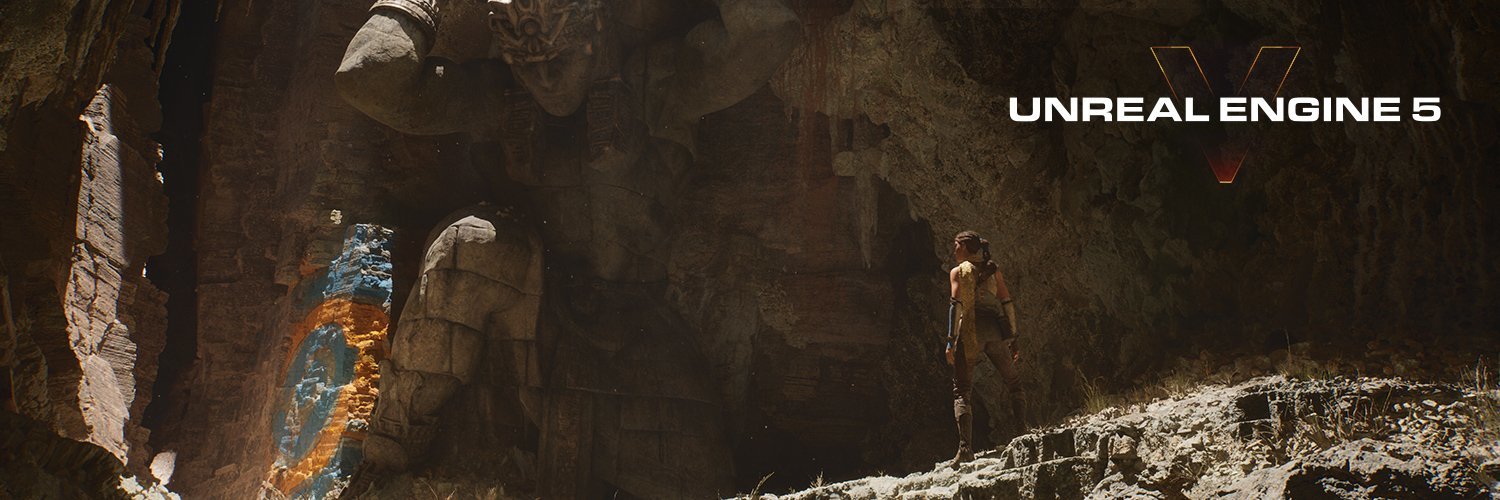
Unreal Engine is a powerful software that helps creators build virtual environments and interactive content. Initially designed for video games, it has evolved into a versatile engine suitable for many different projects. With Unreal Engine, students can bring their ideas to life, whether it's designing games, exploring architectural concepts, or even creating immersive virtual reality experiences.
Exciting Features:
Unreal Engine's popularity stems from its impressive features. Let's explore some of them:
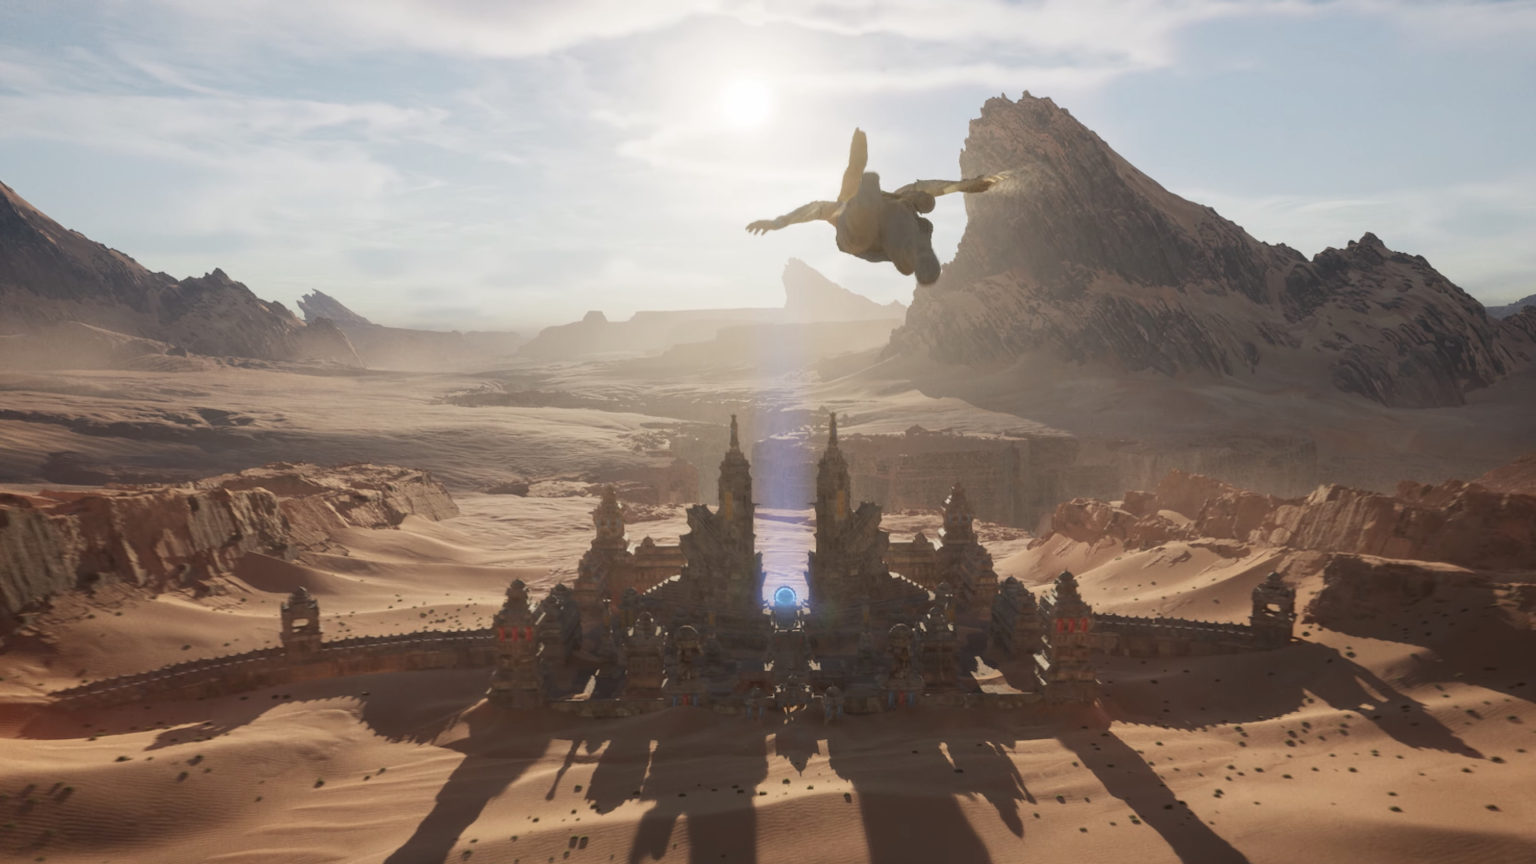
1) Eye-catching Visuals: Unreal Engine allows students to create visually stunning graphics with realistic lighting, shadows, reflections, and special effects. These features make the virtual worlds come alive, captivating the audience and enhancing the overall experience.

2) No Coding Required: One of the standout features of Unreal Engine is its Blueprint visual scripting system. Students who are not familiar with coding can still create interactive gameplay mechanics and behaviors using a visual interface. This empowers them to unleash their creativity without the need for extensive programming knowledge.

3) Realistic Physics: Unreal Engine incorporates a physics engine that enables realistic object interactions, gravity simulations, and collision detection. This feature is useful for students studying fields like architecture and engineering, as it allows them to test and visualize designs with accurate physics simulations.
4) Reach Different Platforms: Unreal Engine supports multiple platforms, such as PCs, consoles, mobile devices, and virtual reality headsets. This means that students can develop their projects and showcase them on various platforms, reaching a wider audience and exploring different mediums.
Exciting Applications:
Unreal Engine's versatility opens doors to exciting opportunities across various domains:
Game Development: Unreal Engine is widely used in the gaming industry to create engaging and visually impressive games. Students can learn game development skills and bring their imaginative ideas to life, crafting their own interactive experiences.
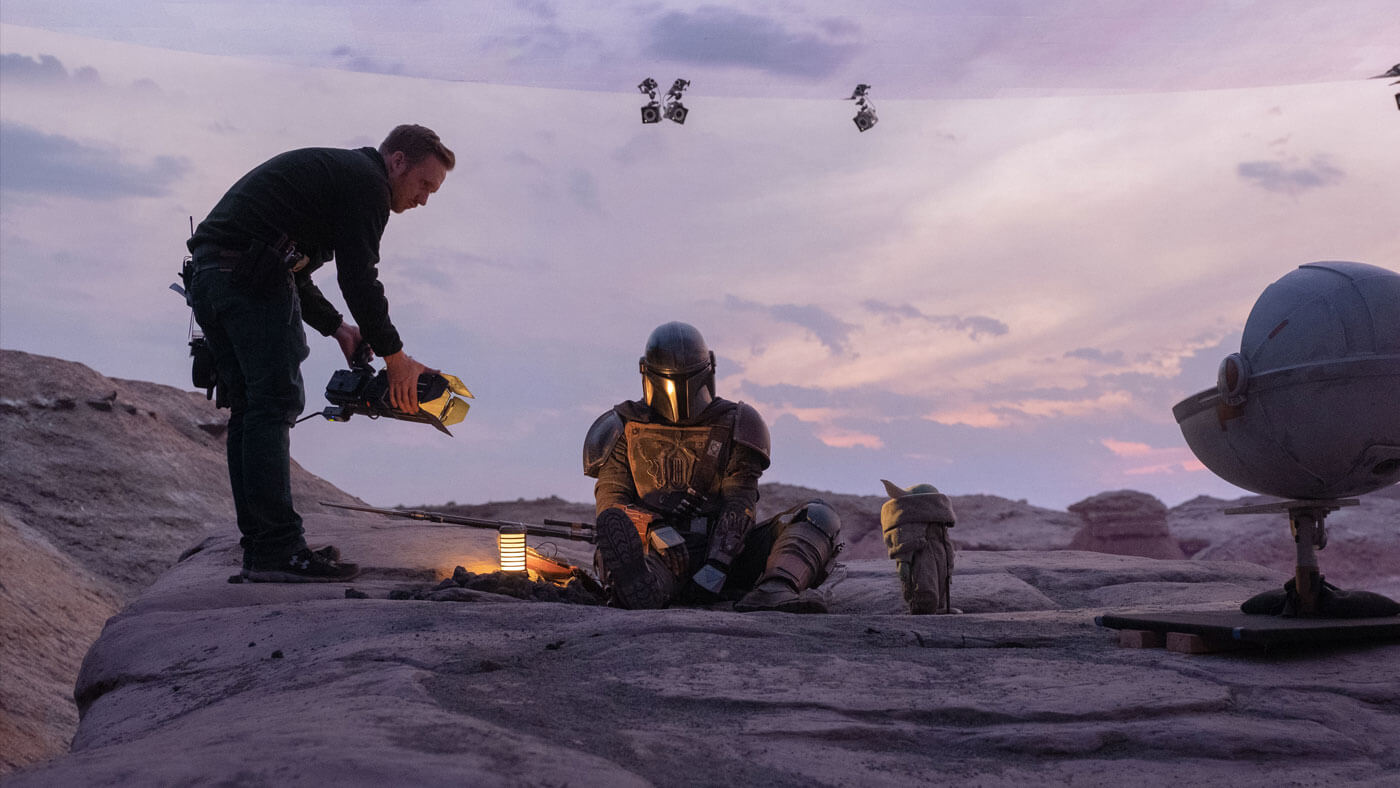
Film and Animation: Unreal Engine is also popular in film production and animation. Students interested in these fields can utilize its real-time rendering capabilities to create virtual sets, stunning visual effects, and even render entire scenes in real-time, saving time and enhancing the production process.
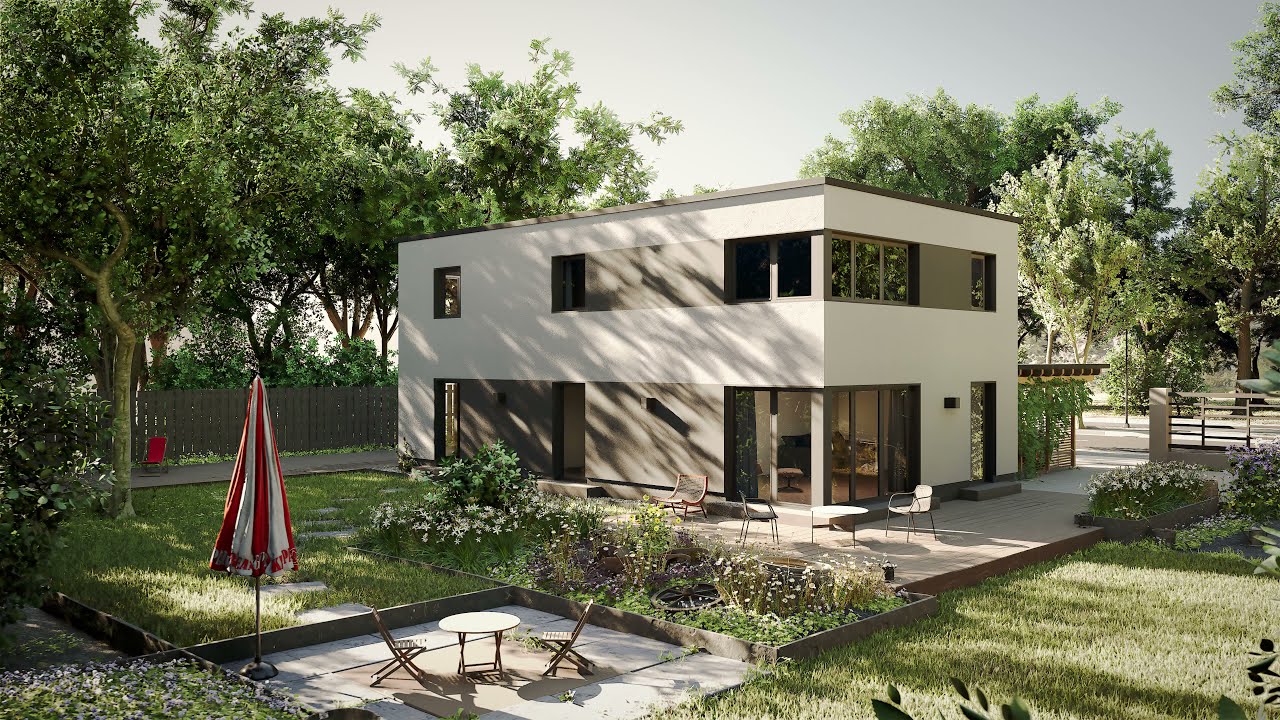
Architecture and Visualization: Students studying architecture and design can use Unreal Engine to visualize and present their concepts. They can create interactive walkthroughs, realistic visualizations, and virtual tours of their designs, providing a more immersive and engaging experience for clients and viewers.
Training and Simulation: Unreal Engine finds applications in training programs and simulations. Students interested in fields like military training, medical simulations, or industrial safety can leverage Unreal Engine's capabilities to create immersive and realistic virtual environments, enhancing the effectiveness of practical training scenarios.
By embracing Unreal Engine, students can embark on journeys of game development, architectural visualization, and immersive storytelling. The possibilities are endless, and with Unreal Engine, the future of digital creation is at their fingertips.
UE Installation and Set-up
Installing Unreal Engine
To download and install Unreal Engine, you need to:
-
Download and install the Epic Games Launcher.
-
Sign up for an Epic Games account, if you don't have one.
-
Sign in to the Epic Games Launcher.
-
Install Unreal Engine.
Download and Install the Epic Games Launcher
The Epic Games Launcher is where you can manage all Epic Games products. The Unreal Engine Tab on the left is where you manage all your Unreal Engine installations.
To download and install the Launcher, follow these steps.
-
Access the Download Unreal Engine page.
- Select the license type that best matches how you intend to use UE. There are two types of licenses available:
- Publishing, if you plan to publish and make money with Unreal Engine.
- Creators, if you plan to make other types of content.
You can learn more about the different kinds of licensing available from the Unreal Engine FAQ.
- Click the DOWNLOAD NOW button that corresponds to the license type you selected. This will download the Launcher installer to your computer. Depending on your operating system settings, you might be asked to select a save location, or have to approve a security prompt before the download can start.
- After the download finishes, run the installer and wait for it to complete.
Create an Epic Games Account
After the setup program installs the Epic Games Launcher on your machine, you will be prompted to sign in with your Epic Games account.
If you have an account, sign in to the Launcher and continue to the next section.
If you don't have an account, click Sign Up to create one. You can sign up for an Epic Games account with your email, or with a supported social media or gaming platform account.
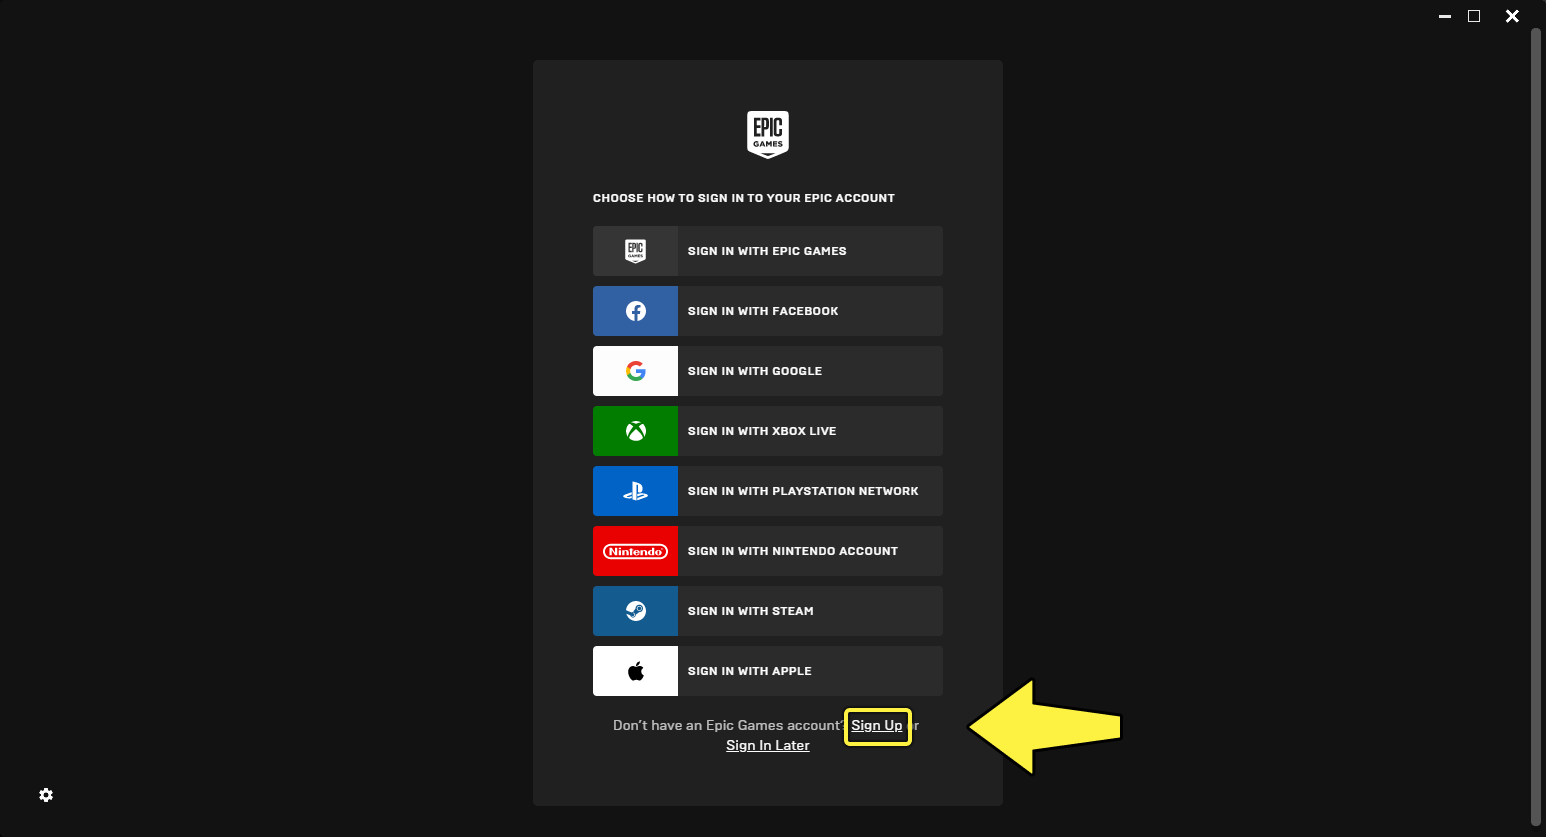
After you've created your account, Sign In to the Launcher.
Install Unreal Engine
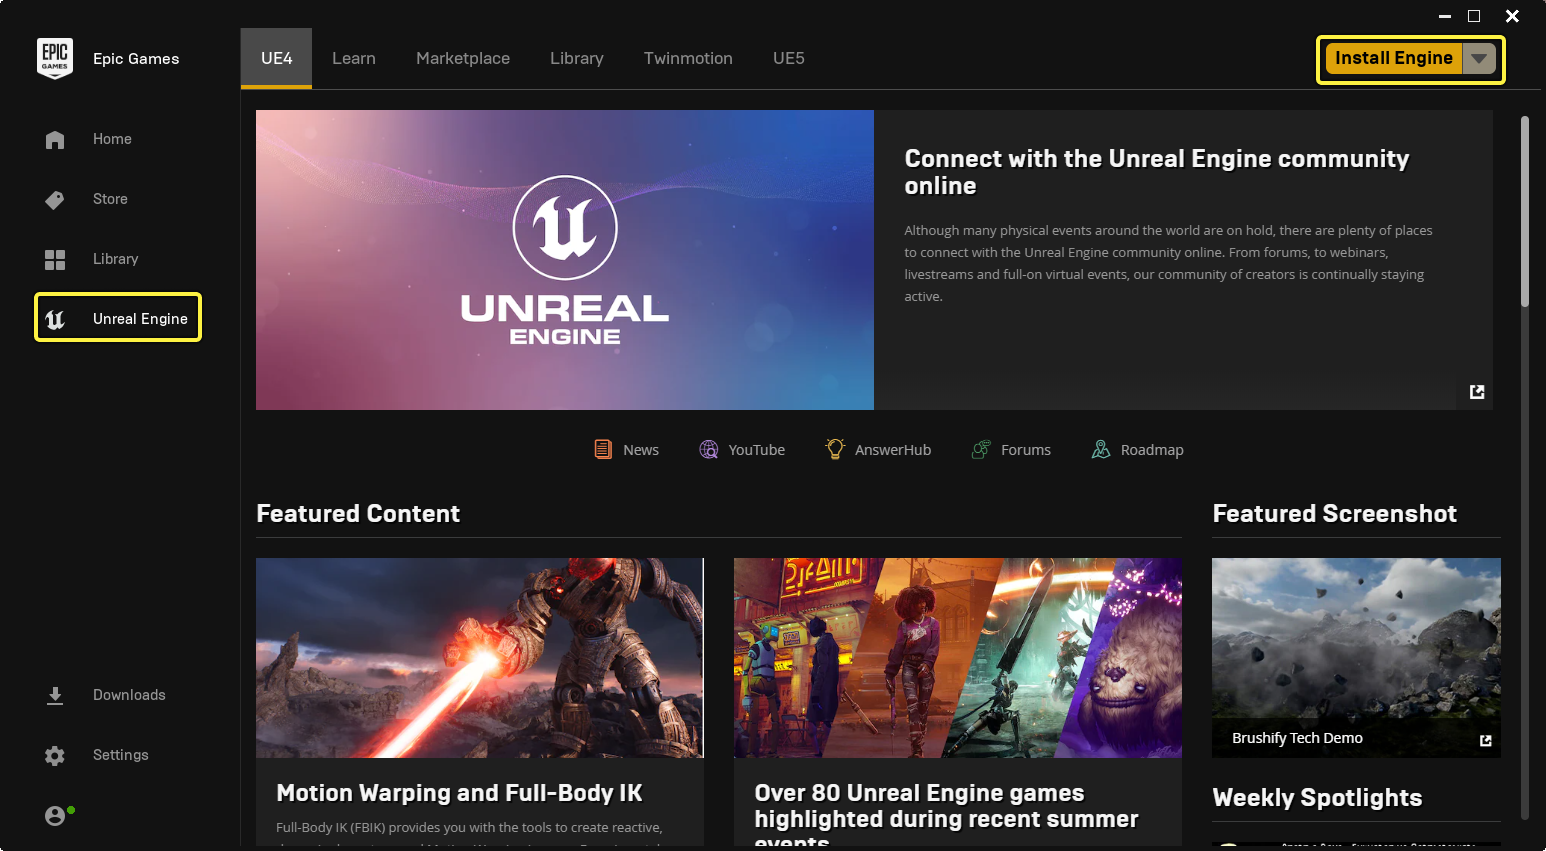
Now that you've signed in to the Epic Games Launcher, you're ready to install Unreal Engine.
- Click the Unreal Engine tab inside the Epic Games Launcher, then click the Install Engine button. This will install the most recent version of Unreal Engine
2. (Optional) CLick the Browse button to change the location of your installation. For most people, the default path will be fine.
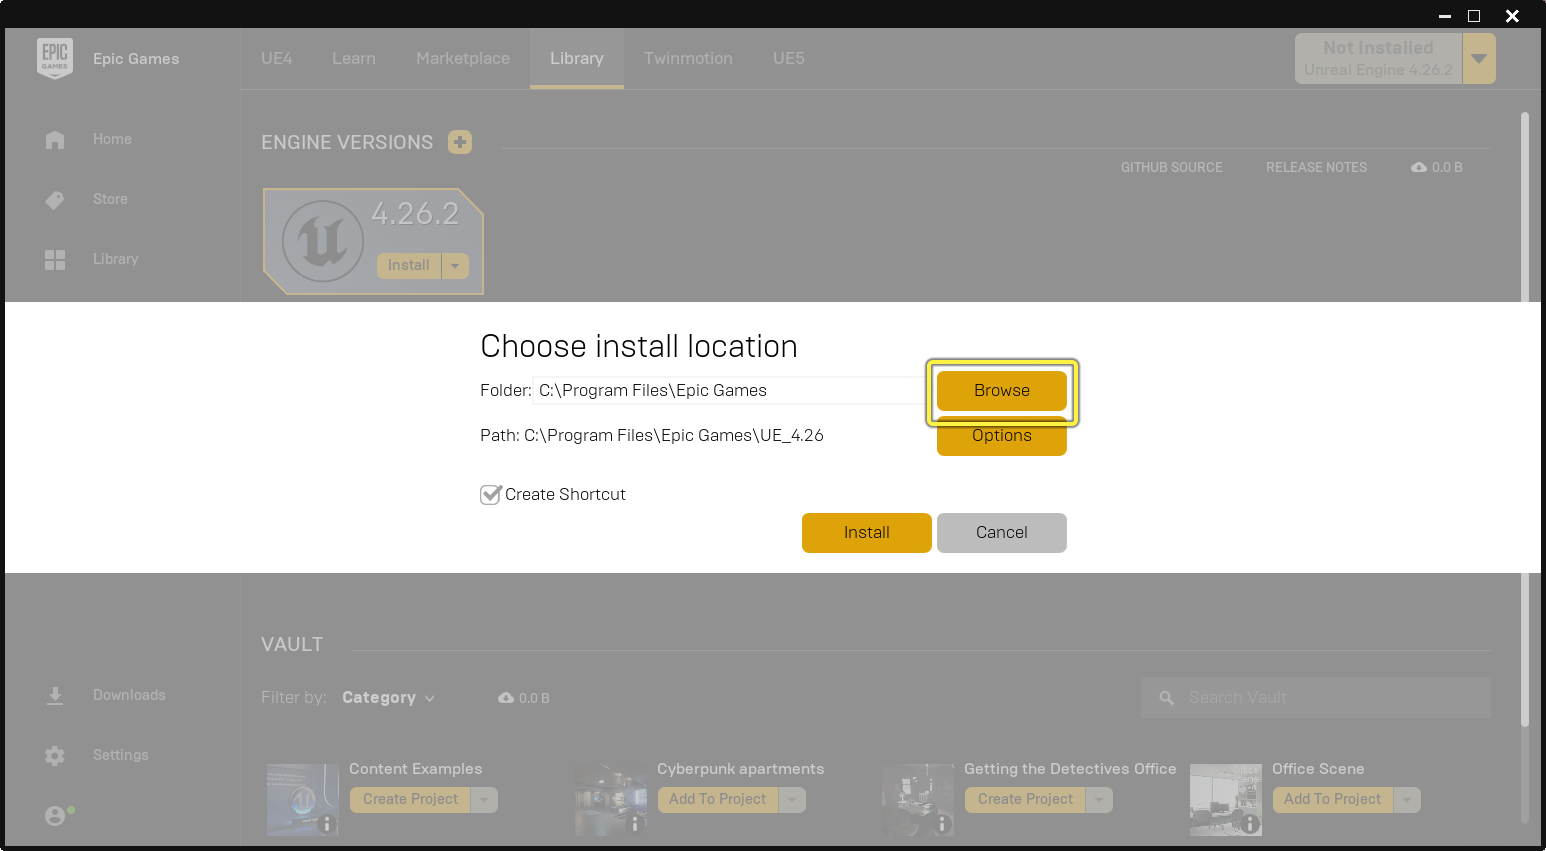
3. Click the Options button to select which Engine components you want to install. This is where you select components such as:
-
Platform support
-
Starter content
-
Debug symbols
-
Engine source code
You may select or de-select and components that you think you need/don't need.
If you are unsure, just leave these to the default selections
Important: Before you install Unreal Engine, make sure you have enough disk space. Requirements vary depending on the engine components you select. The Options screen will show you how much space you need for the installer download, as well as the engine itself.
- Click the Install button and wait for the installation to complete. Depending on your system specifications and Internet connection speed, downloading and installing Unreal Engine can take between 10 to 40 minutes, sometimes longer.
Launch Unreal Engine
After the install completes, click the Launch button to open Unreal Engine.
Unreal Engine UI Video
A short demo explaining the basic UI of Unreal Engine, as well as instructions on how to navigate viewports and content organisation.
Types of Lighting and Lighting Mobility
Lighting is a crucial element in creating realistic and immersive environments in video games. In Unreal Engine, a powerful and widely-used game development platform, various lighting techniques and features are available to bring virtual worlds to life. In this article, we will explore the different types of lighting in Unreal Engine and their applications.
This article is a basic guide and it is recommended to conduct further research into lighting mobility before using it extensively in a project.
There are 5 different types of lights within Unreal Engine.
1) Directional Lights:
Directional lighting represents an infinitely distant light source, simulating the sun or a strong moonlight. It casts parallel rays of light in a specific direction, providing uniform lighting across the scene. This type of lighting is primarily used to simulate outdoor environments and create realistic day-night cycles.
2) Point Lights: Point lights emit light from a specific position in all directions, resembling a light bulb or a campfire. They produce omnidirectional lighting, which can cast shadows and illuminate nearby objects. Point lights are commonly used for indoor scenes, small light sources, or to create localized lighting effects.
3) Spot Lights: Spot lights emit light in a cone-shaped beam, replicating a flashlight or a stage spotlight. They have a position, direction, and a specified angle of spread. Spot lights can cast shadows and create dramatic lighting effects, making them suitable for highlighting specific objects or areas of interest.
4) Area Lights: Area lights are large, flat light sources that emit soft and diffused light. They can simulate light panels, windows, or open doors. Area lights are ideal for achieving uniform lighting across large surfaces, such as walls or floors, and creating soft shadows.
5) Sky Lights: Sky lighting in Unreal Engine is a technique used to simulate global illumination by capturing the lighting information from the sky. This approach enhances the overall ambient lighting in the scene, providing soft shadows and natural lighting conditions. It is particularly useful for outdoor environments and creating realistic lighting variations throughout the day.
 Fig: Adding different lights through the Place Actors tab on the Top-Left of the screen.
Light Mobilities and their recommended applications
After selecting the lights you will need in your project, each light object can be set to one of three mobilities. These settings will greatly change how the lights affect your scene.
1) Static Lights:
Static or Non-moveable lighting is the most performant type of lighting in Unreal Engine. They are fixed in both position and orientation and do not contribute to dynamic lighting calculations during gameplay. Static lights are precomputed and baked into lightmaps, resulting in efficient rendering performance. They are ideal for static objects, environments with minimal lighting changes, or scenes where real-time lighting updates are not necessary.
2) Stationary Lights: Stationary lights are a commonly used light mobility type in Unreal Engine. They offer a balance between flexibility and performance. Stationary lights have static positions and orientations, but they can dynamically affect the scene by casting shadows and producing real-time reflections. This makes them suitable for indoor environments or areas with a fixed light source.
3) Moveable Lights:
Movable lights provide greater flexibility than stationary lights. They can be freely moved and rotated within the game world in real-time. Movable lights are perfect for situations where dynamic lighting changes are required, such as a moving spotlight or a character carrying a flashlight. However, the real-time calculations for movable lights can be more demanding on system resources.
 Fig: Mobility settings within the Details panel when selecting a light object.
Note: Changes in light mobility can have drastic impacts on a scene. It is recommended to conduct further research into these settings to fully understand when is best to use certain features of lighting.
Creating Virtual Worlds
This is a multi-part tutorial on how to build large-scale virtual worlds in Unreal Engine.
This tutorial assumes you have basic knowledge of UE.
Creating a Landscape
This is a multi-part tutorial on creating virtual worls in Unreal Engine. This tutorial assumes you have a basic understanding of 3D work but no prior experience is necessary.
Please contact the Creative Technology Lab for questions or assistance.
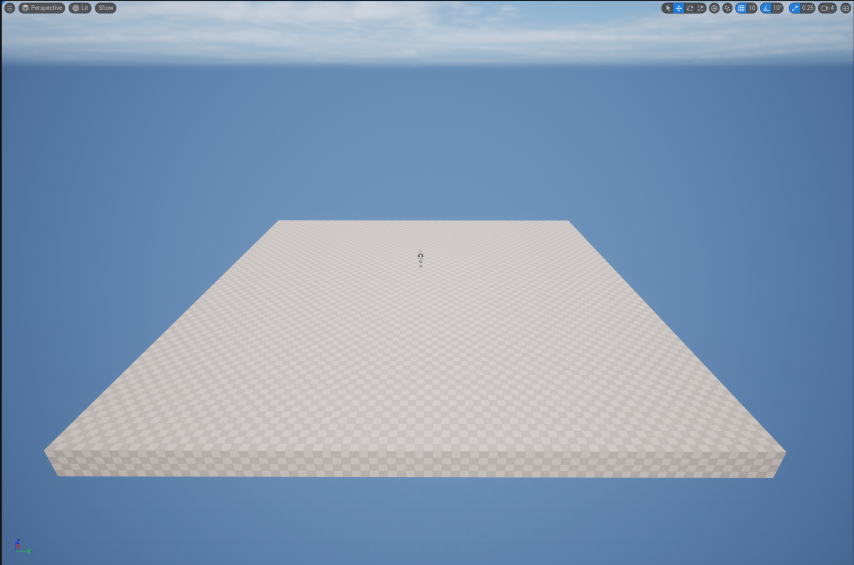
1) Start with a blank level in Unreal Engine.
This will give you a fresh scene with a floor, sky, clouds, and sunlight. We will use this as a base from which we create our scene.
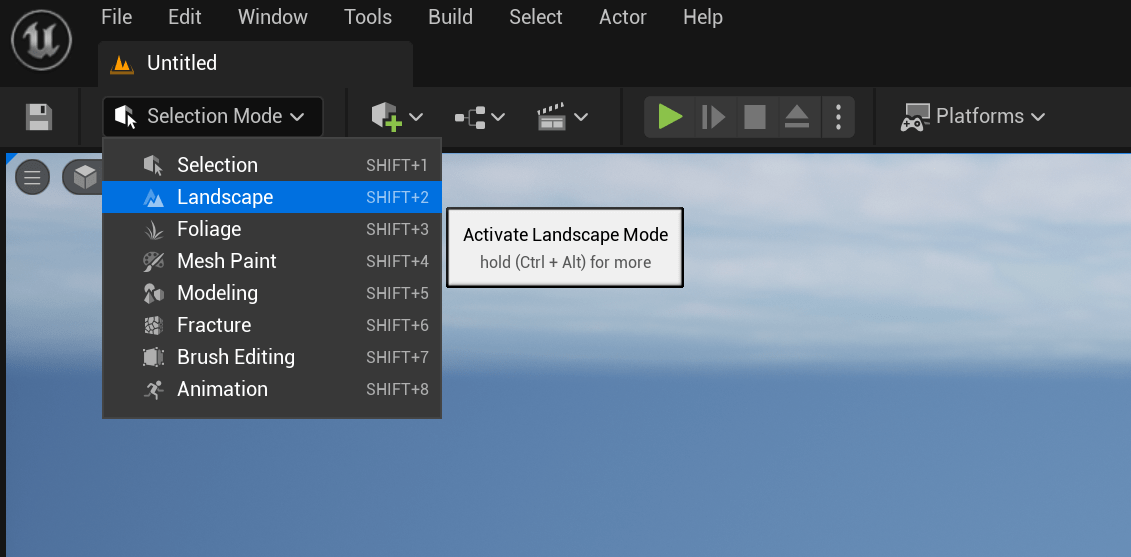
2) Change the editor to Landscape mode.
We will want to change two important settings here.
-
Turn ON Enable Edit Layers. This will allow us to modify our landscape later.
-
Change the Section Size to a smaller size. For this tutorial we will use 31x31 quads. For larger landscapes, you can use a larger size.
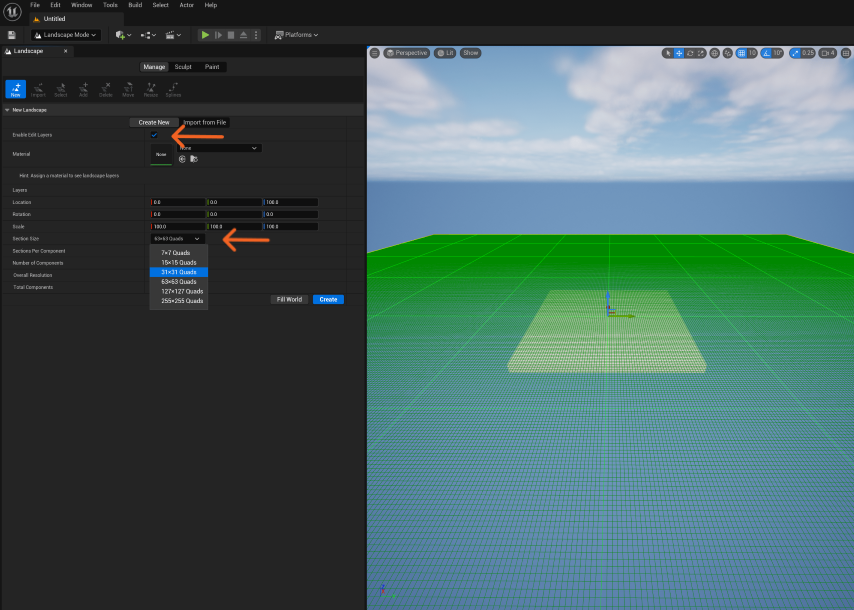
After this is done, you can click create and your landscape will be done.
3) Modifying the shape of the landscape.
Our landscape will look quite flat when we first create it. To add some details, we can use a variety of tools to change it. We will be focusing on the Noise tool.
The Noise tool applies a random height the portion of landscape we paint over. But first, we need to change a few settings with our tool.
-
The Tool Strength should be reduced to 0.04. This will reduce the variation in height that is produced.
-
The Noise Mode should be changed to Add. This will make it so height is added to our existing landscape, not reduced from it.
-
Finally, the Brush Size can be increased so we can paint our whole landscape with one click. This is not necessary if you want to make small adjustments.

After clicking once to paint our landscape with Noise, it should look like this.

As you can see, the height has been randomised, greating a nice ground effect for our scene.
To continue with this tutorial, follow the next article in this series where we will cover Materials.
Using Quixel Materials
This is a multi-part tutorial on creating virtual worls in Unreal Engine. This tutorial assumes you have a basic understanding of 3D work but no prior experience is necessary.
Please contact the Creative Technology Lab for questions or assistance.
Materials and Libraries
Just like in the real world, Materials determine what an object will look and feel like in Unreal Engine.
We can either create our own materials or use materials that have already been created.
Creating our own materials can be easier or more difficult depending on how detailed a material has to be.
Therefore for this tutorial, we will use materials that have been created for us.
A collection of these pre-made materials is called a Material Library.
It is also possible to create libraries for 3D models and assets called Asset Libraries.
1) Using Quixel
Quixel is a Material and Asset Library that is free to use with Unreal Engine. This provides easy access to thousands of pre-made assets for your projects.
We will be using Quixel to select a material for the landscape we already created.
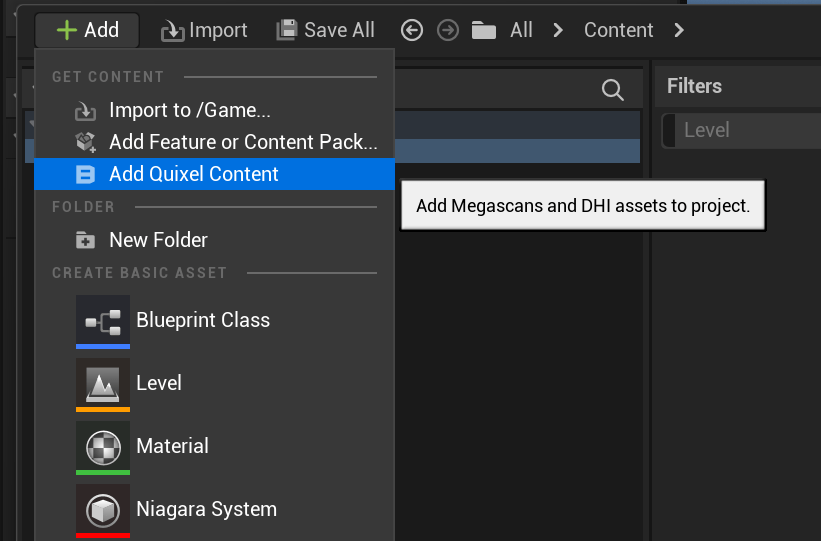
- Open up the Content Bowser in the bottom left corner of Unreal Engine. There, we will select the Content folder so we can add items to it.
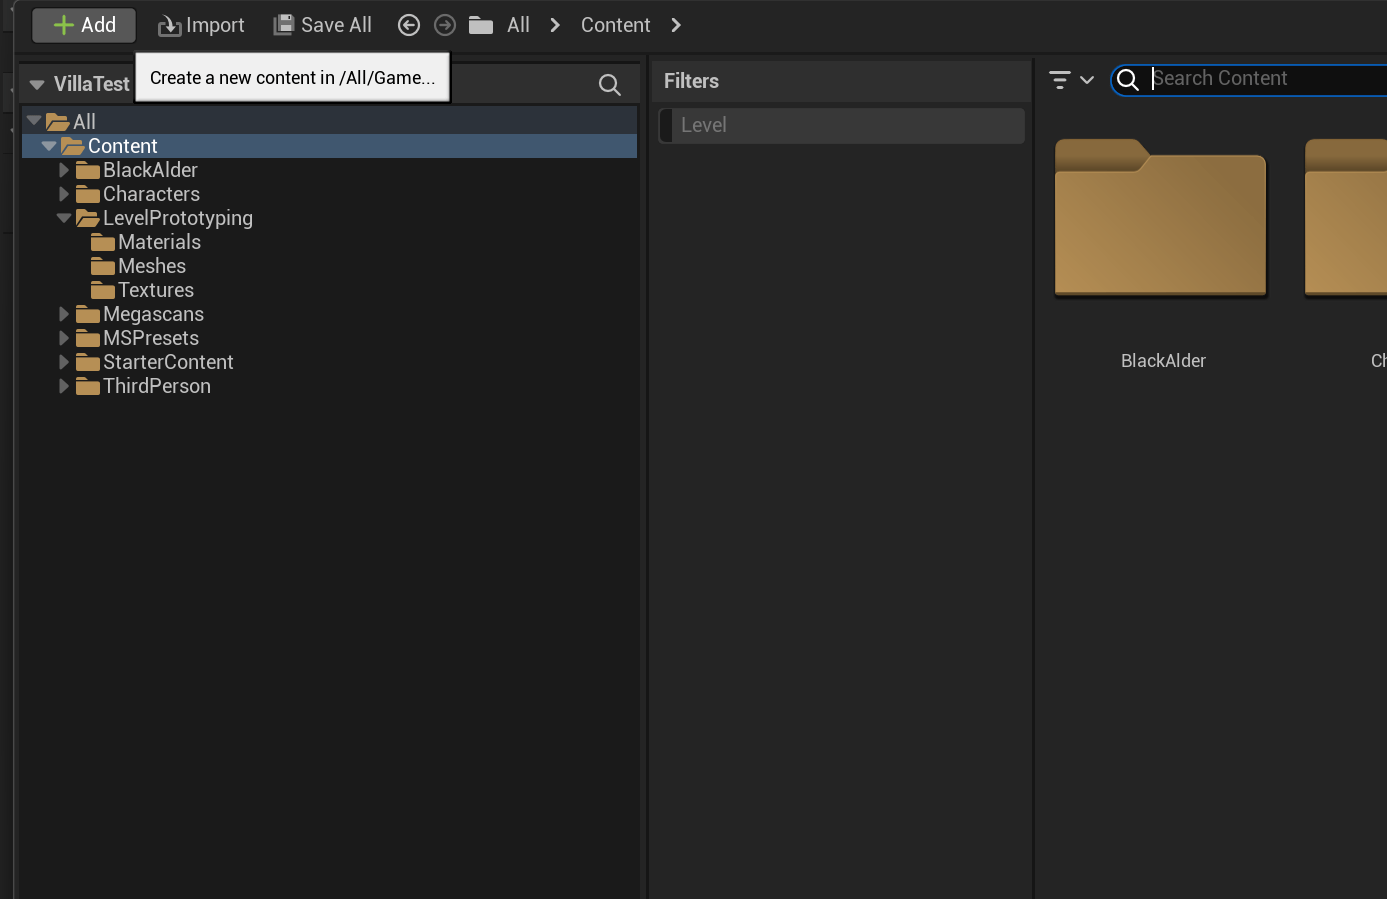
- After clicking on + Add, we can select Add Quixel Content which will open up the Quixel Bridge window.
2) Adding Materials
Quixel contains thousands of assets so it can be challenging to find exactly what we want. It is important to think about what kind of aesthetic we are trying to achieve when selecting a material.
I already know that I am trying to find a grainy ground material so I will search for it and select a material that I like.
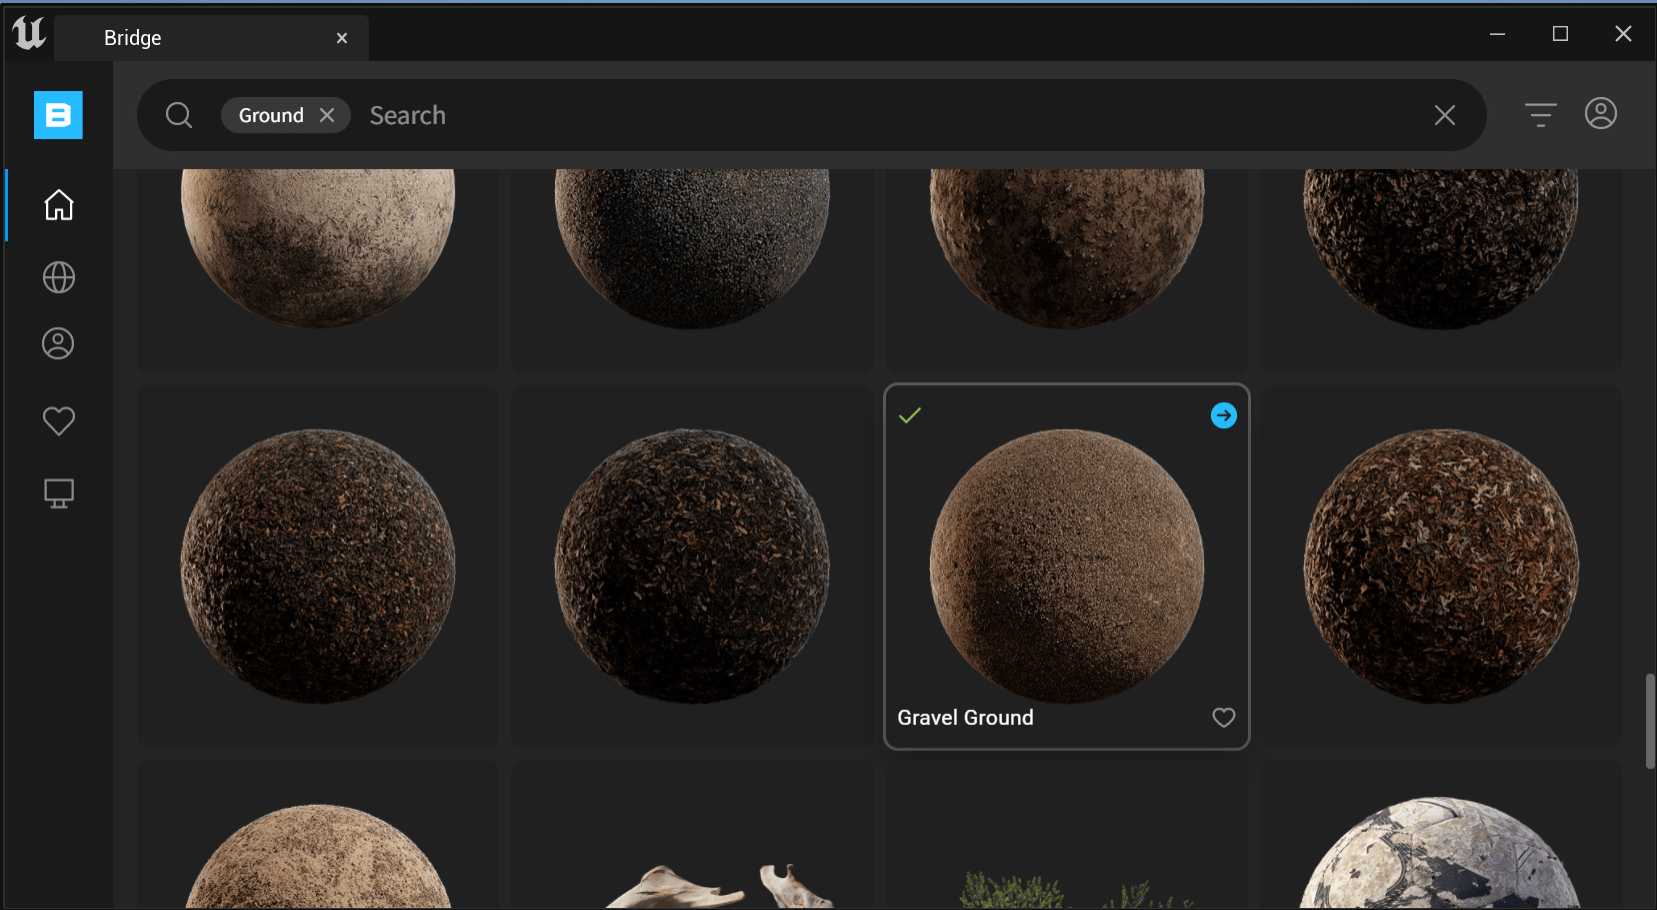
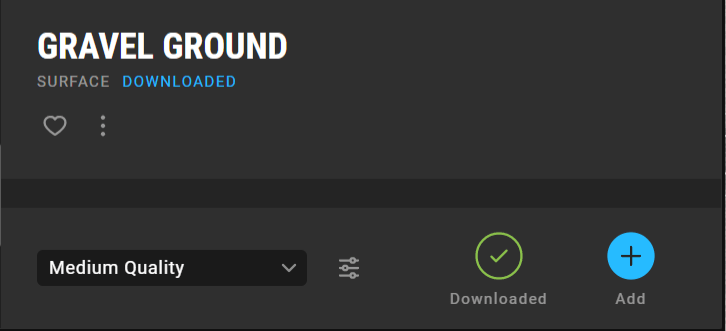
Once you find a material that you want to use, select it, download it, and add it to your project.
Medium quality is suitable for most projects. You can choose a lower or higher quality asset for your needs
You can then close Quixel and your content browser.
After you have added the material to your project, we have to make our landscape use the material.
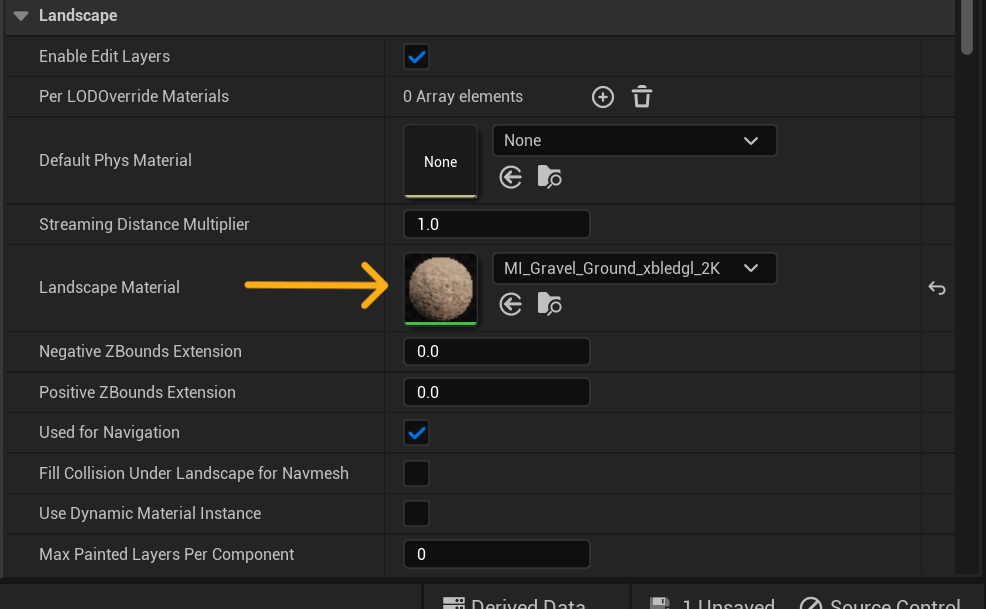
3) Assigning Materials
First we should return to Selection Mode on the top left of the screen.

Then after selecting your landscape, scroll down on the Details panel. This panel shows you the properties of the object you have selected. This is where you can see the location, rotation, scale, and other various properties that an object might have. We are interested in the Landscape Material section. After scrolling to this section, we can click on the None bar and search for our material.


4) Modifying Materials
You might have noticed that the landscape has now switched to using the material but it doesn't display correctly. That's because the material doesn't know what size it should be.
When a material is too small for our object (in our case, landscape), it will use Tiles to repeat itself till it fills up the area on our object.
Luckily, we can adjust the tiling on all Quixel materials. To do this, we will first double click our material to open it up.
This will open up our Material Editor where we can tick the Tiling option and change the values. I found the values of 0.05 to be best for my materials.
You can change these values to get the size you want on your project.

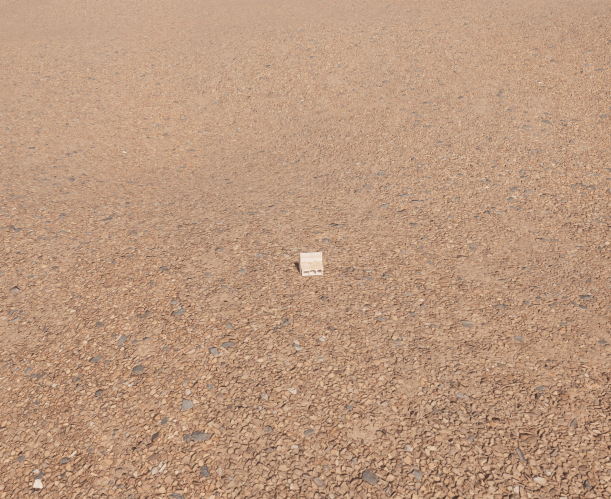
After changing these values and saving the material, we will be able to see the material displayed with the correct size on our landscape.
As you can see, I can now see the grains of sand and gravel on my landscape.

To continue with this tutorial, please follow the next article in this series.
Importing and Placing 3D Models
This is a multi-part tutorial on creating virtual worls in Unreal Engine. This tutorial assumes you have a basic understanding of 3D work but no prior experience is necessary.
Please contact the Creative Technology Lab for questions or assistance.
3D Models
3D Models are objects that can be placed in a 3D scene. They can also be called 3D Assets.
You can either create your own 3D model or use models that have been created by others.
We will use a model of a building that can be downloaded from here: UE Workshop Assets
After downloading the Building.fbx, diff, and diff wood files, we can then import them into our project.
Importing Models
-
To import assets into your project, first open the Content Browser and click on +Add. From there you can click on Import to...
Note: you can specify which folder the assets will get imported into by selecting that folder before clicking on Import.. This will make file management easier in the future.

- Select all the files you want to import to your project. For us, that will be the 3 files we downloaded.

- they will show up in your Content Browser like this:

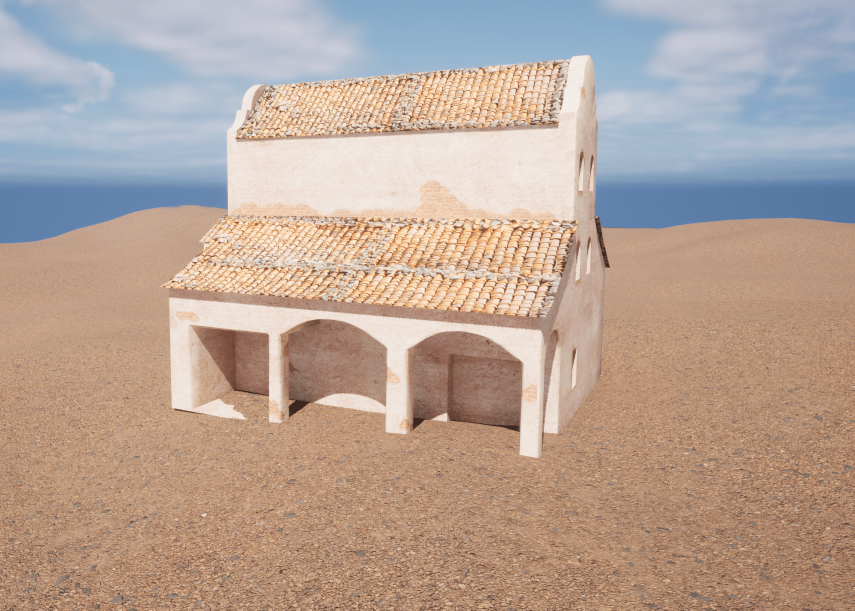
- You can then drag the building asset into your scene and place it wherever you like. Don't worry if the sizing doesn't look right yet.
Manipulating Models
You may have noticed that the model is too small within the scene. We will now change the scale of the object so it looks right in our scene.

After changing these values, you will see that your building will look much better now. If your model is intersecting with the ground too much, try changing different values in the Location & Rotation fields to make it look a little better.
To continue with this tutorial, please follow the next article in this series.
UE Foliage
This is a multi-part tutorial on creating virtual worls in Unreal Engine. This tutorial assumes you have a basic understanding of 3D work but no prior experience is necessary.
Please contact the Creative Technology Lab for questions or assistance.
Foliage Tool
The foliage tool in Unreal Engine allows you to quickly paint sets of assets on a landscape. Like the name suggests, this tool is primarily used for trees and plants, to create scenes which might contain thousands of trees or vast grasslands. This tool saves us the effort of individually placing many assets and automates it for us.
But first we need a pack of foliage assets to use...
Megascans Foliage Packs
Apart from small assets and materials, Quixel also releases megascans, which are large scans of created assets for us to use in Unreal Engine. We will be using one of these packs for our scene.
Open the Epic Games Launcher and to the Unreal Engine window. There, we will go to the Marketplace tab and search the categories for the Megascans.
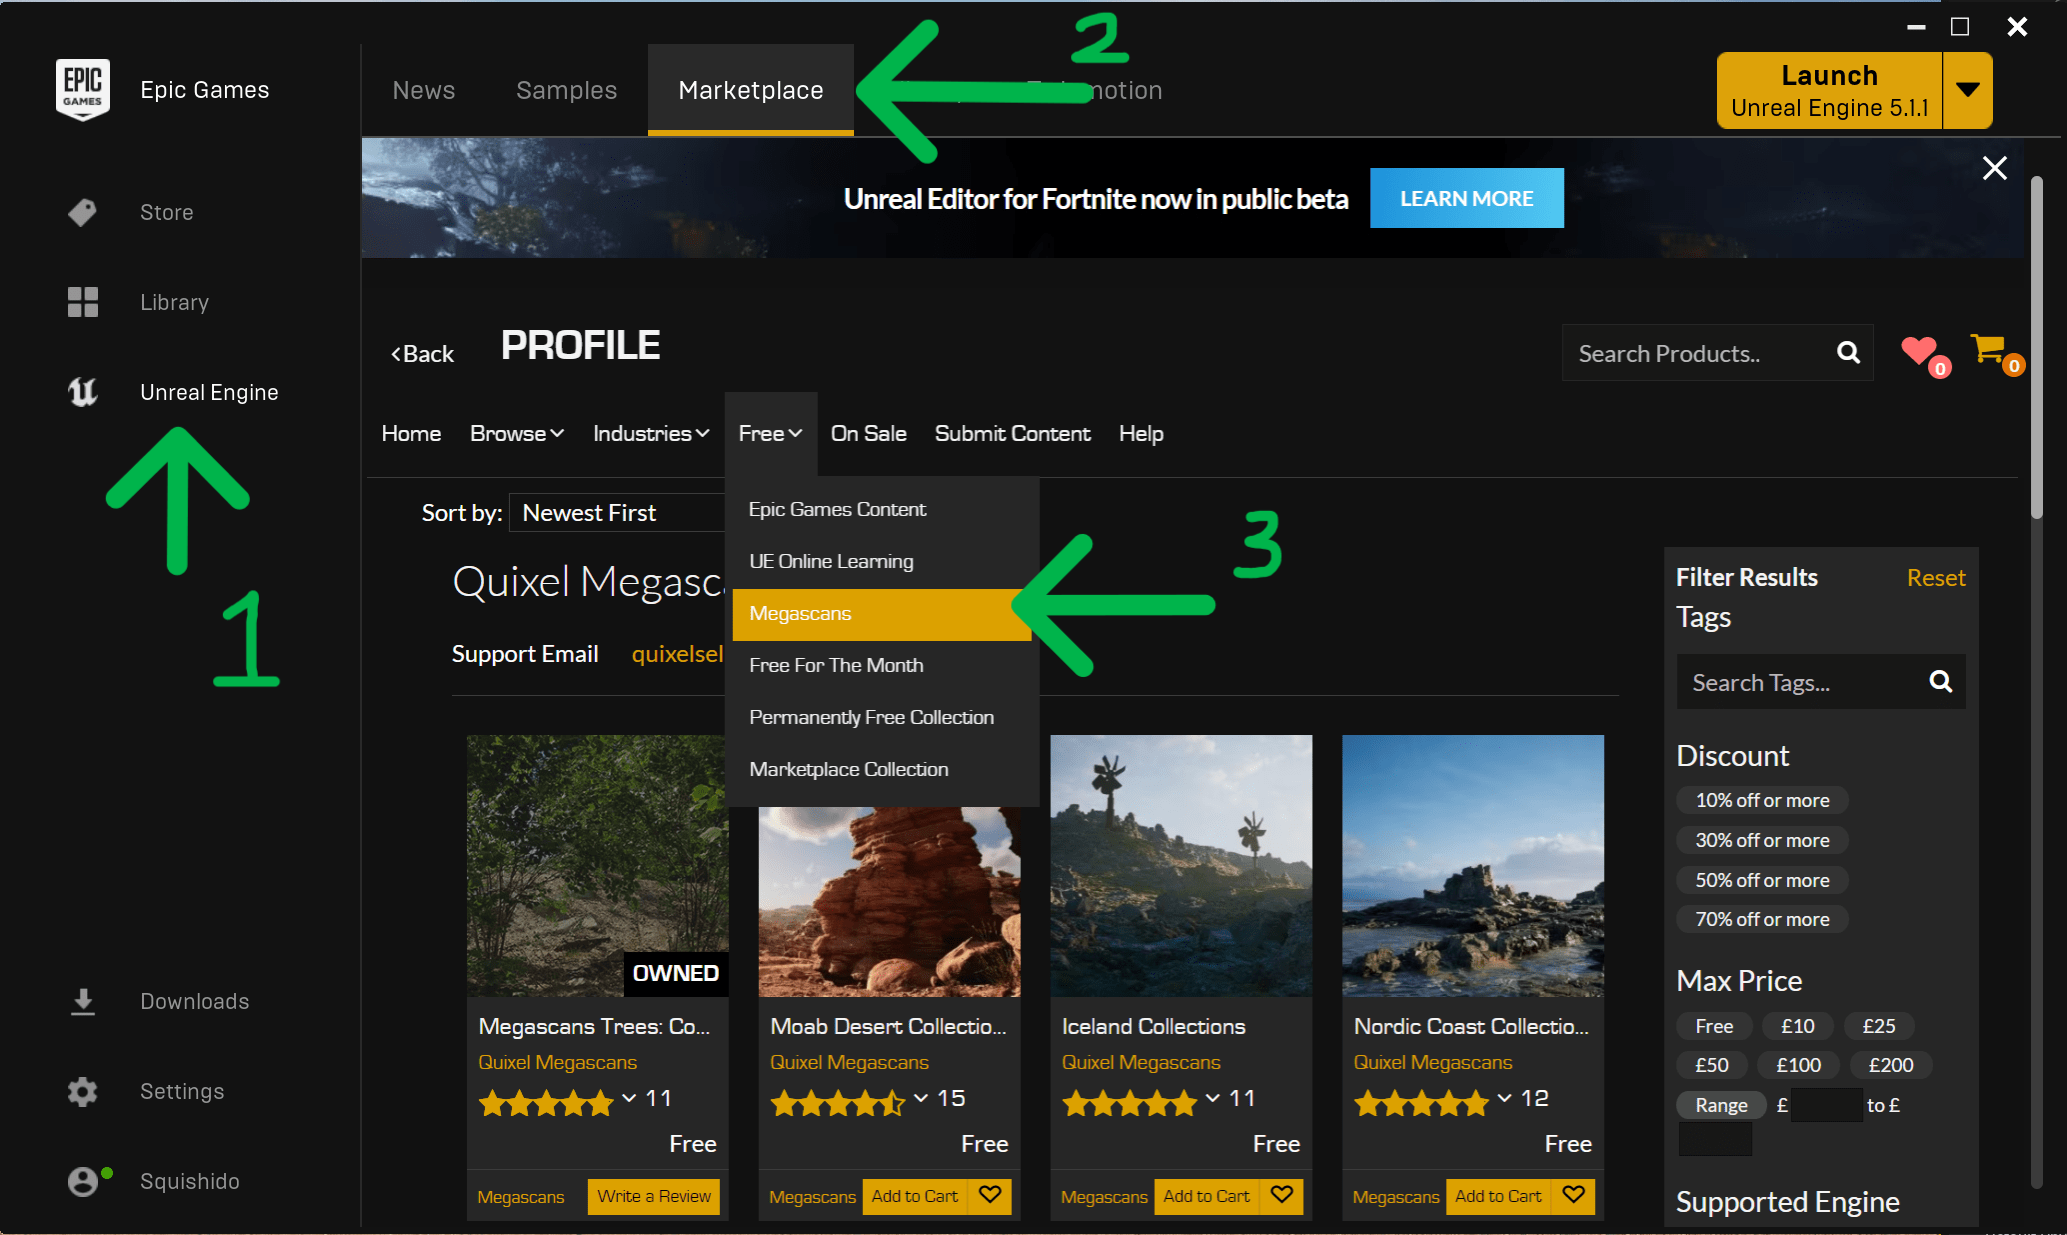
The pack we want to import is called the Megascans Trees: European Black Alder.
Find this pack, download it, and add it to your project.

Foliage Painting
We will now go over the steps needed to start adding instanced foliage.
- To access the foliage tool, first change the editor mode to Foliage on the top left of your screen.
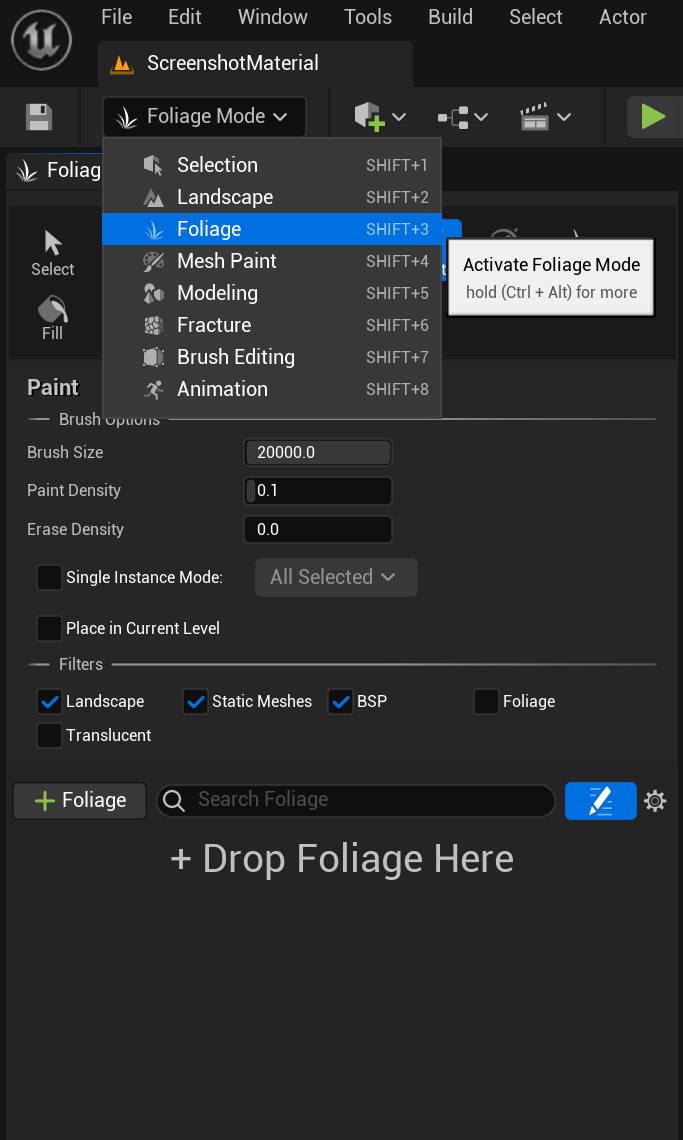
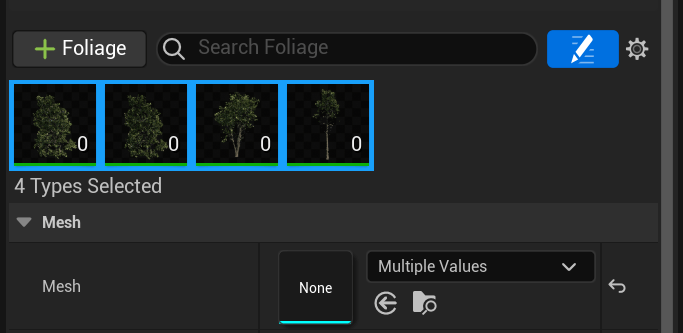
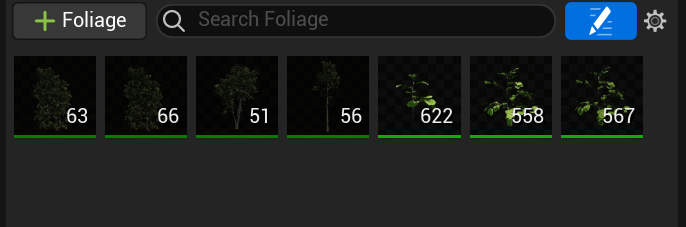
- You have to then specify which trees/bushes/grasses you want to use by clicking the +Foliage button.
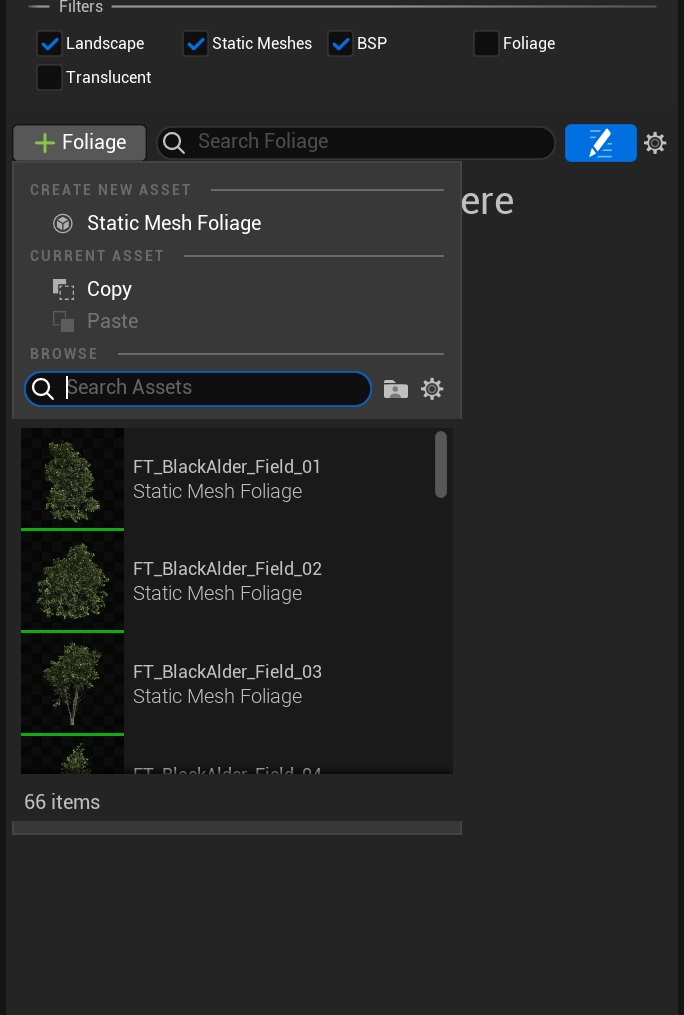
As you can see, I have added 4 types of trees to my selection and ticked all the boxes.
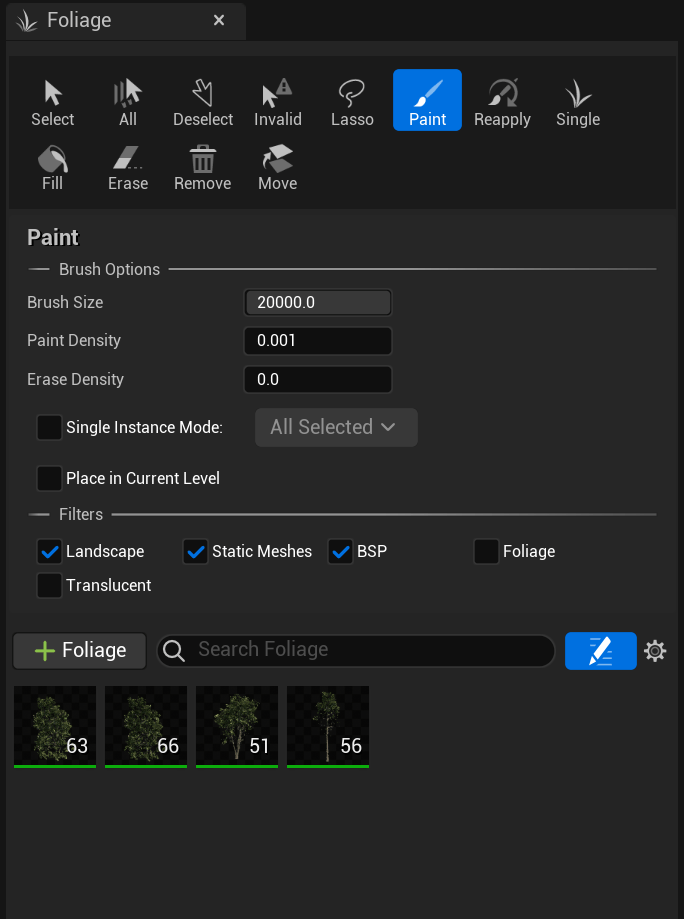
-
You can then change your Brush size and Paint Density.
-
Brush Size will affect the size of your painting area.
-
Paint Density will affect how densely your foliage is placed. A lower density will place foliage more sparsely and vice versa.


-
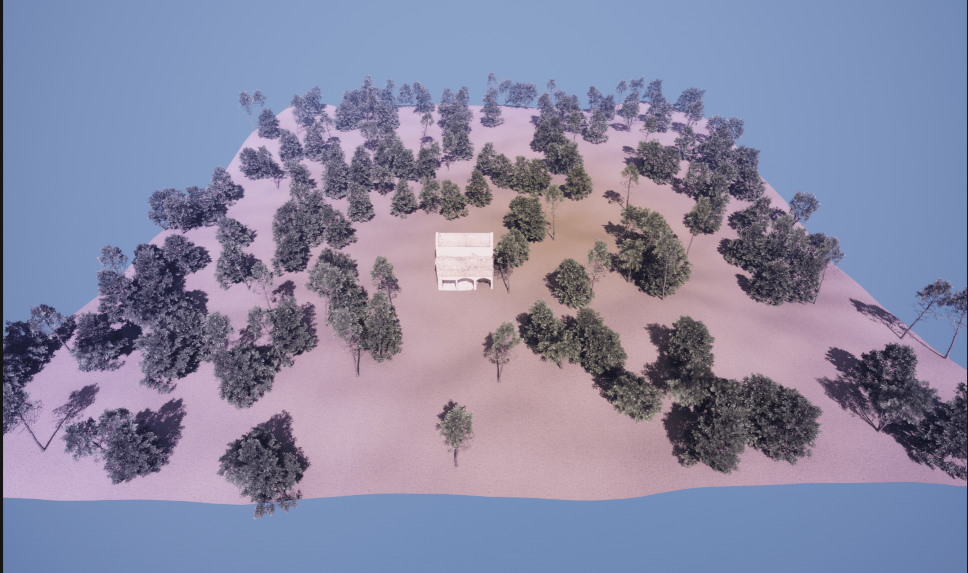
Filling your landscape (optional)
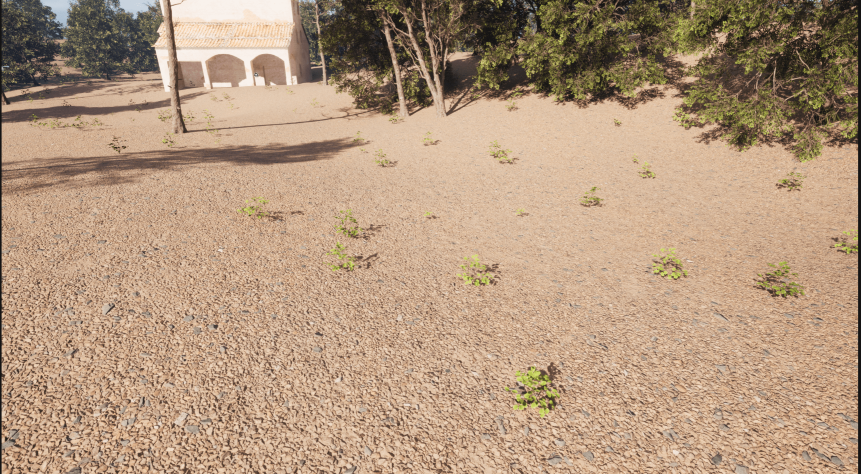
Adding large tree assets is usually enough to make a landscape look realistic. However, if you feel like you want to add more assets to fill out your scene, the foliage packs also contain smaller plants that you can add to your scene.
As shown below, it is possible to add these in and paint your landscape with them to make it look more realistic.
I have added smaller plants and painted them at a higher density, which is why there is more of them (500-600) in my scene.
To continue with this tutorial, please follow the next article in this series.
Building to a VR headset
This series of articles will describe the process of building to VR headsets and go in-depth for building to some of the most common platforms. However, you are encouraged to conduct individual research since development can have different results on different devices. Please ask a technician for assistance if you find any issues.
How to build a project onto a VR headset
1. Install Unreal Engine and Required VR SDKs:
Download and install the latest version of Unreal Engine from the Epic Games website. Identify the VR platform and headset you want to target (e.g., Oculus Rift, HTC Vive, Oculus Quest, etc.). Install the corresponding VR SDK and plugin for Unreal Engine. For example, for Oculus headsets, you can use the Oculus VR Plugin.
2. Create a New VR Project:
Launch Unreal Engine and create a new project. Choose the appropriate VR template. If you're new to VR development, the "Virtual Reality" or "VR Template" is a good starting point.
3. Configure Project Settings:
Go to Edit > Project Settings. Under Platforms > Virtual Reality, enable the VR platforms you want to support (e.g., Oculus, SteamVR). Configure VR-specific settings like tracking method (e.g., room-scale, seated) and controller bindings.
4. Design VR Environment and Assets:
Create or import 3D assets for your VR environment using external tools or Unreal Engine's built-in modeling tools. Set up the VR-specific player pawn (character) and camera. Make sure the camera is set to match the user's head movement.
5. Implement VR Interactions:
Set up VR-specific input bindings for the headset and controllers. Unreal Engine provides a VR Motion Controller component for handling controller input. Implement VR interactions, such as grabbing objects, interacting with buttons, and teleportation. For advanced interactions, you may need to use Blueprints or C++ to handle custom logic.
6. Optimize for Performance:
VR applications require high performance for a smooth experience. Optimize your assets and level design to maintain a stable frame rate (e.g., optimize textures, use LODs, reduce draw calls). Use level streaming techniques to manage resources efficiently, especially for large and complex environments.
7. Test in VR:
Connect your VR headset to your development machine. Launch the VR app from the Unreal Engine editor to test it in VR. Test all interactions and movements to ensure everything works as intended.
8. Package the App:
Once your VR app is ready for distribution, package it for the target VR platform. Go to File > Package Project > (Choose the target platform). Follow the on-screen instructions to generate the appropriate package for your VR headset.
9. Distribute the App:
For PC VR platforms (e.g., Oculus Rift, HTC Vive), you can distribute the app through online stores like Oculus Store or SteamVR. Follow the submission guidelines for each platform. For standalone VR headsets (e.g., Oculus Quest), you may need to follow specific distribution channels, like Oculus Store for Quest apps.
10. Update and Maintain:
Regularly update and maintain your VR app to improve performance, add new features, and stay compatible with the latest VR hardware and software updates. Remember that building VR apps can be a complex process, and it's crucial to test and optimize your app thoroughly to ensure a comfortable and immersive experience for users. Refer to the official documentation and community resources provided by Unreal Engine and the specific VR platform you're targeting for more in-depth guidance and troubleshooting.
How to build to a Meta Quest 2
Building a VR app for the Meta Quest 2 from Unreal Engine involves a series of steps, including setting up the development environment, configuring project settings, and packaging the app. Below are detailed instructions to guide you through the process:
-
Install Unreal Engine and Required SDKs:
- Download and install the latest version of Unreal Engine from the Epic Games website (https://www.unrealengine.com/).
- Ensure you have the Android SDK and NDK installed on your development machine. You can download these tools through Android Studio or separately from the Android developer website (https://developer.android.com/studio).
-
Set Up Oculus Development Hub:
- Download and install Oculus Development Hub from the Oculus developer website (https://developer.oculus.com/).
- Log in with your Oculus developer account or create a new one if you don't have one already.
-
Enable Developer Mode on Quest 2:
- On your Meta Quest 2, navigate to Settings > Oculus Quest 2 > More Settings > Developer Mode.
- Enable Developer Mode and follow the instructions to set it up.
-
Create a New VR Project:
- Launch Unreal Engine and create a new project.
- Choose the "Virtual Reality" or "VR Template" as a starting point for your Meta Quest 2 project.
-
Configure Project Settings:
- Go to Edit > Project Settings.
- Under Platforms > Android, configure Android-specific settings such as package name, minimum SDK version (recommended to use Android 7.0 or higher), and any required permissions.
- Under Platforms > Android > APKPackaging, enable "Package For Oculus Mobile Devices."
- Enter your Oculus app ID obtained from the Oculus developer dashboard.
-
Set Up Oculus Quest 2 for Development:
- Connect your Meta Quest 2 to your development machine using a USB cable.
- In the Oculus Development Hub, you should see your connected device under "My Devices."
- Follow the prompts to authorize the device for development.
-
Install Oculus Quest 2 ADB Drivers (if needed):
- If your computer doesn't recognize the Quest 2, you may need to install the Oculus ADB Drivers. The drivers can be installed through the Oculus Development Hub or separately from the Oculus website.
-
Build and Run the VR App:
- In Unreal Engine, select the "Launch" or "Package" option for Android.
- Choose "Quest 2" as the target device and build the APK.
- Once the APK is built, it will be automatically installed on your connected Meta Quest 2 device.
-
Testing and Debugging:
- Disconnect the Meta Quest 2 from your development machine after the app is installed.
- Put on the headset and navigate to the "Unknown Sources" section in the Library to find and launch your app.
- Test the app thoroughly on the Meta Quest 2, ensuring all VR interactions and functionalities work as intended.
- Optimize Performance (if needed):
- Use Unreal Engine's profiling tools to identify performance bottlenecks and optimize your VR app for smooth performance on the Meta Quest 2.
- Optimize textures, reduce draw calls, and use level streaming to manage resources efficiently.
- Submit to Oculus Store (Optional):
- If you plan to distribute your app through the Oculus Store, you need to follow the Oculus submission guidelines and perform necessary testing for approval.
Remember, Meta Quest 2 development with Unreal Engine requires attention to performance optimization and adherence to Oculus store guidelines (if applicable). Regularly test your app on the device to ensure a comfortable and immersive experience for users. Also, keep up-to-date with the latest Unreal Engine updates and Oculus SDK changes to maintain compatibility with future releases.
How to build to a Vive Pro or Vive Pro Eye
Building a VR app for the Vive Pro Eye with Unreal Engine involves several steps, including setting up the development environment, configuring project settings, and packaging the app. Below are detailed instructions to guide you through the process:
-
Install Unreal Engine and Required SDKs:
- Download and install the latest version of Unreal Engine from the Epic Games website (https://www.unrealengine.com/).
- Ensure you have SteamVR installed on your development machine. You can download SteamVR through the Steam client (https://store.steampowered.com/steamvr).
-
Set Up SteamVR for Vive Pro Eye:
- Connect your Vive Pro Eye headset to your development machine.
- Launch SteamVR and follow the on-screen instructions to set up the headset and controllers.
-
Create a New VR Project:
- Launch Unreal Engine and create a new project.
- Choose the "Virtual Reality" or "VR Template" as a starting point for your Vive Pro Eye project.
-
Configure Project Settings:
- Go to Edit > Project Settings.
- Under Platforms > Windows, configure Windows-specific settings such as the package name and minimum supported Windows version.
- Under Platforms > Windows > VR, enable "SteamVR" as the target VR platform.
- Configure VR-specific settings like tracking method (e.g., room-scale, seated) and controller bindings.
-
Design VR Environment and Assets:
- Create or import 3D assets for your VR environment using external tools or Unreal Engine's built-in modeling tools.
- Set up the VR-specific player pawn (character) and camera. Make sure the camera is set to match the user's head movement.
-
Implement VR Interactions:
- Set up VR-specific input bindings for the headset and controllers. Unreal Engine provides a Motion Controller component for handling controller input.
- Implement VR interactions, such as grabbing objects, interacting with buttons, and teleportation.
- For advanced interactions, you may need to use Blueprints or C++ to handle custom logic.
-
Optimize for Performance:
- VR applications require high performance for a smooth experience. Optimize your assets and level design to maintain a stable frame rate (e.g., optimize textures, use LODs, reduce draw calls).
- Use level streaming techniques to manage resources efficiently, especially for large and complex environments.
-
Build and Run the VR App:
- In Unreal Engine, select the "Launch" or "Package" option for Windows.
- Choose "VR Preview" as the target device and build the executable.
- Once the executable is built, it will automatically launch SteamVR, and you can put on your Vive Pro Eye headset to test the app.
-
Testing and Debugging:
- Test the app thoroughly on the Vive Pro Eye headset, ensuring all VR interactions and functionalities work as intended.
- Use SteamVR's built-in debugging tools to monitor performance and resolve any issues that arise during testing.
- Optimize Eye Tracking Interactions (if needed):
- If your VR app utilizes eye tracking features of the Vive Pro Eye, ensure that the interactions and visual feedback are optimized for a seamless and comfortable user experience.
- Use Unreal Engine's Eye Tracking API to access and utilize eye tracking data in your app.
- Package the App for Distribution:
- Once your VR app is ready for distribution, package it for Windows.
- Follow the guidelines for content distribution on the Viveport store or other distribution platforms if you plan to distribute your app to a broader audience.
Remember, Vive Pro Eye development with Unreal Engine requires attention to performance optimization and compatibility with SteamVR. Regularly test your app on the Vive Pro Eye headset to ensure a comfortable and immersive experience for users, and consider integrating eye tracking features for a more innovative user interaction.