VR tutorials - Unity
Immerse yourself in seated and room-scale VR, AR and MR with devices such as HTC VIVE and VIVE Pro, Oculus Rift, Microsoft HoloLens, Samsung Gear VR and Google Cardboard. Create merged and mixed reality installations in the Lab’s open-plan project space.
- HTC VIVE Tutorials
- Steam VR setup Tutorial #1 - Player camera setup
- Steam VR setup Tutorial #2 - Teleporting around your scene
- Steam VR setup Tutorial #3 - Interactable object setup
- Installing Unity
- Oculus Quest Tutorials
- Mobile VR
- Interaction Toolkit Essentials
- Getting Started
- Interaction Toolkit examples
- Interaction Tookit Basic Interaction
- Interaction Toolkit custom hands
- Doors, Drawers and Levers
- Oculus Integration - Hand Tracking
HTC VIVE Tutorials
Steam VR setup Tutorial #1 - Player camera setup
Aims
This tutorial aims to get you started using Unity and HTC VIVE HDM (Head Mounted Display) Using Steam VR 2.2 plugin.
Please notice that this is the first of a series of tutorials focused on enabling the use of HTC VIVE devices, each tutorial will build on top of previous ones to get you from basic concepts to more functional and complex projects.
Prerequisites
-
Download and install Unity 2018.2.21f1.
More recent versions might also work, this tutorial was made using Unity 2018.2.21f1
-
Create a Unity personal account.
To use Unity you will have to create your own account as you will be prompted to login when you start running the software.
- Download and install Steam. Steam platform will install additional components needed to run the HTC VIVE on your computer. Click here to go to the Steam download page.
Getting started
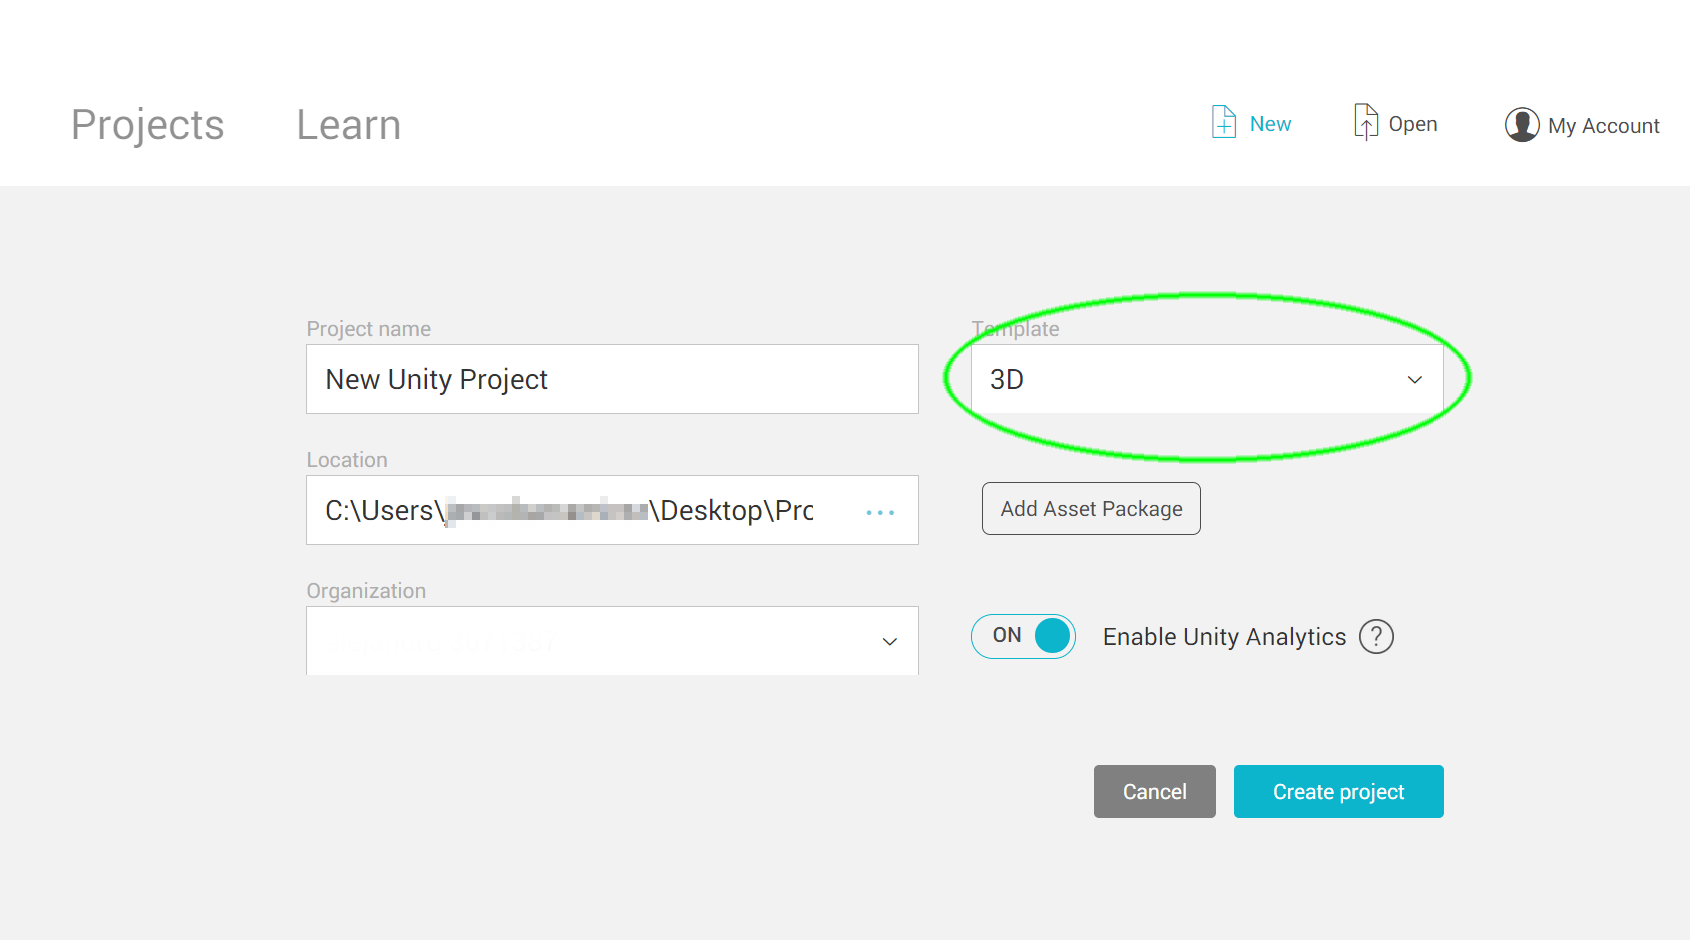
Create a new Unity project, you might need to login first. Make sure you select a 3D template.
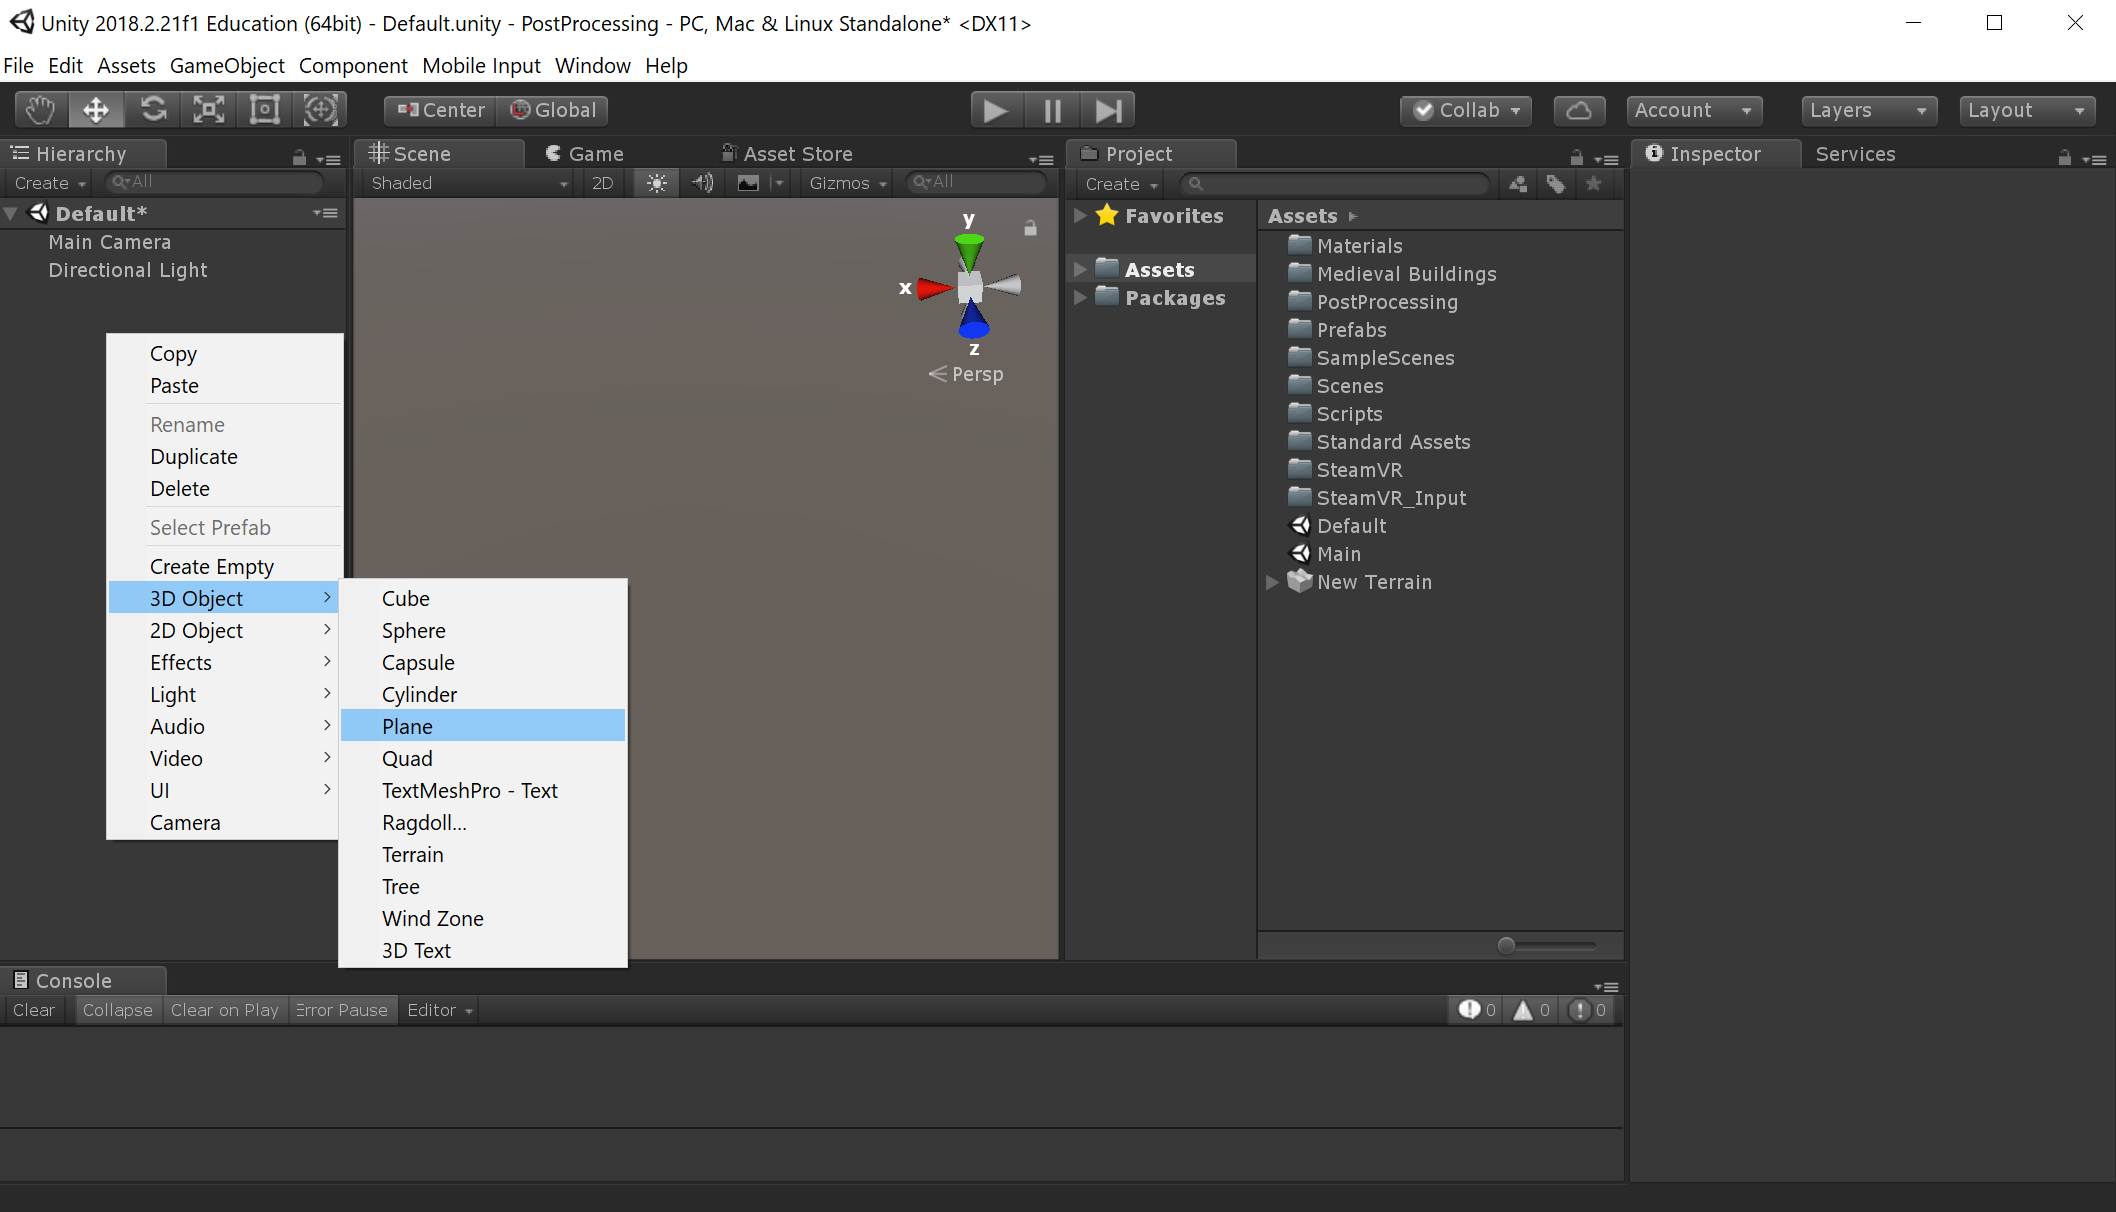
After your new project opens, locate your mouse cursor on top of the "Hierarchy" panel and right-click to create a plane.
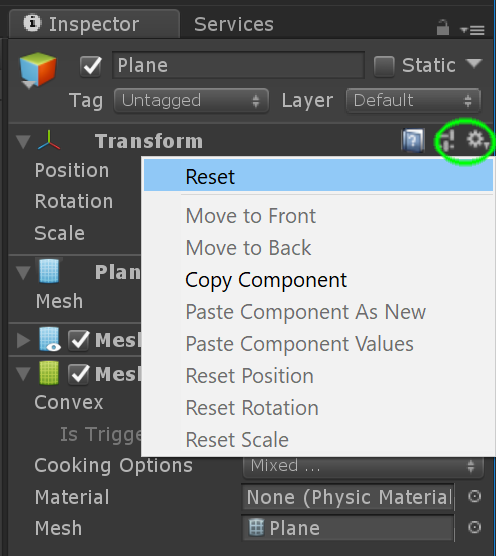
Now let's place the plane in the middle of the space. Select the plane and chose the Reset option inside the drop-down menu found on the right top corner of the transform component. This will reset all the transform values for the plane.
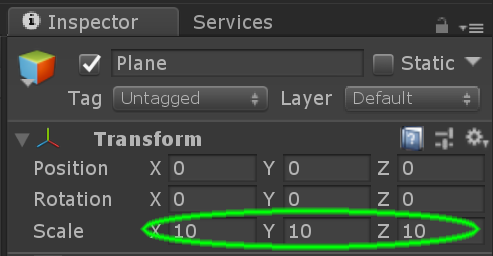
Now, let's make bigger so your player can have a bit more of space to interact. With your plane selected, look for the Transform component in the "Inspector" panel and change the scale to 10 on all three axes.
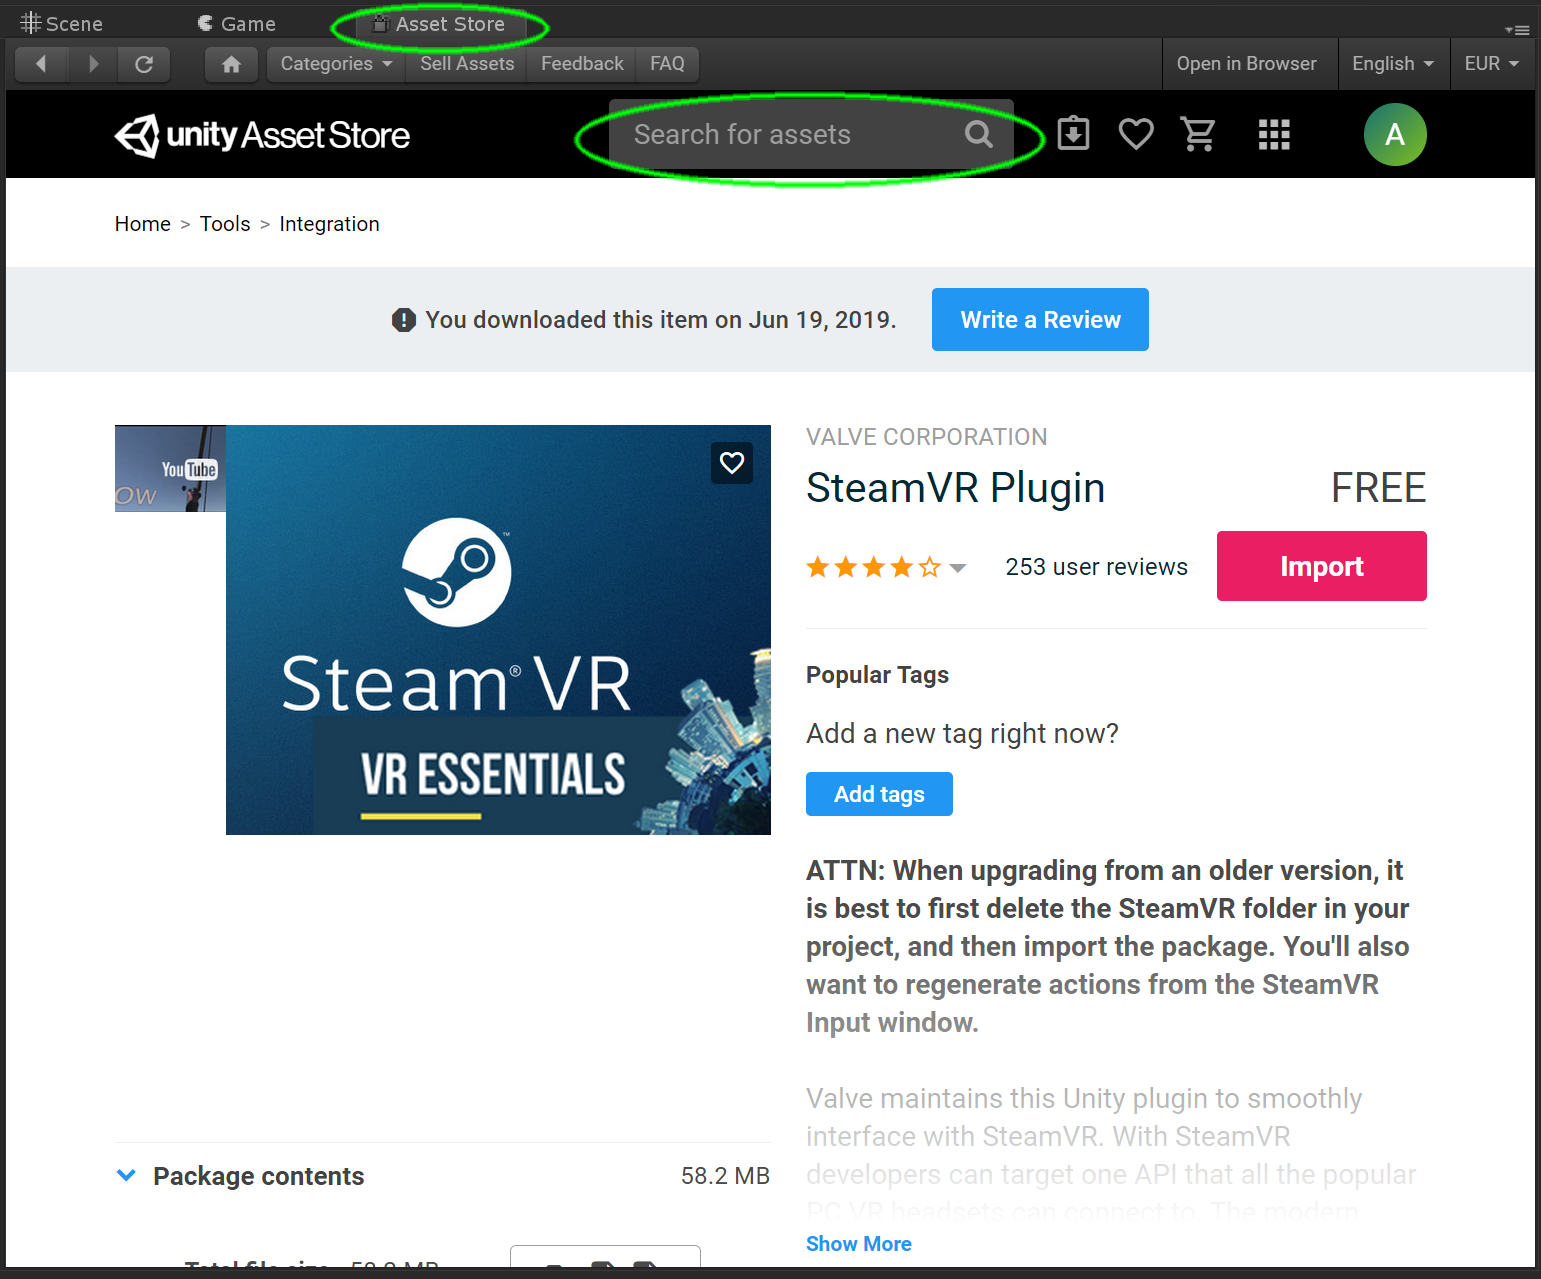
Now that we have a plane for our player to stand on, it is time to import the Steam VR Plugin from the asset store, this plugin will allow us to integrate and use both the VR Headset and the controllers. Click on the "Asset Store" tab and type "Steam VR" into the search box.
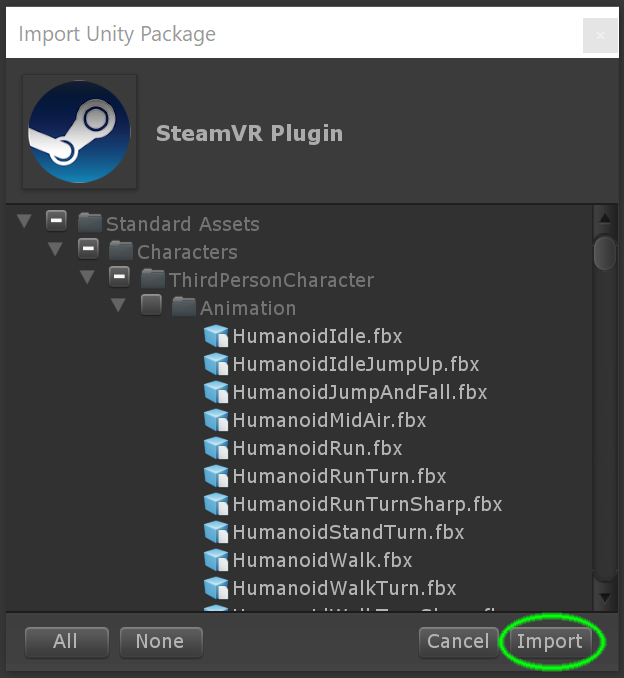
First, you will need to click the "Download" button, after downloading, the same button will turn into the "Import" button, click on it, you should see a window displaying all the contents of the package, just click Import.
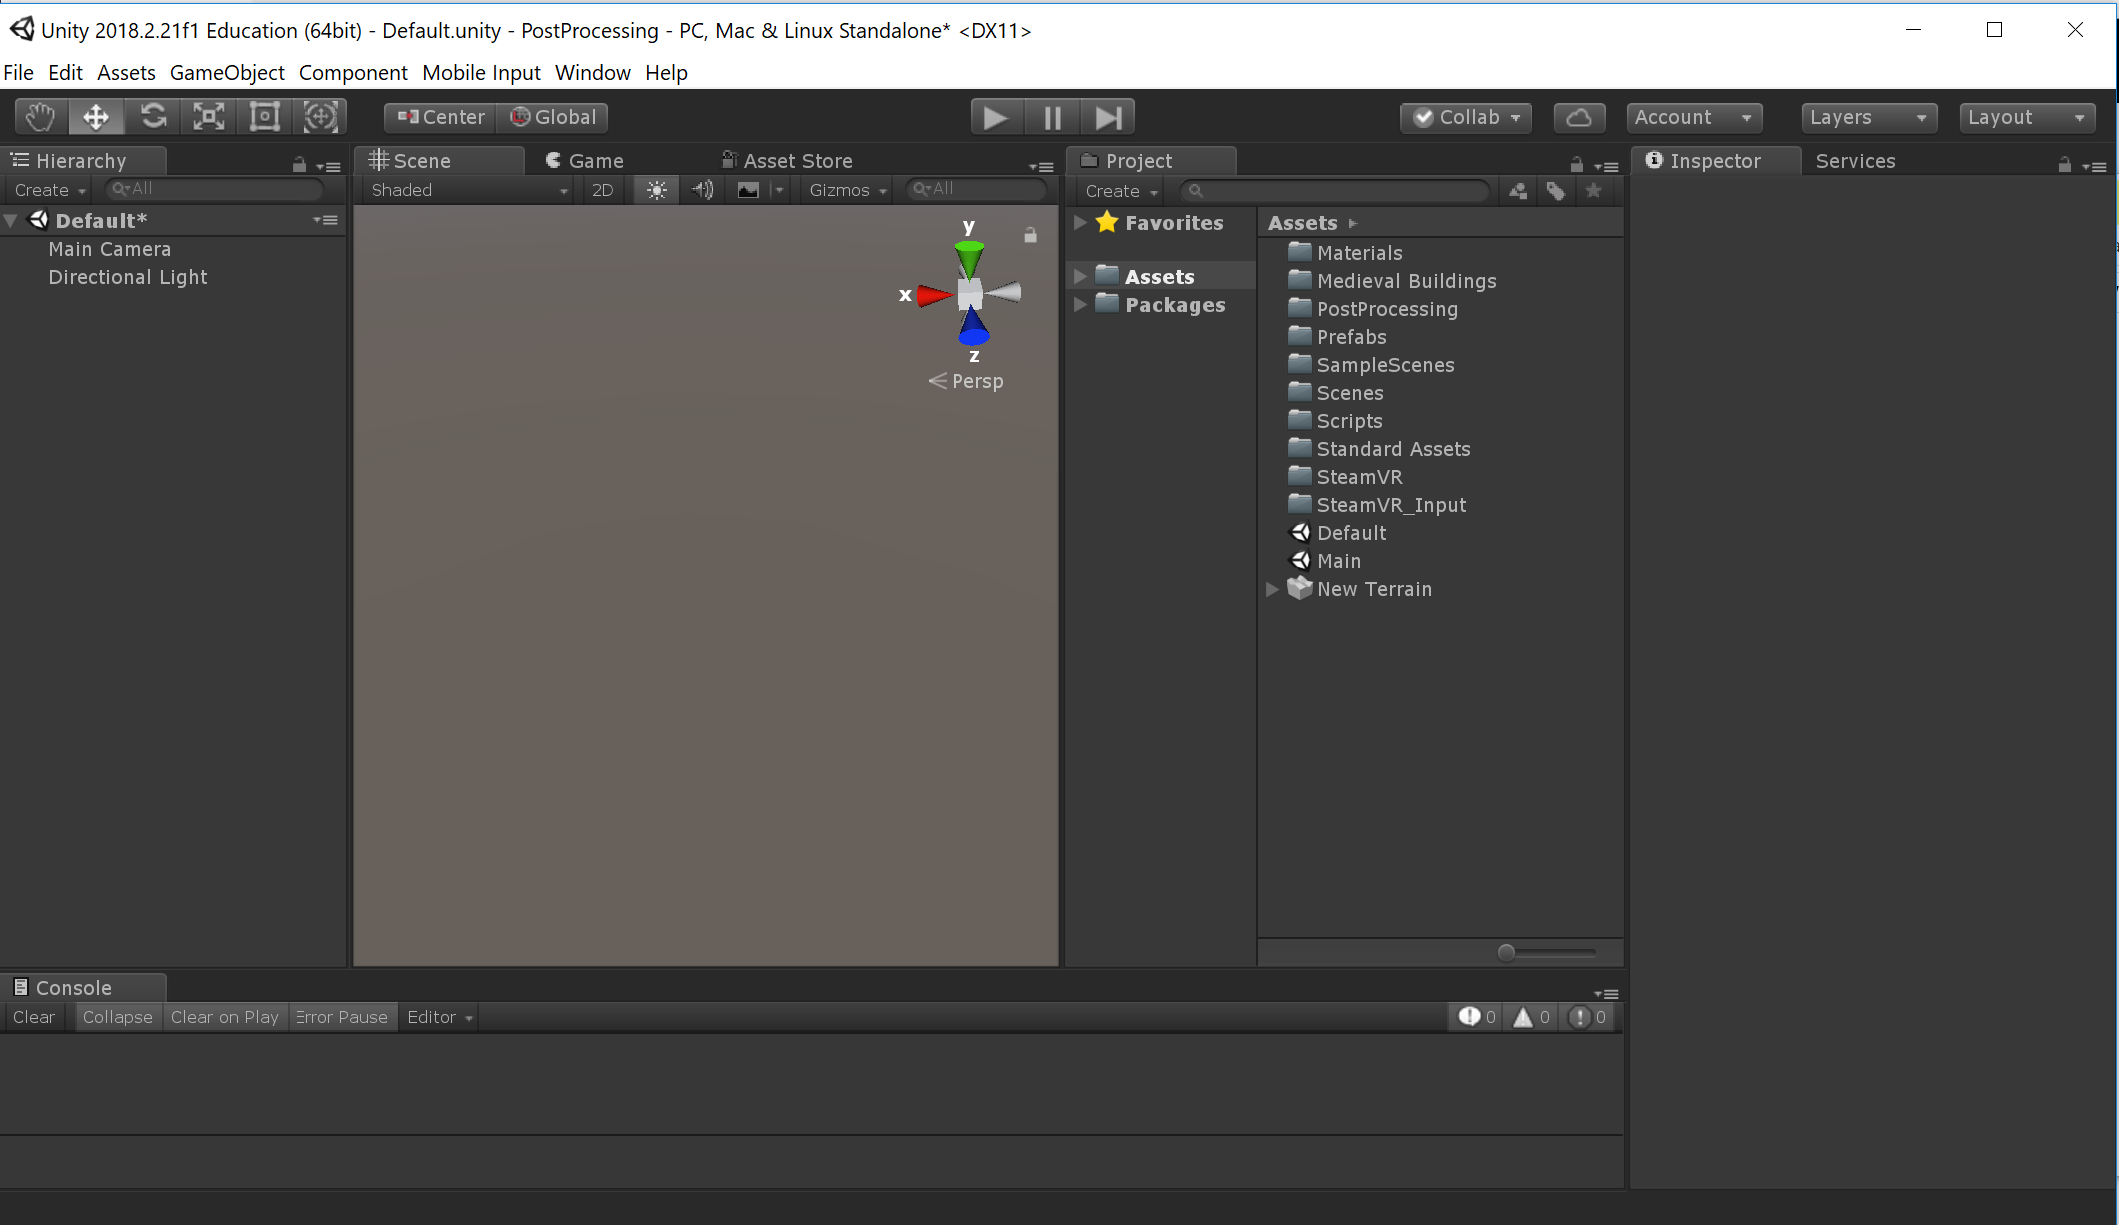
After a moment, your package should be installed and you will be able to see the "SteamVR" folder in your Project panel.

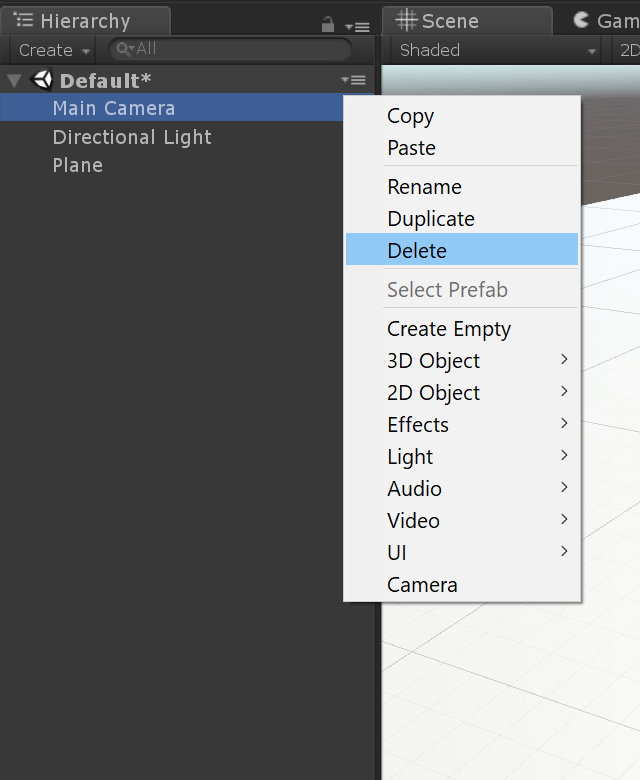
We are almost ready to place our player in the scene, however, we need to delete the Main Camera (Included by default in our new project) as will conflict with our player's camera. Please notice that in most cases you will only need one camera inside of your project and having more than one usually requires extra settings for them to work properly. Please right-click over your Main Camera game object and select "delete".
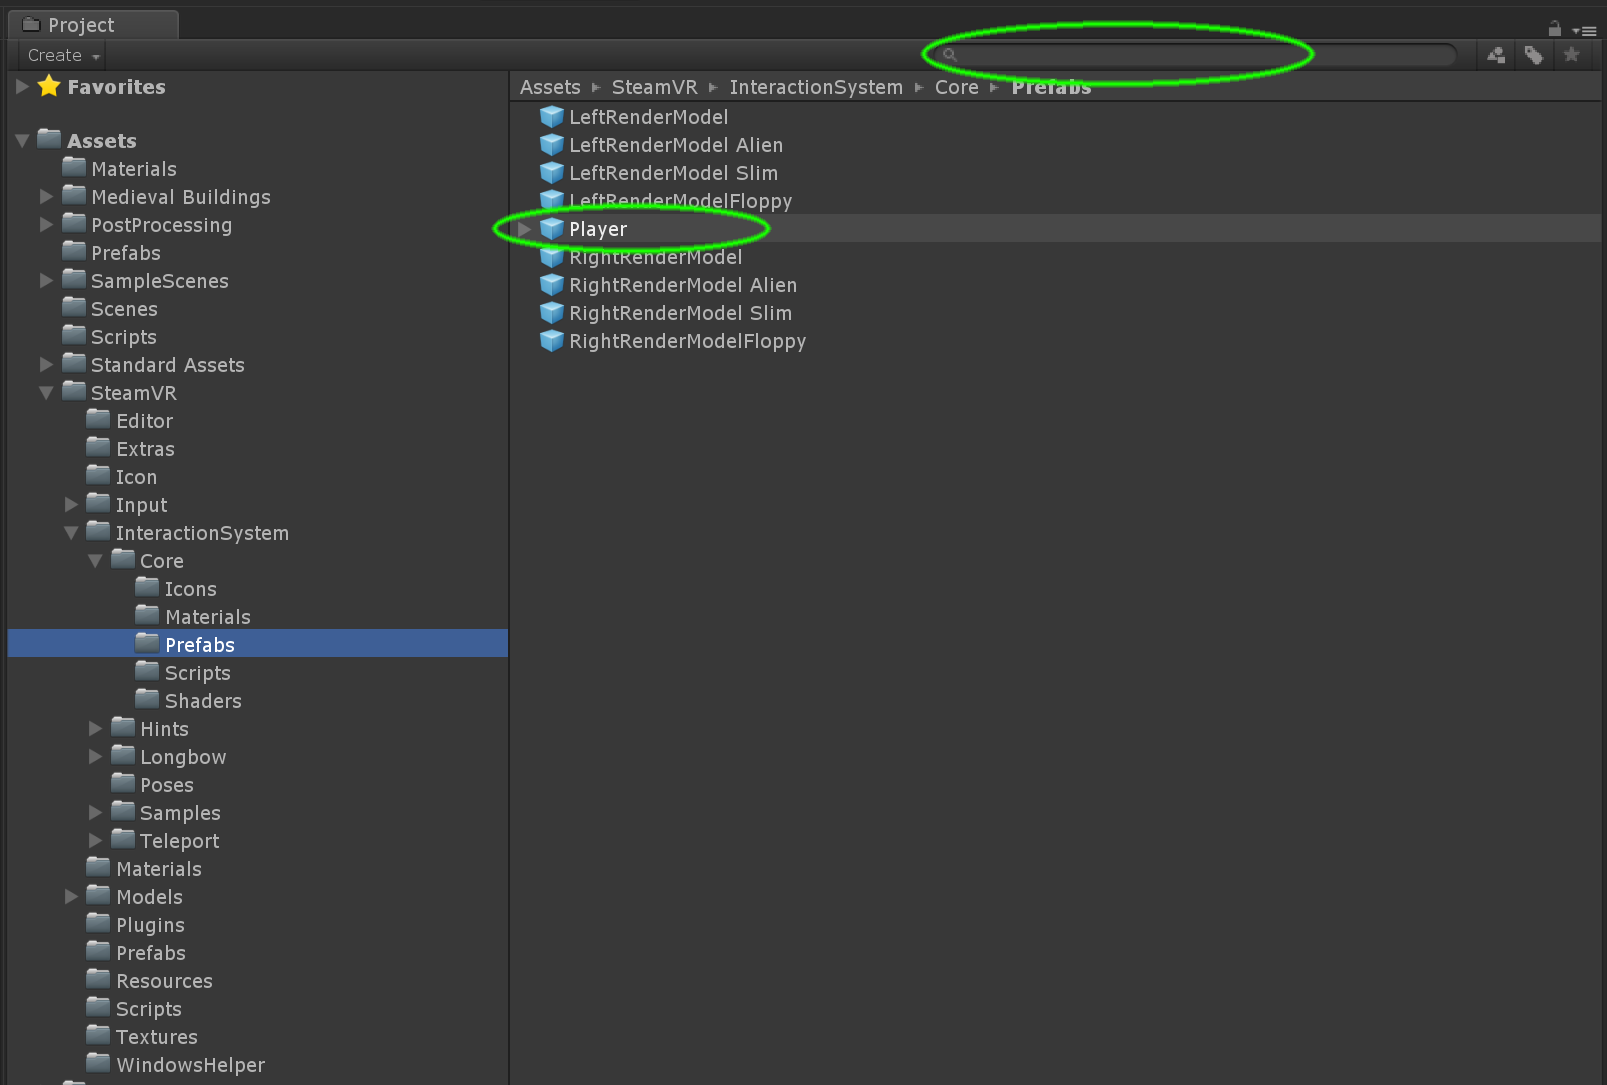
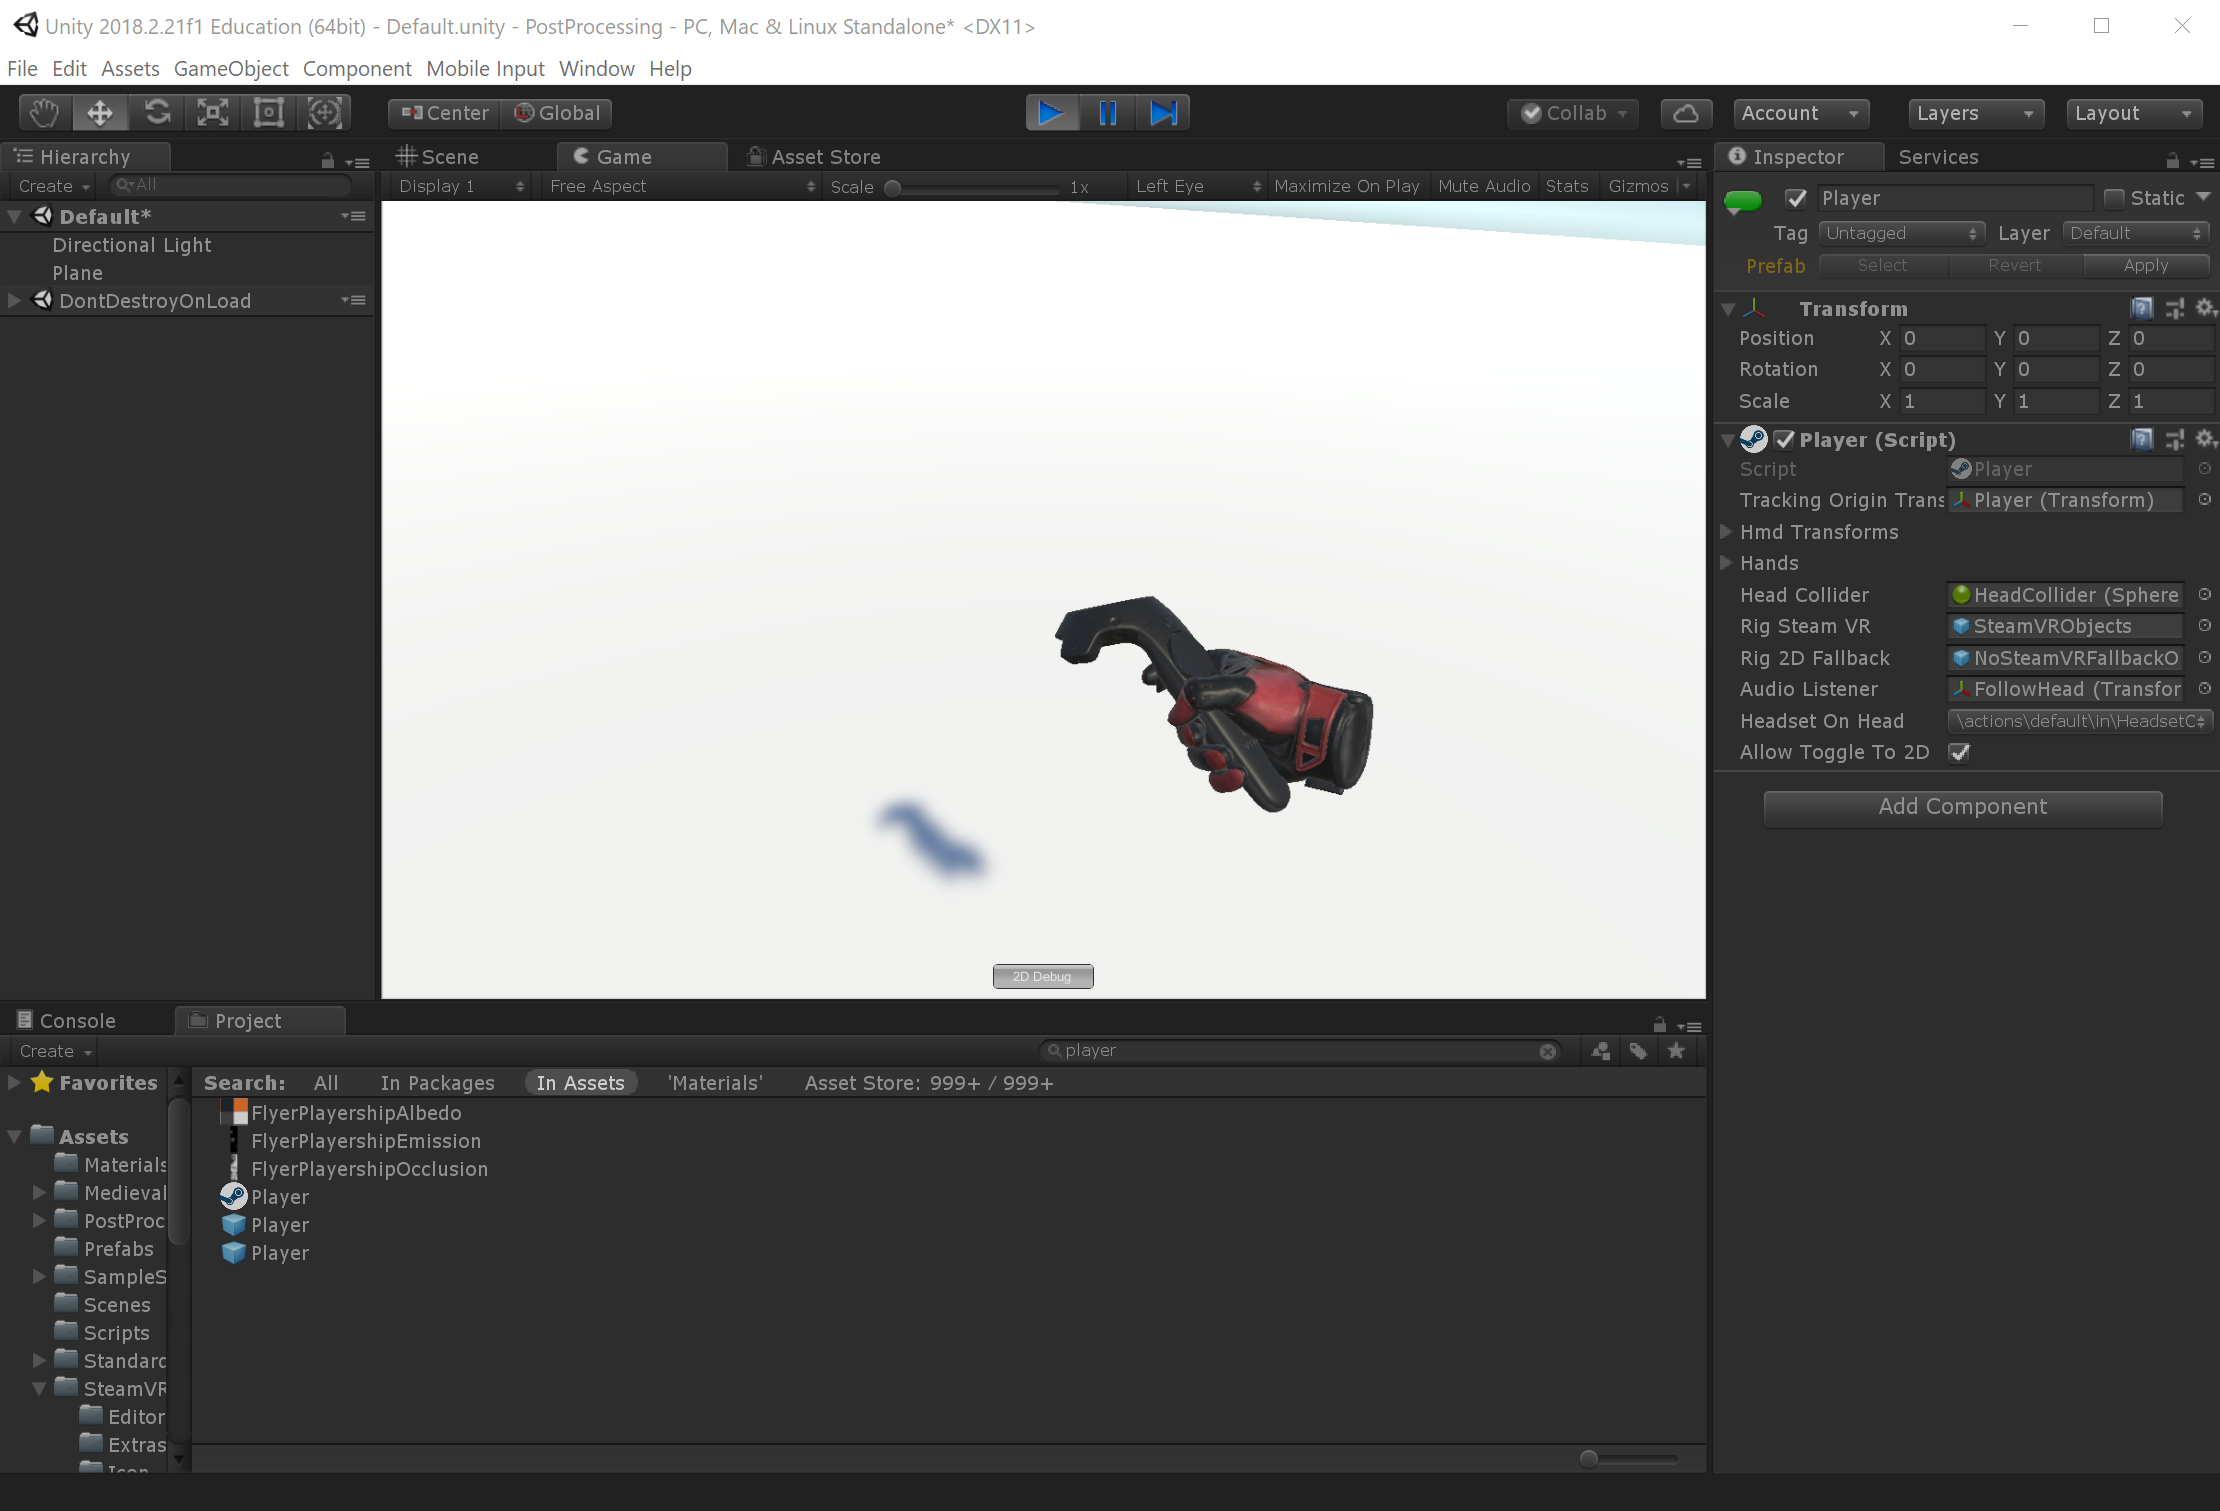
Now we are ready to place our Player prefab. You can locate it either by looking for it inside of the SteamVR folder (see path below) or just typing "Player" into the search box found on top of the Project panel.
After dragging and dropping your player into your "Hierarchy" panel, hold the "alt" key and click on the little arrow next to the prefab name, this will unfold/display all the child objects contained inside the player game Object.
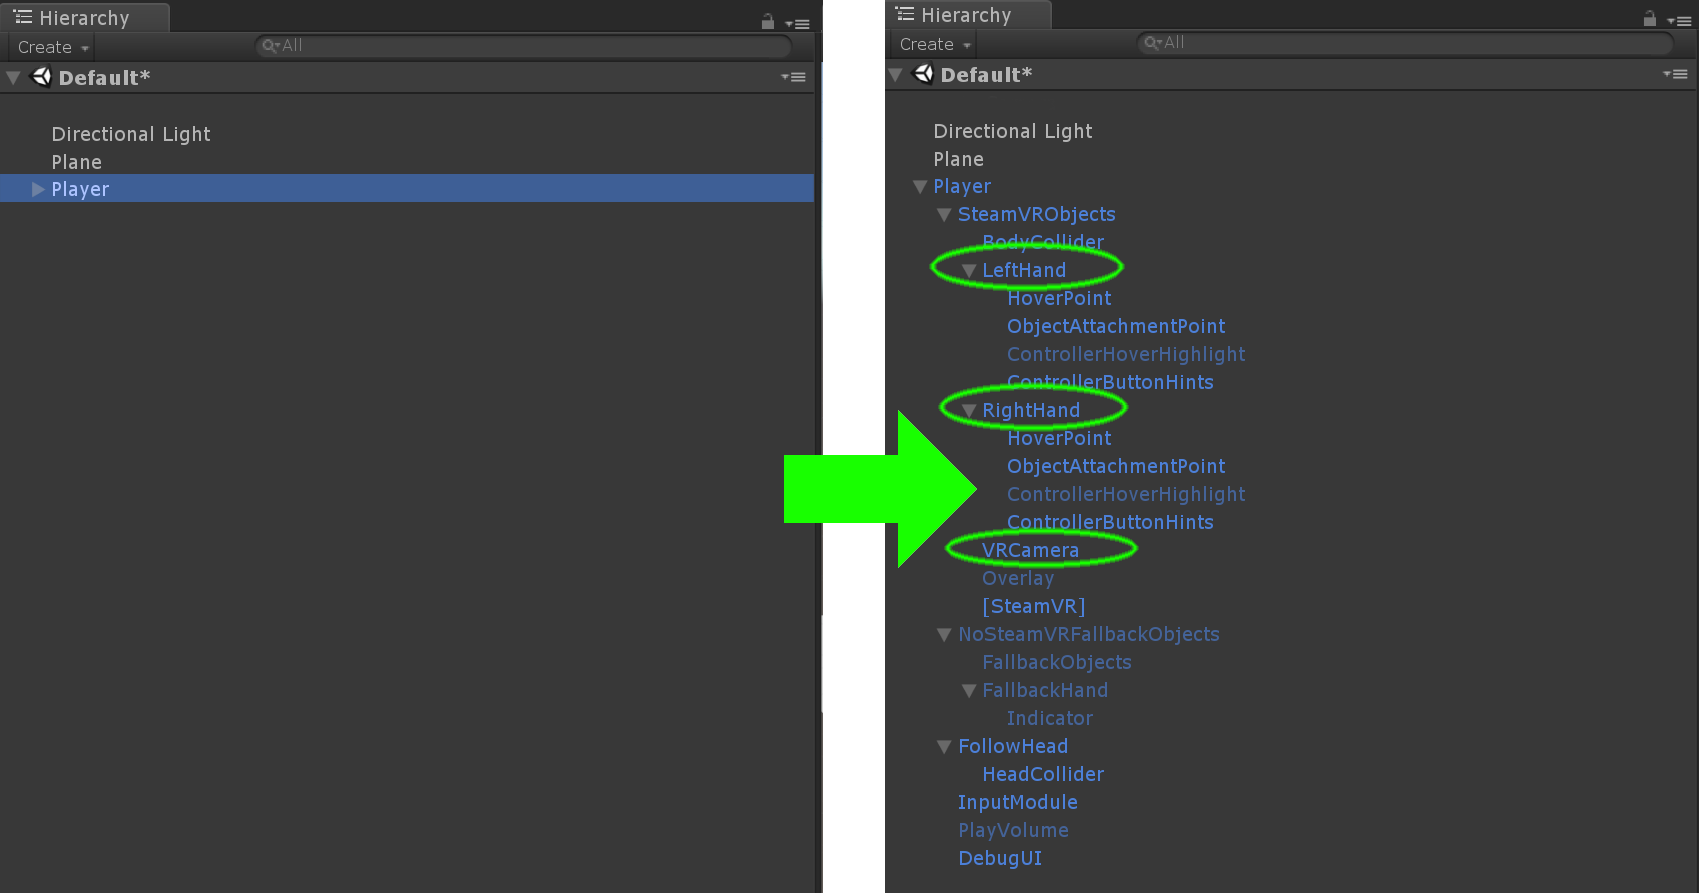
We are not going to review these elements in this tutorial, however, it is worth noticing that they include both controllers and the VR camera.
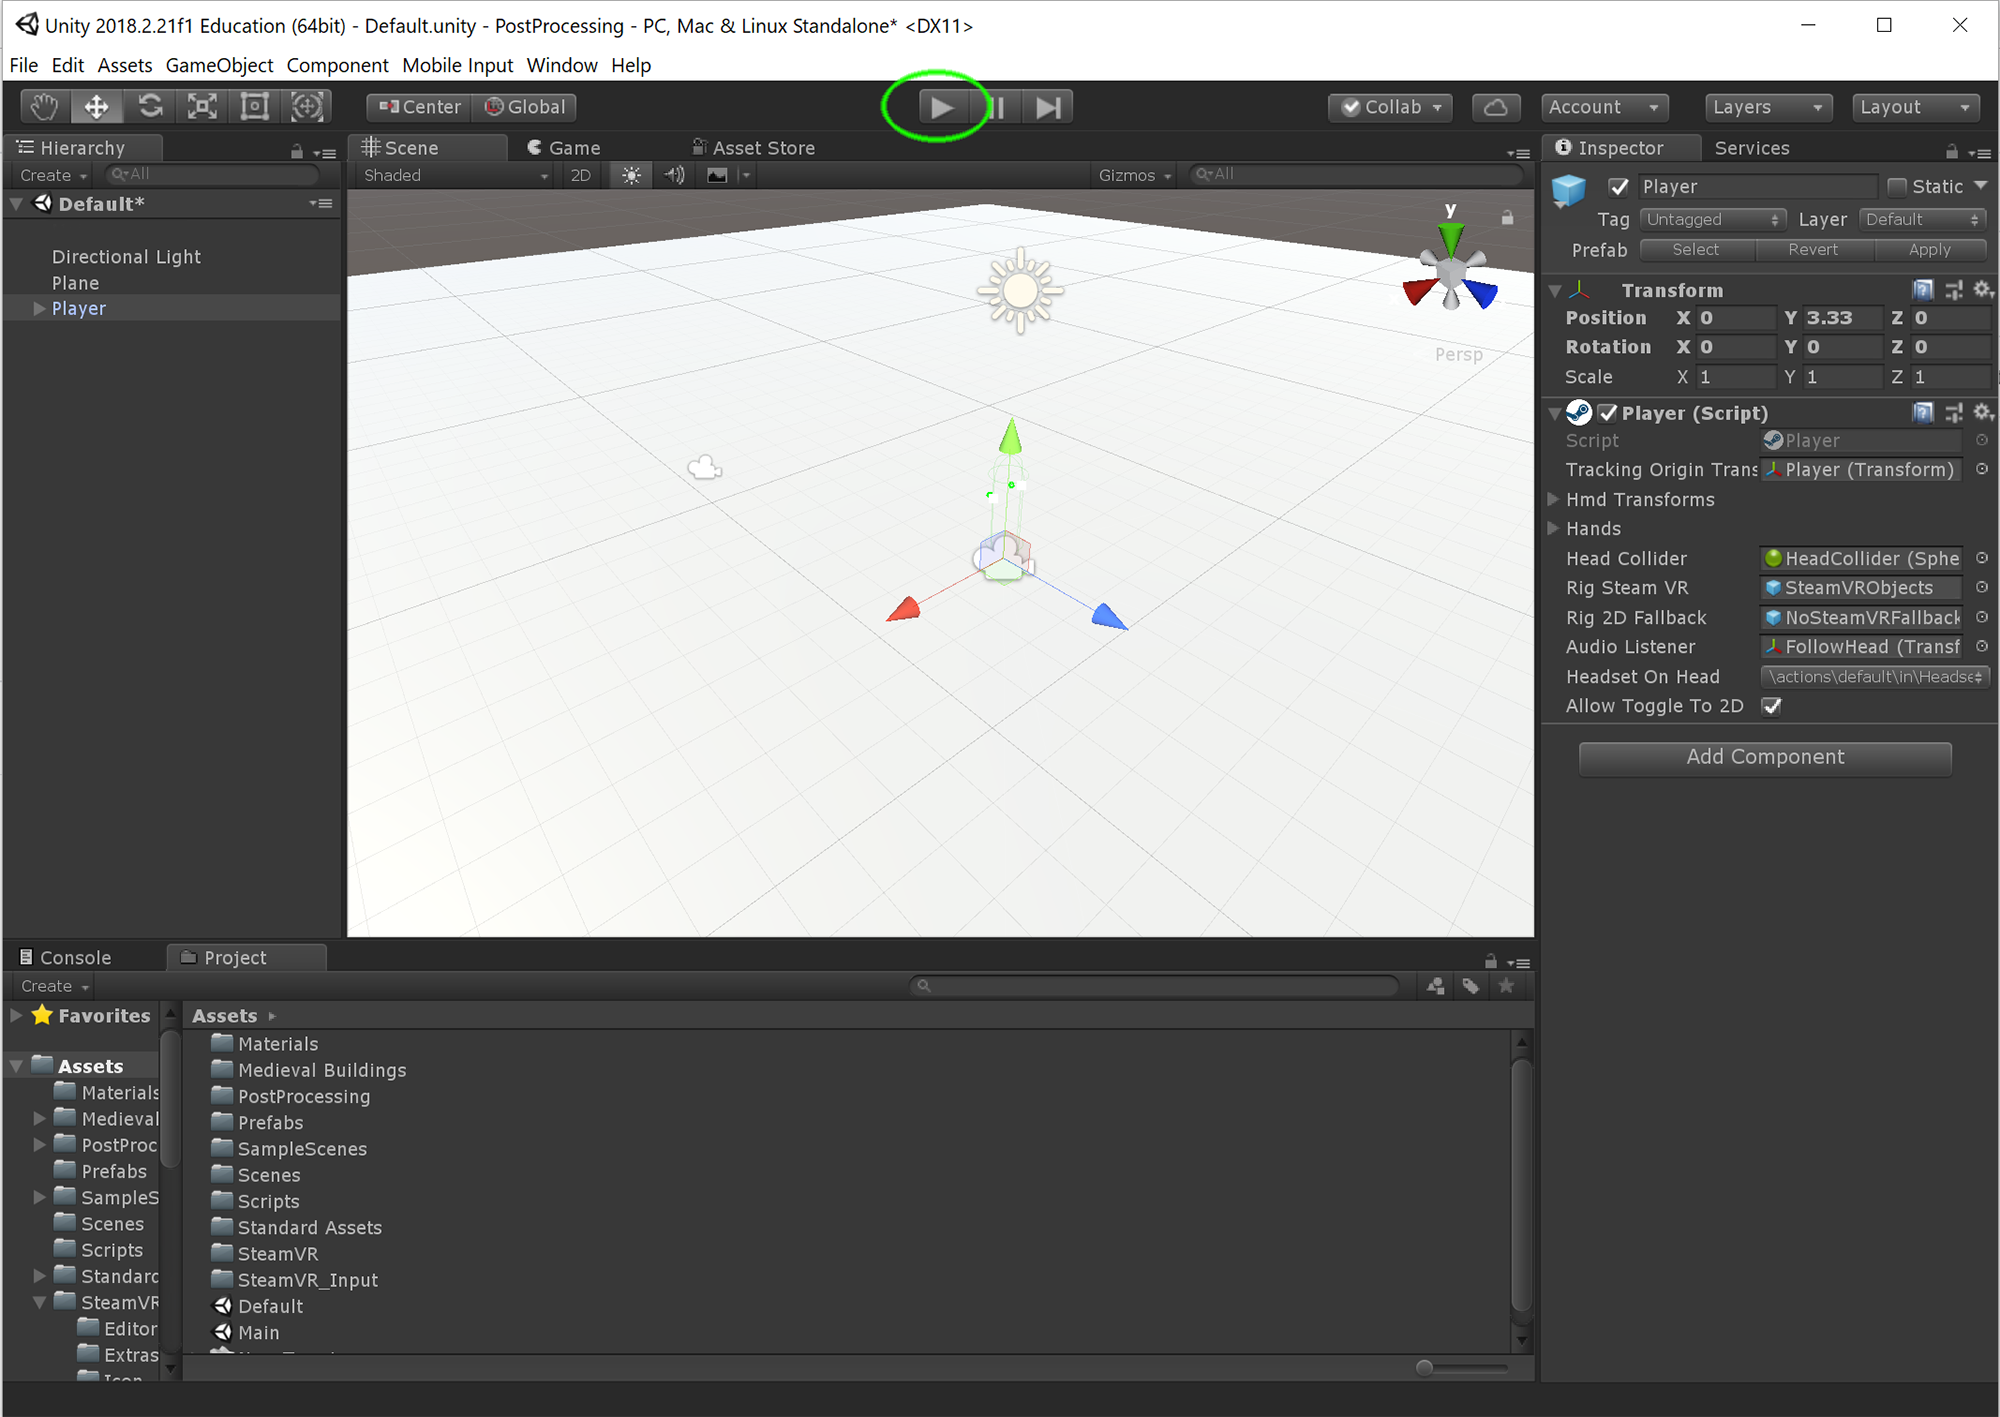
We are almost done, now you need to set up your HTC VIVE, run Steam VR and press play.
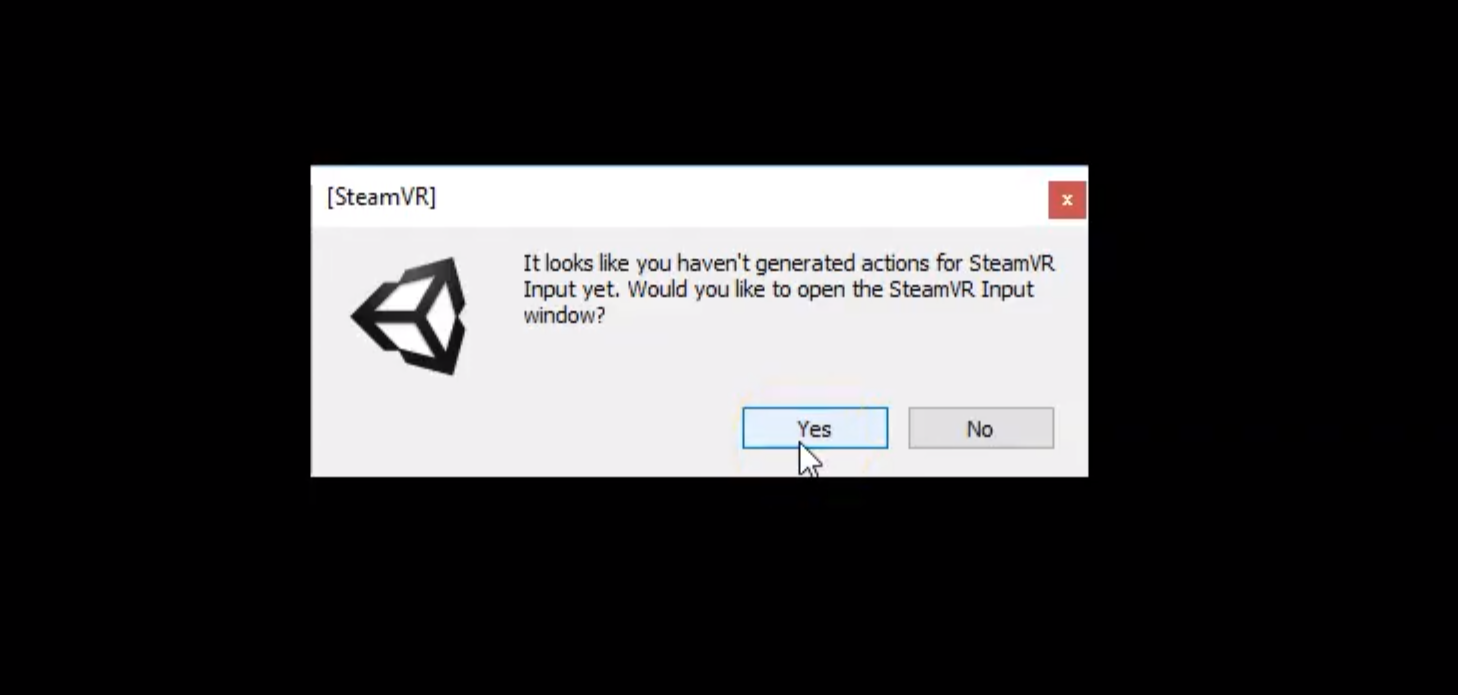
You will get a message asking you to generate the actions for the Steam VR Input, this file is the one that Unity uses to read the input from the controllers and the headset to generate actions in your project, for now, you just need to click "yes".
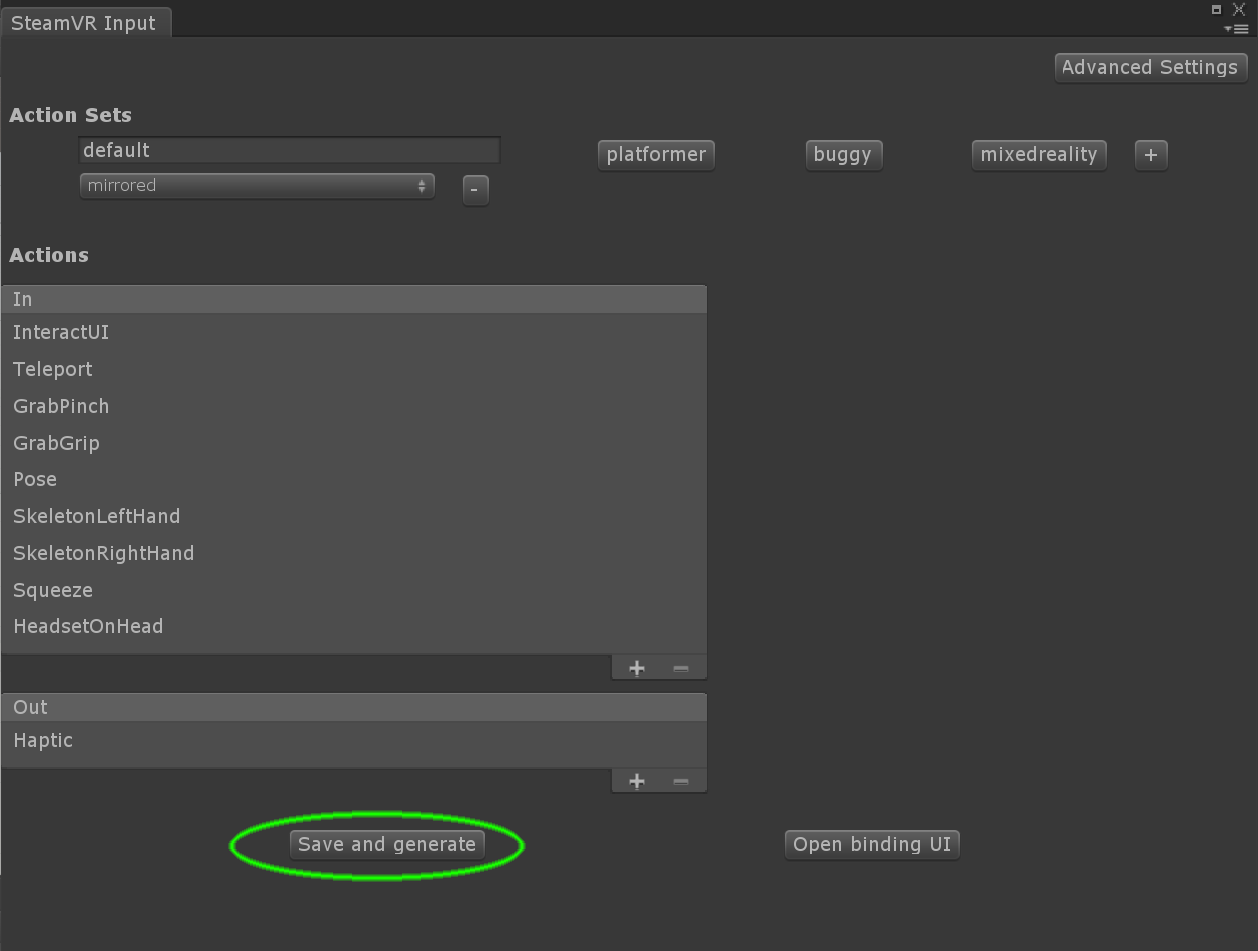
Next, you will see a new window listing the default action sets, just press the button that says "Save and generate".
Now you are ready to test it, press the Play button again, now you will be able to look inside of your new scene. You should be able to see both controllers following the movements of your hands and reacting to your interaction with the buttons.
Steam VR setup Tutorial #2 - Teleporting around your scene
Aims
This tutorial aims to show you how to enable the teleporting feature included in the Steam VR 2.2 plugin.
Please notice that this is part of a series of tutorials progressing from basic concepts to more functional and complex projects. In previous pages, we already explored how to set up the scene you are expected to use for this tutorial.
Prerequisites
-
Setting up the Steam VR plugin.
Steam VR setup tutorial# 1
Getting started
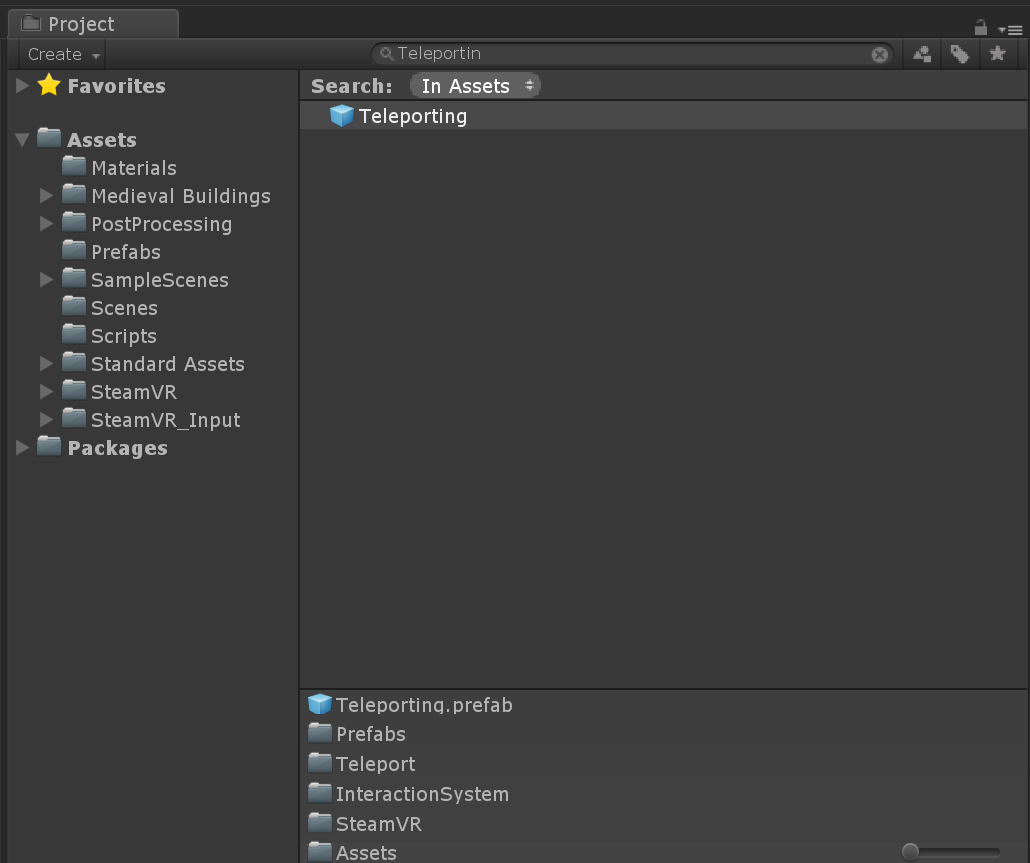
In the Steam VR setup tutorial #1, we downloaded the Steam VR plugin and placed the "Player" prefab on our scene, in this tutorial we are going to set up the teleporting feature also included in the plugin, we are also going to add a few teleporting spots to jump from one area to another. With our previous project open, please type "Teleporting" into the search box of the project panel.
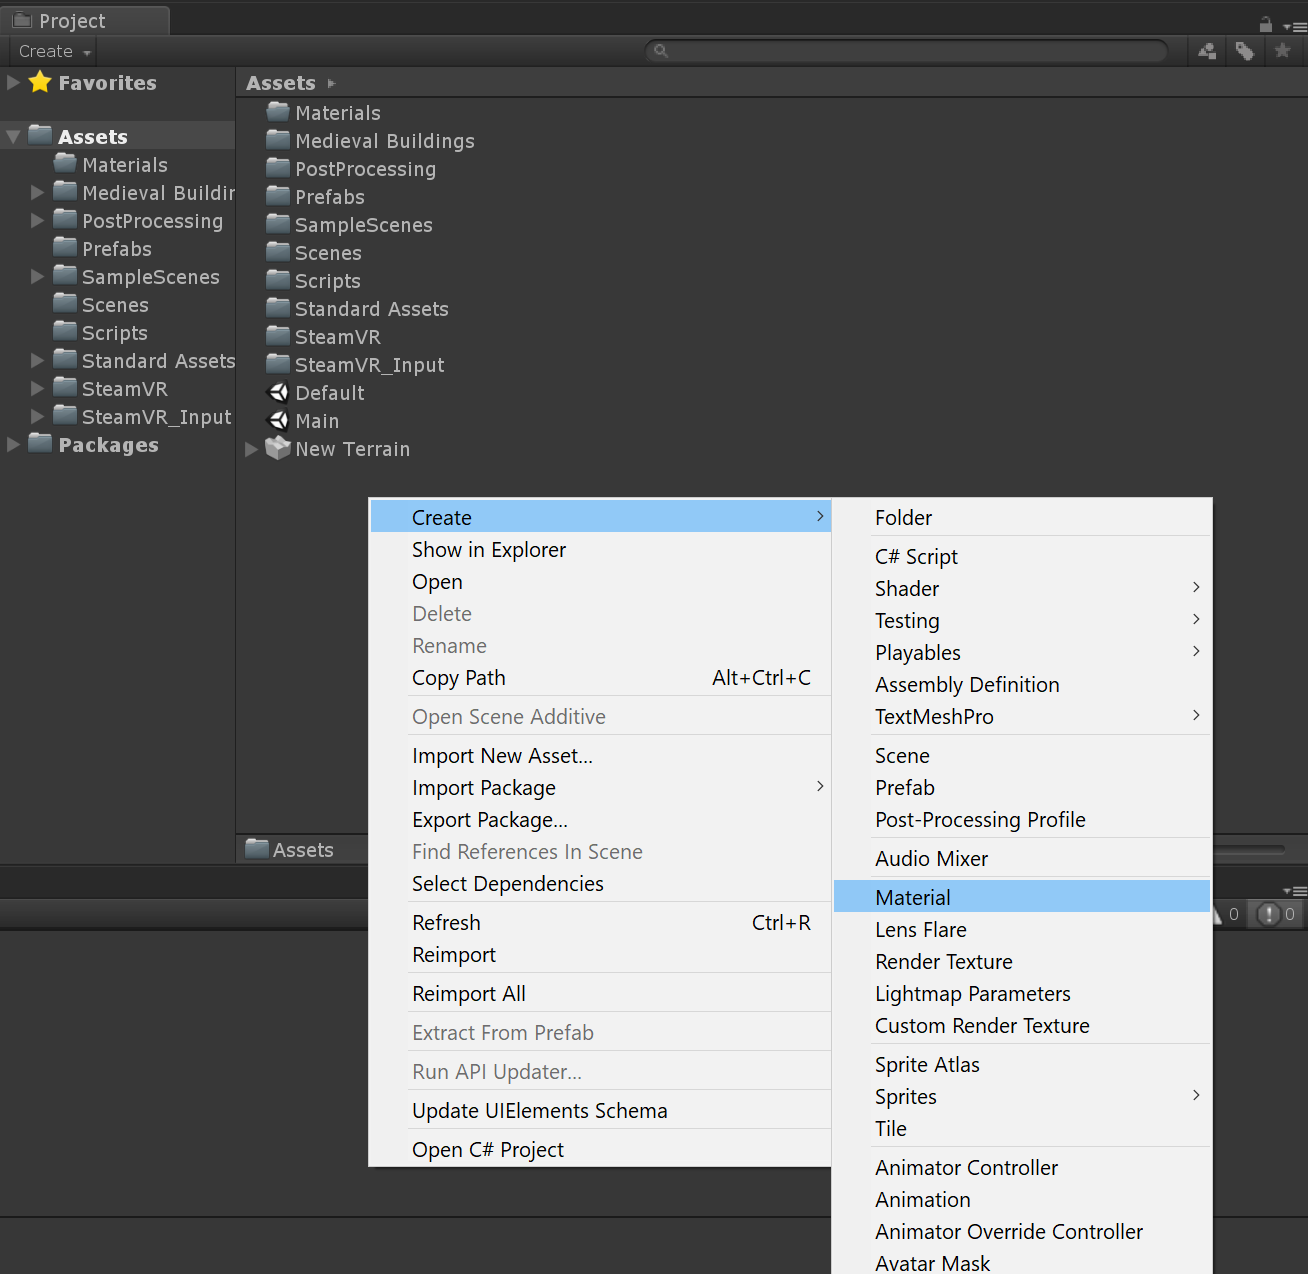
Now just drag and drop the Teleport prefab into your "Hierarchy" panel, this will automatically enable the Teleport feature on both of your controllers, Before we test it, it is a good idea to change the default floor material to be able to see the "Bézier curve" more clearly. Please select your Assets folder in the Project panel and right-click to create a new material and name it "Blue". To keep things tidy, we recommend creating a "Materials" folder, then dragging your new material inside of it.
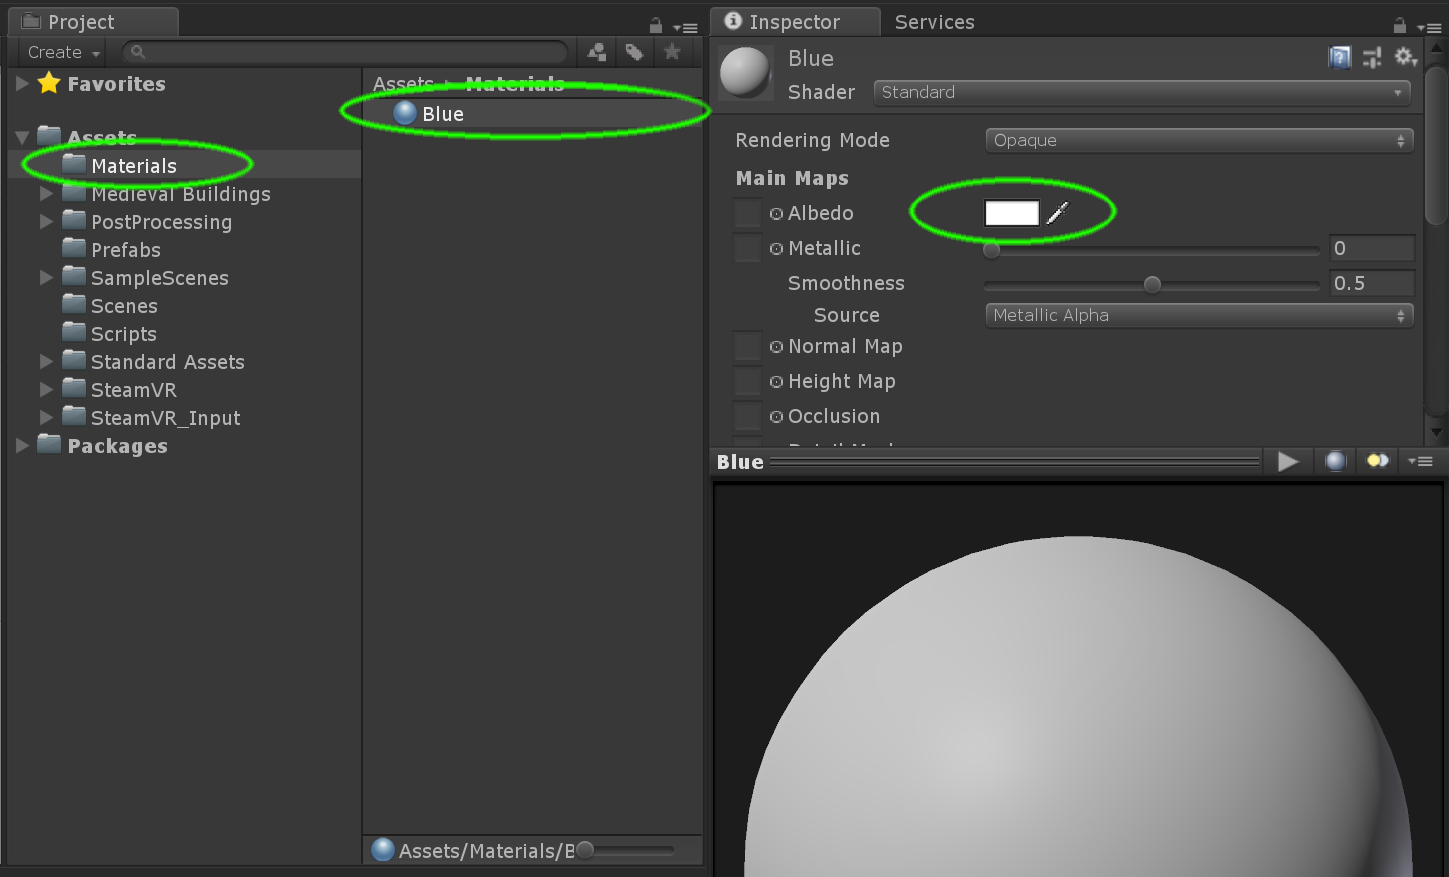
With your material selected, look at the inspector panel, you will see all the properties associated to your material, please click on the colour picker next to the Albedo slot.
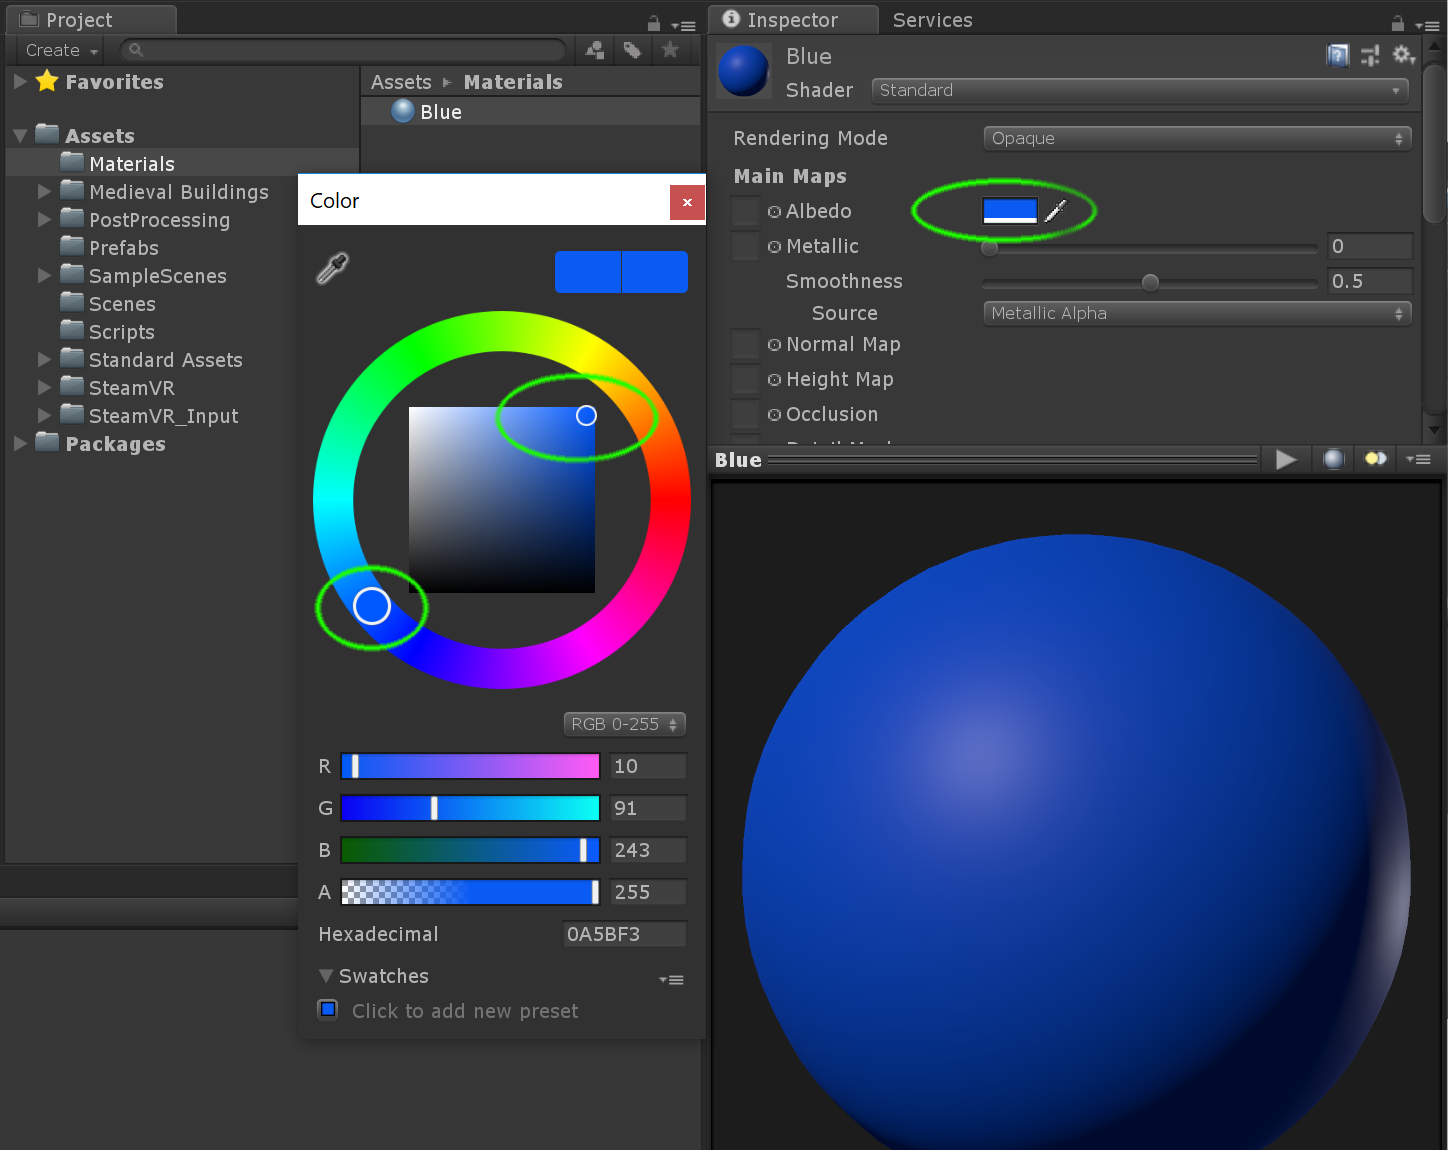
You will see a colour window, please drag both white circles in order to get the desired shade of blue, to finish just close the colour window.
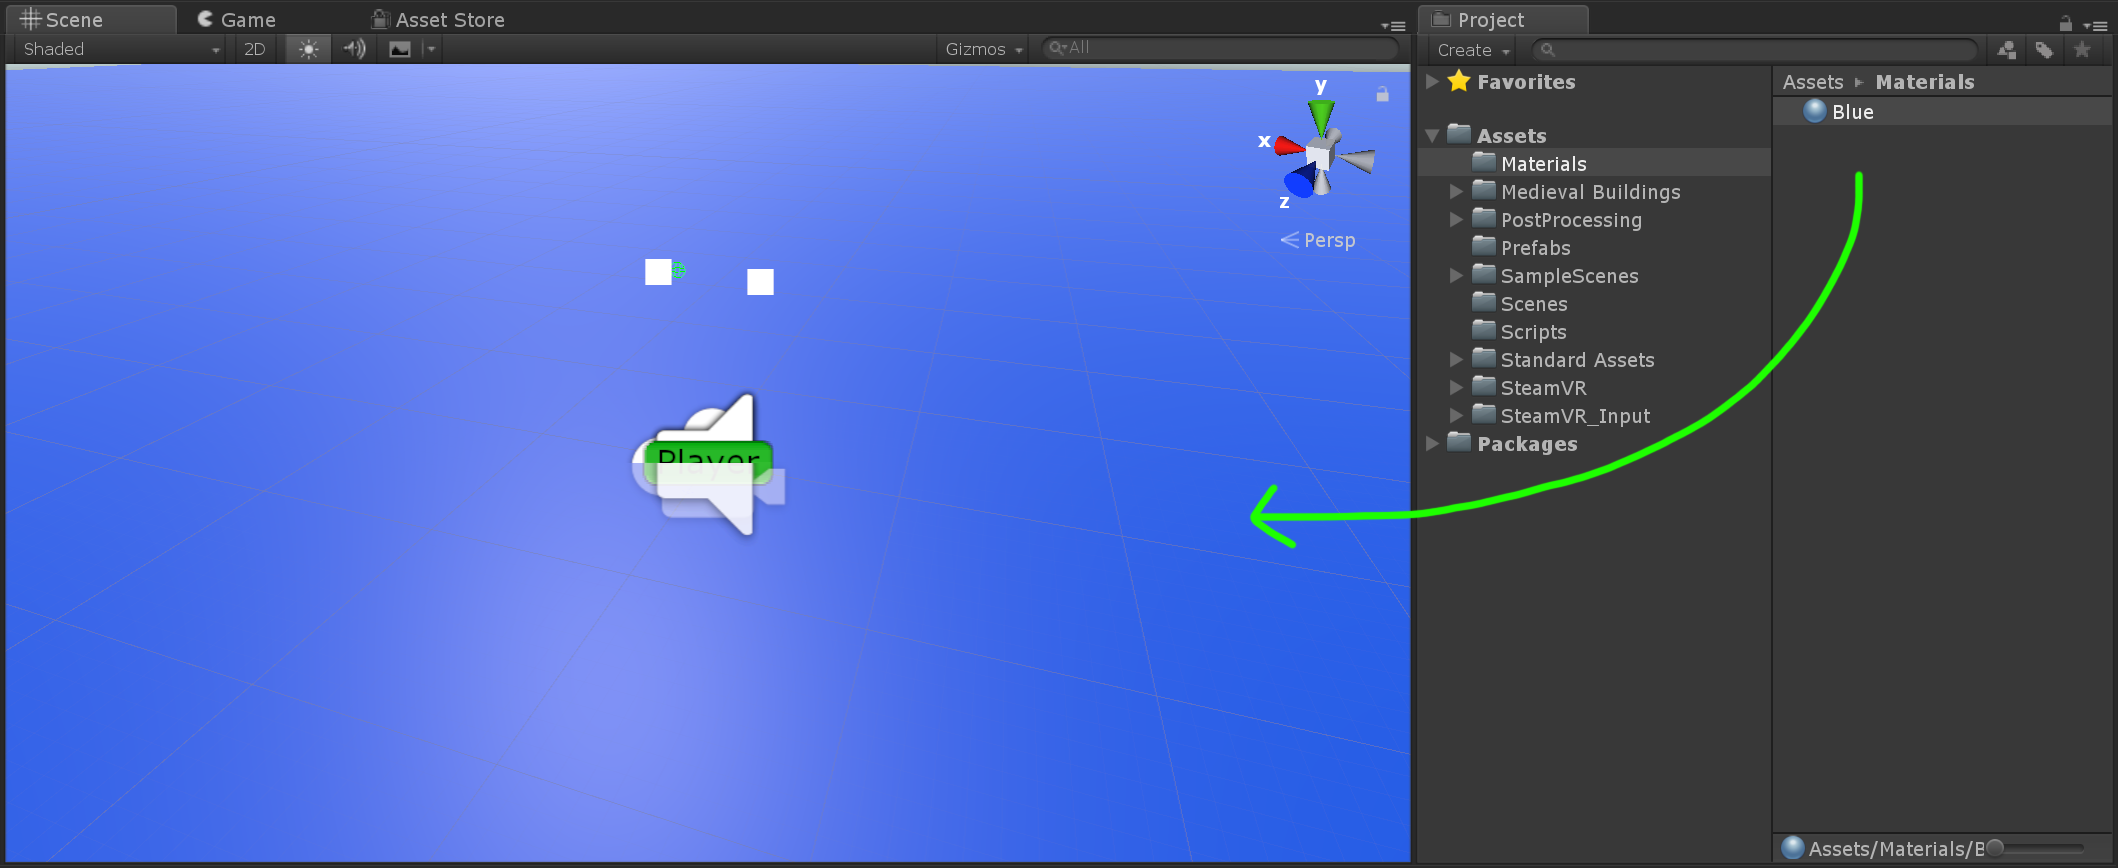
To apply your material, just drag it and drop it on top of the plane in the scene window.
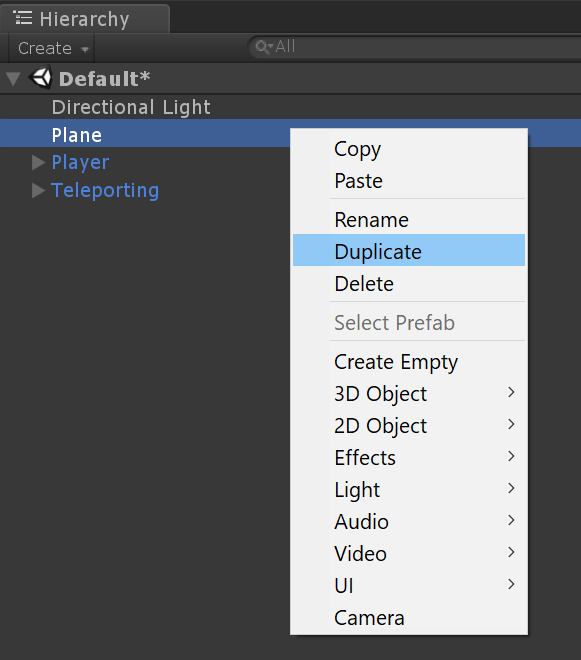
Now we need to create a teleport area that will sit on top of our plane, the easiest way to achieve this is by duplicating our existing plane so right-click over the plane gameObject in the "Hierarchy" and select duplicate.
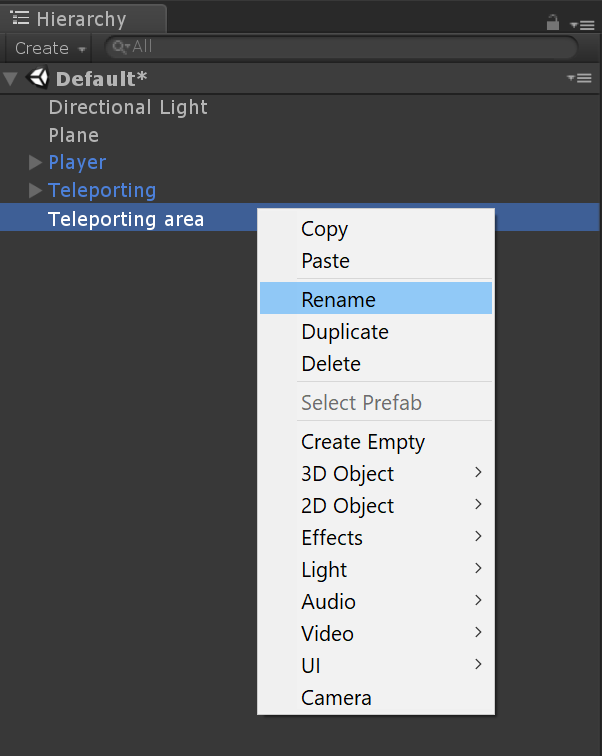
In order to keep things tidy, let's rename our new game object and place it underneath the "Teleport" prefab.
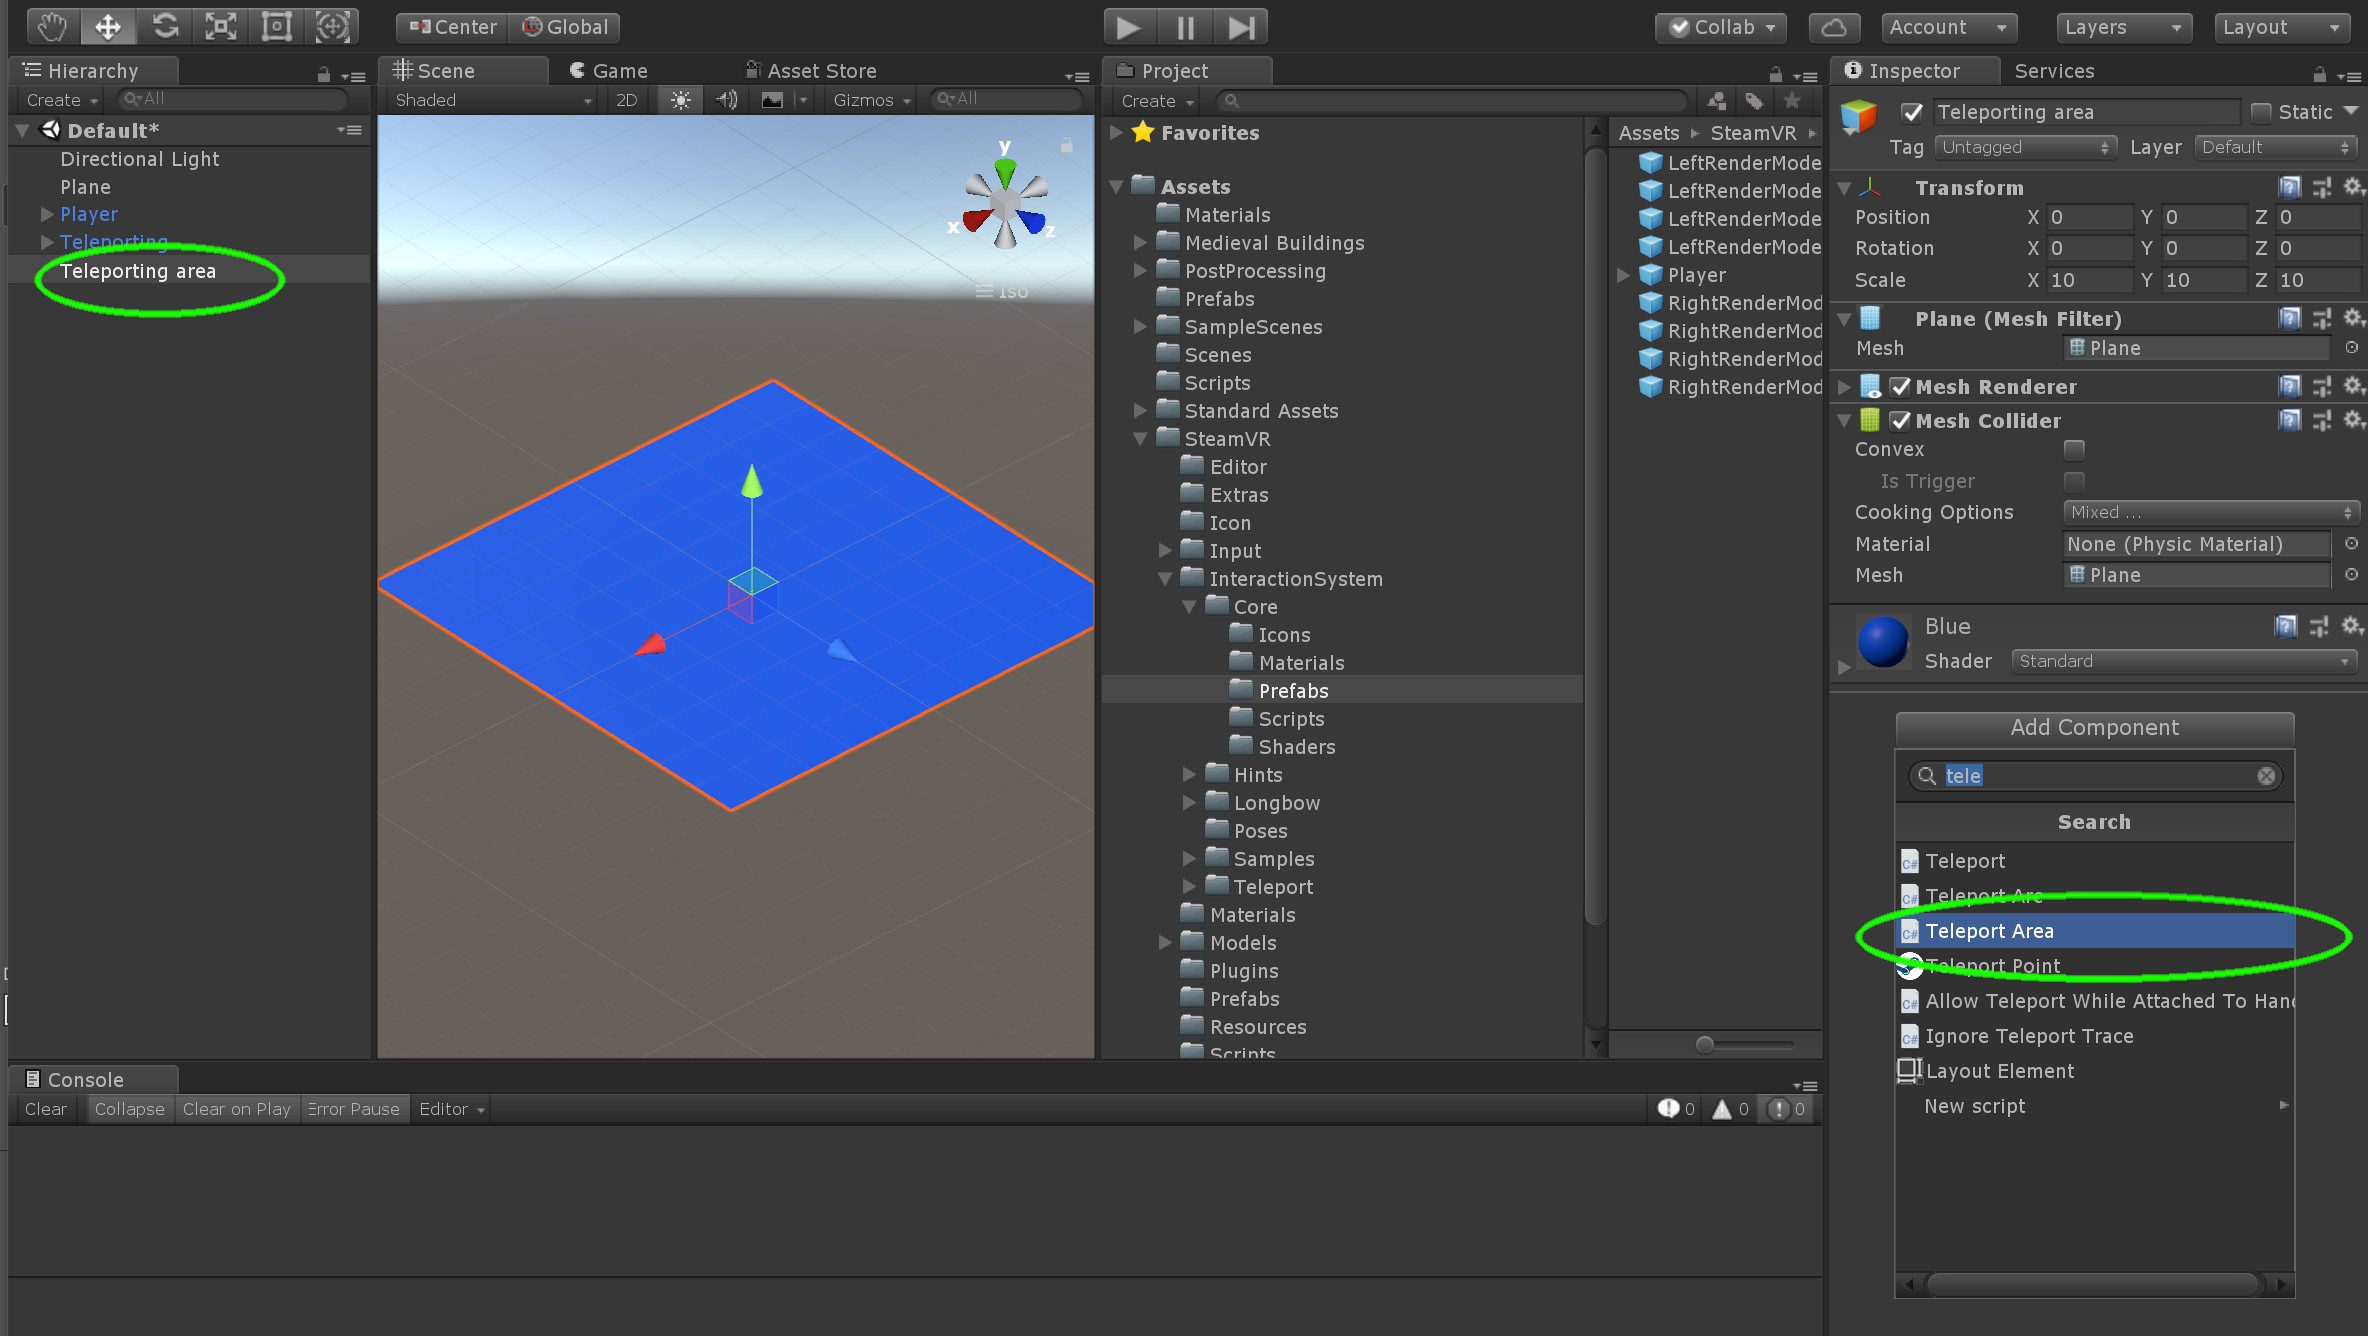
Now let's add the "Teleport Area" script to our new gameObject, please notice that if you are importing a custom mesh to use it as a Teleporting Area you have to make sure that it has a "Mesh Collider" component attached, in this case, as we duplicated a 3D object created directly in Unity, the Mesh collider is attached by default. With the "Teleporting Area" gameObject selected, click the "Add component" button in the "Inspector" panel and type "Teleport Area" and click over the "Teleport Area" script.
Finally, we need to move the "Teleporting Area" slightly up to place on top of the first plane, this is to avoid conflict between the colliders on both of the planes, With the "Teleport Area" gameObject selected, type "0.1" in the "Y" position slot of the transform component.

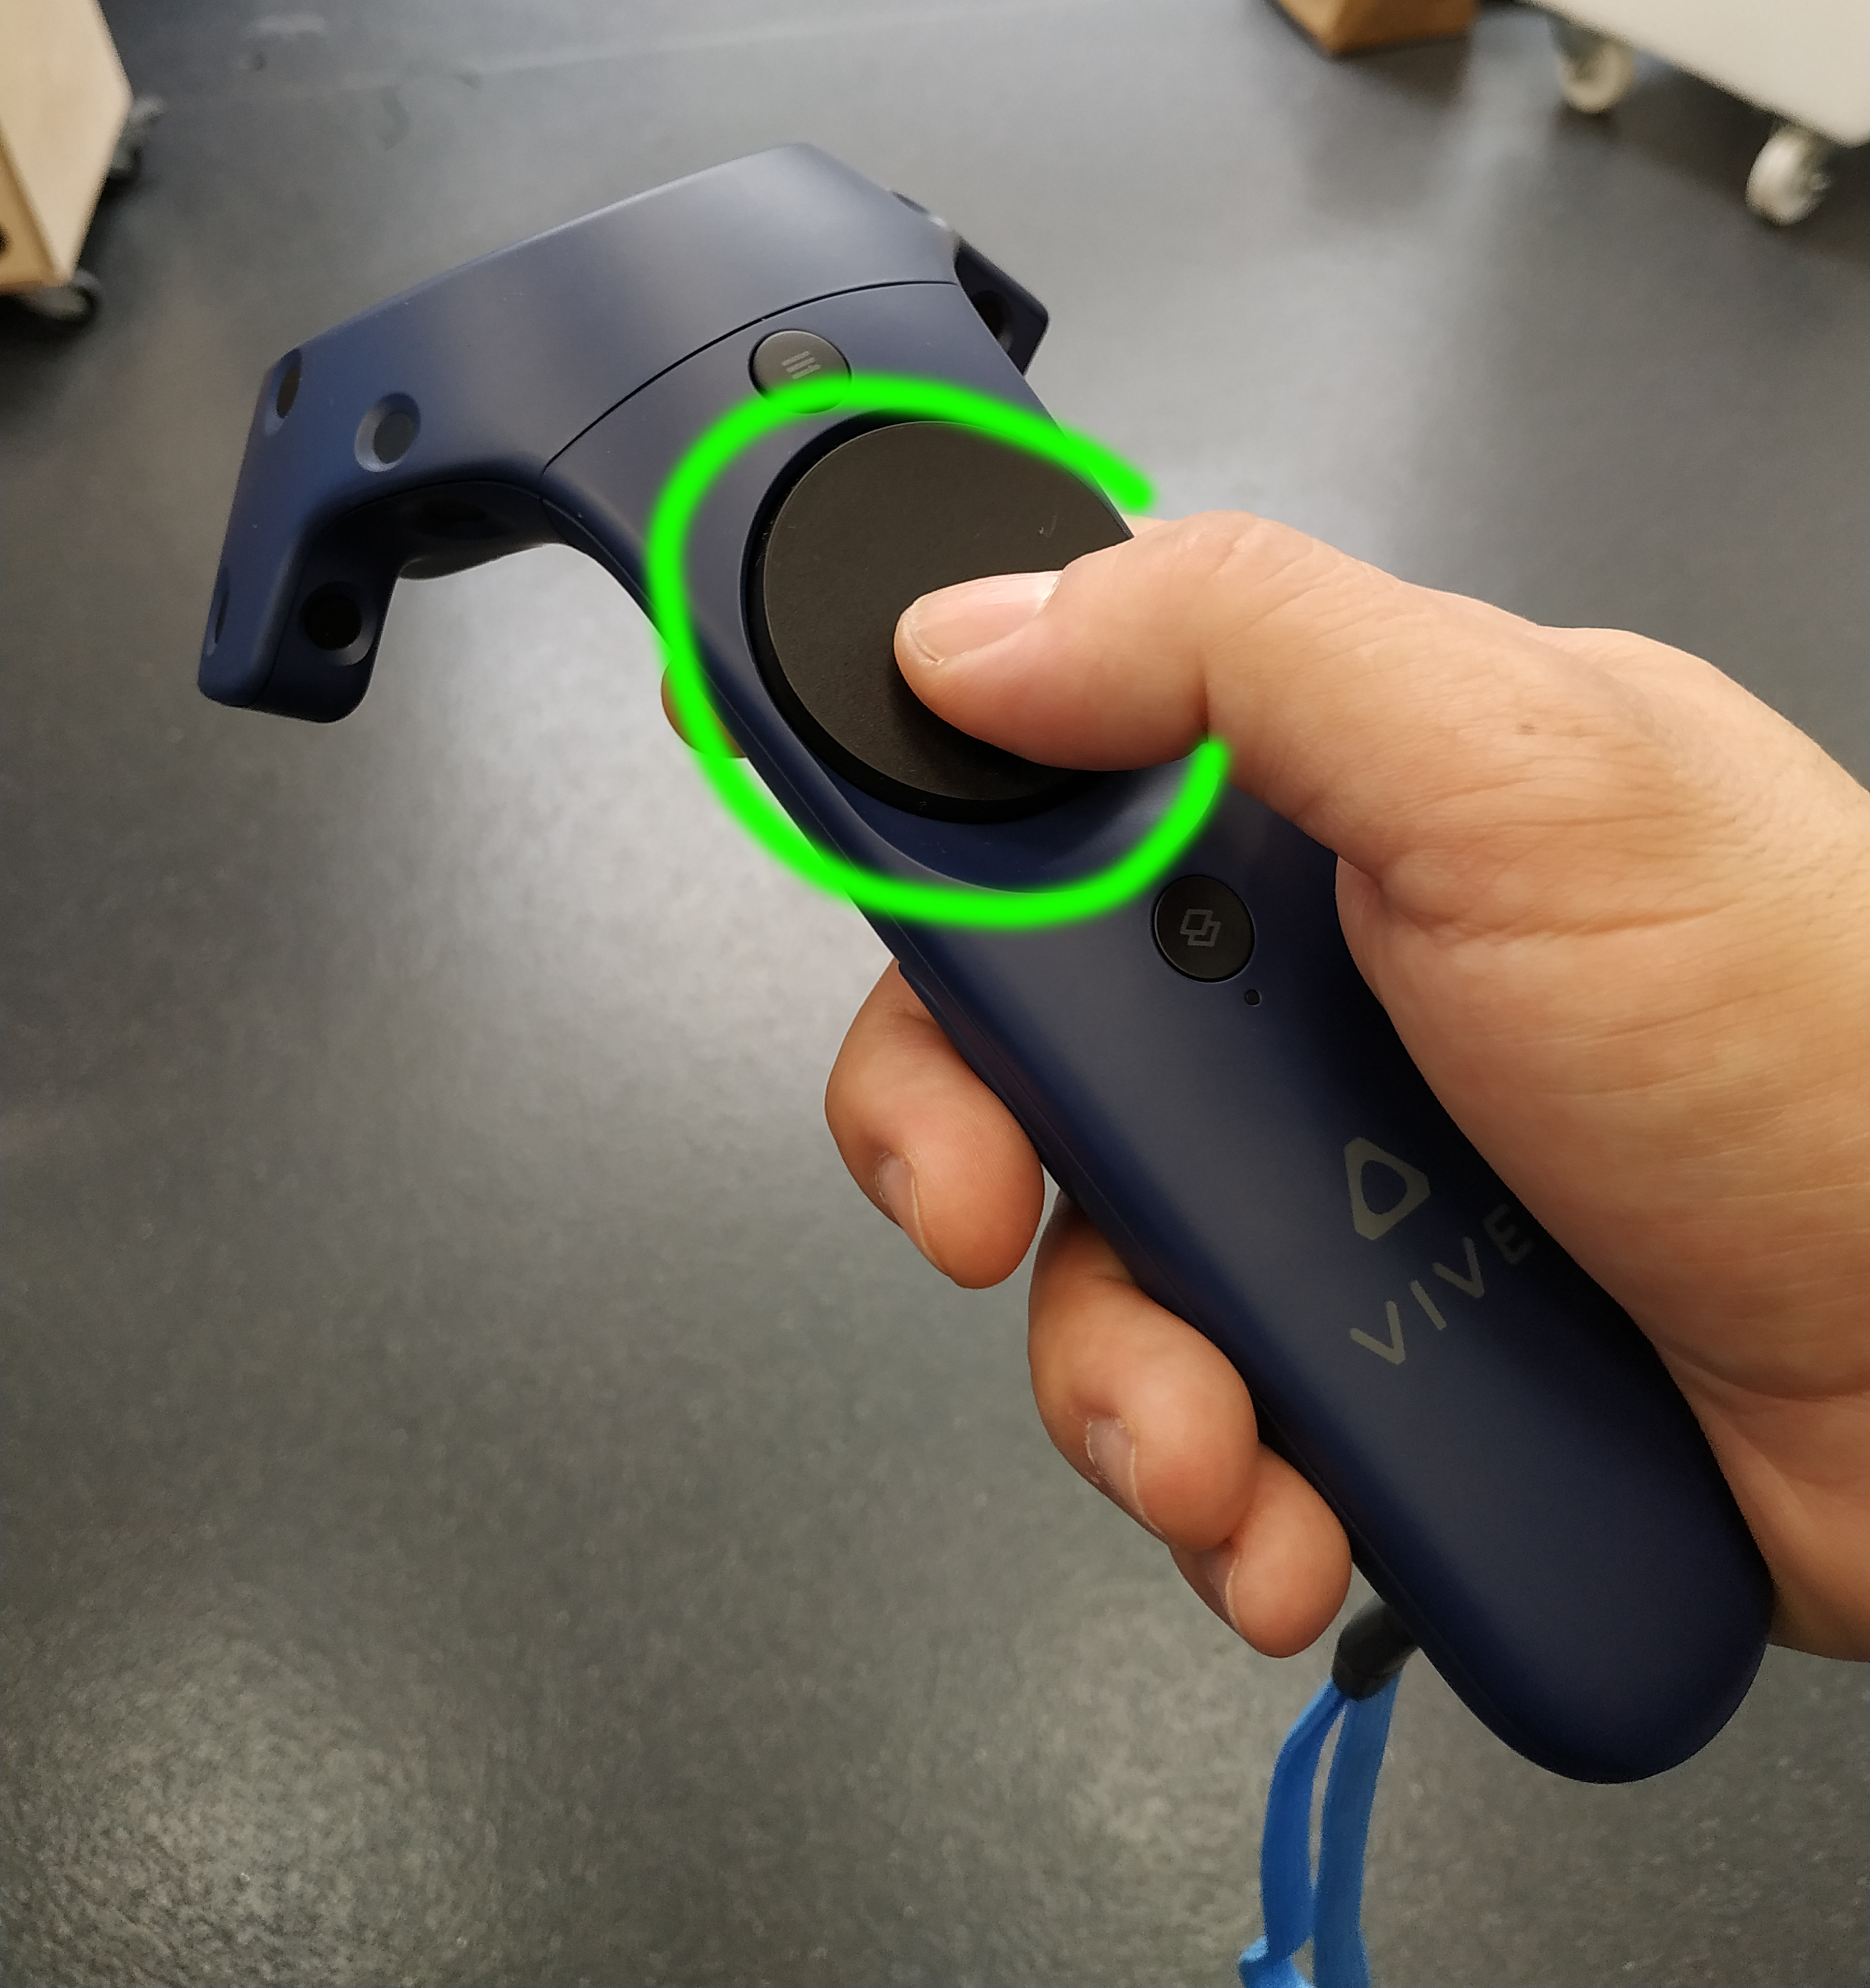
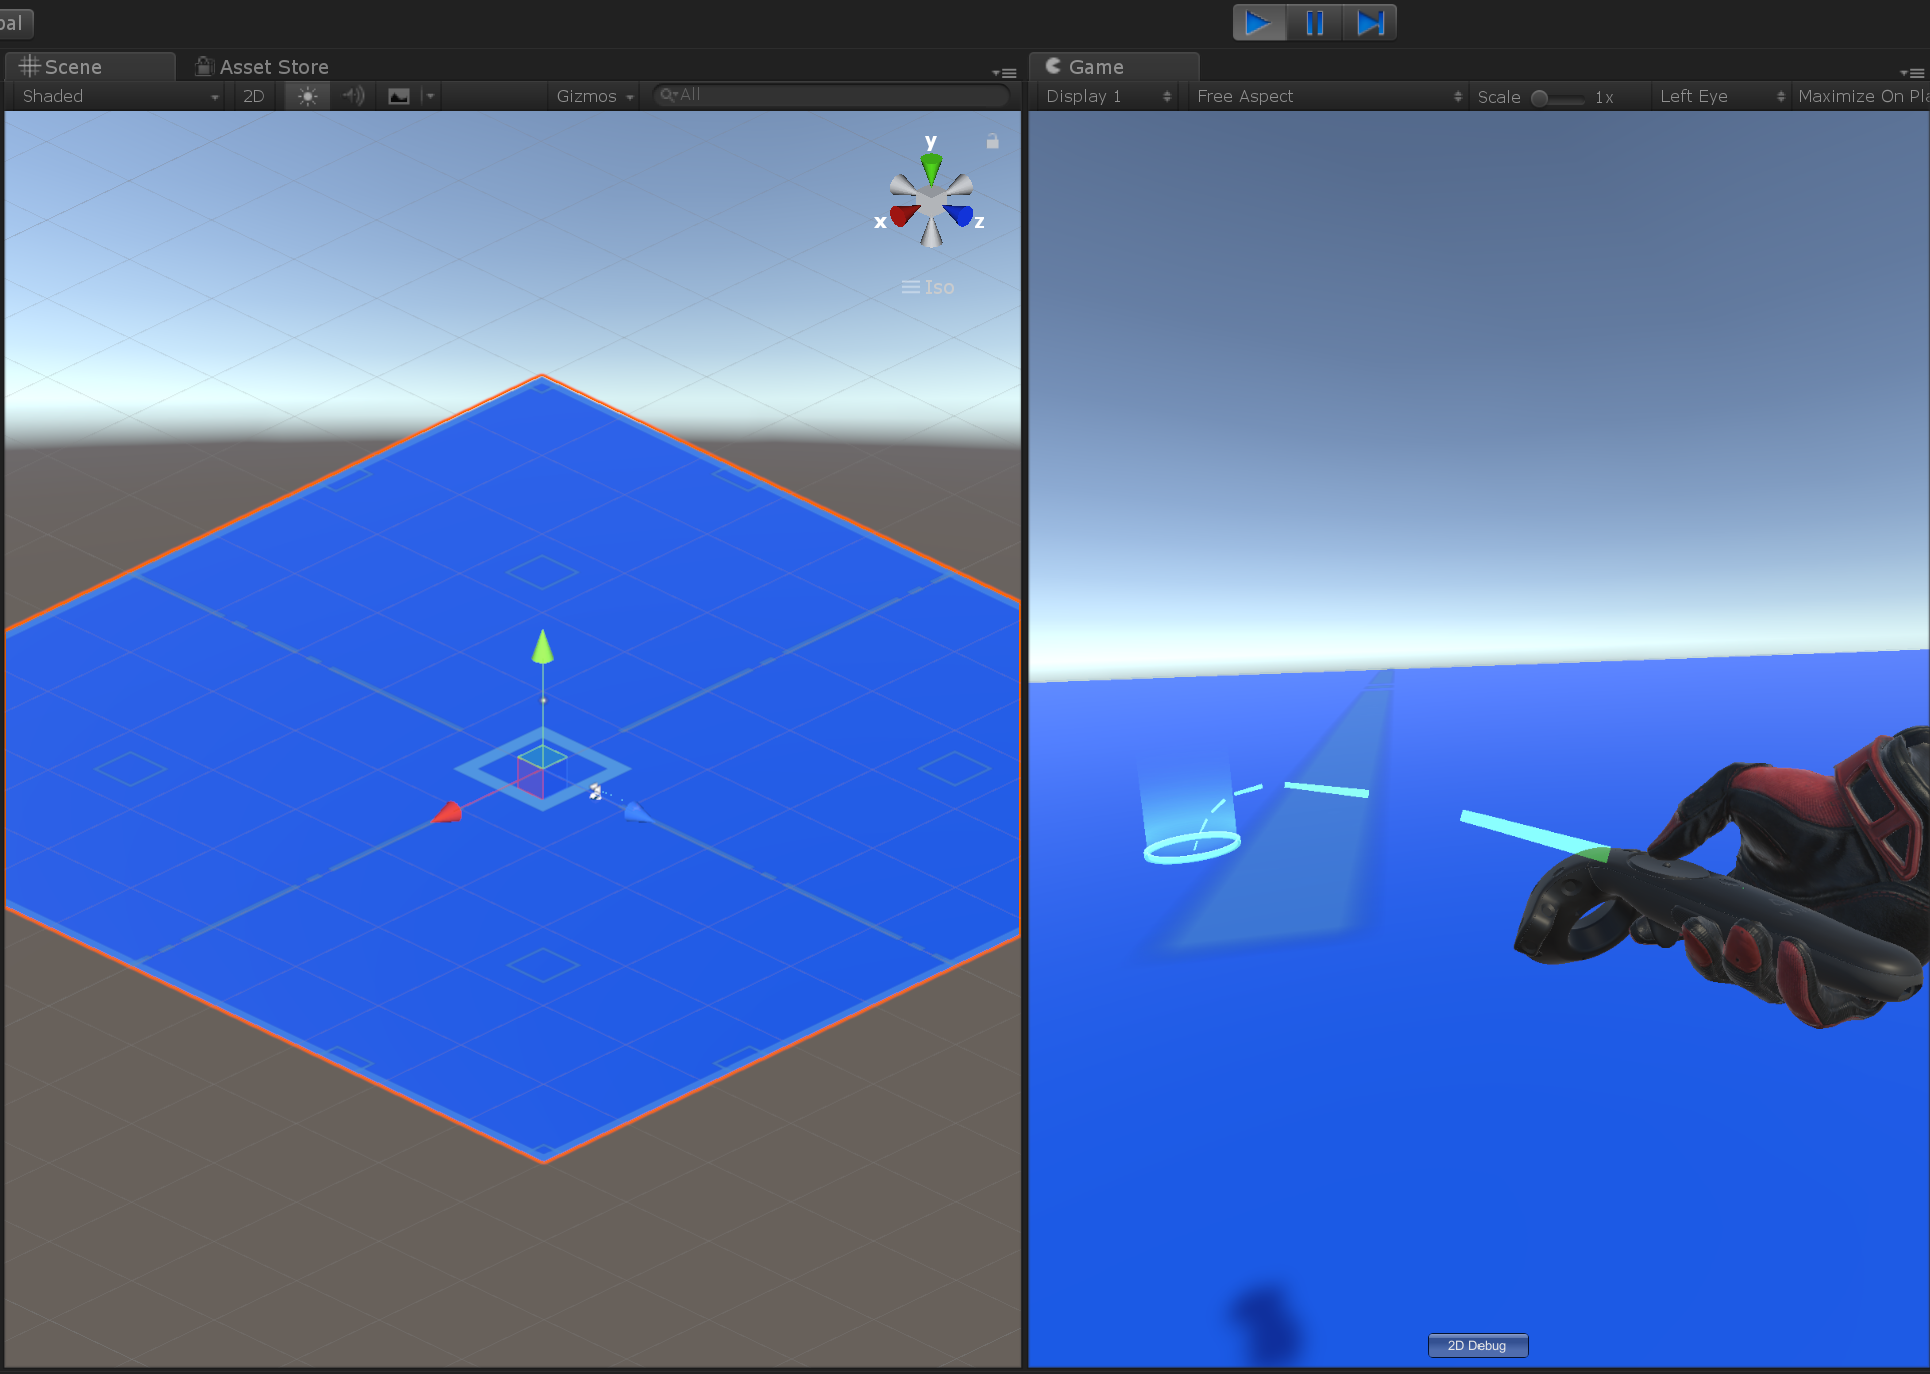
Now we are ready to test the Teleporting feature, Just hit the "Play" button. Once inside of your scene, please press the "Trackpad" button, you will see a "Bézier curve" projecting from the front of your controller to the ground. Try changing the angle of your controller to move the landing point, then, just let go the button and you will be teletransported to that location.
Steam VR setup Tutorial #3 - Interactable object setup
Aims
This tutorial aims to get you started creating objects that you can interact with using your HTC VIVE controllers (Using Steam VR 2.2 plugin).
Please notice that this is part of a series of tutorials progressing from basic concepts to more functional and complex projects. In previous pages, we already explored how to set up the scene you are expected to use for this tutorial.
Prerequisites
-
Setting up the Steam VR plugin.
Steam VR setup tutorial# 1
-
Setting up teleporting feature (Optional).
Steam VR setup tutorial# 2
Getting started
In Steam VR setup tutorial #2 we added a blue material to a plane in order to make it easier for us to see the teleporting feature at work. In this tutorial, you are going to learn how to create two "throwable" objects but first, we are going to create a plinth to put the throwable objectS on so it is easier to test them.
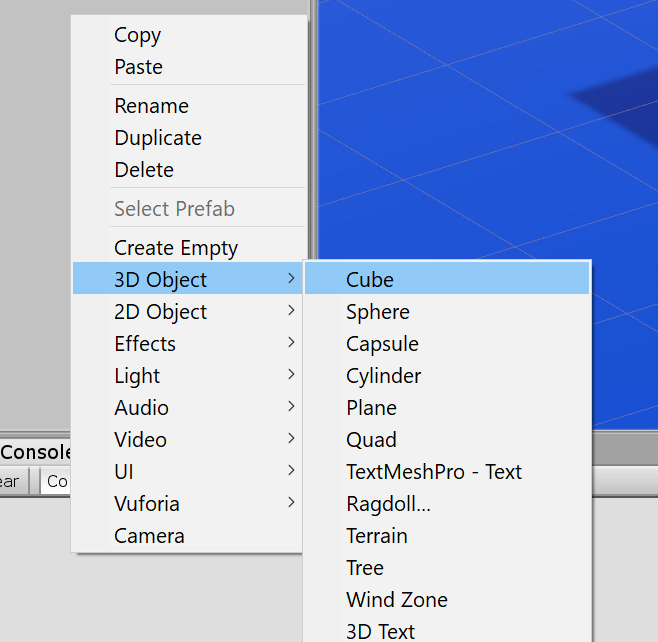
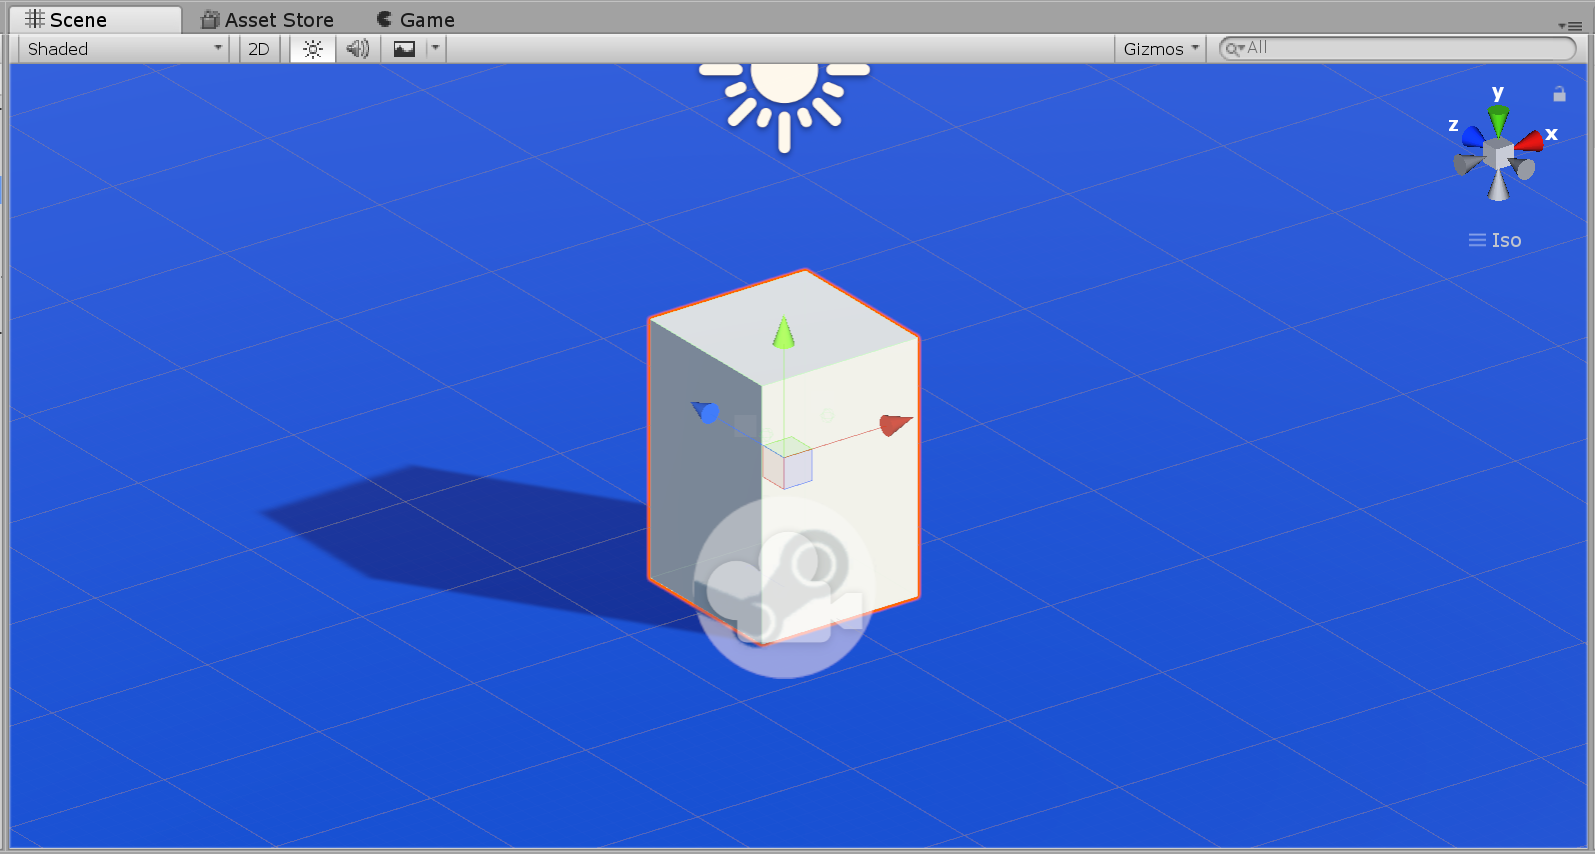
To begin, right-click over the Hierarchy panel and select cube.
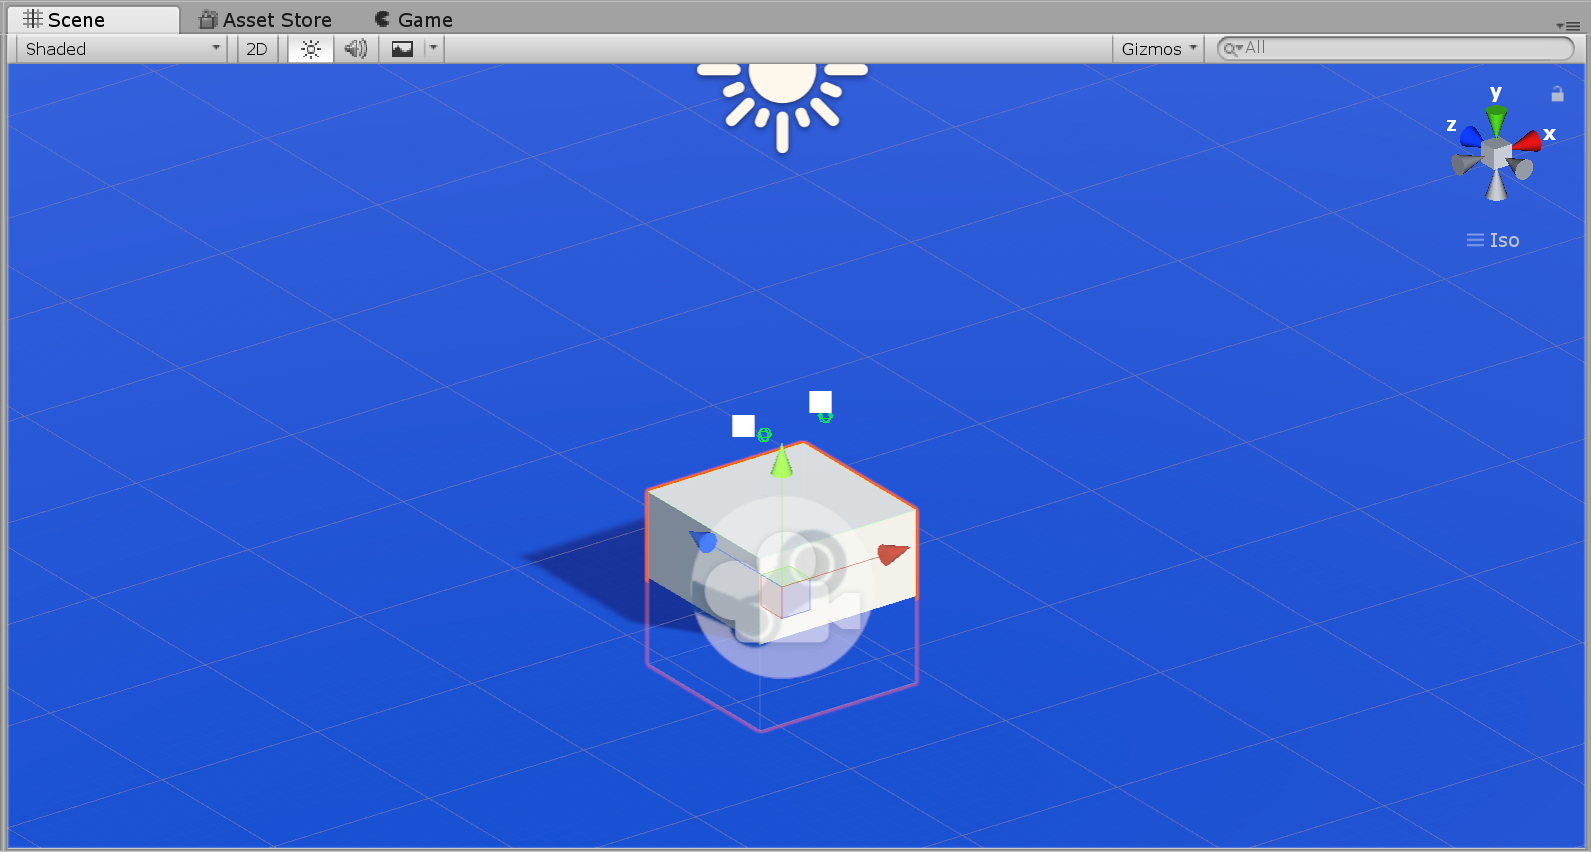
You should now see a cube intersecting the walking plane.
Now let's change the scale and the position to make it look like an actual plinth. With the cube selected look at the Transform component parameters shown on the Inspector, you will see that by default, your cube has the scale set to "1" and both Position and Rotation parameters should be set to "0" an all three axis.
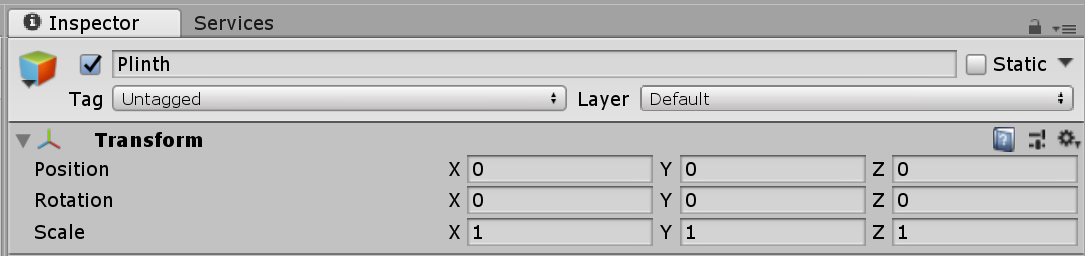
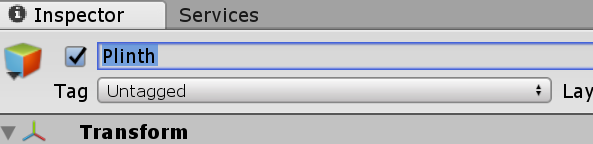
Let's increase the "Y position" value up to 0.75 and the "Y scale" value to 1.5. It is also important to give meaningful names to our objects to keep our scene tidy. In order to change the name of a selected object just left-click inside the text field located on top of the Transform component and type your text.
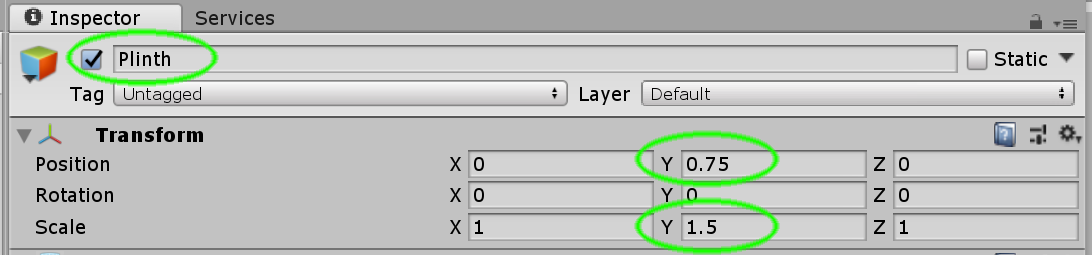
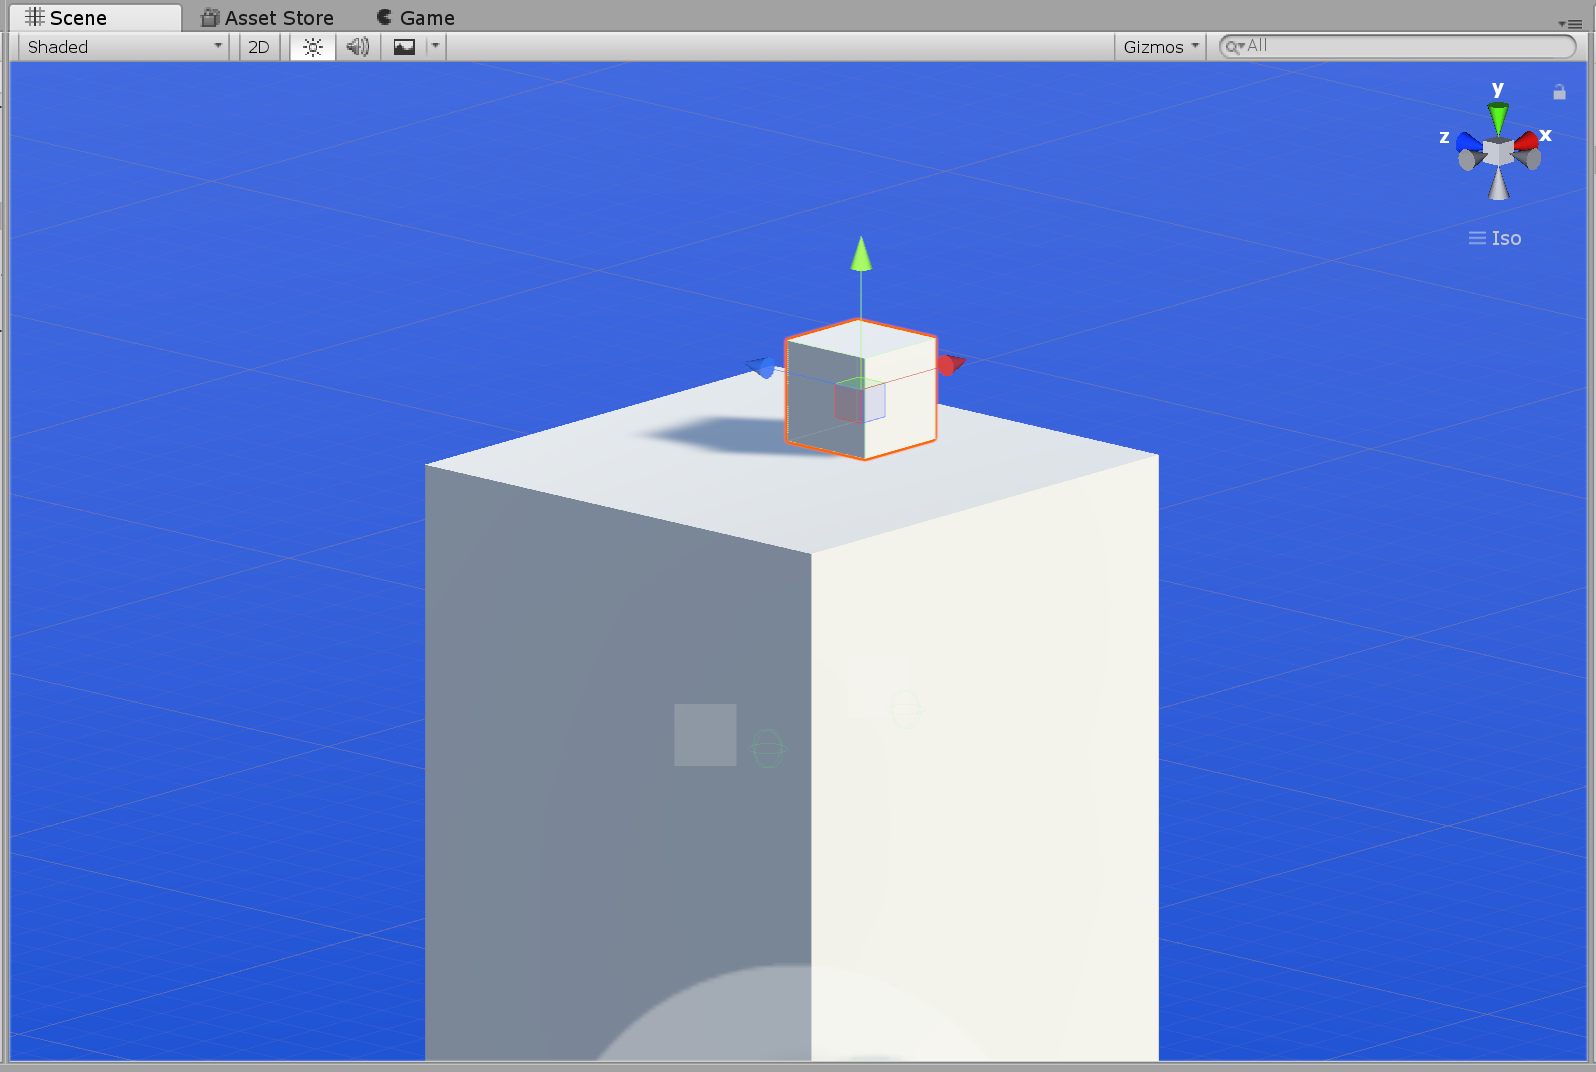
Now our plinth should be taller and placed at the right height.
Now we are going to create our interactable objects. To create the first one, right-click over the hierarchy panel and select cube. With our new cube selected, let's change the Transform parameters to make it sit on top of our plinth. First change the scale down to 0.2 on all three axes then change the Position values as follows: x=.2, y=1.6 and z=0. Finally, let's put a name to it to keep things tidy, you can call it whatever you want, we suggest a meaningful name like "Magic cube".

We should see our "Magic cube" on top of our "Plinth".
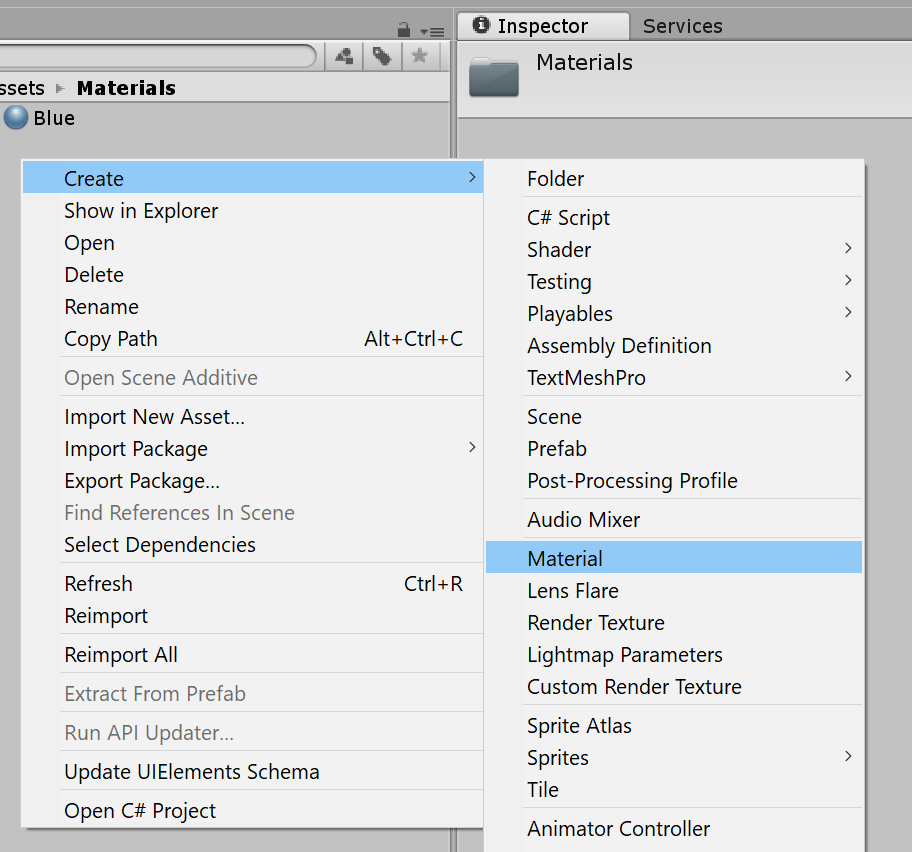
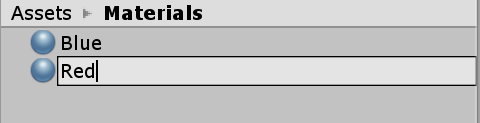
Now, in order to make things look a bit more interesting, let's create and apply a new colour material to our interactable object, just right click on top of the project panel and select Create/Material, give it a meaningful name, like "Red" (or any other colour you might prefer).
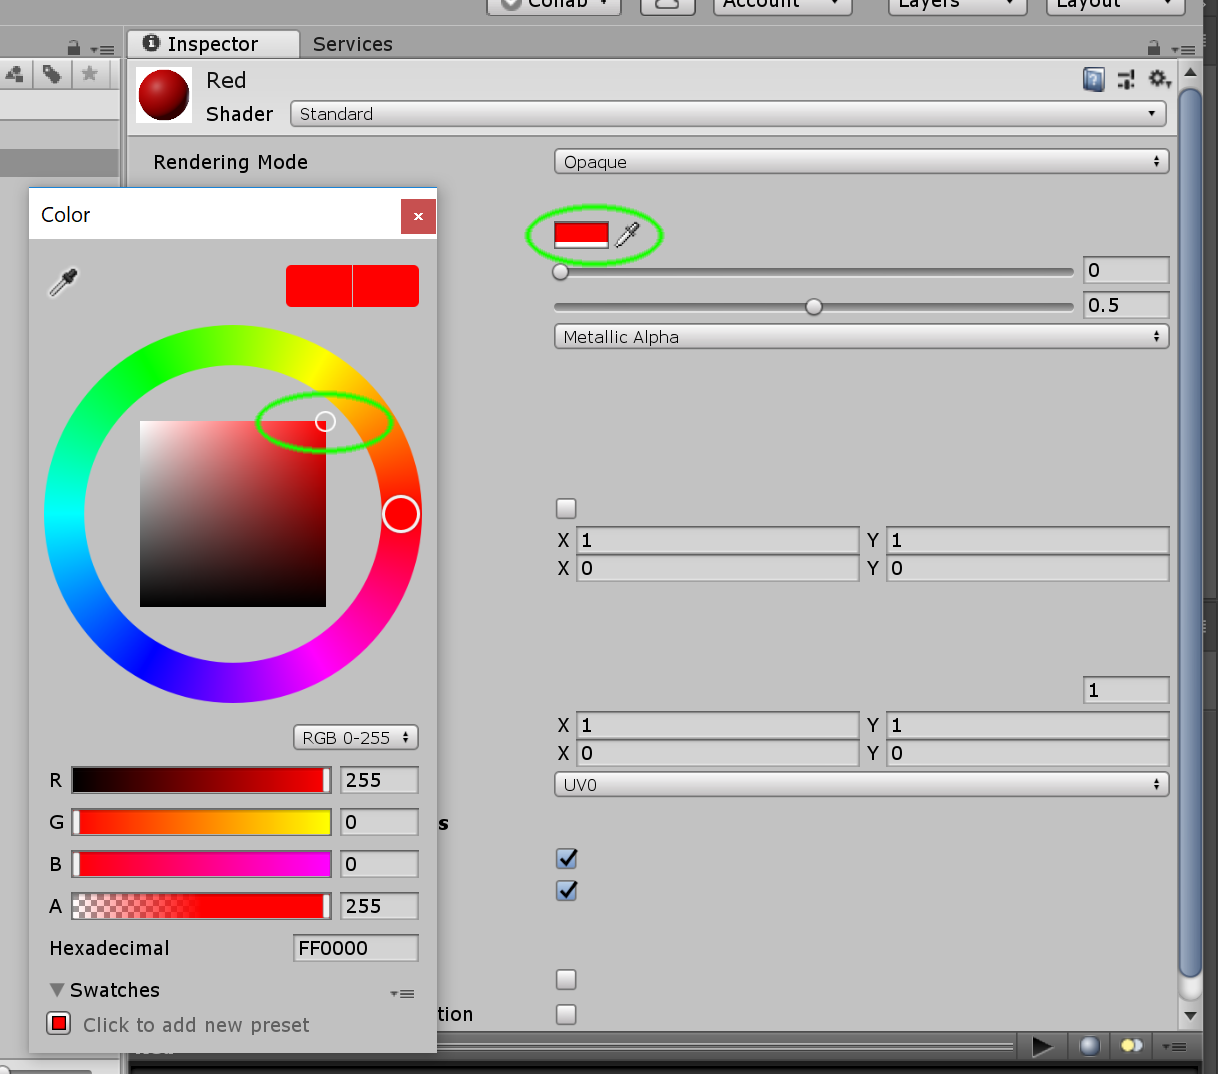
Next, with your material selected, click on top of the "colour picker" box shown in the inspector. This will open a colour picker window where you can select the colour you that corresponds to the name of your material.
Now just drag and drop the material on top of your "Magic cube".
Now we are ready to add the scripts (included in the Steam VR plugin) that are going to make your object interactable. With the "magic cube" selected, press the "Add component" button and type "throwable", this will filter the component list and will highlight the "Throwable" script. Now you just need to either press enter or click on top of it to add it to your object.
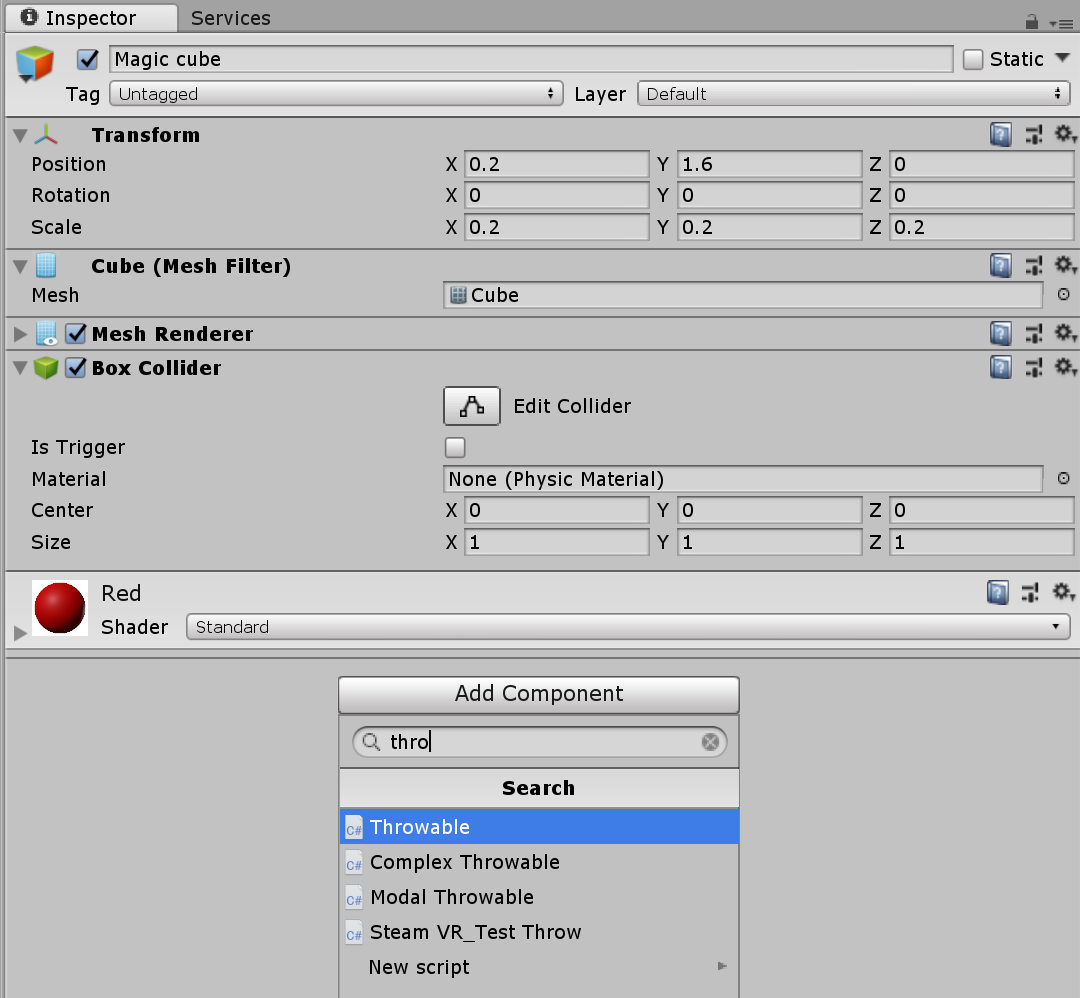
You will notice that instead of one, Unity actually added 4 different components.
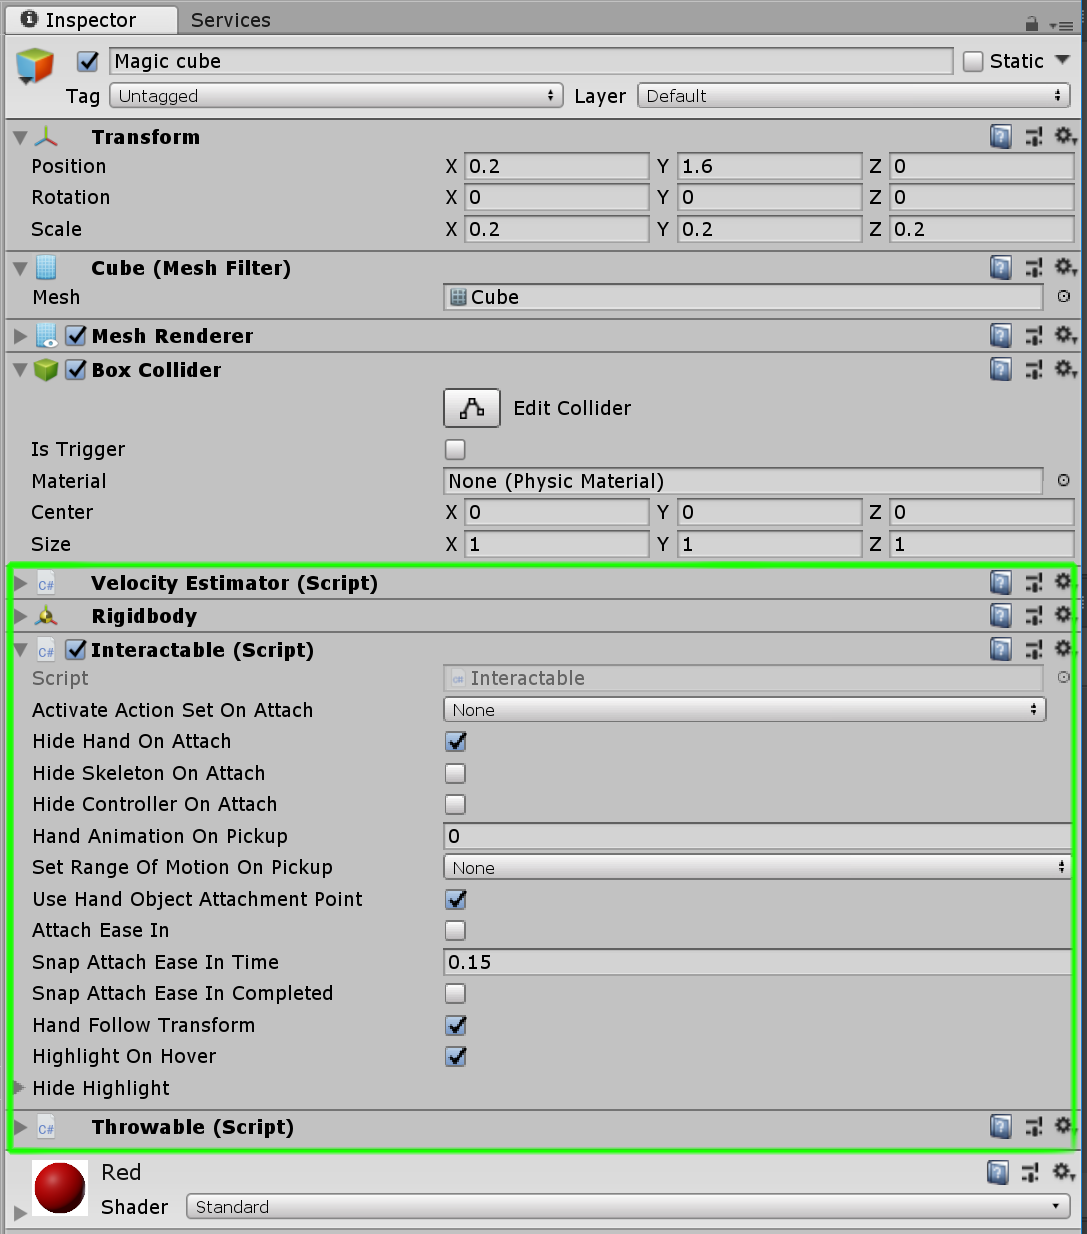
Unity added those components automatically as your interactable object needs all three scripts and also a Rigidbody for the object to interact with the physics system. Press play and intersect the cube with the controller and pull and hold the trigger button.
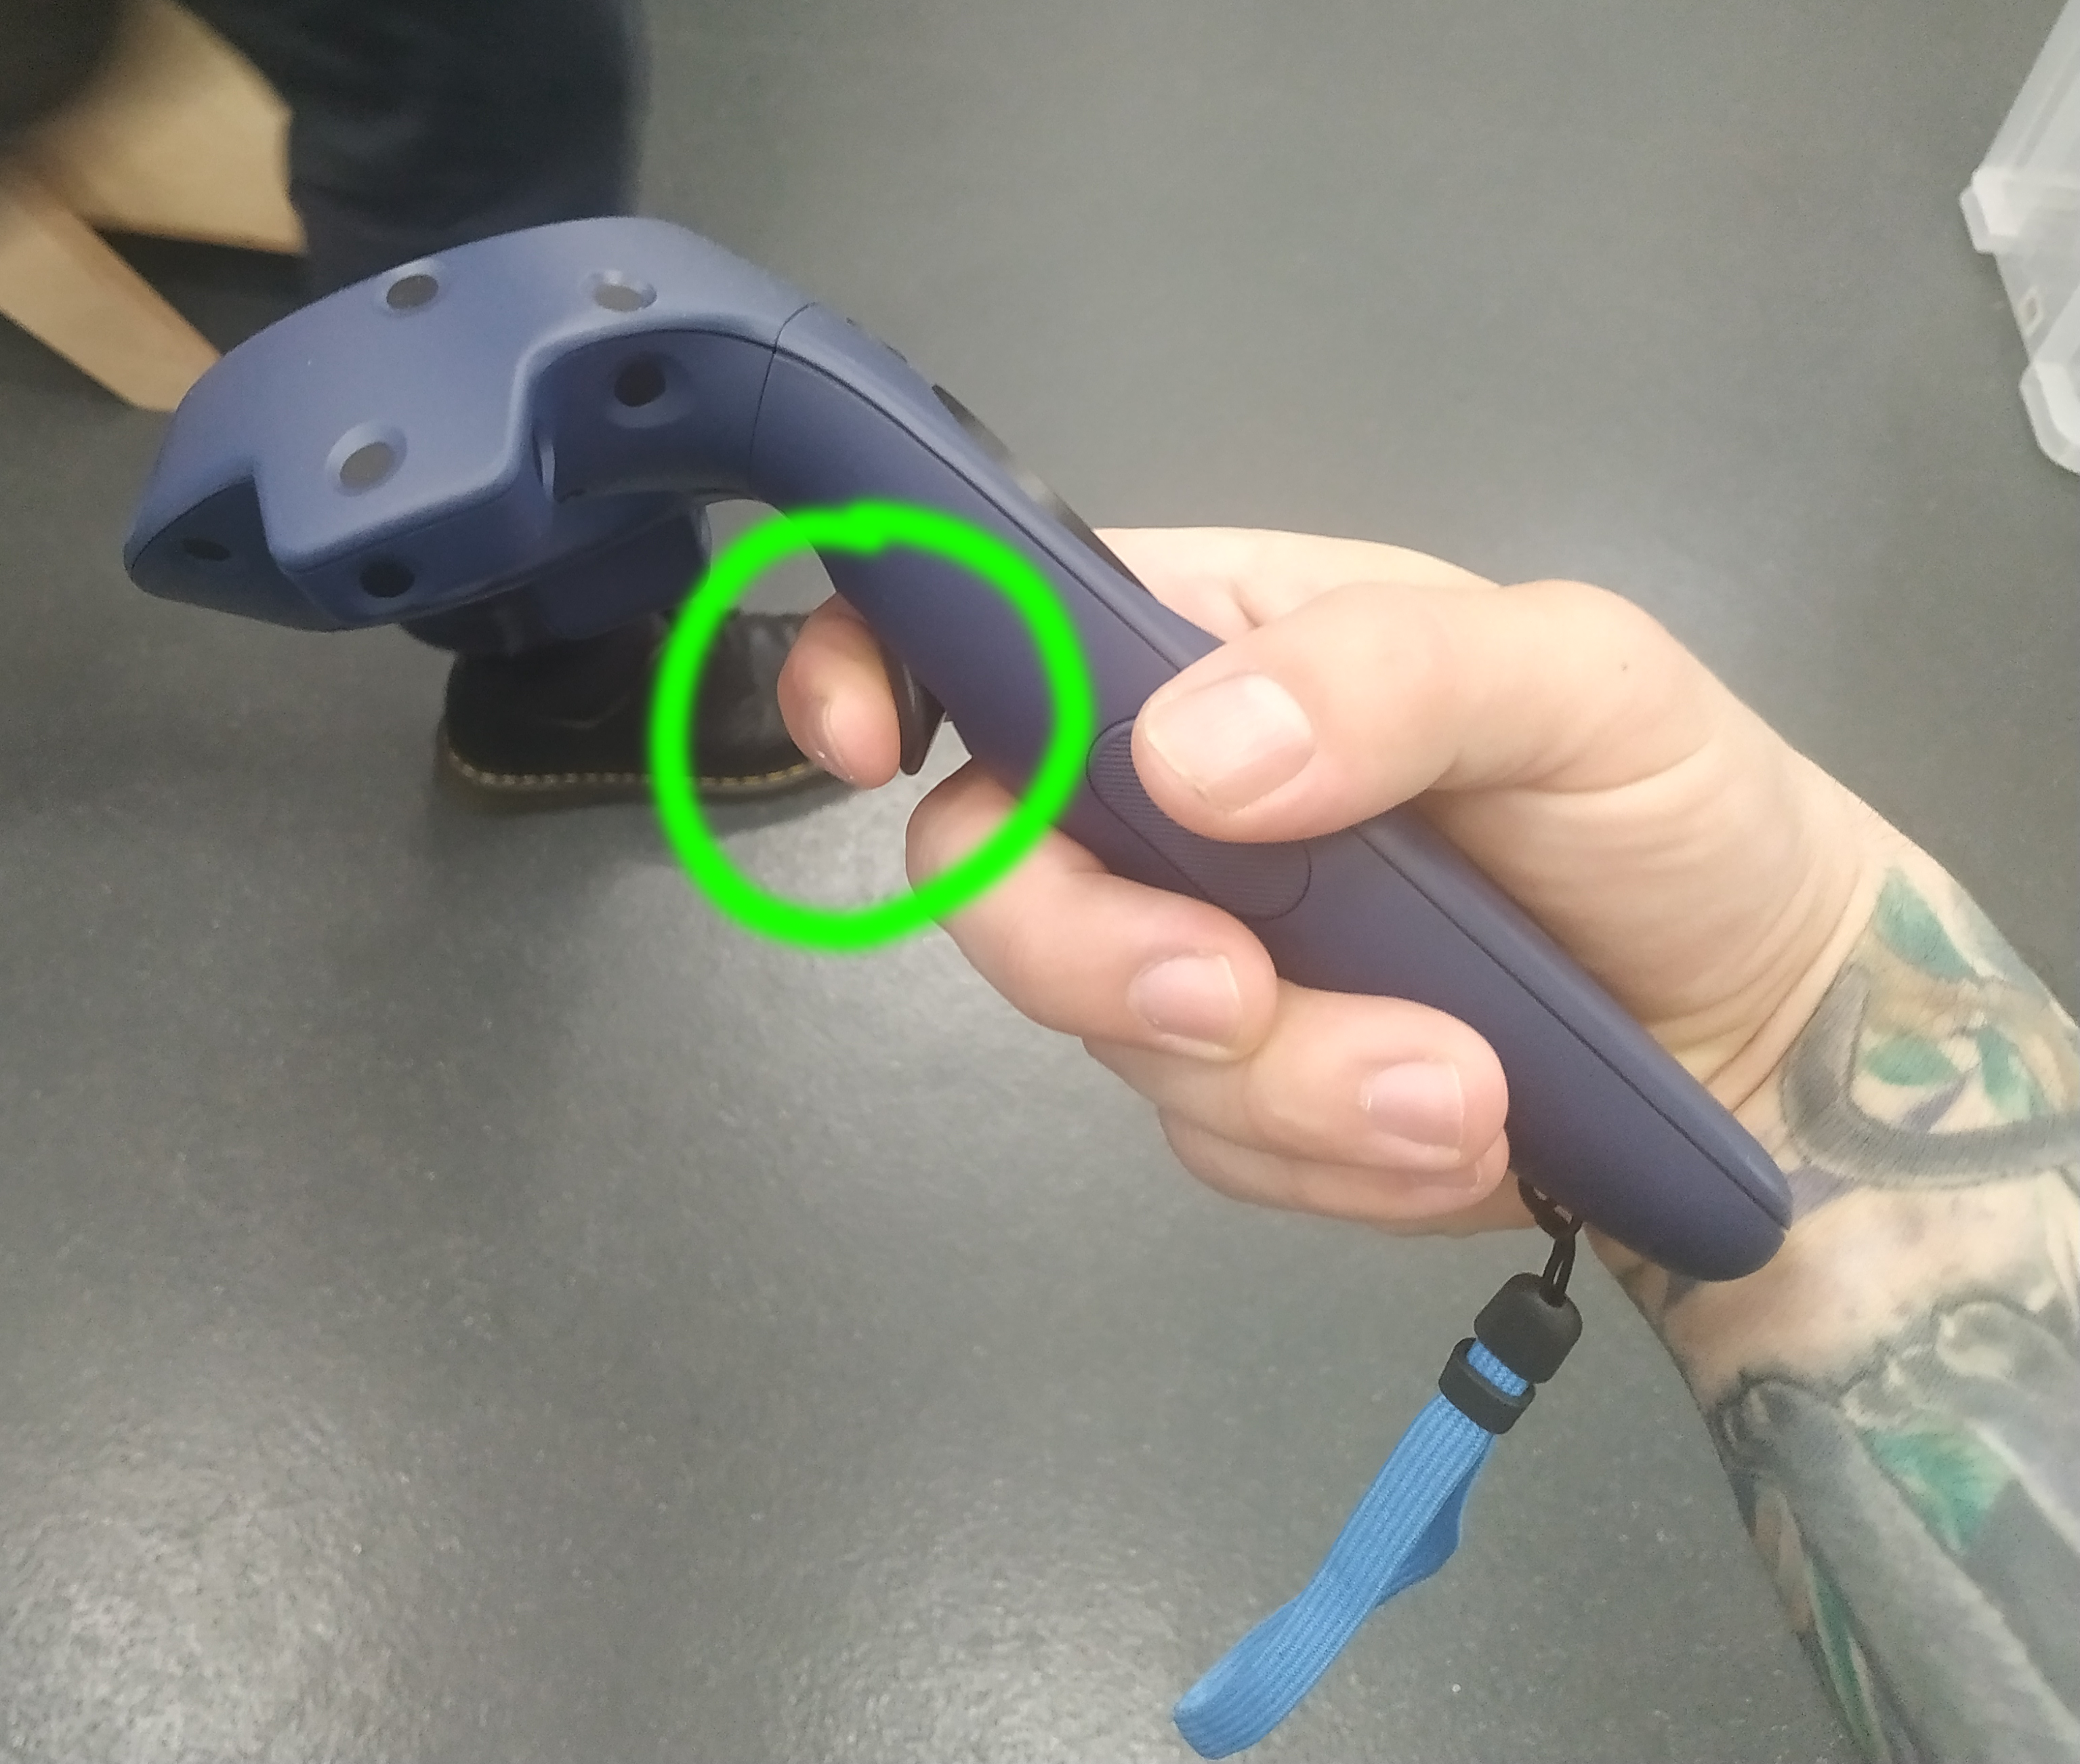
You might notice that both the controller and the virtual hand disappear once you start holding the cube in the air, if you let go the trigger button, you will notice that the cube falls and both the virtual hand and controller reappear.
Let's take a look at the "Interactable" script to understand what is happening, with the "Magic cube" selected, Take a look at the presets on the "Interactable" script found in the inspector. You will discover that the selection box for "Hide hand on attach" is checked.
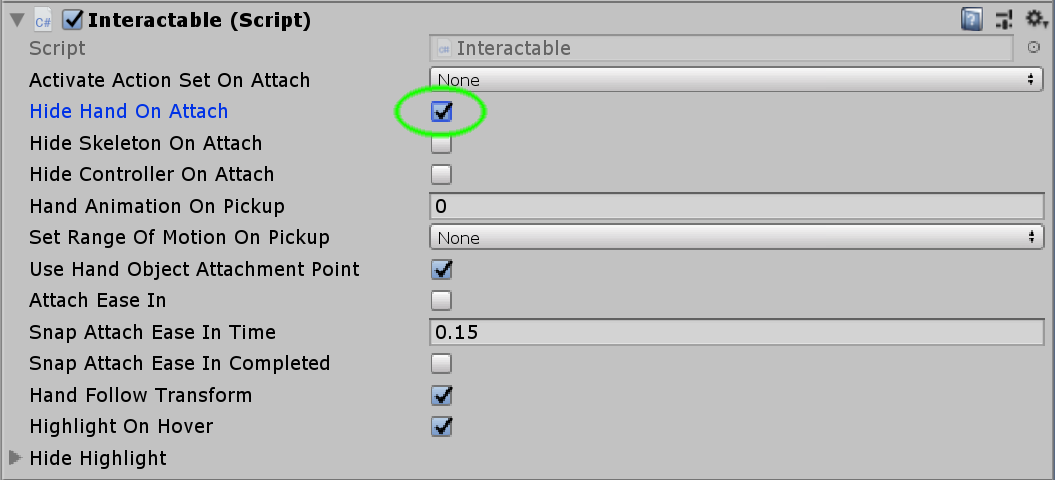
Now let's uncheck the box and try again.

Now the controller is displayed whilst pressing the trigger button, However, the hand seems to be off. Let's give another look at the properties for the "Interactable" script. You might notice that the "Hand follow transform" is also checked, this setting is making the hand model copy the transform values for the "Magic Cube", in order to change this, you just need to uncheck this box, then hit Play, and now you will see the hand properly graving the controller whilst picking up the object.