AR with Unity - Step #1 - Development environment setup
Please notice that this is the first of a series of tutorials progressing from basic concepts to more functional and complex projects.
Aims
This tutorial aims to get you started creating AR applications using Unity and the Vuforia plug-in.
Prerequisites
-
Download and install Unity 2019.2.0f1.
Previous versions might also work, however, this tutorial was made using Unity 2019.2.0f1 (please read instructions below before installing Unity).
-
Create a Unity personal account.
To use Unity you will have to create your own account as you will be prompted to login when you start running the software.
About the Vuforia Engine
As of 2017.2, Unity integrates the Vuforia Engine, this SDK allows you to easily create AR applications that you can deploy on both Android and IOS devices.
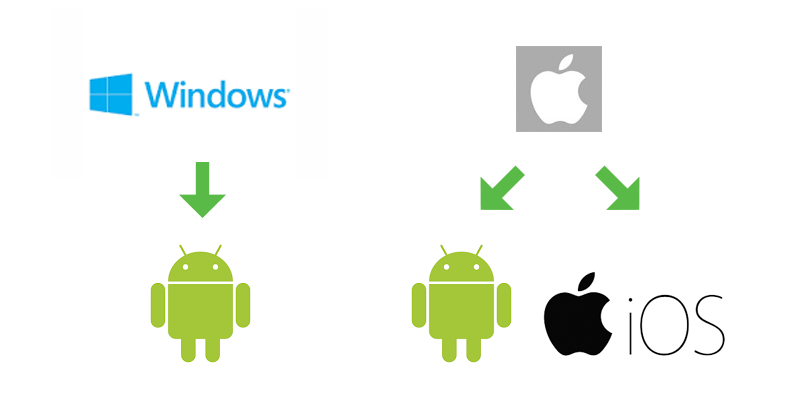
Android and/or IOS build support
To compile mobile applications on your computer, you will need to make sure to download the Android and/or the IOS build support. Please be aware that both Windows and IOS computers might allow you to compile Android apps, however, IOS apps require you to use a MAC computer running Xcode as IOS build is not supported on Windows PCs.
Please keep in mind that in most cases you won't need both Android and IOS build support, think about the kind of device are you planning to use to test/show your project. We found that in most cases, students use just one device. Also, keep in mind that building an app for two different platforms might add significant complexity to your project as you might need to test/debug your app on both platforms.
When installing either of these SDKs you might find your self facing three different scenarios, first, you might be installing 2019.2.0.f1 for the first time, second, you might have Unity already installed on your computer and you are missing the SDKs, finally, you might have a previous version installed on your computer, it does not have the SDK installed and, for some reason, you can't install Unity 2019.2.0f1, all these situations require different procedures that will be explained in the following lines.
Scenario #1 - Installing Unity 2019.2.0f1 for the first time
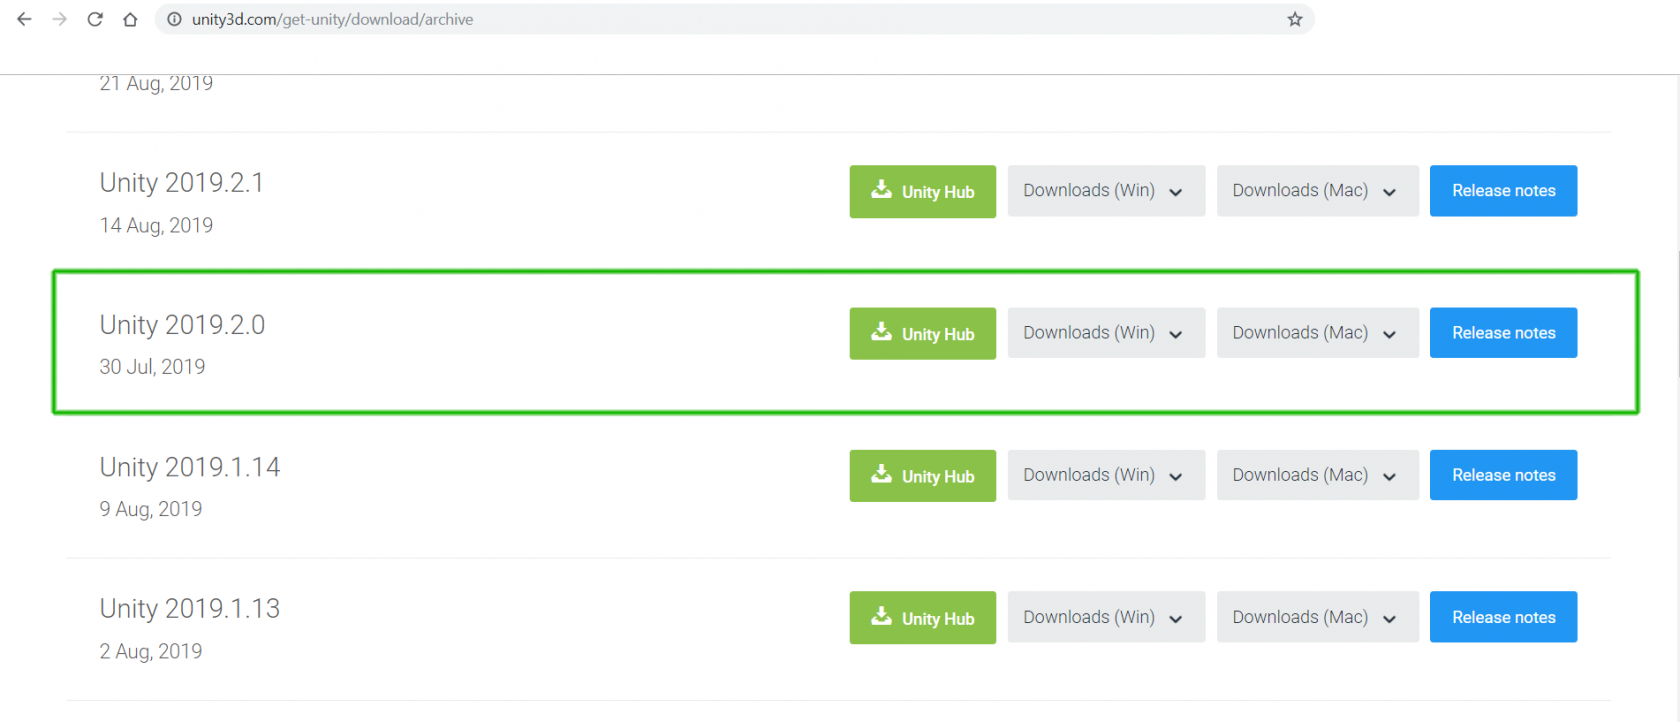
First, we recommend installing the Unity HUB as it will make your life a lot easier when installing and using Unity 2019.2.0f1. After installing the HUB, you just need to go to visit the Unity Download Archive, find the Unity 2019.2.0f1 version and click on the button that says "Unity HUB" this will automatically open the HUB and then run the installation wizard.

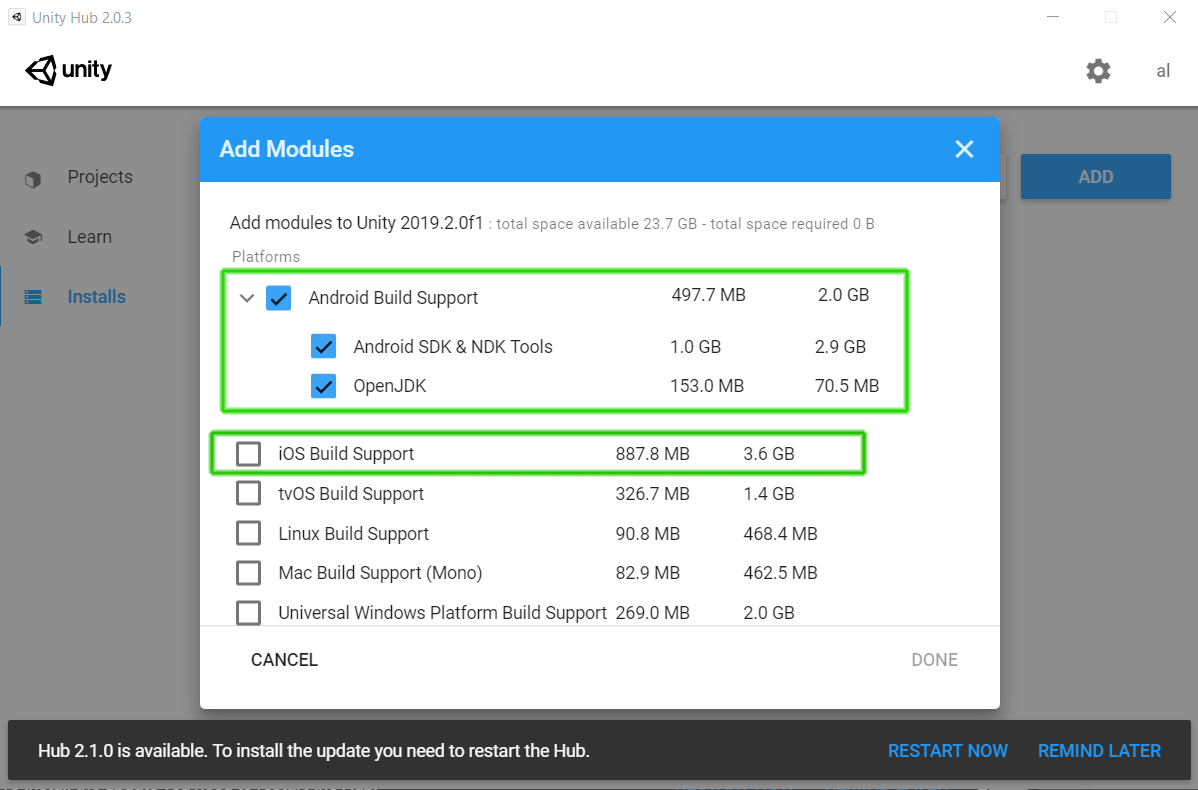
You will see a list of all the available Unity components, you just need to make sure that the Android and/or the IOS build support is selected before continuing with the installation.
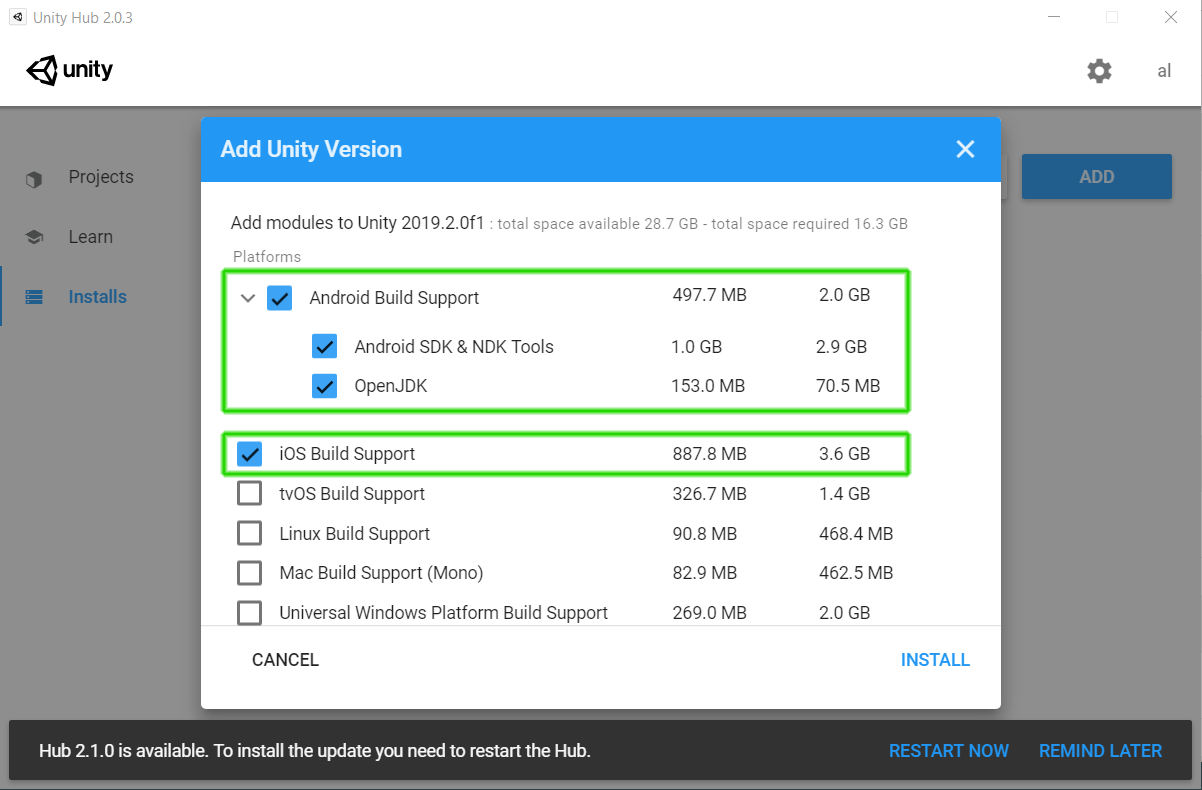
Do notice that the Android build support includes the Software Development Kit (SDK), the Native Development Kit (NDK) and the Java Development Kit (OpenJDK). Just make sure all of them are selected before continuing. After this, you just need to follow the final steps of the installation process.
Scenario #2 - Installing Android and/or IOS build support for a previously installed copy of Unity 2019.2.0f1
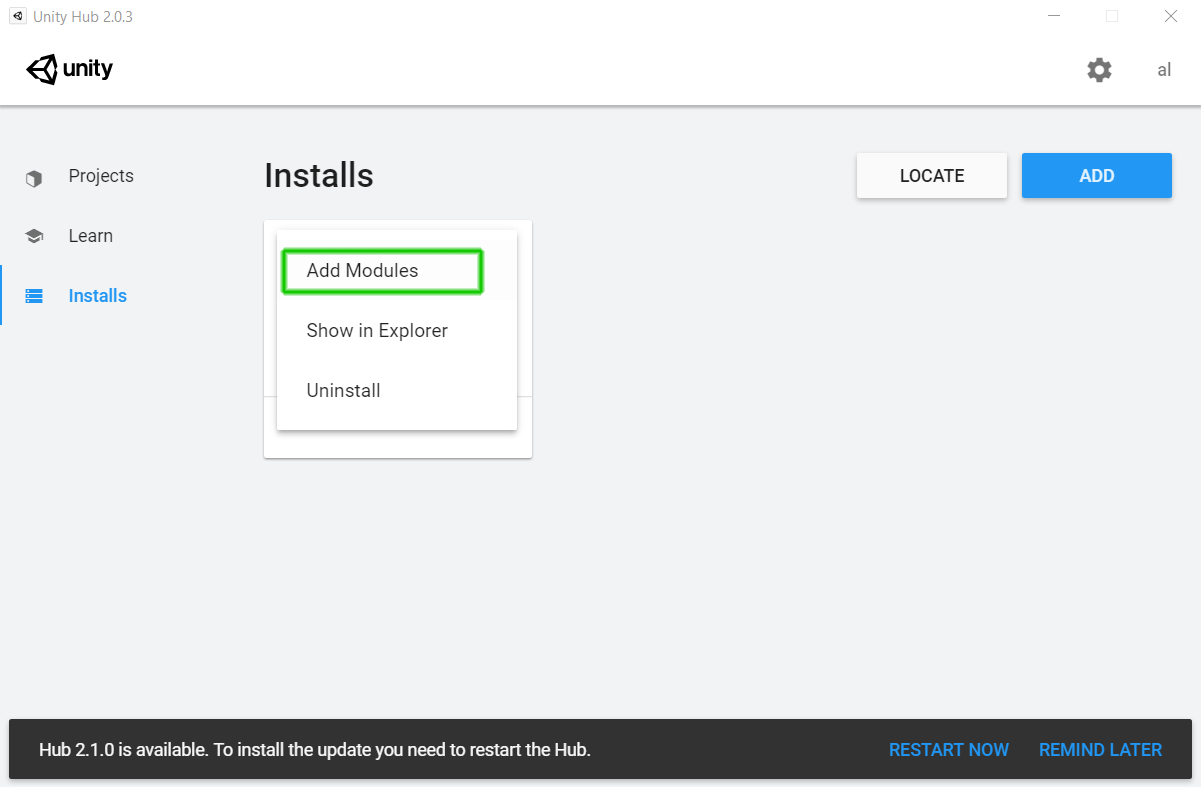
Your previous copy of Unity 2019.2.0f1 must have been installed through the Unity HUB, if you don't have Unity HUB installed then we recommend uninstalling your previous copy of Unity and following the steps for the Scenario #1. To add the Android and/or the IOS build support to your previously installed copy of Unity you just need to open the Unity HUB and click on the installs link, then click on the three dots found on the top right corner of the Unity 2019.2b box. 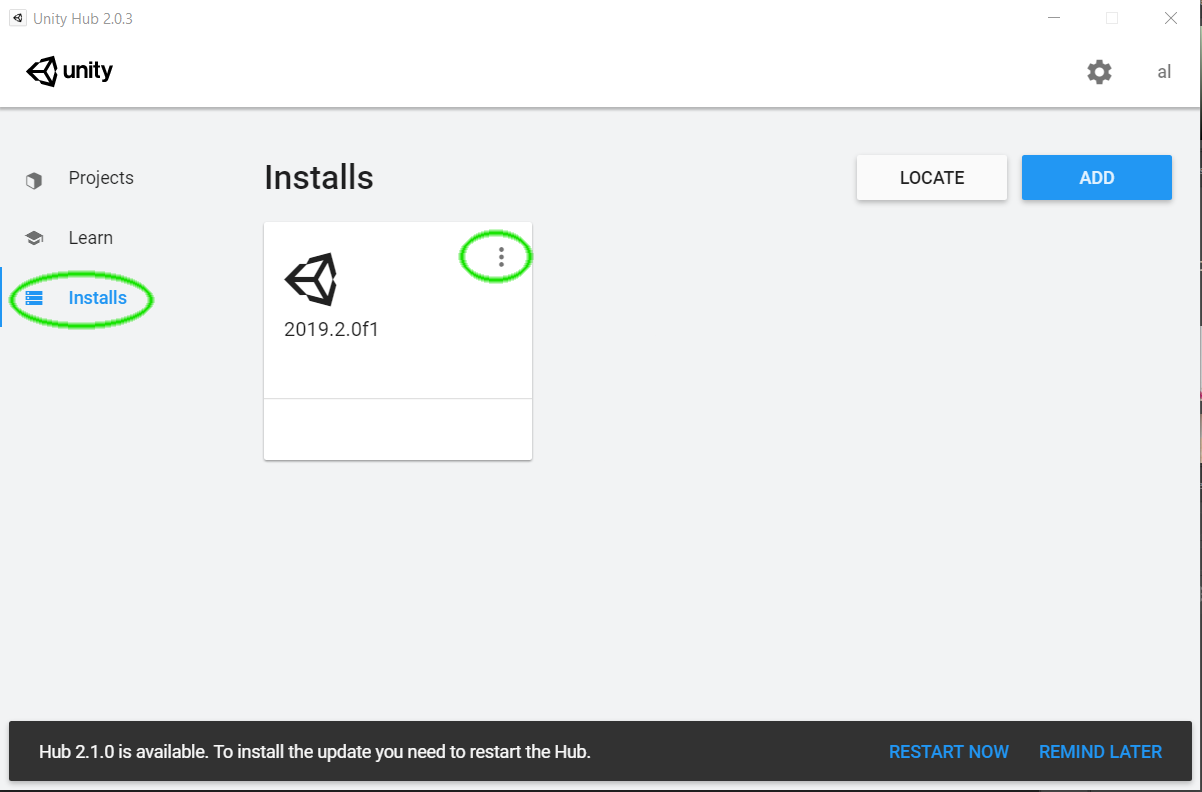
This will display a menu that includes the "Add modules" option, once you click on it, you will see a list of components you can add to your previously installed copy of Unity.
After this, you just need to follow the final steps of the installation process.
Scenario #3 - Installing Android and/or IOS build support for a previously installed older version of Unity
Please be aware that the Unity HUB might allow you to install more than one version of Unity, however, the "Add modules" option might not be available for other Unity versions.
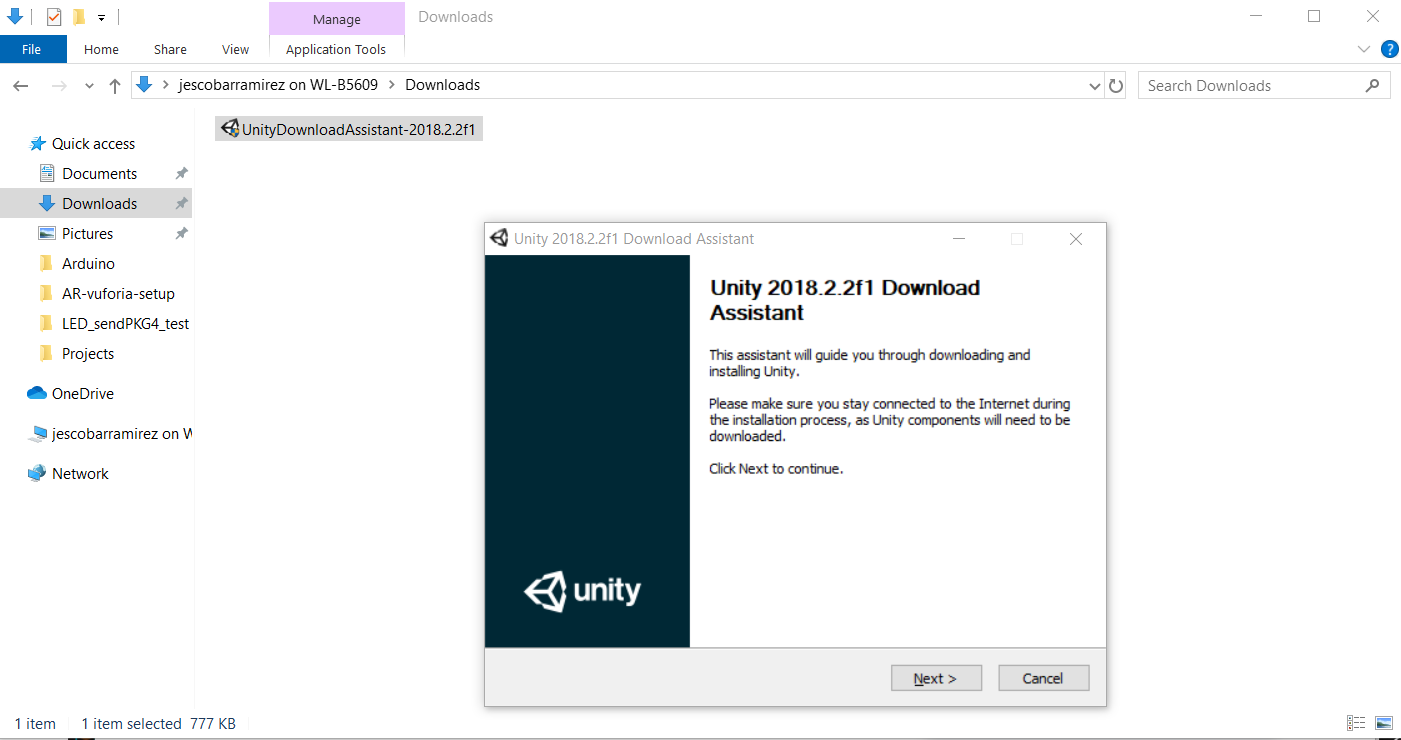
If for some reason you have to use an older version of Unity on your computer and it is missing the Android and/or IOS build support, you will have to visit the Unity download archive, locate your version of Unity and download the Unity installer.
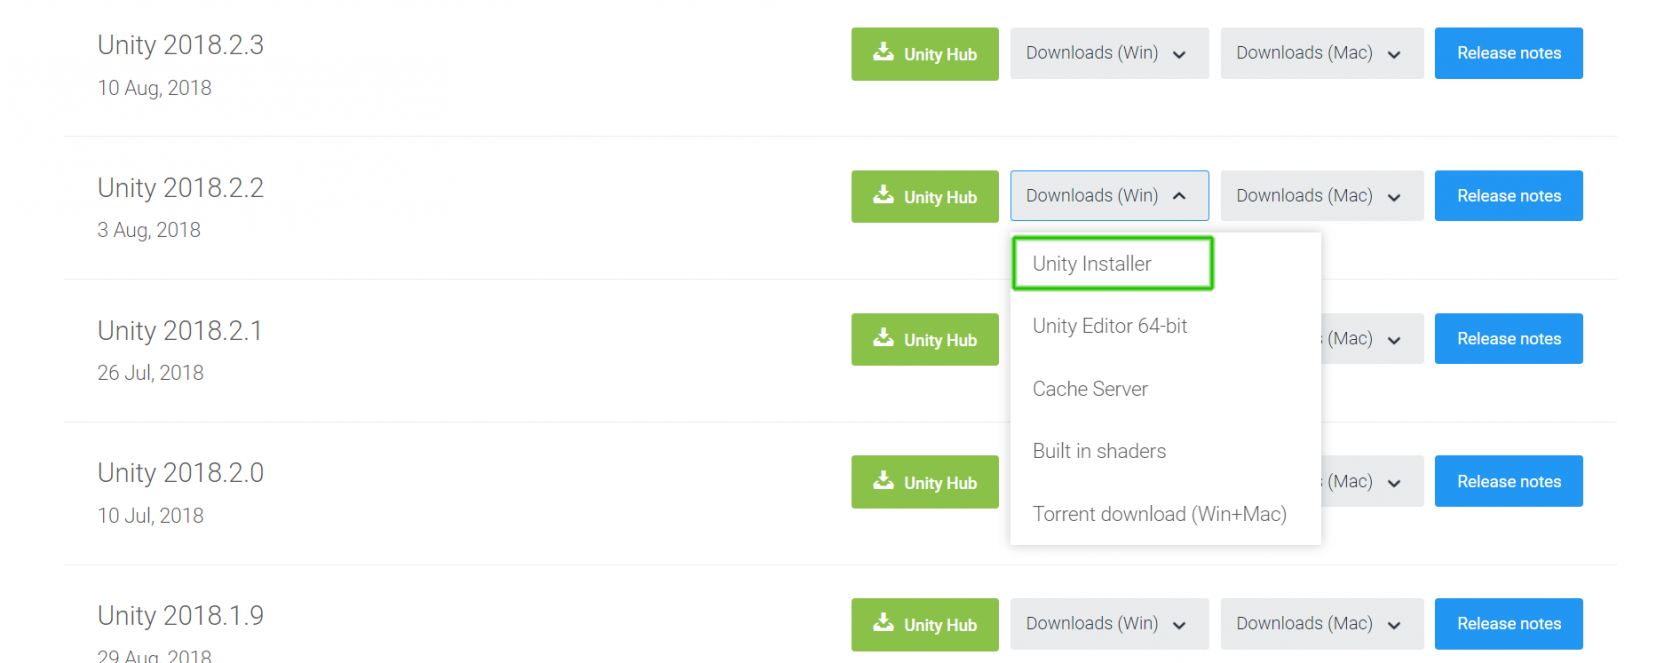
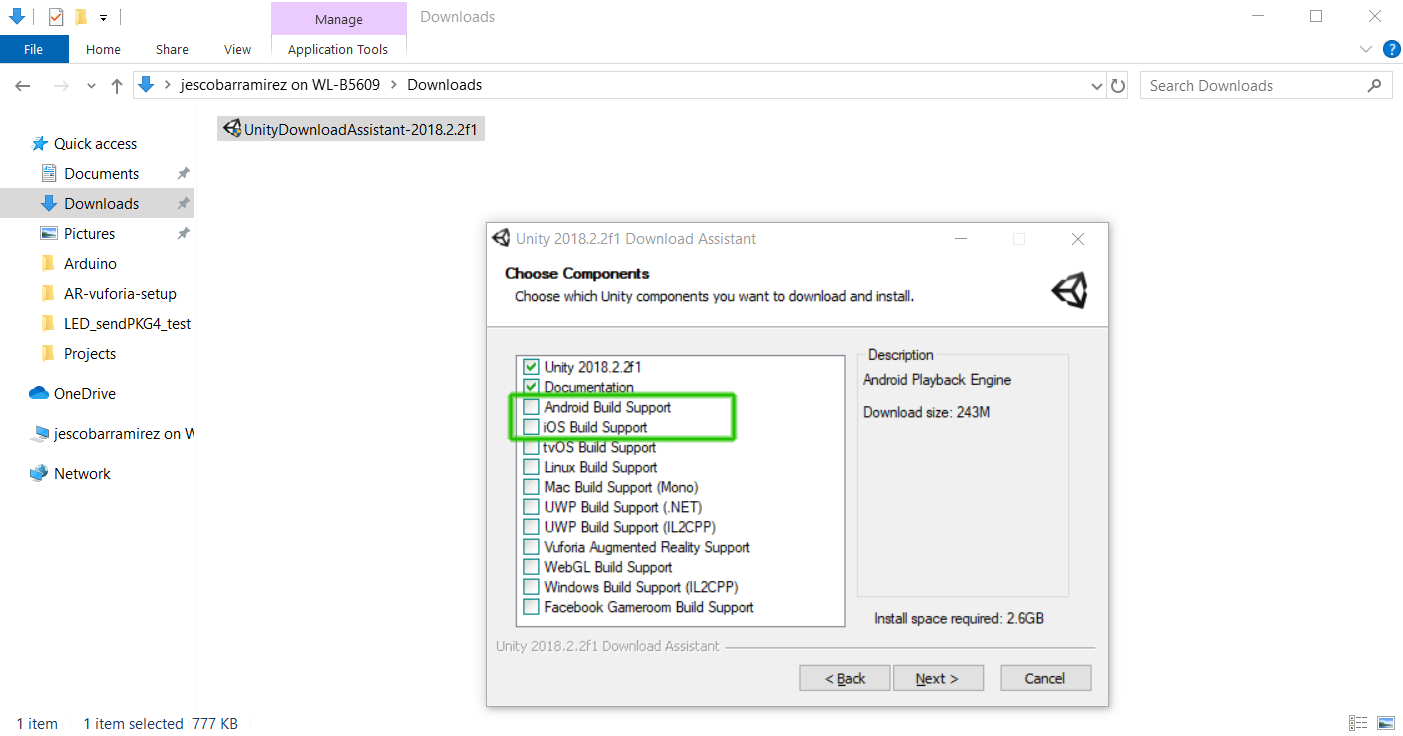
After running the installer, you will get a list of components, do make sure to untick the box next to the Unity editor (first item) otherwise you will reinstall it, select the desired build support and follow all the installation steps.
Please use old Unity versions as a last resort as configuring the development environment might require following more complex procedures and downloading extra components.
Next step - Adding content to your project
In the next step, we will create a free Vuforia developer account, generate a license key and create a target database using your own content.
Go to step #2 - Unity project setup