AR with Unity - Step #2 - Unity project setup
Please notice that this is part of a series of tutorials progressing from basic concepts to more functional and complex projects.
Aims
This tutorial aims to help you setting up a AR Unity project using the Vuforia plug-in.
Prerequisites
-
Developing environment setup.
In order to continue with this project you should make sure to first check our tutorial:
AR with Unity - Step #1 - Developmen environment setup
Understanding Image target AR.
You can use Vuforia to create different types of Augmented Reality projects, in this tutorial, we will be focusing on the creation of an Image target AR project, this means, creating a mobile app that will look for and track a printed image that will act both as a trigger and a spatial reference for your content to be displayed on top of.
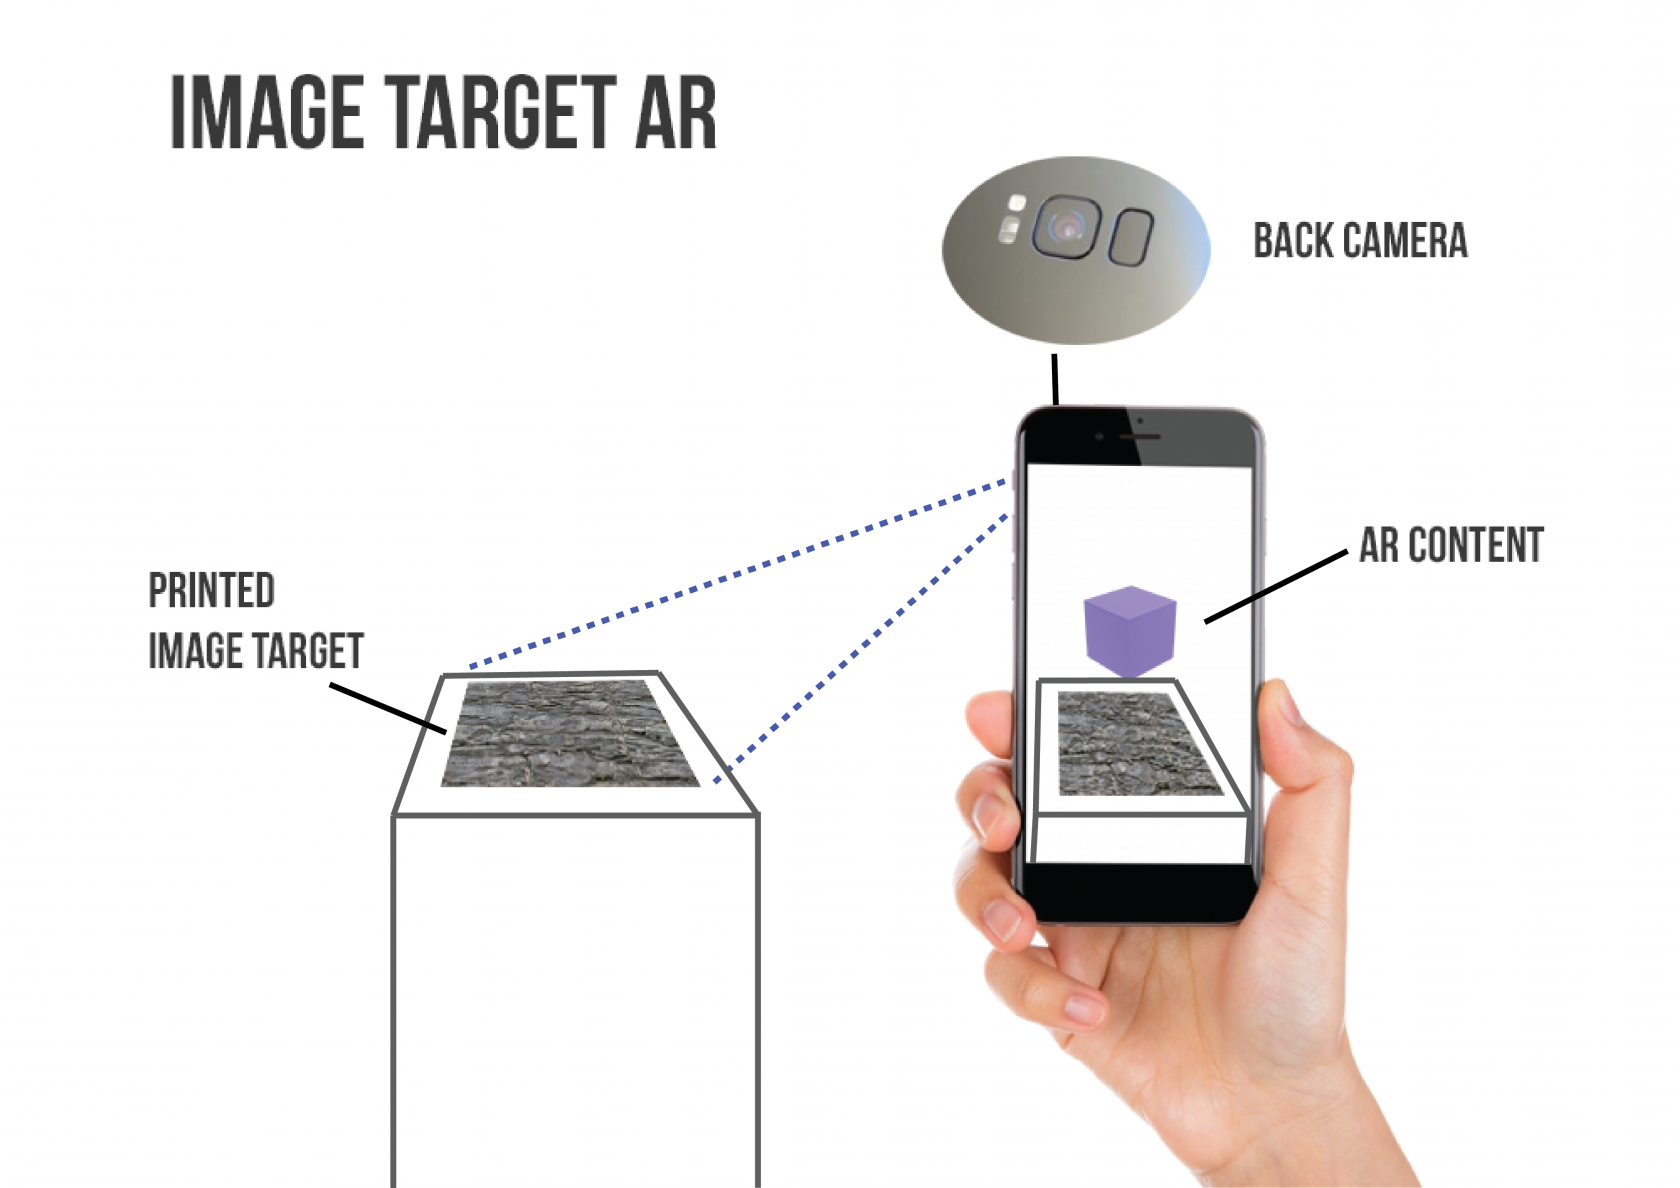
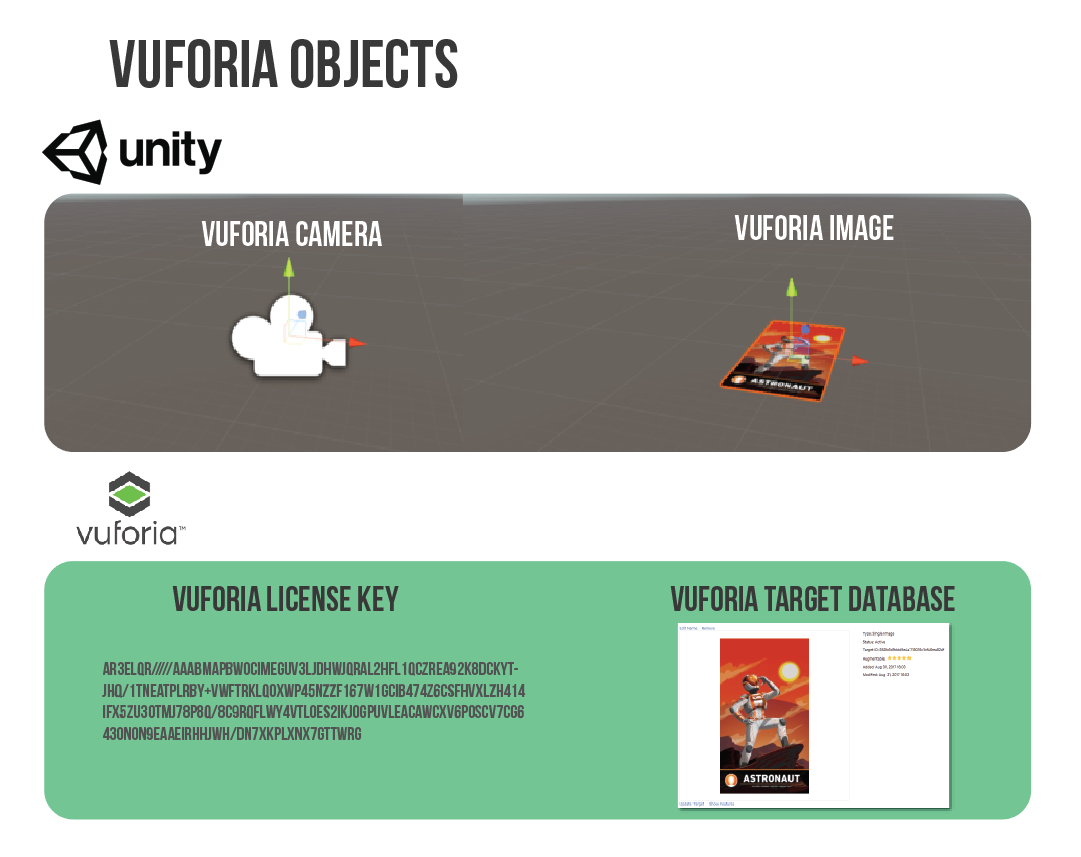
In order to set up your Unity project you will need four different items, the first two: a camera and image object will be available inside of Unity once we enable the Vuforia plugin, the other two: a license key and a target database will be generated in the Vuforia developer webpage (step #3 of this tutorial).
Enabling the Vuforia plugin
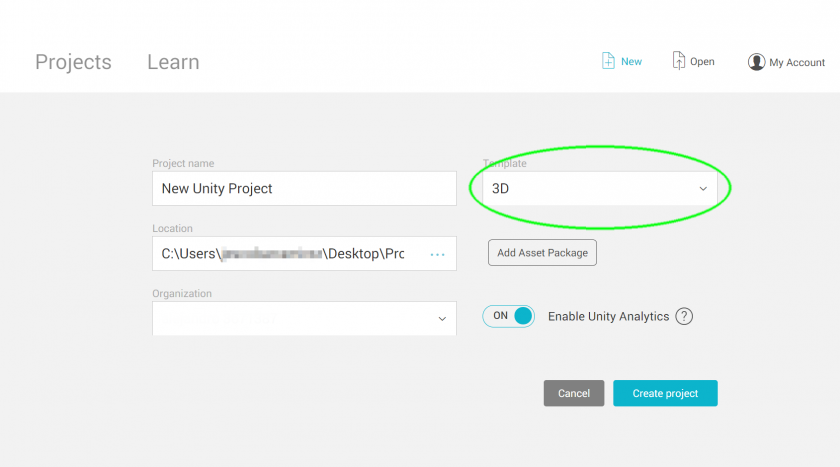
Enabling the Vuforia plug-in (already included in Unity 2019.2.0f1) is a quite straight forward process, first, let's create a new Unity project, please make sure you select a 3D template.
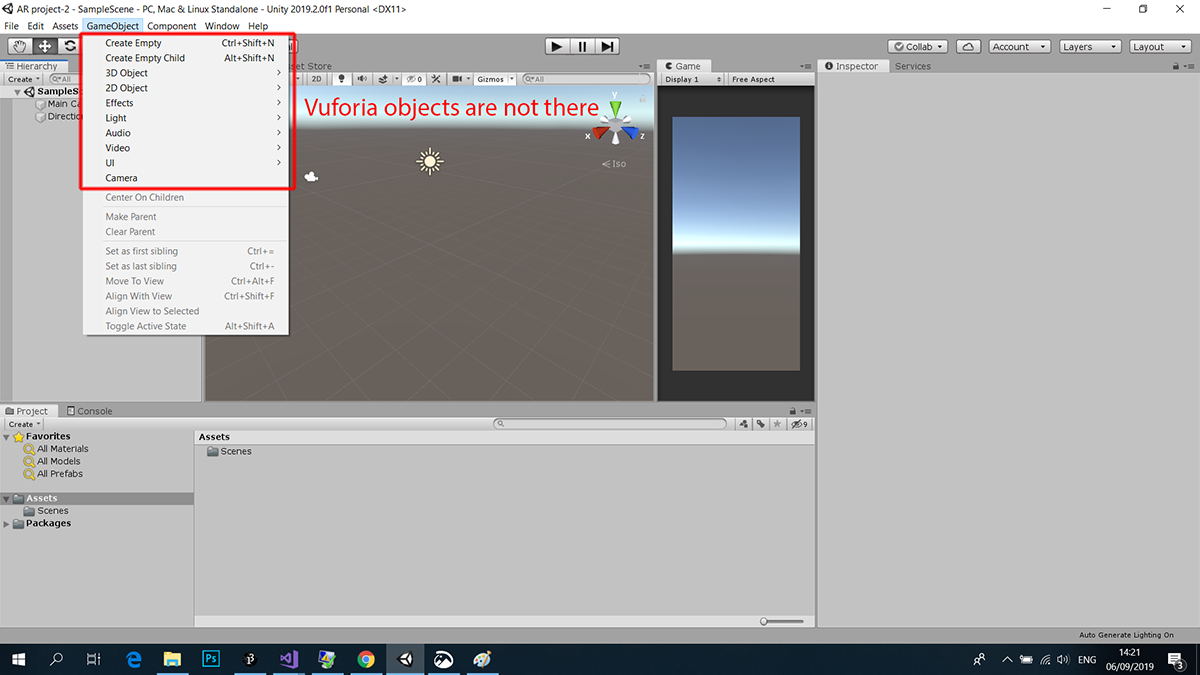
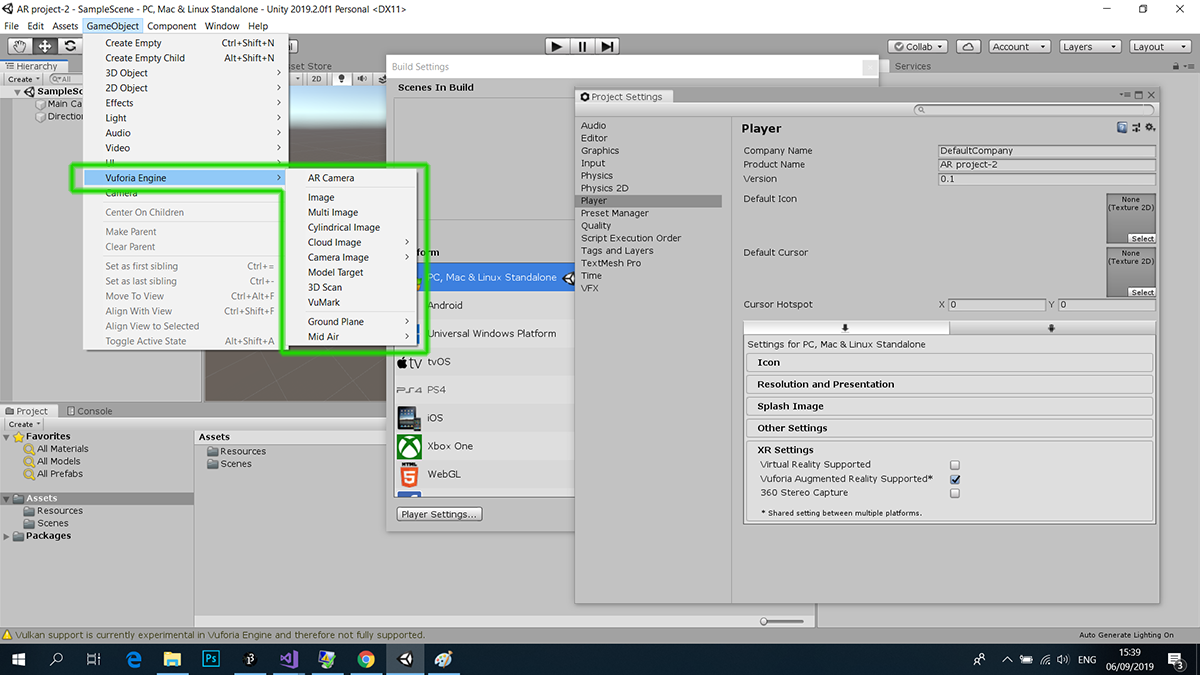
Now let's check the "gameObject" menu as this is were you will find the Vuforia elements once you enable the plug-in, for now, you will notice Vuforia objects are missing.
To enable the plug-in, we need change the player's settings on the project settings panel, the easiest way to do it is by opening the build settings panel found in the File menu and then clicking the "Player settings" button found on the left bottom corner, finally, you will need to tick the "Vuforia Augmented Reality Supported" box found inside the XR settings section.
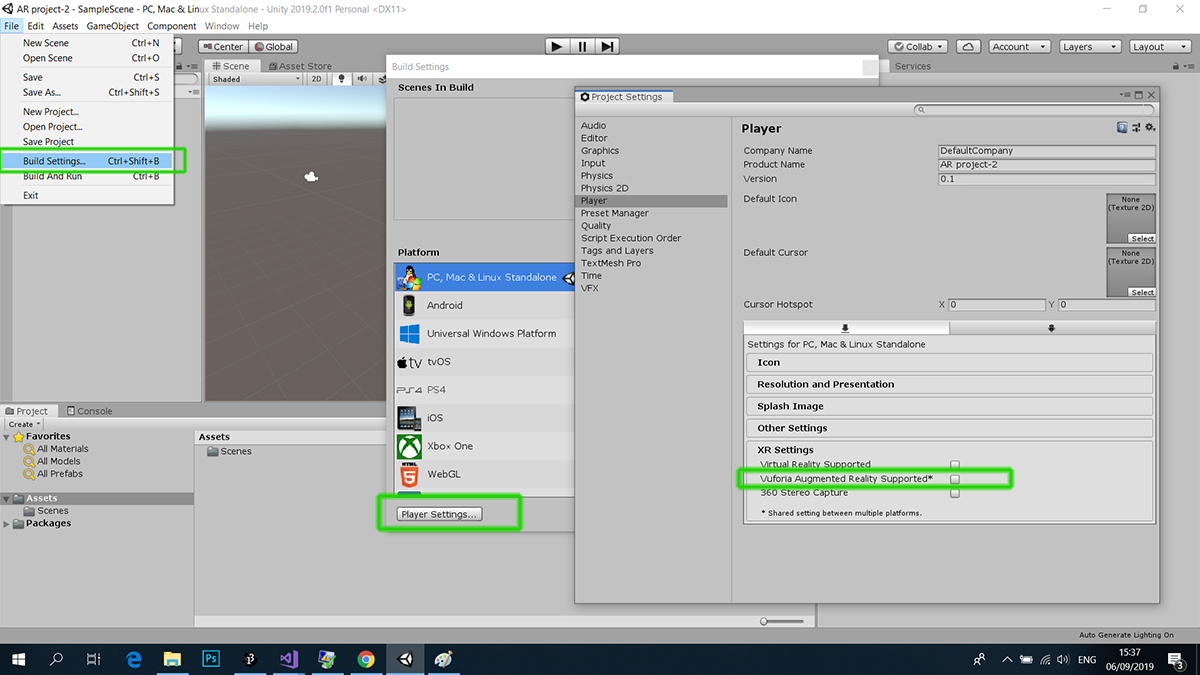
This will install the Vuforia package, once the process finishes, you will be able to find and access the Vuforia objects collection through the GameObject menu.
Adding Vuforia objects to your project
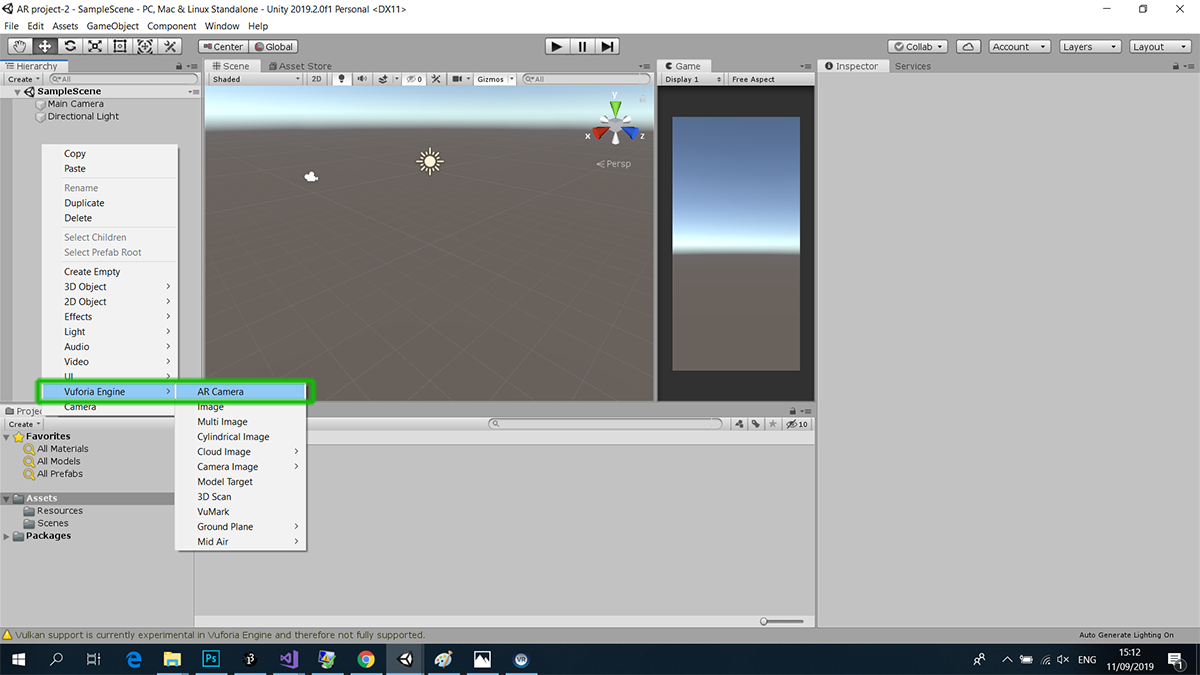
With the Vuforia plug-in enabled in your project, right-click on top of the hierarchy panel and place the cursor on top of the Vuforia Engine submenu and then click on top of the AR Camera option. This will add a camera object to your scene.
Now, with the Vuforia camera selected, let's take a look in the inspector. Down at the bottom, you will find the Vuforia Behaviour script component.
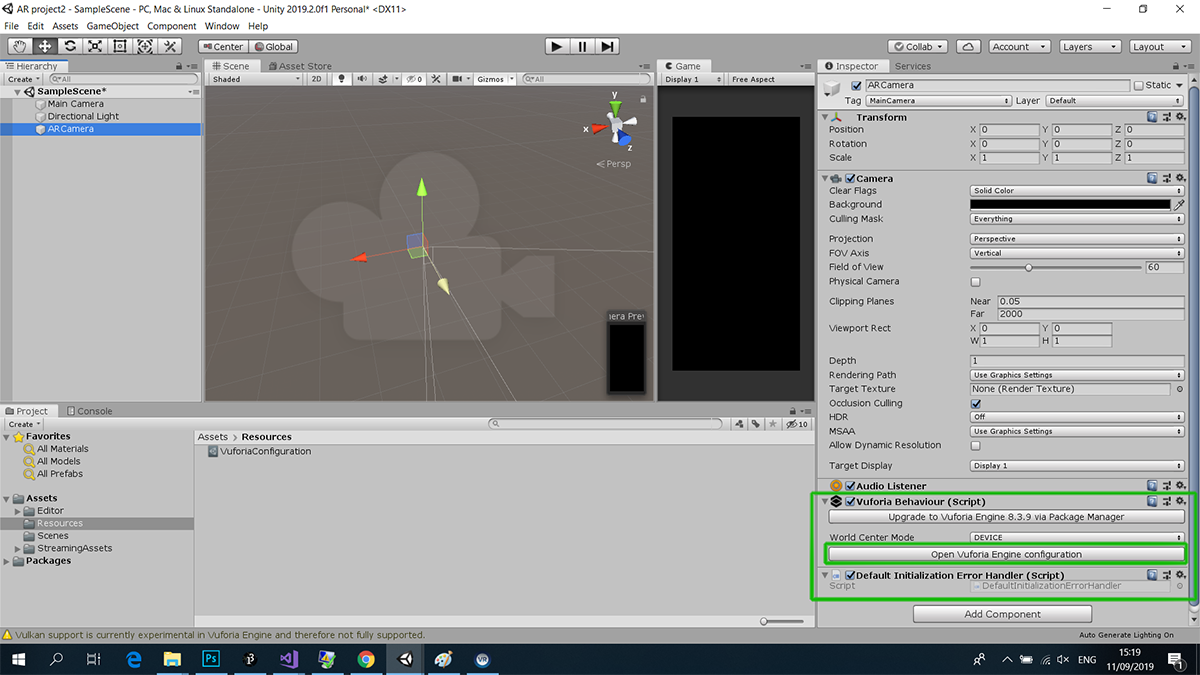
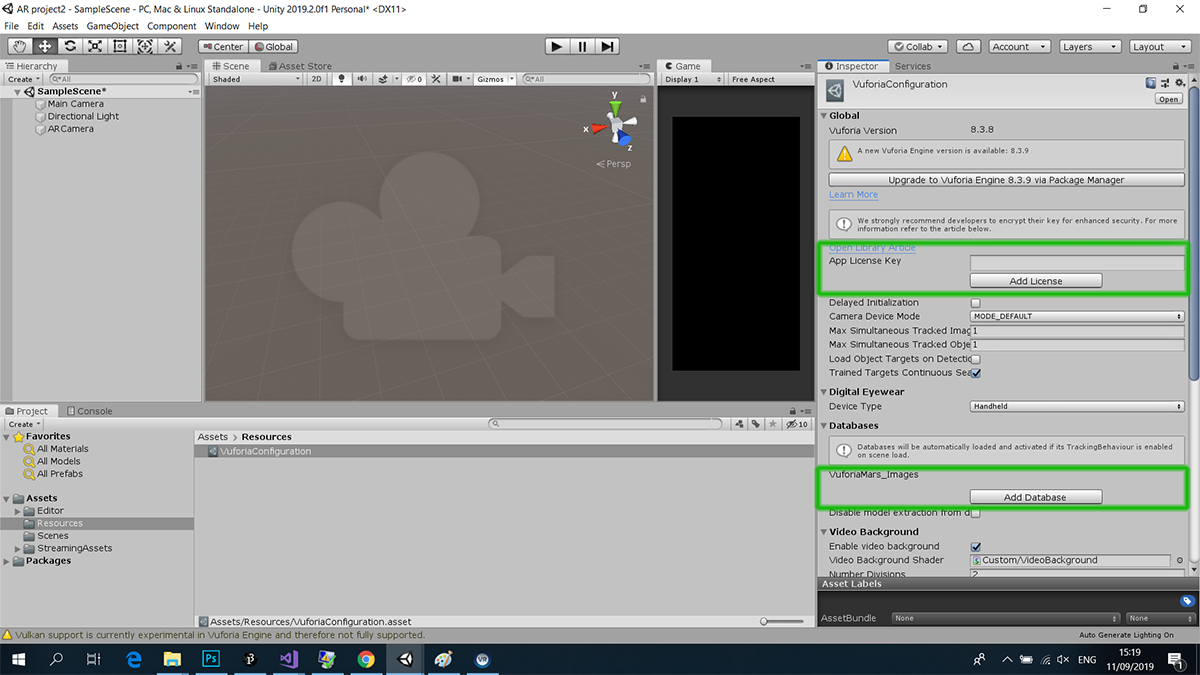
If you click on top of the "Open Vuforia Engine Configuration" button, you will be able to access the panel where you should paste your License Key and add your target database, we will come back to this panel later on.
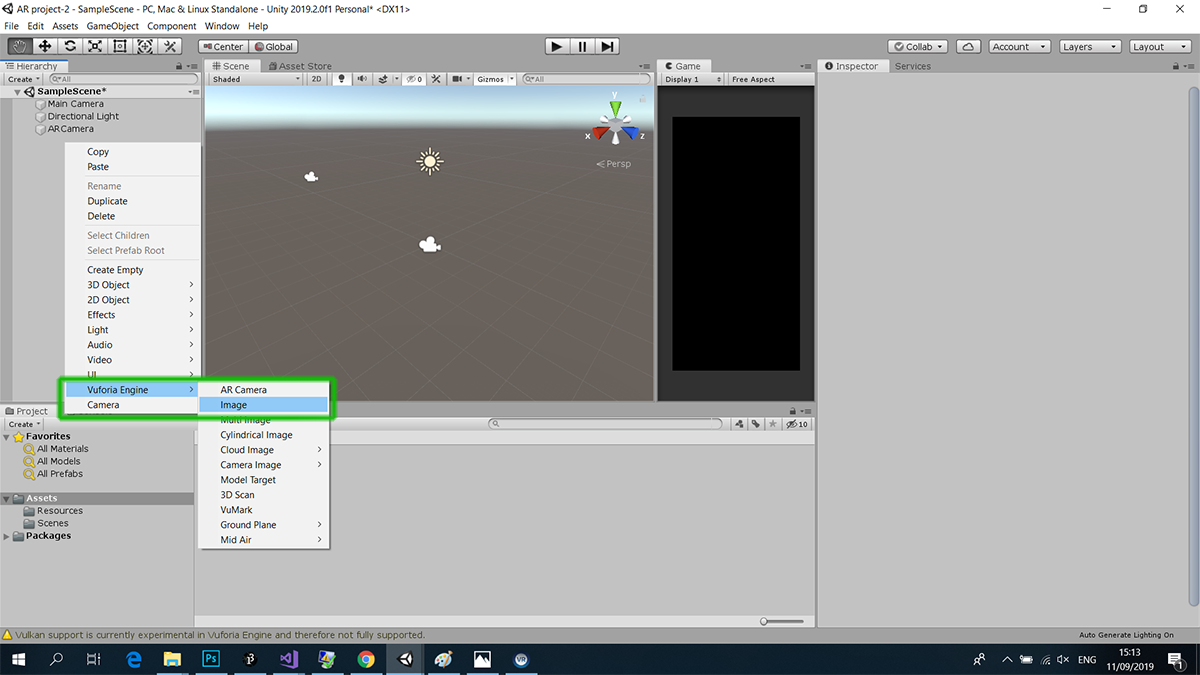
Now, let's add the image target object, this is the game object that will hold all the information related to the target image you are going to use as a trigger for your content. Again, right-click on top of the Hierarchy panel, select the Vuforia Engine submenu and this time, click on top of the Image option, this will add an image target object to your scene.
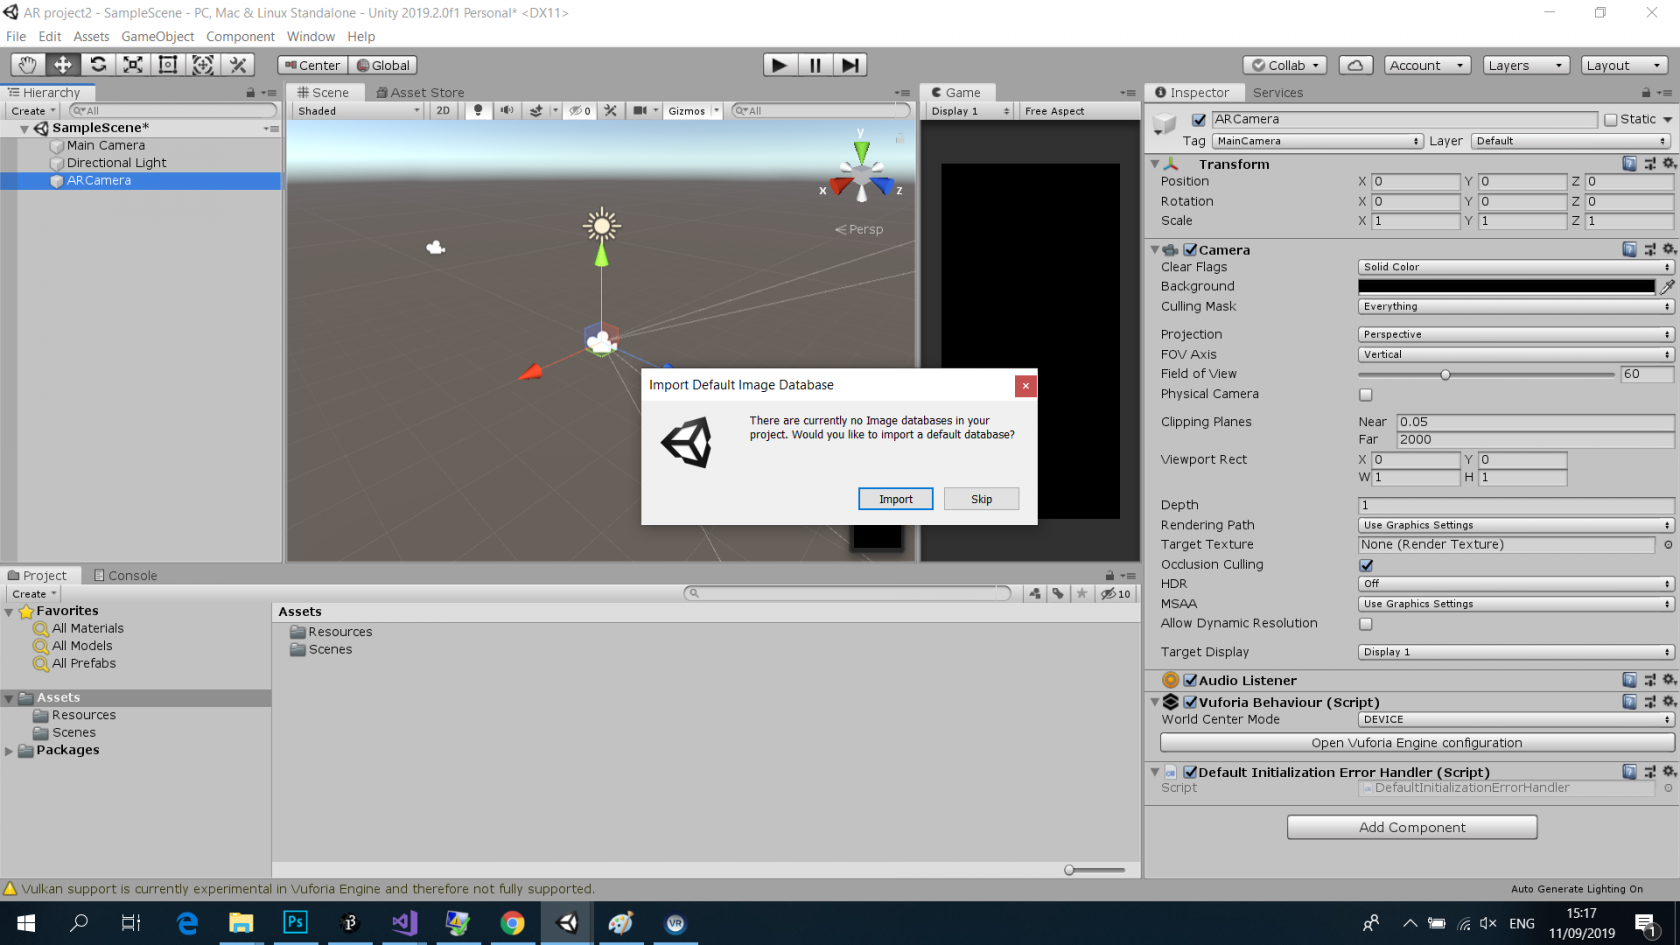
Please note that if you are adding an image object to your project for the first time, Unity will ask you if you want to include a default database, please click the "Import" button, this will automatically insert a default image as a texture for your image object. importing this default database will be useful for you to understand how Vuforia works and won't interfere with the future development of your project.
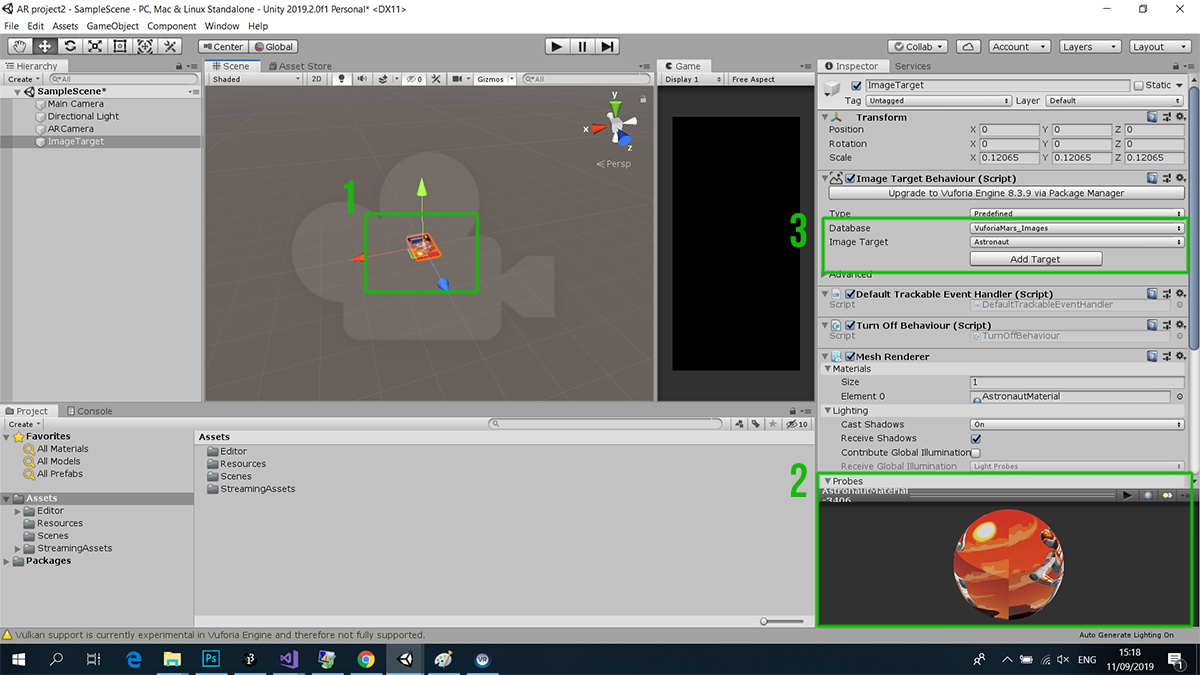
If you take a look inside of the Scene panel (element #1 on the image below), you will notice a plane with an image applied as a texture (see element #2), this is the digital image that your mobile app is going to compare to your physical print in order to trigger your content. Now, if you look in the Inspector (see element #3), you will see a reference to both a database and an image target, this is the example content you have just imported. Once you insert your custom content, we will come back to this panel to replace the sample content.
Next step - Adding content to your project
In the next step, we will create a free Vuforia developer account, generate a license key and create a target database with your content.
Go to step #3 - adding content to your project