3D Scanning a face for MetaHuman
This guide will show you how to create a realistic copy of yourself into a MetaHuman for you to use in digital content. This guide assumes you have a basic knowledge of 3D modelling but will cover most of the steps required.
The approach we are going to use to create the MetaHuman is called Mesh to MetaHuman. This involves us creating a mesh model of the face and then relying on Unreal Engine to match the facial features of the scan to a new digital subject.
1. Using the Reality Scan app.
Download the Reality scan app on your phone. After launching the app, you should be able to create a new project. This will open your phone camera.
2. Prepare your subject and lighting.
You will get the best results when scanning in natural, neutral lighting with no harsh shadows or highlights. Try to brush hair back or use a hairband to hold any hair away from the forehead. Note: This will not work with long facial hair or accessories.
3. Begin your scan.
Once your subject is ready, you can begin the scanning process. The scan works by you taking multiple pictures of the subject from different angles. The software will then build a model from your photographs. Be sure to take pictures from many different angles while holding the phone steady.
- Try to get a low angle so the chin area is captured correctly.
- Get a few wide angle pictures so that the sides are captured correctly.
- It is common for a scan to require 50+ pictures so don't worry if you think you are taking too many. The more pictures you take, the more accurate your scan will be.
- Make sure your subject maintains a neutral expression and does not move. Your scan will not be accurate if your subject moves too much.
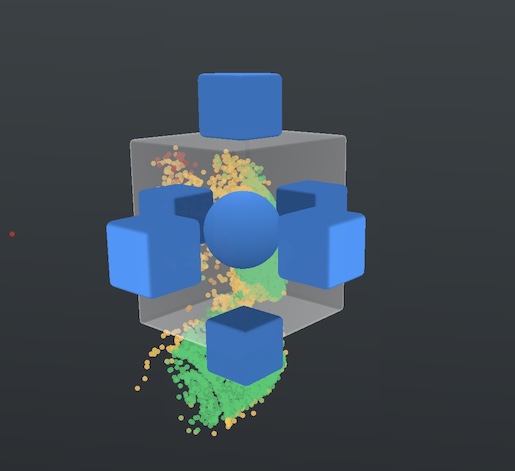
4. Previewing the scan
After you have taken a few pictures, you will start to see coloured points start to appear on the screen. This is the app building the Point Cloud of your model.

As you can probably tell, the dots are green if the pictures have captured a good amount of data.
Yellow dots are alright on the edge of the face because we won't be using the whole model for this process. If any portions of the face are coloured red, you should probably add some more pictures or re-do the process entirely.
We also want to crop our scan to save the processing power for the parts that really matter. You should adjust this crop box to contain the head of your model but not any excess points that were captured.
After this, you should wait for the model to generate. This can take a couple of minutes. You are free to press continue after the model is generated and wait for the processing.