How to use a Heart Beat Sensor
What is a Heart Rate Sensor?
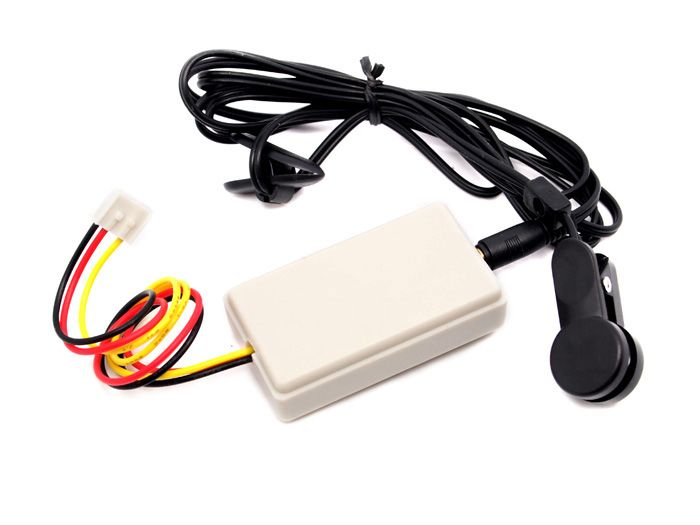
Heart Rate Sensor a plug-and-play sensor that can easily incorporate live heart-rate data into projects. In the lab, we offer the oneEar-clip/Finger-clip Heart Rate Sensor from WhaddaSeeed Studio, but this tutorial will work for.
Adafruit Pulse Sensor Amped as well. Know more about Pulse Sensor
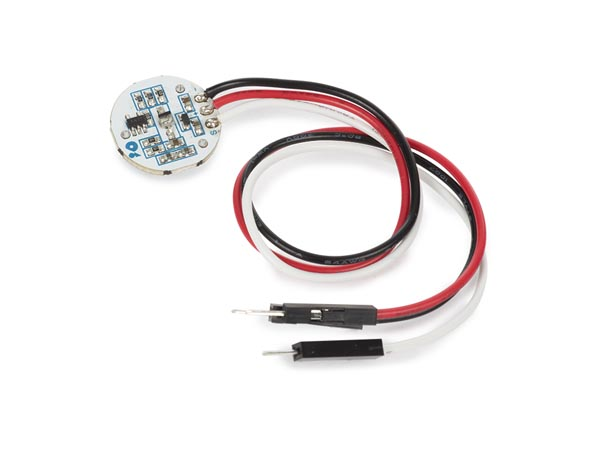
For other popular heart rate sensors that look like below, we found it to be tricky to use. The user cannot press on the sensor too hard or too soft, otherwise you will get very unstable reading.

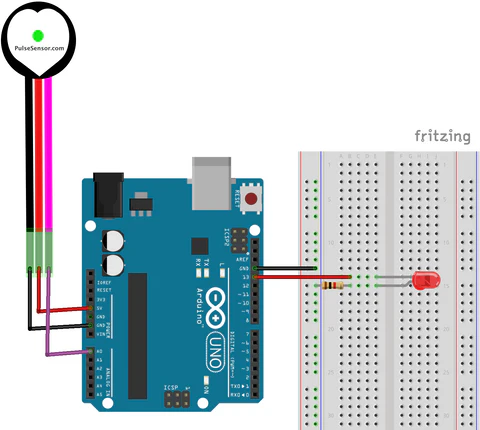
Wiring
+pinRed to 5V (Power)S pinYellow to A0 (Signal)-pinBlack to GND (Ground)
Get Started
This example will print the BPM on the serial monitor and blink the builtin LED to indicate each beat.
int PulseSensorPurplePin = A0;    // Pulse Sensor connected to analog pin A0
int LED = LED_BUILTIN;            // On-board LED
int Threshold = 550;              // Threshold for detecting a heartbeat

int Signal;                       // Holds raw analog reading
bool PulseDetected = false;       // True when a beat is detected
unsigned long lastBeatTime = 0;   // Time (ms) of the last beat
float BPM = 0;                    // Calculated Beats Per Minute

void setup() {
  pinMode(LED, OUTPUT);
  Serial.begin(115200);
}

void loop() {
  // Read the sensor
  Signal = analogRead(PulseSensorPurplePin);

  // Check if signal crosses the threshold upward (beat detected)
  if (Signal > Threshold && !PulseDetected) {
    PulseDetected = true;  // mark that we’re in a beat

    unsigned long currentTime = millis();
    unsigned long delta = currentTime - lastBeatTime;

    if (lastBeatTime > 0) {  // skip first beat (no interval yet)
      BPM = 60000.0 / delta;  // 60000 ms per minute
      Serial.print("BPM: ");
      Serial.println(BPM);
    }

    lastBeatTime = currentTime;
    digitalWrite(LED, HIGH);  // flash LED on beat
  }

  // When signal goes back below threshold, reset for next detection
  if (Signal < Threshold && PulseDetected) {
    PulseDetected = false;
    digitalWrite(LED, LOW);
  }

  // Small non-blocking pause (optional for stability)
  // Just ensures serial output isn’t too fast
  static unsigned long lastPrint = 0;
  if (millis() - lastPrint > 20) {
    Serial.print("Signal: ");
    Serial.println(Signal);
    lastPrint = millis();
  }
}
This example GettingStartedProject will print your heart rate on the Serial Potter, you will see somthing similar to the hospital machine.
//  Variables
int PulseSensorPurplePin = 0;        // Pulse Sensor PURPLE WIRE connected to ANALOG PIN 0
int LED = LED_BUILTIN;   //  The on-board Arduion LED


int Signal;                // holds the incoming raw data. Signal value can range from 0-1024
int Threshold = 540;       // Determine which Signal to "count as a beat", and which to ingore.


// The SetUp Function:
void setup() {
  pinMode(LED,OUTPUT);         // pin that will blink to your heartbeat!
   Serial.begin(115200);       // Set's up Serial Communication at certain speed.

}

// The Main Loop Function
void loop() {

  Signal = analogRead(PulseSensorPurplePin);  // Read the PulseSensor's value.
                                              // Assign this value to the "Signal" variable.

   Serial.println("Signal " + String(Signal)); // Send "reading " followed by the Signal value to Serial Plotter.


   if(Signal > Threshold){                          // If the signal is above "550", then "turn-on" Arduino's on-Board LED.
     digitalWrite(LED,HIGH);
   } else {
     digitalWrite(LED,LOW);                //  Else, the sigal must be below "550", so "turn-off" this LED.
   }


delay(20);


}