How to use MatrixPortal M4
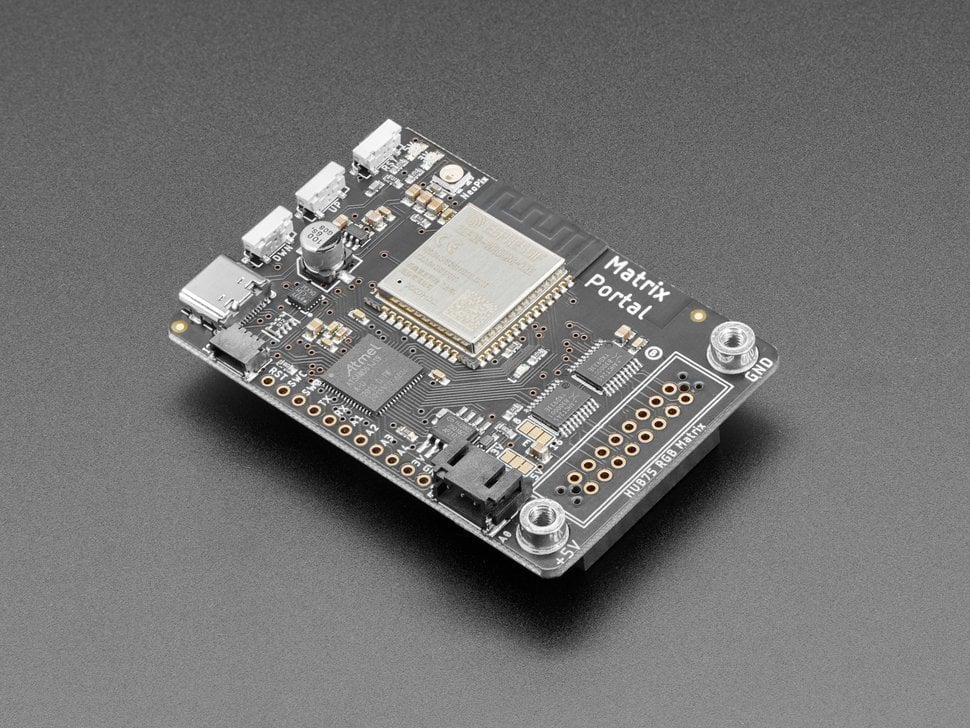
What is GroveMatrixPortal Serial Bluetooth v3.0M4
GroveThe -MatrixPortal Serial BluetoothM4 is ana easy-to-usedevelopment moduleboard compatiblecreated by Adafruit designed to control RGB LED matrices. It is equipped with thean existingATSAMD51 Grovemicrocontroller Base(Cortex Shield,M4) and designedhas built-in Wi-Fi support thanks to the ESP32 coprocessor.
Here are some key features of the MatrixPortal M4:
- Microcontroller: ATSAMD51, Cortex M4 processor running at 120 MHz.
- Coprocessor: ESP32 handles Wi-Fi and network communication.
- Memory: 512KB of RAM, 8MB of QSPI flash storage.
- Matrix Control: Dedicated connectors for
transparentRGBwirelessLEDserialmatricesconnection(HUB75setup.interface), allowing direct control without needing additional hardware. - Power: Can be powered via USB-C or through the matrix’s power supply.
- Programming: Supports programming via CircuitPython and Arduino IDE.
- Wi-Fi Connectivity: Useful for IoT projects that require network connectivity, such as weather stations, stock tickers, or message boards.
It’s great for building projects that involve large, colourful LED displays, such as scrolling text, interactive dashboards, or internet-connected signs. In this tutorial, we will beuse usingCircuitPython twoto Groveprogram Seriala Bluetooth64X32 modulesmatrix andas twoCircuitPython libraries make it easier to display images, animations, text, etc than Arduino to perform a wireless communication.IDE.
You can read more about this component here.
Wiring
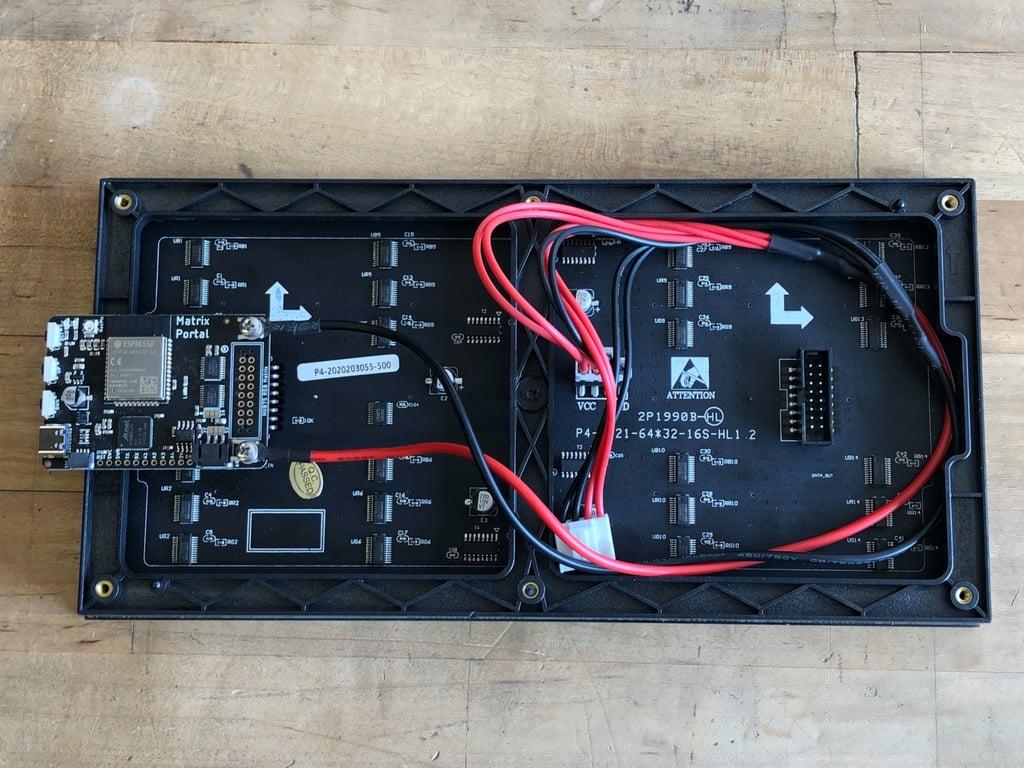
There -is Sendingno data)wiring needed for basic setup, it's literally plug and play. Please refer to this page to see how to set it up.
Using a 64X64 Matrix
Ask a Technician first!
If you are using a MatrixPortal M4 borrowed from us, please do not do this step yourself, ask a technician for help instead.
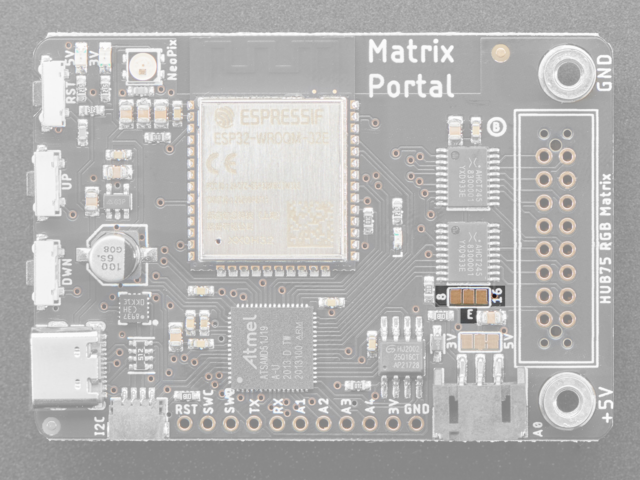
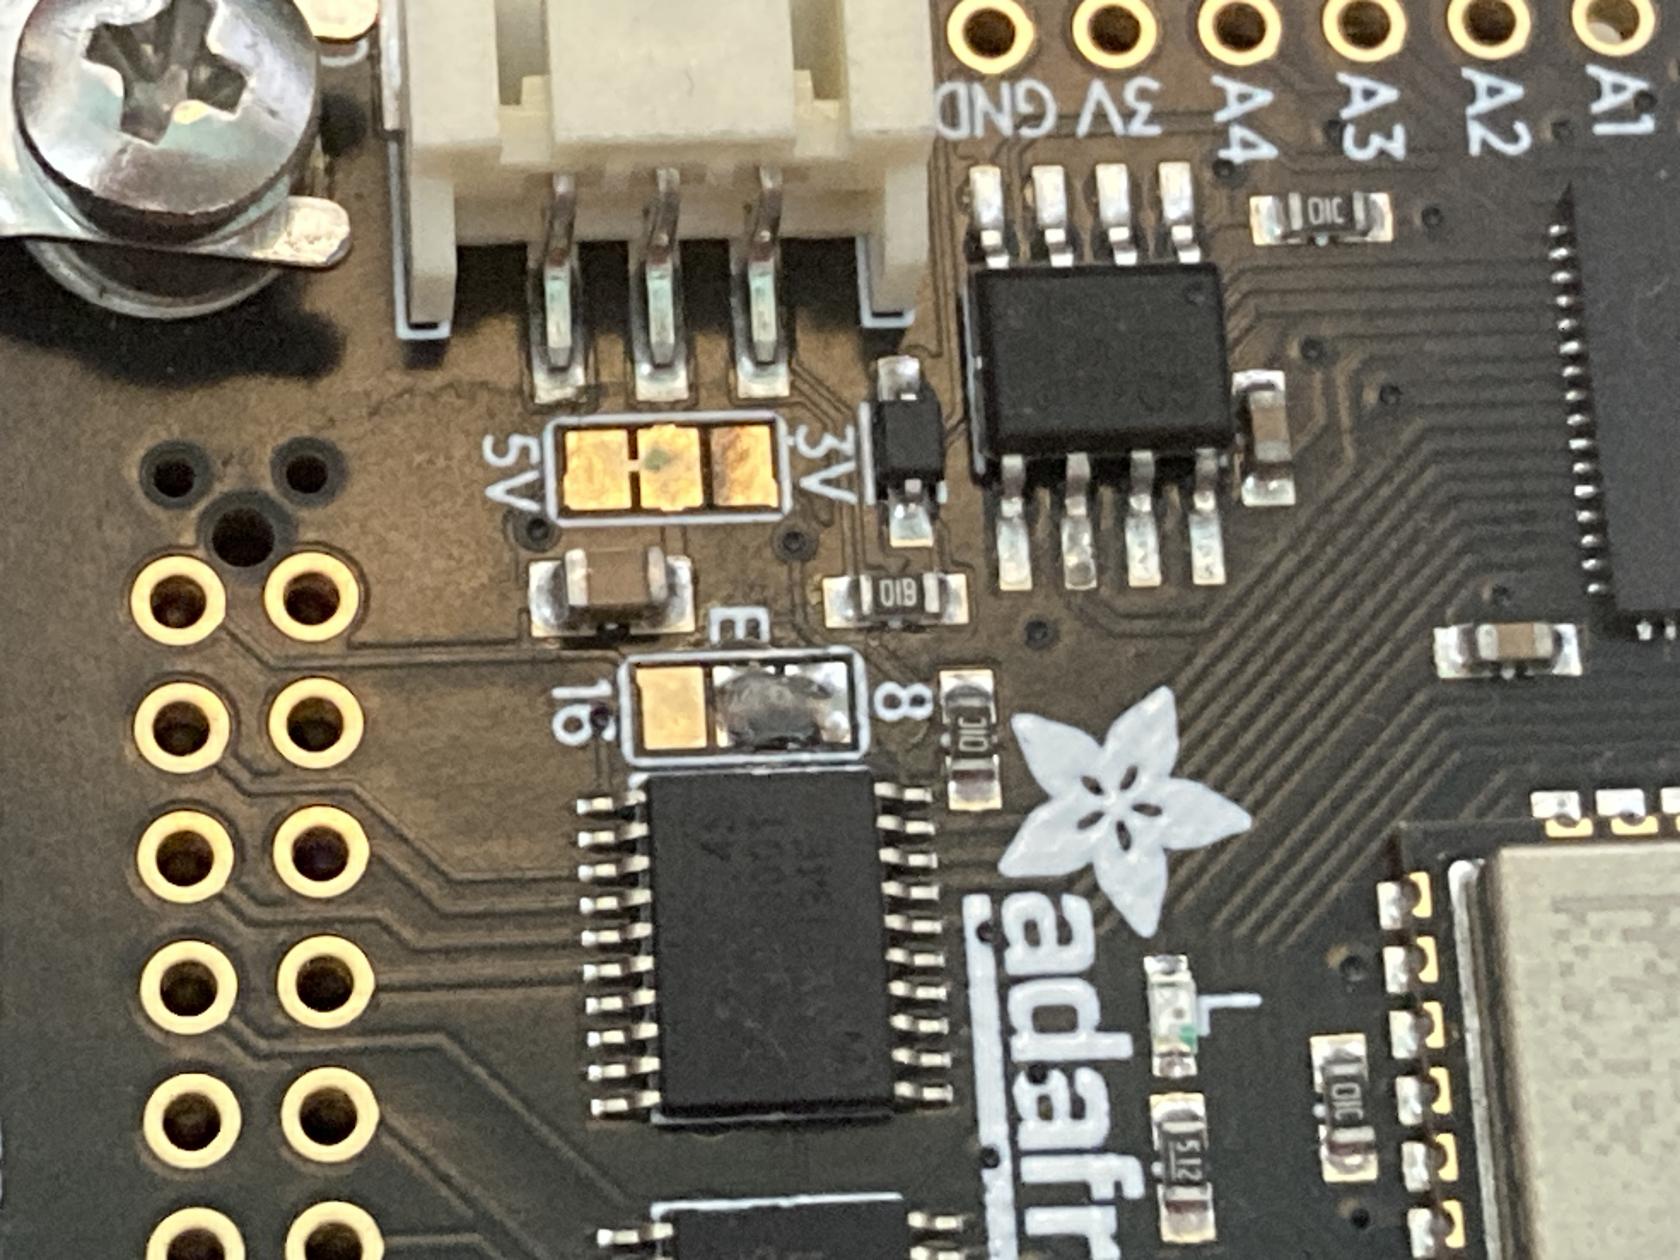
This jumper is used for use with 64x64 matrices. You can close the jumper by using your soldering iron to melt a blob of solder on the bottom solder jumper so the middle pad is 'shorted' to 8 as below.
You can read more about Address E Line Jumper here.
Install CircuitPython
InterruptCircuitPython Pinsand forlibraries RX/TXversions
In this tutorial, I am using an UNO which has pin 2 & 3 as the interrupts pins. Check the model youwe are using CircuitPython 9.0.5 (11/10/2024), and all libraries used are compatible with this version. Please double-check the latest version of CircuitPython you have installed and use updated and compatible libraries.
CircuitPython is an open-source programming language designed for microcontrollers. It's a beginner-friendly version of Python developed by Adafruit, optimized for hardware projects like controlling sensors, displays, and other electronics.
1. Download CircuitPython
Download the latest version for MatrixPortal UF2 file for your board here.
2. Put the Board into Bootloader Mode
To install CircuitPython, you need to place the board into bootloader mode.
- Press the reset button on your board twice quickly.
- The board’s LED will change to a different colour (usually pulsing red or green)
- A new USB drive will appear on your computer named something like "BOOT".
3. Copy the pinsCircuitPython accordingly.UF2 File
- Drag and drop the downloaded UF2 file onto the new drive.
- The board will reboot, and a new drive named CIRCUITPY will appear. This drive is where you'll place your Python code and libraries.
Libraries
- Download the libraries bundle here, choose the version you need.
- Copy the libraries you need to the
libfolder of the CIRCUITPY drive.
Common libraries you need:
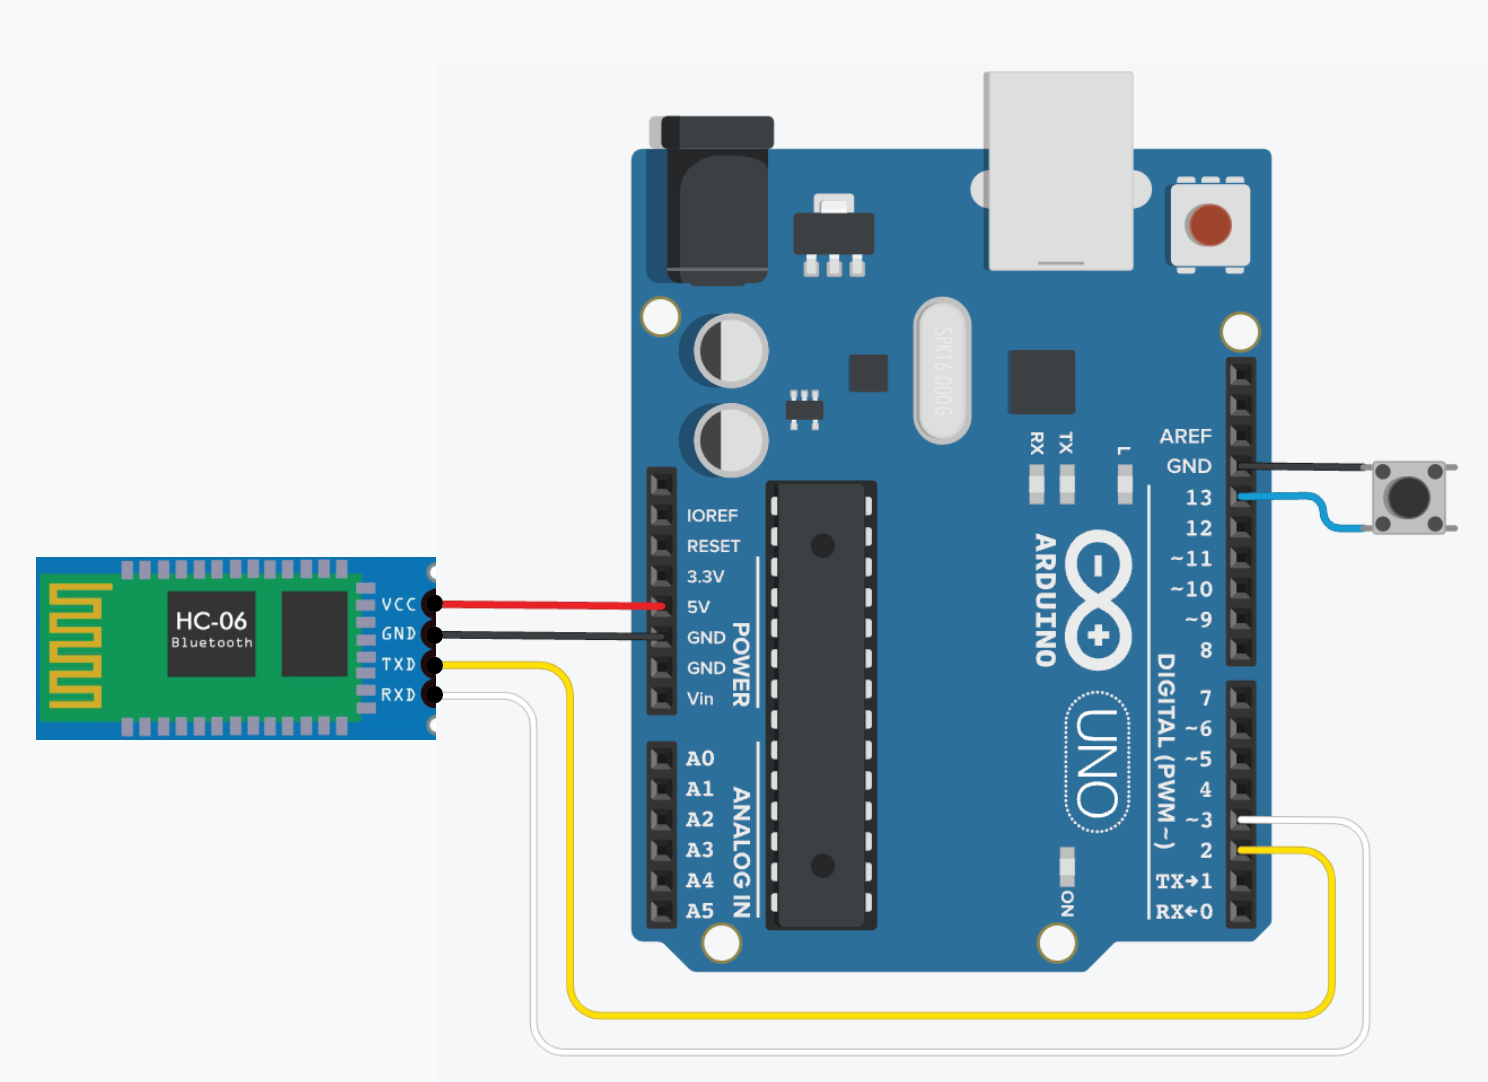
VCC (Red) to 5Vadafruit_matrixportalGND (Black) to GNDadafruit_debouncer.mpyRX (White) to pin 3 (Arduino TX)adafruit_portalbaseTX (Yellow) to pin 2 (Arduino RX)adafruit_esp32spiButton to GNDneopixel.mpyButtonadafruit_bus_device- adafruit_requests.mpy
- adafruit_fakerequests.mpy
- adafruit_io
- adafruit_bitmap_font
- adafruit_display_text
- adafruit_lis3dh.mpy
- adafruit_minimqtt
- adafruit_ticks.py
- adafruit_rgb_display
- adafruit_imageload
- adafruit_display_shapes
Wiring (Slave - Receving data)
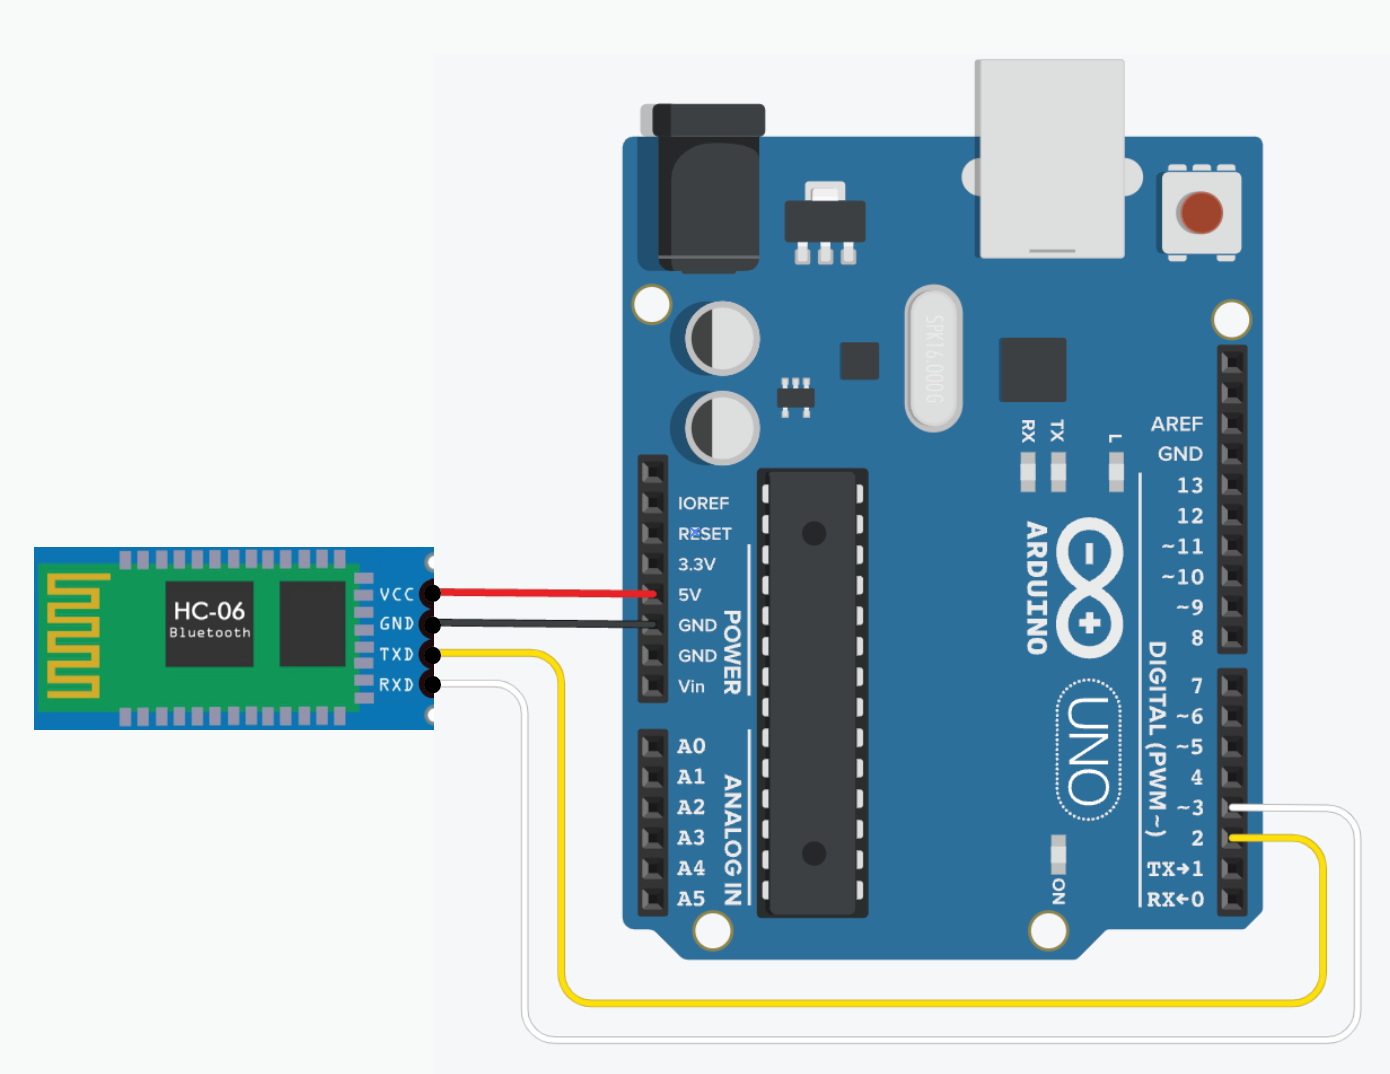
VCC (Red) to 5VGND (Black) to GNDRX (White) to pin 3 (Arduino TX)TX (Yellow) to pin 2 (Arduino RX)
Code - MasterScrolling Text
# SPDX-FileCopyrightText: 2020 Jeff Epler for Adafruit Industries
#
# SPDX-License-Identifier: MIT

# This codeexample readsimplements a simple two line scroller using
# Adafruit_CircuitPython_Display_Text. Each line has its own color
# and it is possible to modify the signalexample to use other fonts and non-standard
# characters.

import adafruit_display_text.label
import board
import displayio
import framebufferio
import rgbmatrix
import terminalio
from adafruit_bitmap_font import bitmap_font
from displayio import Bitmap

# If there was a display before (protomatter, LCD, or E-paper), release it so
# we can create ours
displayio.release_displays()
matrix = rgbmatrix.RGBMatrix(
    width=64, bit_depth=6,
    rgb_pins=[
        board.MTX_R1,
        board.MTX_G1,
        board.MTX_B1,
        board.MTX_R2,
        board.MTX_G2,
        board.MTX_B2
    ],
    addr_pins=[
        board.MTX_ADDRA,
        board.MTX_ADDRB,
        board.MTX_ADDRC,
        board.MTX_ADDRD
    ],
    clock_pin=board.MTX_CLK,
    latch_pin=board.MTX_LAT,
    output_enable_pin=board.MTX_OE
)
display = framebufferio.FramebufferDisplay(matrix, auto_refresh=False)
keycolour = 0X7BFF4A
# Create two lines of text to scroll. Besides changing the buttontext, you can also
# customize the color and sendsfont it(using Adafruit_CircuitPython_Bitmap_Font).
# To keep this demo simple, we just used the built-in font.
# The Y coordinates of the two lines were chosen so that they looked good
# but if you change the font you might find that other values work better.
line1 = adafruit_display_text.label.Label(
    terminalio.FONT,
    color=keycolour, #white
    text="This is Creative Technology Hub")
line1.x = display.width
line1.y = 5

line2 = adafruit_display_text.label.Label(
    terminalio.FONT,
    color=0x000000,
    background_color=keycolour,
    background_tight = True,
    text="Hello Hello Hello Hello Hello Helloooooooooo")
line2.x = display.width
line2.y = 15

line3 = adafruit_display_text.label.Label(
    terminalio.FONT,
    color=keycolour,

    text="Stop peeking come in")
line3.x = display.width
line3.y = 26

# Put each line of text into a Group, then show that group.
g = displayio.Group()
g.append(line1)
g.append(line2)
g.append(line3)
display.root_group = g

# This function will scoot one label a pixel to the Slaveleft Arduino.and send /*it *back FM.hto
*# Athe libraryfar right if it's gone all the way off screen. This goes in a function
# because we'll do exactly the same thing with line1 and line2 below.
def scroll(line):
    line.x = line.x - 1
    line_width = line.bounding_box[2]
    if line.x < -line_width:
        line.x = display.width

# This function scrolls lines backwards.  Try switching which function is
# called for SeeedStudioline2 Grovebelow!
FMdef *
 * Copyright (c) 2012 seeed technology inc.
 * Website    reverse_scroll(line):
    www.seeed.ccline.x *= Authorline.x :+ Steve1
    Changline_width *= Createline.bounding_box[2]
    Time:if JULYline.x 2014>= *display.width:
        Changeline.x Log= :-line_width

Modified# byYou looveecan 2013-10-29add ,more Modifiedeffects by jacob yan 2014-7-29

 * The MIT License (MIT)
 *
 * Permission is hereby granted, free of charge, to any person obtaining a copy
 * ofin this softwareloop. andFor associatedinstance, documentationmaybe filesyou (the "Software"),want to deal
 * in the Software without restriction, including without limitation the rights
 * to use, copy, modify, merge, publish, distribute, sublicense, and/or sell
 * copies of the Software, and to permit persons to whom the Software is
 * furnished to do so, subject to the following conditions:
 *
 * The above copyright notice and this permission notice shall be included in
 * all copies or substantial portions of the Software.
 *
 * THE SOFTWARE IS PROVIDED "AS IS", WITHOUT WARRANTY OF ANY KIND, EXPRESS OR
 * IMPLIED, INCLUDING BUT NOT LIMITED TO THE WARRANTIES OF MERCHANTABILITY,
 * FITNESS FOR A PARTICULAR PURPOSE AND NONINFRINGEMENT. IN NO EVENT SHALL THE
 * AUTHORS OR COPYRIGHT HOLDERS BE LIABLE FOR ANY CLAIM, DAMAGES OR OTHER
 * LIABILITY, WHETHER IN AN ACTION OF CONTRACT, TORT OR OTHERWISE, ARISING FROM,
 * OUT OF OR IN CONNECTION WITH THE SOFTWARE OR THE USE OR OTHER DEALINGS IN
 * THE SOFTWARE.
 */

#include <SoftwareSerial.h>                         // Software Serial Port

#define RxD         2
#define TxD         3

#define PINBUTTON   13                               // pin of button

#define DEBUG_ENABLED  1


SoftwareSerial blueToothSerial(RxD,TxD);

void setup()
{
    Serial.begin(9600);
    pinMode(RxD, INPUT);
    pinMode(TxD, OUTPUT);
    pinMode(PINBUTTON, INPUT_PULLUP);

    setupBlueToothConnection();
    //wait 1s and flush the serial buffer
    delay(1000);
    Serial.flush();
    blueToothSerial.flush();
}

void loop()
{

    static unsigned char state = 1;             // led off
    //Serial.println(digitalRead(PINBUTTON));

    if(digitalRead(PINBUTTON))
    {
        //state = 1-state;

        Serial.println("button on");

        blueToothSerial.print(state);

        delay(10);
        while(digitalRead(PINBUTTON))       // until button release
        {
            delay(10);
        }

        Serial.println("button off");
    }
}

/***************************************************************************
 * Function Name: setupBlueToothConnection
 * Description:  initilizing bluetooth connction
 * Parameters:
 * Return:
***************************************************************************/
void setupBlueToothConnection()
{


    blueToothSerial.begin(9600);

	blueToothSerial.print("AT");
	delay(400);

	blueToothSerial.print("AT+DEFAULT");             // Restore all setup value to factory setup
	delay(2000);

	blueToothSerial.print("AT+NAMESeeedMaster");    // set the
bluetooth# name as "SeeedMaster" ,the lengthcolor of bluetootheach namelabel mustto lessa thandifferent 12value.
characters.while delay(400);True:
    blueToothSerial.print("AT+ROLEM");scroll(line1)
    //#scroll(line2)
    setscroll(line3)
    thereverse_scroll(line2)
    bluetooth work in slave mode
	delay(400);


	blueToothSerial.print("AT+AUTH1");
    delay(400);

	blueToothSerial.print("AT+CLEAR");             // Clear connected device mac address
    delay(400);

    blueToothSerial.flush();


}display.refresh(minimum_frames_per_second=1)


Code - Slave
/*
 * FM.h
 * A library for SeeedStudio Grove FM
 *
 * Copyright (c) 2012 seeed technology inc.
 * Website    : www.seeed.cc
 * Author     : Steve Chang
 * Create Time: JULY 2014
 * Change Log : Modified by loovee 2013-10-29  ,   Modified by jacob yan 2014-7-29

 * The MIT License (MIT)
 *
 * Permission is hereby granted, free of charge, to any person obtaining a copy
 * of this software and associated documentation files (the "Software"), to deal
 * in the Software without restriction, including without limitation the rights
 * to use, copy, modify, merge, publish, distribute, sublicense, and/or sell
 * copies of the Software, and to permit persons to whom the Software is
 * furnished to do so, subject to the following conditions:
 *
 * The above copyright notice and this permission notice shall be included in
 * all copies or substantial portions of the Software.
 *
 * THE SOFTWARE IS PROVIDED "AS IS", WITHOUT WARRANTY OF ANY KIND, EXPRESS OR
 * IMPLIED, INCLUDING BUT NOT LIMITED TO THE WARRANTIES OF MERCHANTABILITY,
 * FITNESS FOR A PARTICULAR PURPOSE AND NONINFRINGEMENT. IN NO EVENT SHALL THE
 * AUTHORS OR COPYRIGHT HOLDERS BE LIABLE FOR ANY CLAIM, DAMAGES OR OTHER
 * LIABILITY, WHETHER IN AN ACTION OF CONTRACT, TORT OR OTHERWISE, ARISING FROM,
 * OUT OF OR IN CONNECTION WITH THE SOFTWARE OR THE USE OR OTHER DEALINGS IN
 * THE SOFTWARE.
 */


#include <SoftwareSerial.h>   //Software Serial Port

#define RxD         2
#define TxD         3

#define PINLED      13

#define LEDON()     digitalWrite(PINLED, HIGH)
#define LEDOFF()    digitalWrite(PINLED, LOW)

#define DEBUG_ENABLED  1

SoftwareSerial blueToothSerial(RxD,TxD);

void setup()
{
    Serial.begin(9600);
    pinMode(RxD, INPUT);
    pinMode(TxD, OUTPUT);
    pinMode(PINLED, OUTPUT);
    LEDOFF();

    setupBlueToothConnection();
}

void loop()
{
    char recvChar;

    while(1)
    {
        if(blueToothSerial.available())
        {//check if there's any data sent from the remote bluetooth shield
            recvChar = blueToothSerial.read();
            Serial.print(recvChar);

            if(recvChar == '1')
            {
                LEDON();
            }
            else if(recvChar == '0')
            {
                LEDOFF();
            }
        }
    }
}


/***************************************************************************
 * Function Name: setupBlueToothConnection
 * Description:  initilizing bluetooth connction
 * Parameters:
 * Return:
***************************************************************************/
void setupBlueToothConnection()
{


	blueToothSerial.begin(9600);

	blueToothSerial.print("AT");
	delay(400);

	blueToothSerial.print("AT+DEFAULT");             // Restore all setup value to factory setup
	delay(2000);

	blueToothSerial.print("AT+NAMESeeedBTSlave");    // set the bluetooth name as "SeeedBTSlave" ,the length of bluetooth name must less than 12 characters.
	delay(400);

    blueToothSerial.print("AT+PIN0000");             // set the pair code to connect
	delay(400);

	blueToothSerial.print("AT+AUTH1");             //
    delay(400);

    blueToothSerial.flush();

}

Connection
After uploading both codes to both Arduinos, reset them simultaneously. The LEDs on the modules will be flashing and wait until they stay on, then they are connected.
You may need to repeat a couple of times to get them connected, it's all about patience.

