Understanding Arduino hardware
In the kit, you will find an Arduino and two USB cables (USBC or USBA, pick the one that fits your computer).
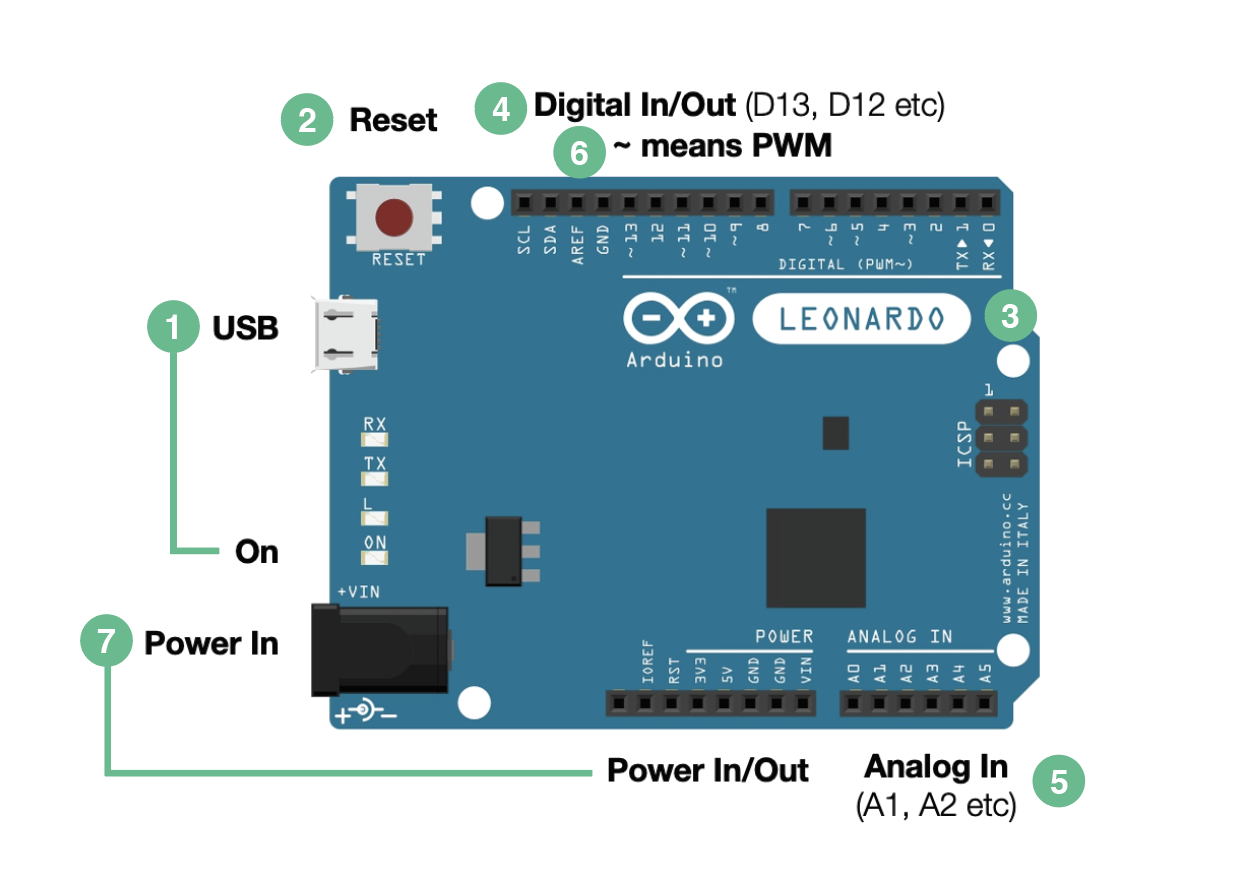
1. Micro USB Port
Connect the Arduino with your computer using the USB cable, you will see the yellowish light turned on.
2. RESET Button
It is not the factory reset button than you may find in other gadgets, but more like a restart button. If your Arduino freezes, lags or does anything weird, you can press the button.
3. Arduino Model
The white label indicates the model we are using. In the kit, you will find a LEONARDO, and we will need this piece of information later.
4. Digital Input/ Output
Digital means two states only, yes or no. Input can be something like a button, pressed / not pressed. Output can be something like an LED light, light on or light off.
5. Analog Input
Analog will give you something more than yes or no. For example, analog input can be something like a temperature sensor, instead of just hot and cold, it will give you degress degree celsius, a range of values.
6. PWM pins
You can see the symbol ~ next to some digital pins, those are PWM pins. For now, you can see them as analog output pins. For example, if you want to create a breathing light effect with the LED light, you will need to use one of those PWM pins.
7. Power Input/ Output
At the moment, we are using our computers as the power source via the micro USB port. When you finalise the setup, you won't need your computer with the setup, you can switch the power source to a power adapter, phone charger, batteries etc.
All other components that will be added to the circuit will need a power supply too, so we will make the Arduino as the "second battery" and use the power output pins to power them all.