How to power the Raspberry Pi Pico
This
Powering short tutorial should be enough for you to be able to setup athe Raspberry Pi withPico
The modeeasiest and auto login enabledway to disablepower a webPico pageis full screen automatically when it turns on.
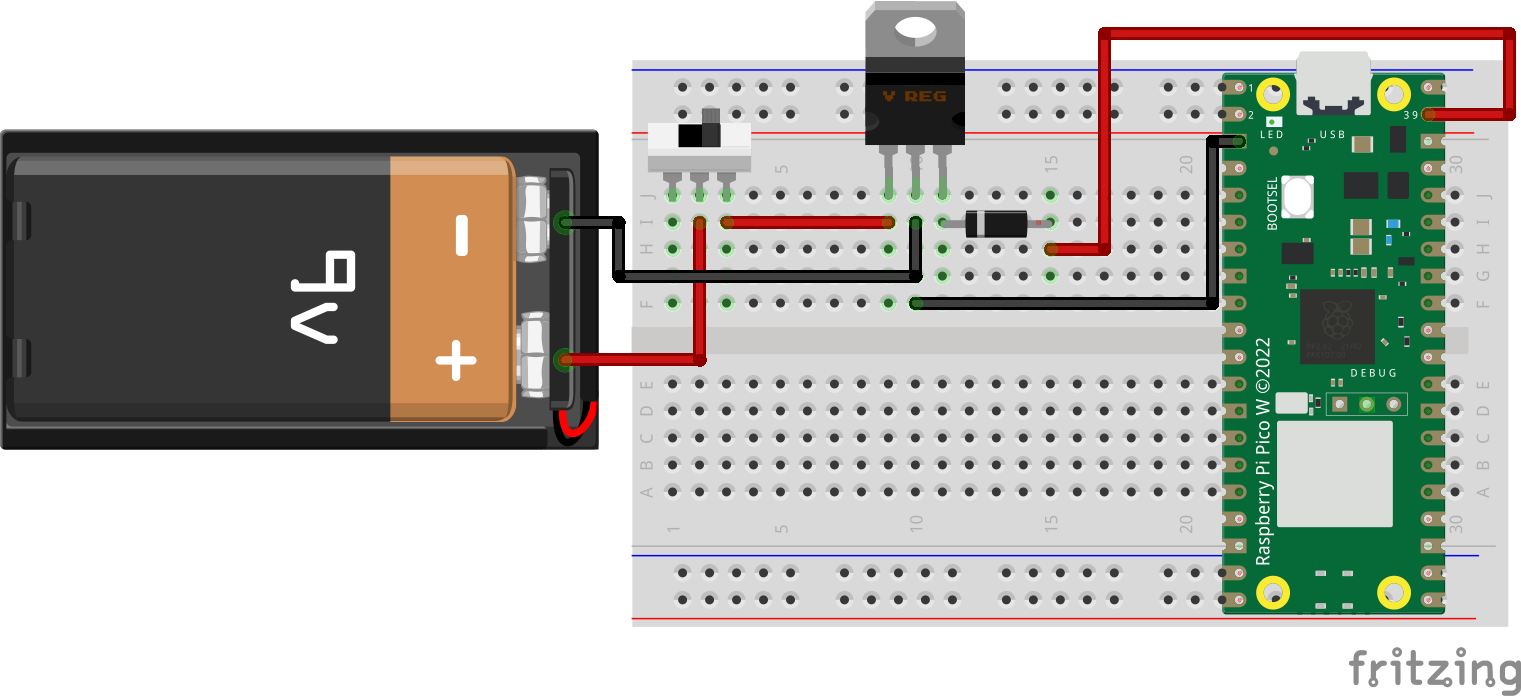
Copyfull-screen.shintothrough thehomeUSBfoldercable either to a computer or a phone charger. If you are going for a wireless design, you can use batteries as well. This tutorial will demonstrate how to power a Pico with a 9V battery or 3 AA batteries.Raspberry Pi Pico pinout
You have to find out the pinout of the
pimodeluser,you are using. The pins you are looking for areVSYSandrunGND. In this tutorial, a Pico W is used.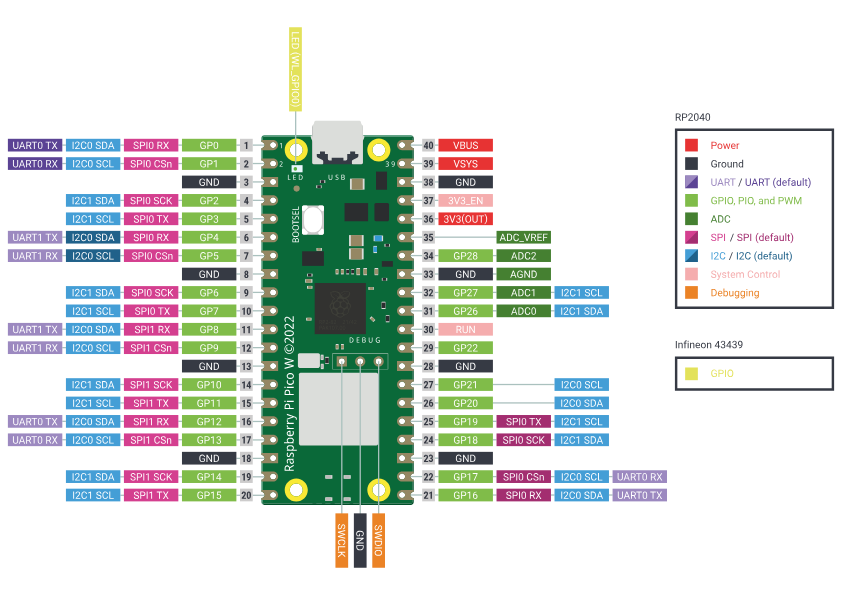
Raspberry Pi Pico's Power Need
VSYS(PIN 39): Pin for main system input voltage. The input voltage can vary between 1.8V to 5.5V. This voltage is used by thefollowingonboardcommand:SMPS/home/pi/full-screen.shWhy these parts are needed
-
Switch: When we are using batteries to power the microcontroller, a switch is preferred. Some battery holder has a built-in switch which will be more convenient for you. With a switch, you can turn off the Pico when not in use and not drain the battery.
-

sudoLM7805: chmodThe LM7805 is a popular voltage regulator integrated circuit (IC). It is a positive voltage regulator that provides a stable and fixed output voltage of +x5 full-screen.sh
Diode: - A diode is a semiconductor device that allows current to flow in one direction while blocking it in the opposite direction. In other words, it acts as a one-way valve for electric current. We need a diode for safety to prevent one power source from back-feeding the other. Raspberry Pi can have two power sources at the same time and there is a risk of unwanted power flow between the two power sources. Schottky diode is preferred for its low voltage drop, but any others should work with a bit of voltage drop around 0.2-0.6V.
9V battery
Part needed: switch, LM7805 & Any diode
full-screen.sh3 AA batteries
exportPart DISPLAY=:0.0needed: xsetswitch s& offAny xsetdiode
-dpms
xset s noblank
chromium-browser --noerrdialogs --kiosk https://google.co.uk --incognito
Create a folder called autorun inside the.configfolder of the home folder of the pi user:/home/pi/.config/autorun/kiosk.desktop
cd /home/pi/.config
mkdir autorun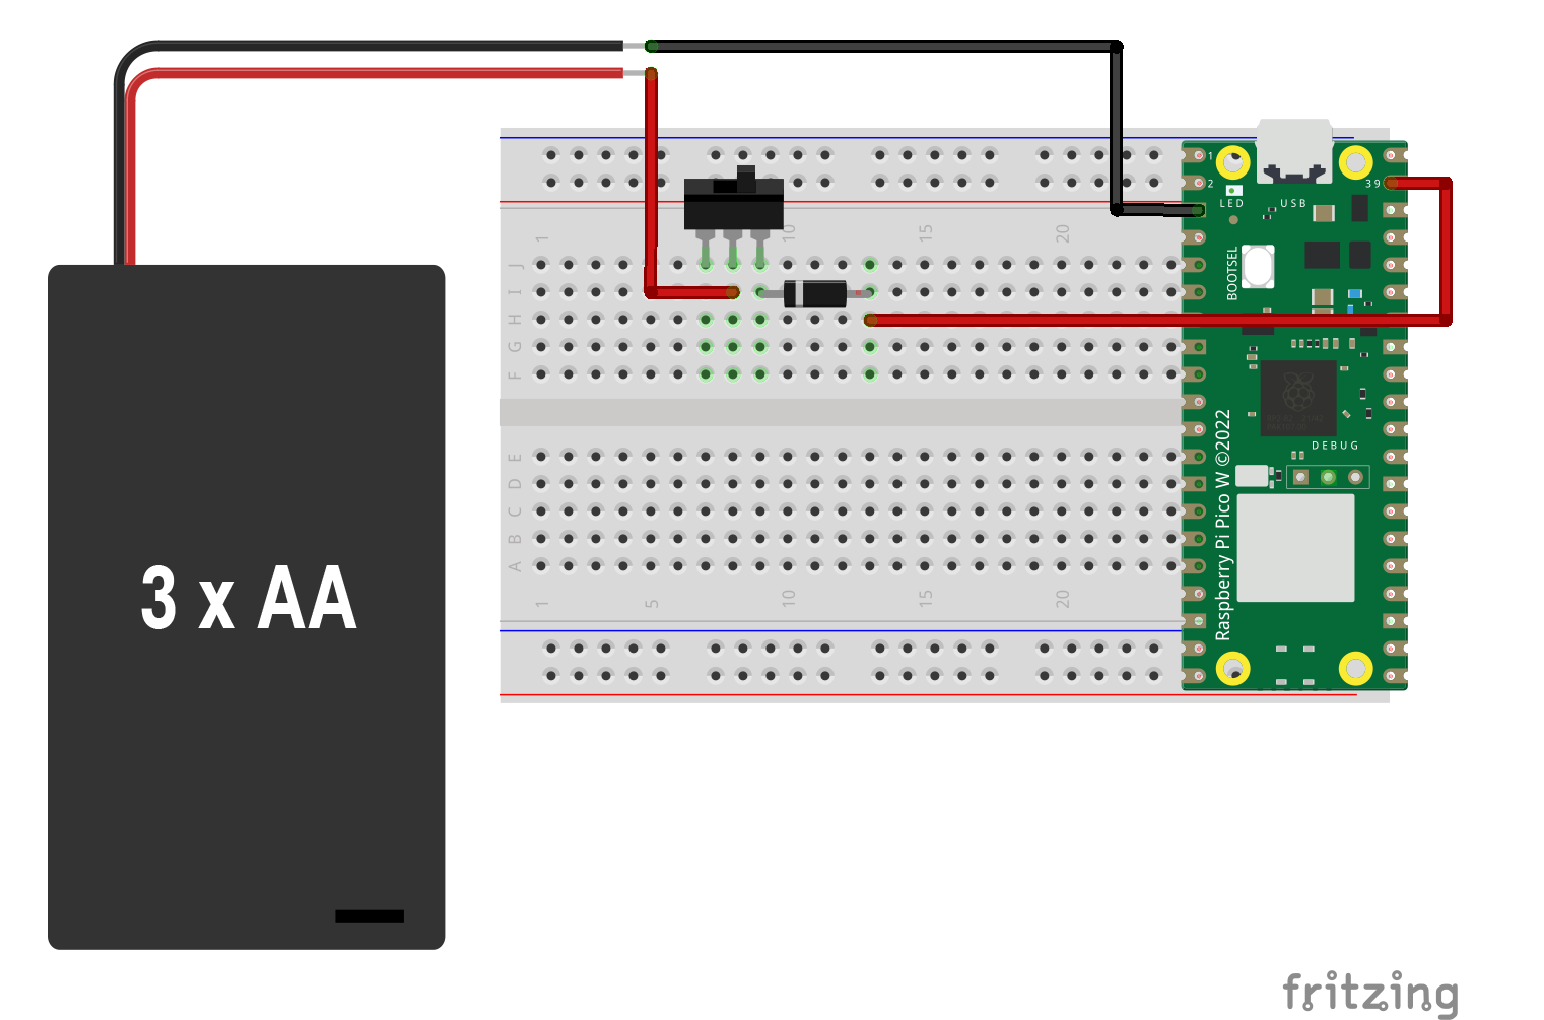
kiosk.desktop
[Desktop Entry]
Type=Application
Exec=/home/pi/full-screen.sh
Hidden=false
X-GNOME-Autostart-enabled=true
Name=kiosk
Reboot the Raspberry Pi.
sudo reboot now