How to use Raspberry Pi Camera Module 3
What is Raspberry Pi Camera Module 3?
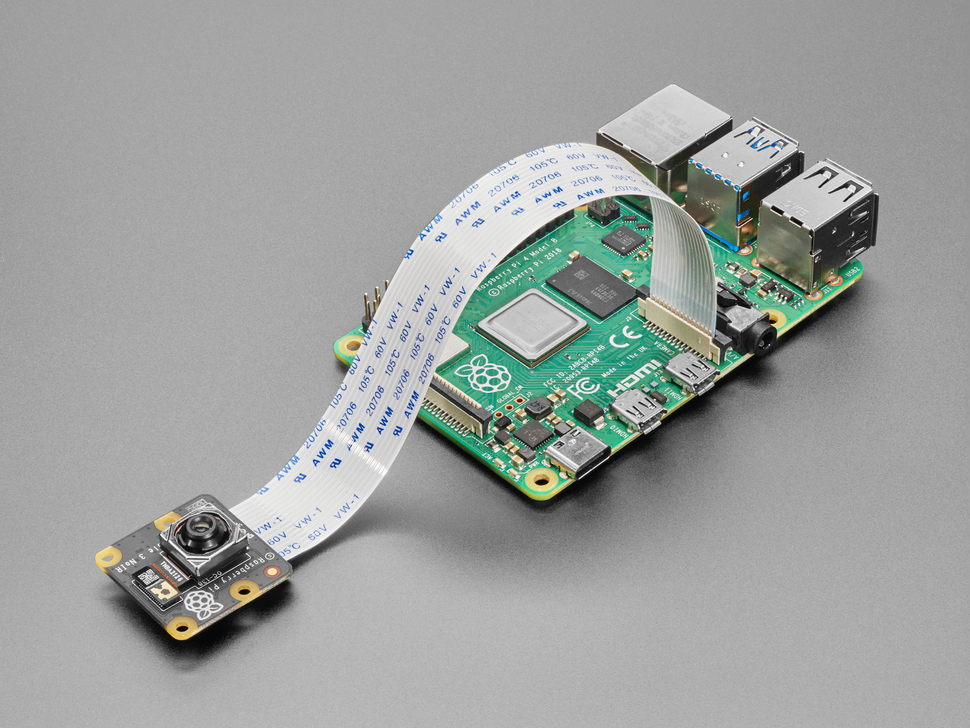
This tutorial will walk you through setting up and using the Raspberry Pi Camera Module 3 Noir on a Raspberry Pi 5, but other Pi like Pi 3 and Pi 4 will work as well.
Camera Module 3 — Key Features
| Feature | Description |
|---|---|
| Sensor | Sony IMX708 |
| Resolution | 12MP (4608 × 2592) |
| Autofocus | ✅ Yes (PDAF or EDOF depending on model) |
| HDR | ✅ Available on certain models |
| FoV Variants | Standard & Wide-angle |
| IR Version | Available (NoIR version) |
| Interface | CSI-2 via 22-pin MIPI ribbon cable |
| OS Support | Raspberry Pi OS Bookworm or later |
Requirements
Hardware
- Raspberry Pi (Pi 3 or later)
- Camera Module 3 (ensure it’s a v3 model)
- Camera ribbon cable (22-pin) [Pi5 will need a 22pin to 15pin cable]
- Power supply & HDMI or SSH access
Software
- Raspberry Pi OS Bookworm (64-bit recommended)
- Camera support via libcamera stack
- picamera2 Python library
Physical Connection
- Power off your Pi.
- Locate the CSI camera port on the board (next to the HDMI ports).
- Gently lift the connector latch.
- Insert the camera ribbon cable blue side facing HDMI.
- Close the latch and ensure it’s snug.
- Power on the Pi.
Enable I2C communication
-
sudo raspi-config - Interface Options -> I2C -> Enable
-
sudo reboot
Update OS & Install Required Packages
sudo apt update && sudo apt upgrade -y
sudo apt install -y libcamera-apps python3-picamera2 python3-opencv
Test Camera via Terminal
- Basic Camera Preview (HDMI required):
libcamera-hello - Take a Photo:
libcamera-jpeg -o test.jpg - Record a Video (10 seconds):
libcamera-vid -t 10000 -o test.h264
Testing Code
Python Code Using picamera2
This code will pop a new window of live preview with autofocus.
from picamera2 import Picamera2
from libcamera import controls
import time

picam2 = Picamera2()
picam2.start(show_preview=True)

# Enable continuous autofocus
picam2.set_controls({"AfMode": controls.AfModeEnum.Continuous})

print("Camera feed started. Press Ctrl+C to stop.")
try:
    while True:
        time.sleep(1)
except KeyboardInterrupt:
    picam2.stop()
    print("Camera stopped.")
Face Detection Example with OpenCV
- Download the Haar Cascade XML and saved it in a folder called
haarcascades.wget -P ~ https://github.com/opencv/opencv/raw/master/data/haarcascades/haarcascade_frontalface_default.xml
import cv2
import numpy as np
from picamera2 import Picamera2
from libcamera import controls
import warnings

# Suppress the specific warning from OpenCV
warnings.filterwarnings("ignore", category=UserWarning, module="cv2")

# Initialize the Picamera2 instance
picam2 = Picamera2()

# Start the camera (no preview for better performance during processing)
picam2.start()

# Set autofocus to continuous mode
picam2.set_controls({"AfMode": controls.AfModeEnum.Continuous})

# Manually specify the path to the Haar Cascade file
face_cascade = cv2.CascadeClassifier('/home/pi/haarcascades/haarcascade_frontalface_default.xml')  # Adjust this path if necessary

# Check if the cascade classifier is loaded properly
if face_cascade.empty():
    print("Error loading Haar Cascade classifier. Make sure the path is correct.")
    exit()

# Start capturing frames and detecting faces
while True:
    # Capture a frame from the camera
    frame = picam2.capture_array()

    # Check if the frame was captured successfully
    if frame is None:
        print("Failed to capture frame.")
        break

    # Convert the image to grayscale (required for Haar Cascade)
    gray = cv2.cvtColor(frame, cv2.COLOR_BGR2GRAY)

    # Detect faces in the image
    faces = face_cascade.detectMultiScale(gray, 1.1, 4)

    # Loop through the faces and draw rectangles around them
    for (x, y, w, h) in faces:
        # Draw a thin rectangle (face bounding box) around the detected face
        cv2.rectangle(frame, (x, y), (x + w, y + h), (0, 255, 0), 2)

    # Show the frame with the face(s) detected
    # Convert the frame to a simpler BGR format or grayscale
		frame = cv2.cvtColor(frame, cv2.COLOR_BGR2RGB)  # Convert to RGB
    cv2.imshow("Face Detection", frame)

    # If the 'q' key is pressed, exit the loop
    if cv2.waitKey(1) & 0xFF == ord('q'):
        break

# Clean up
picam2.stop()  # Stop the camera
cv2.destroyAllWindows()  # Close all OpenCV windows