Sending data to Arduino
When connected with Arduino, Touchdesigner becomes a powerful tool that makes use of external sensors to enhance immersive and interactive experiences. This brief tutorial will walk you through using Firmata, a protocol found both in Arduino IDE and Touchdesigner to enable communication between the softwares through serial.
In Arduino
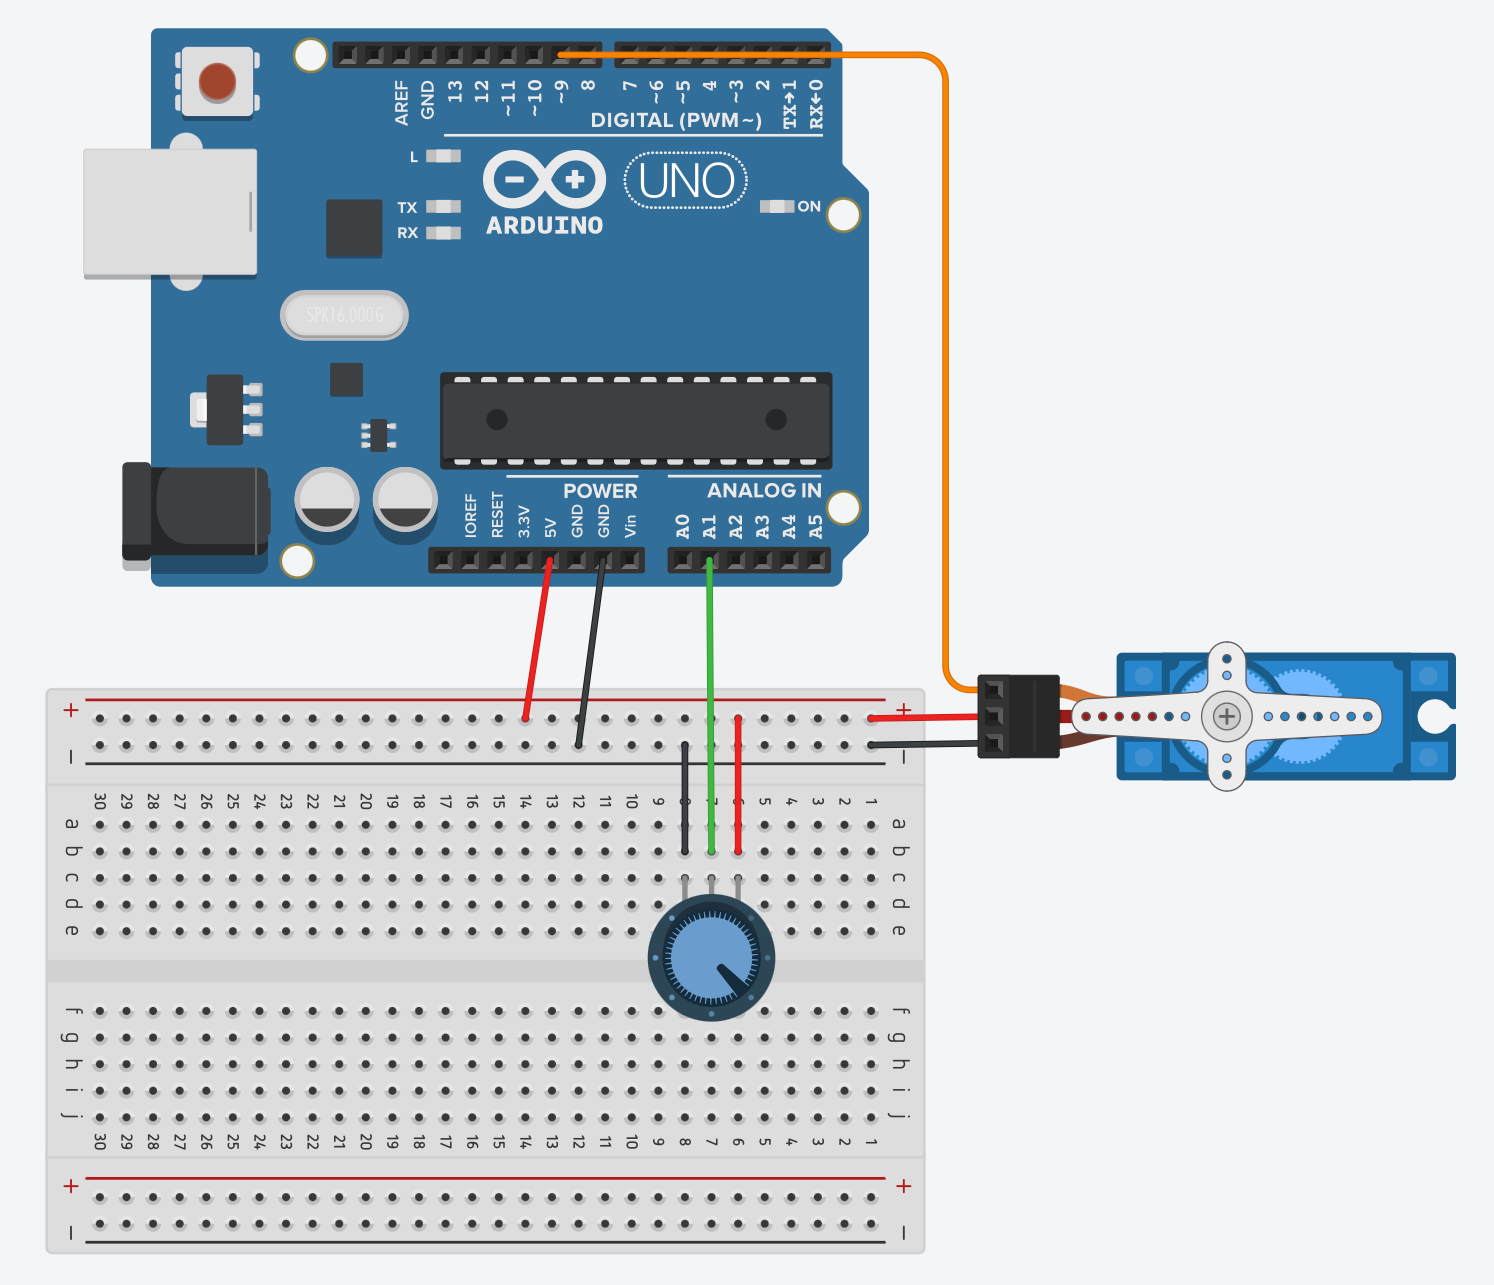
Connect your board to your computer and launch Arduino. Make sure your hardware matches the software by selecting the correct board and port from "Tools". For this tutorial we will connect a potentiometer, as input in our circuit, and a servo motor, as our output, to the Arduino board - It is important to note that, while we will connect these components to both send and receive data through Arduino and influence other another, this is not standard practice, as we will later see.
To load the code choose "File" > Examples, then select Firmata > StandardFirmata. Click on the arrow button ![]() to upload the code.
to upload the code.
In Touchdesigner
A Firmata COMP is available in Touchdesigner to send and receive data through Arduino.
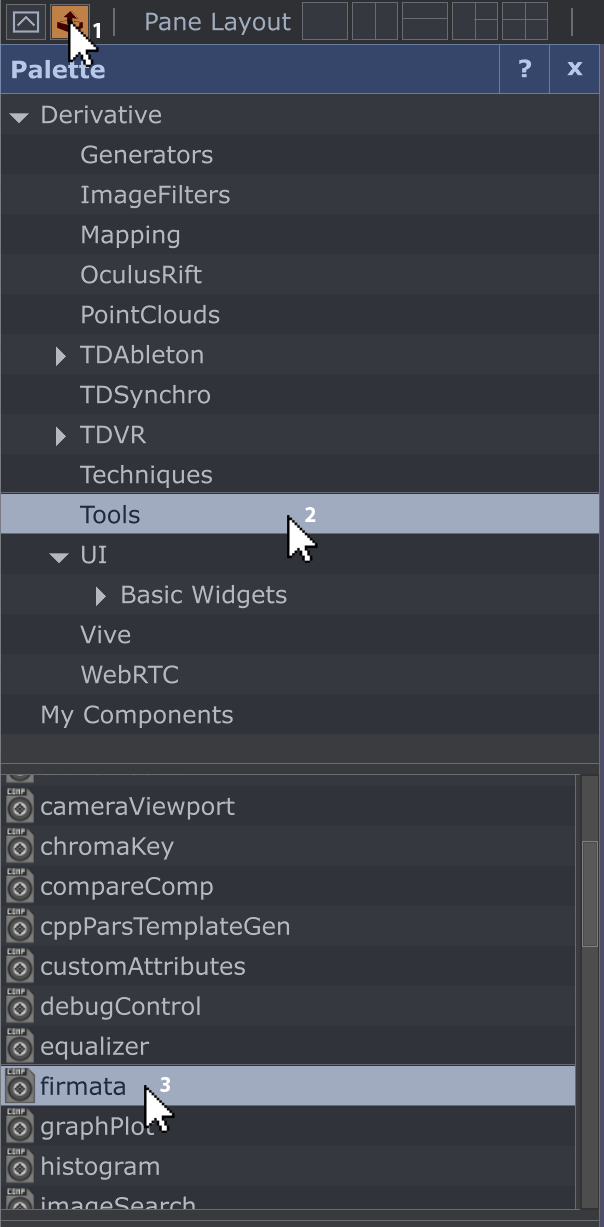 To access it open the Palette and select Tools, where a list of components will appear.
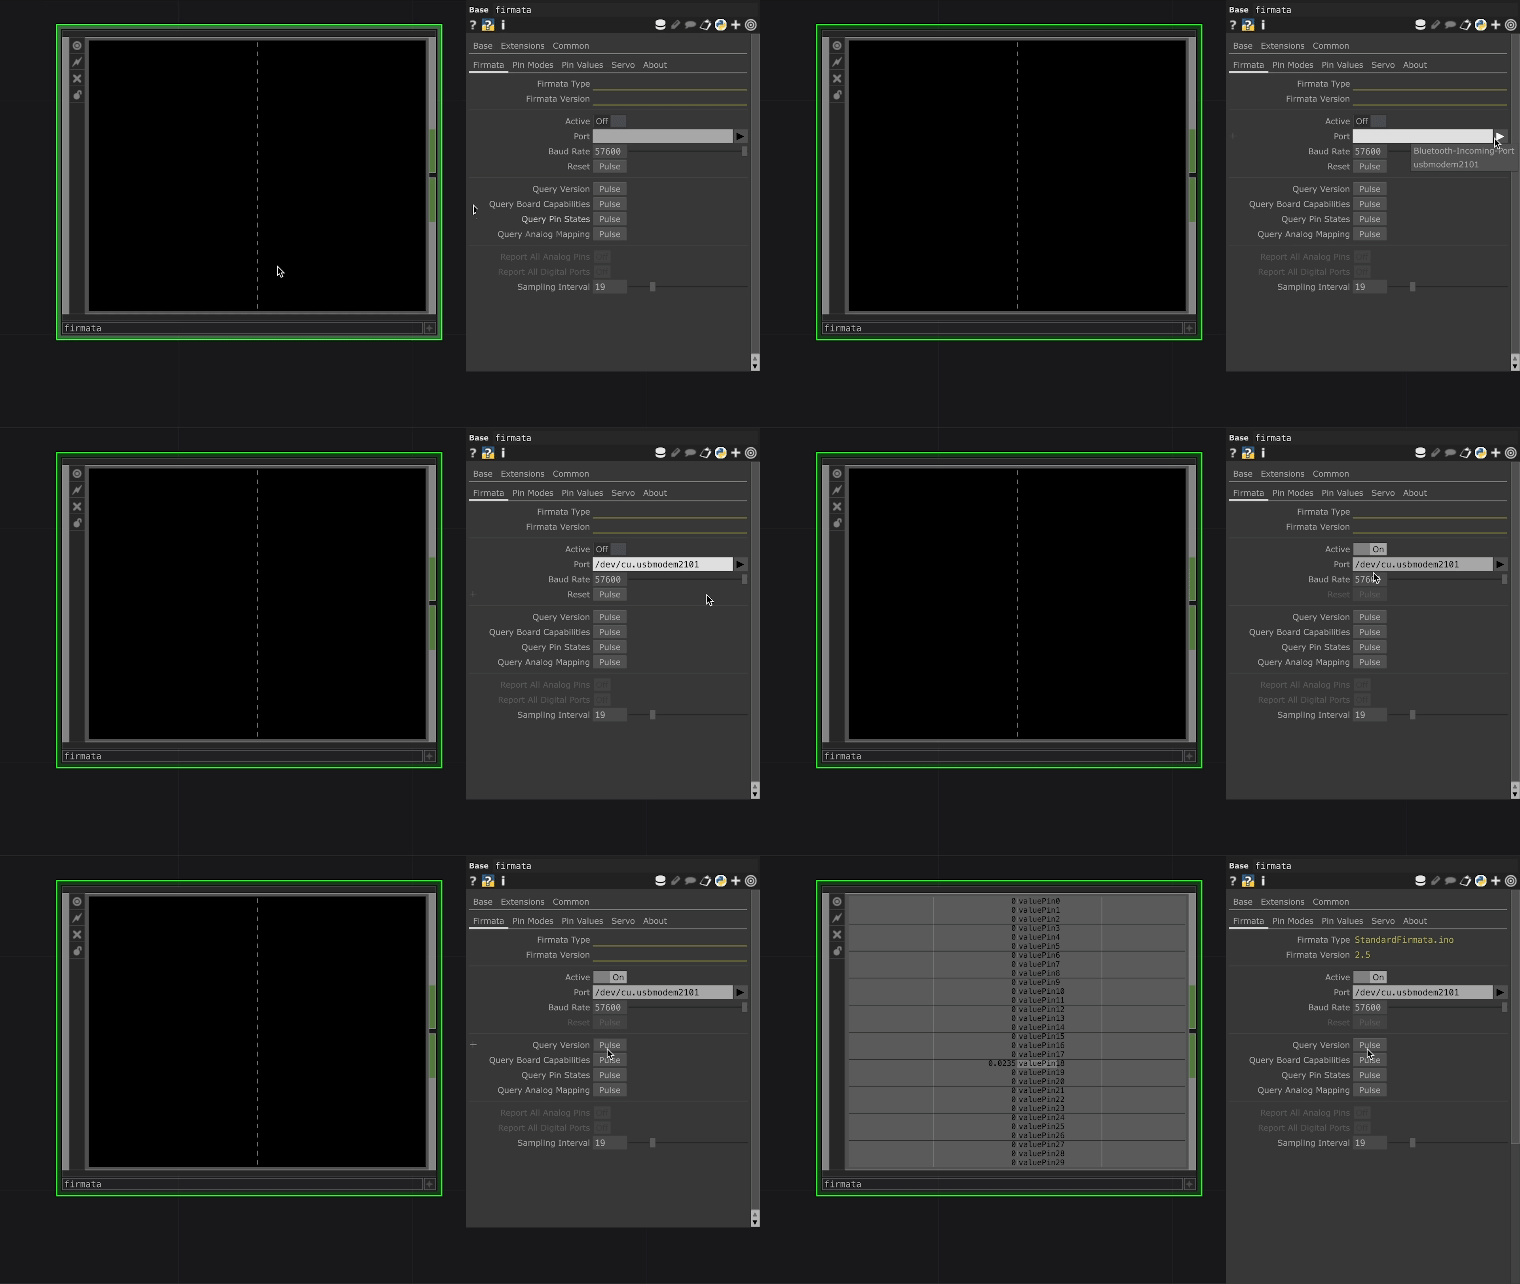
Select firmata, drag and drop it anywhere in the interface. Click "p" on your keyboard to view the parameters window. From the sub-category "Firmata" in Port find the directory of your Arduino board then click on Active to turn on serial communication. To view the status of each pin in your Arduino board click on Pulse next to Query Version.
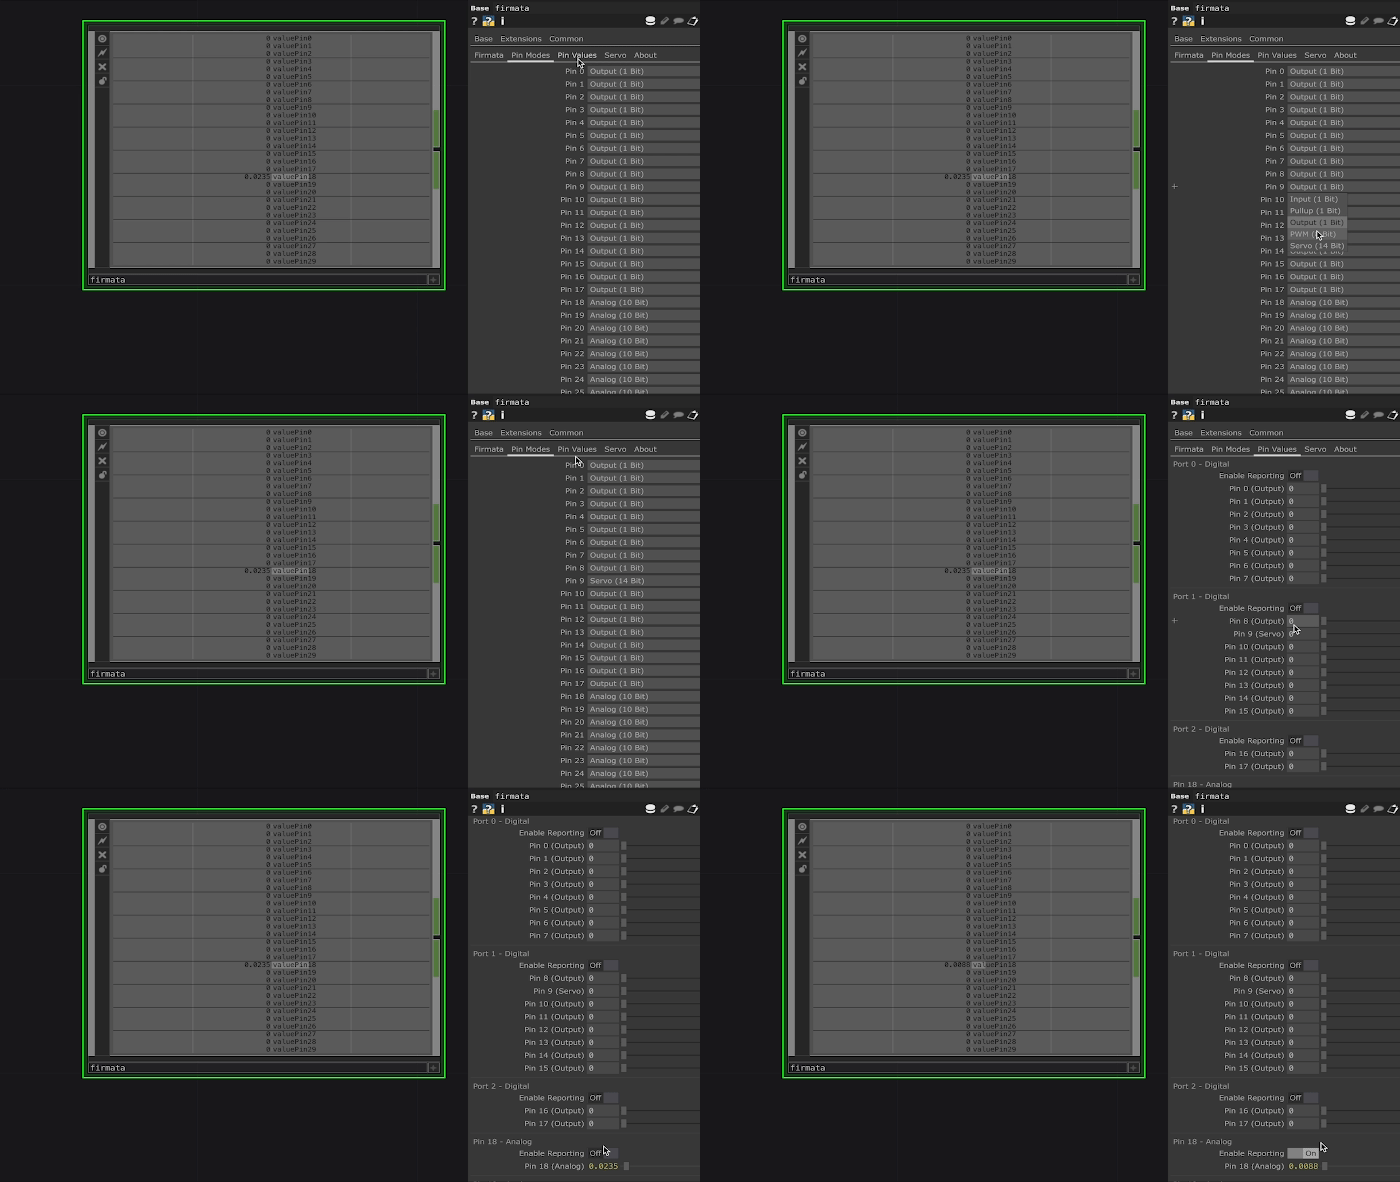
A list of all available pins will now appear in the operator; The first 17 valuePins correspond to the Digital pins on the Arduino board, while the valuePins between 18 and 23 correspond to the Analog pins on the board. For this reason you might notice some noise in valuePin18, which corresponds to our potentiometer's pin, A0. In the sub-category "Pin Values" find Pin 18 - Analog and "Enable Reporting" to receive data from Arduino, use your potentiometer to change this value.
In the sub-category "Pin Modes" find Pin 9 . Here you will be presented with multiple options, in this case we will select "servo", however if we were using another component we could have selected the more generic "output" option. In the sub-category "Pin Values", use the slider next to Pin 9 to activate your servo motor.
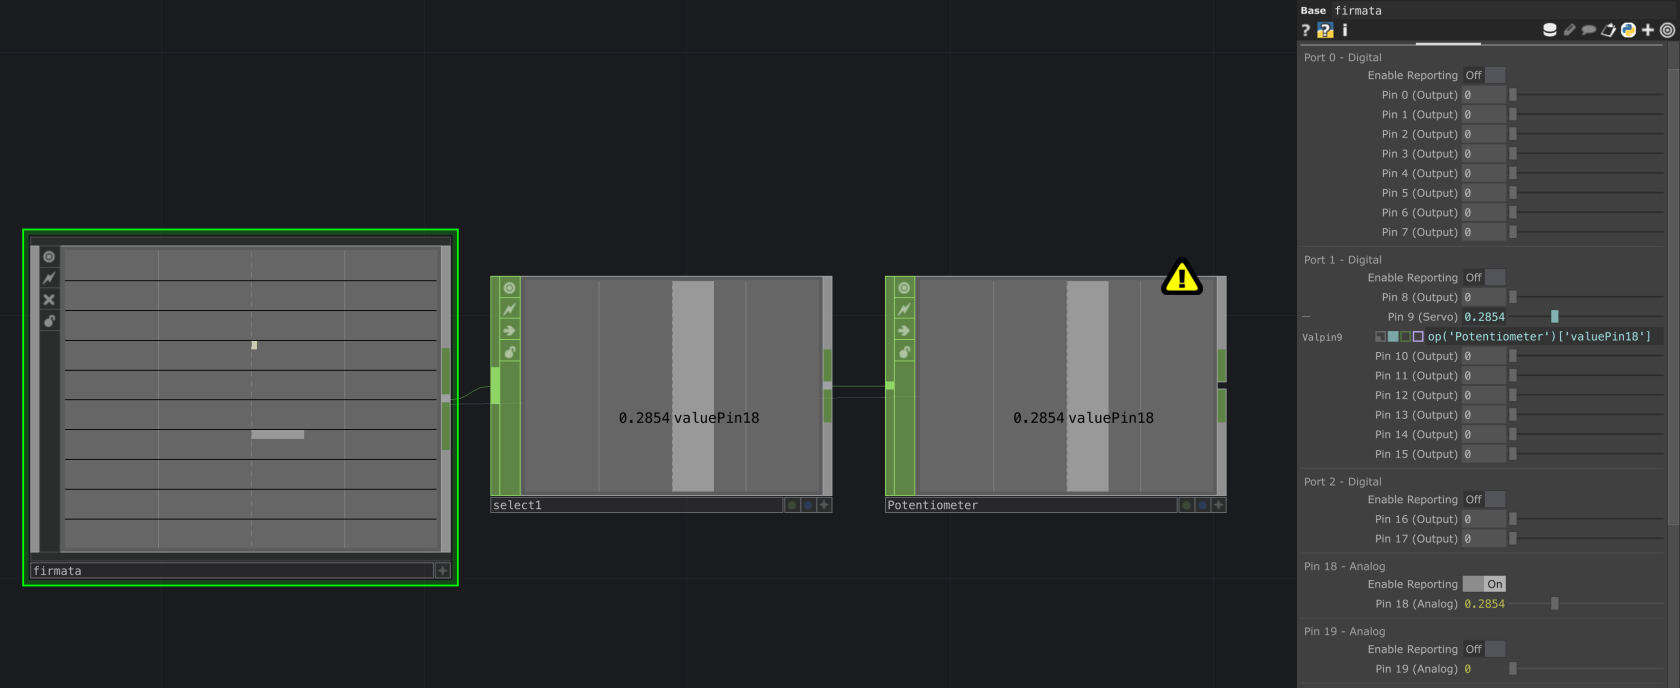
Finally, solelny for this demostration, we will use the potentiometer's value to control our servo; Add a Select CHOP to your Firmata COMP and from Channel Names select valuePin18, next add a Null CHOP - I've renamed it "Potentiometer". Activate the operator, then drag and drop the channel in the parameter Pin 9(Servo) in the Firmata COMP.
As mentioned before, this is not good practice hence we get an error *. A correct practice requires us to either send OR receive data through Arduino to manipulate visuals generated in Touchdesigner or use CHOPs to control external components.
* While our network might still run, the error indicates this practice is not reliable and might fail. If you are interested in controlling a physical output through a physical input you should proceed working in Arduino.

