AR with Unity - Step #2 - Enabling the Vuforia plug-in
Please notice that this is part of a series of tutorials progressing from basic concepts to more functional and complex projects.
Aims
This tutorial aims to help you setting up a AR Unity project using the Vuforia plug-in.
Prerequisites
-
Developing environment setup.
In order to continue with this project you should make sure to first check our tutorial:
AR with Unity - Step #1 - Developmen environment setup
Getting started
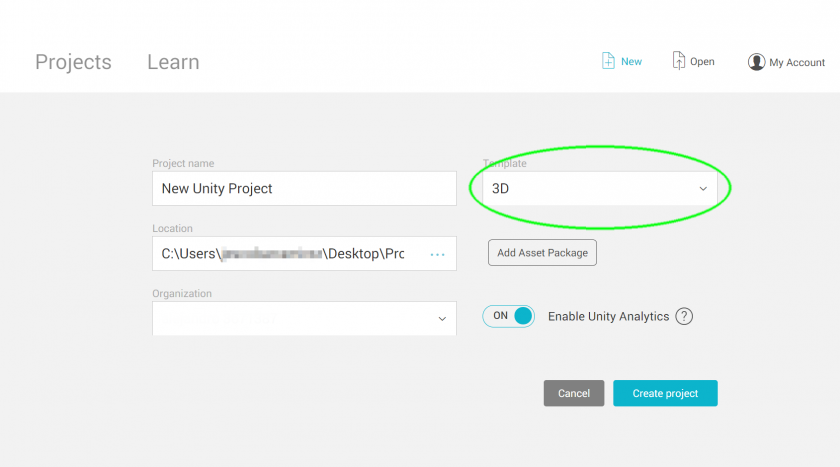
Create a new Unity project, you might need to login first. Make sure you select a 3D template.

Enabling the Vuforia plug-in (already included in Unity 2019.2.0f1) is a quite straight forward process, before continuing, let's check the "gameObject" menu as this is were yow will find the Vuforia elements once you enable the plug-in, for now, you will notice Vuforia objects are not available there.
To enable the plug-in, we need change the player's settings on the project settings pannel, the easiest way to do it is by opening the build settings pannel,
Then clicking the "Player settings" button found on the left botton corner.
Once the player settings pannel is open, you need to look for the XR settings and tick the "Vuforia Augmented Reality Supported" box.
This will install the Vuforia package, once the process finishes, you will be able to find and access the Vuforia objecs collection through the GameObject menu.
