Web App Template for Beginners
Start with this one. Learn to build a local web app that you can modify in your future projects.
Background
To put it simply, each web app has a frontend and backend. Frontend is usually for UI and design and runs on browser, on user’s own computer. P5.js sketches are frontend.
Backend is behind-the-scenes code that runs on server. It is stores and organizes data and delivers your app to users, ie. clients. If 10 people access your website, there are 10 frontends in action but only 1 backend.
Backend is often built with Node.js or Python. Here we use Node.js. Time to code!
Setup
1)Get a code editor if you don’t have one yet. I like Visual Studio.
2)Create a folder for your project on your laptop. For example, a folder called “example_app” in you Documents folder.
3)For Visual Studio: Open example_app folder and create the following file setup by clicking the folder and file icons:
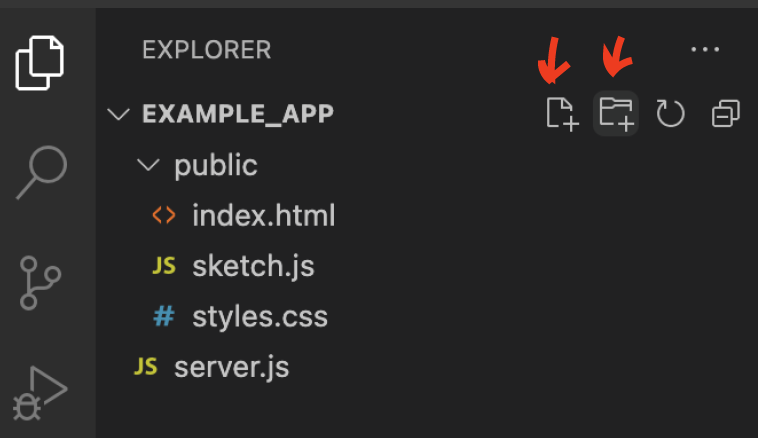
So there are three empty files in “public” subfolder and an empty server.js outside that in the root folder.
Alternatively you can create the setup outside your code editor, however Visual Code has made it really easy to create code files from the scratch so that’s why I recommend it.
Server with Node and Express
4)Install Node.
5)Watch videos 12.1. and 12.2. of this excellent tutorial by Daniel Shiffman: https://www.youtube.com/watch?v=2hhEOGXcCvg
Follow along to test Node and install Express like he does. Also, follow along to make your server.js file similar to his. Test by going to address localhost:3000 on your browser.
NOTE: WRITE steps for express and server.js file as well!! and add link.
Now you should have a basic server running! But we don’t have anything that the server could show. We’ll fix it next.
HTML setup
6)Go to your empty html file and add the following code:
<!DOCTYPE html>
<html>
   <head>
      <meta charset="utf-8" />
      <title>My test project</title>
   </head>
   <body>
      <h1>My first title!</h1>
   </body>
</html>
7)Go to localhost:3000 and refresh. You should see a minimalist white page with the text My first title!
If you get any errors, check your server.js and index.html files again. It's very easy to make a spelling mistake!
Client Javascript setup
8)Now we are only serving html. Let’s add the p5 library to serve some p5.js , ie. Javascript!
In your html file, add the following line of code in the <head> section of your html, after the <title> line:
<script src="https://cdn.jsdelivr.net/npm/p5@1.4.0/lib/p5.js"></script>
So the section now looks like:
<head>
  <meta charset="utf-8" />
  <title>My test project</title>
  <script src="https://cdn.jsdelivr.net/npm/p5@1.4.0/lib/p5.js">  </script>
</head>
This line of code gives us access to p5.js library in our project. Note that you can add other Javascript libraries in a similar fashion, like ML5 for machine learning or Three.js for building 3D visuals.
7)Our Javascript will live in the sketch.js file. First we need to reference that file in out HTML so that there is a connection. You can think about this way: HTML file is like the frame of a painting, and JS is what happens on the canvas of the painting. We need both!
In index.html, add the following line to the <body> section:
<script src="sketch.js"></script>
So that it looks like:
<body>
  <h1>My first title!</h1>
  <script src="sketch.js"></script>
</body>