How to use 7-Segment LED Backpack
What is a7-Segment LED?LED Backpack?
LEDThis (Light Emitting Diode) is a semiconductor light source that emits light when current flows through it. LED includes two pins, Cathode(-), aka the short leg, and Anode(+), aka the longer leg. It is oneversion of the mostLED common components. Making it lights upbackpack is usuallydesigned for these big bright 7-segment displays. These 7-segment displays normally require 13 pins (5 'characters' and 8 total segments each) This backpack solves the firstannoyance stepof intousing physical13 computingpins but we are going to door a littlebunch bitof morechips thisby time.
Whatan isI2C PWMconstant-current pin?
matrix Pulse-widthcontroller modulationsit (PWM)neatly pins areon the pinsback thatof youthe canPCB. findThe oncontroller yourchip Arduinotakes withcare "~"of everything, drawing all the LEDs in front of it. For example, pin D3, D5, D6, D9, D10 and D11 on Arduino UNO are PWM pins. The Arduino IDE has a built in function “analogWrite()” which can be used to generate a PWM signal. The frequency of this generated signal for most pins will be about 490Hz and we can give the valuebackground. from 0-255 using this function.
analogWrite(0)means a signal of 0% duty cycle.(turns somthing off)analogWrite(127)means a signal of 50% duty cycle.(turns somthing half on, e.g. dimmed light)analogWrite(255)means a signal of 100% duty cycle.(turns somthing on)
It can be used in controlling the brightness of LED, speed control of DC motor, controlling a servo motor or whereAll you have to getdo analogis outputwrite withdata digitalto means.it using the 2-pin I2C interface.
In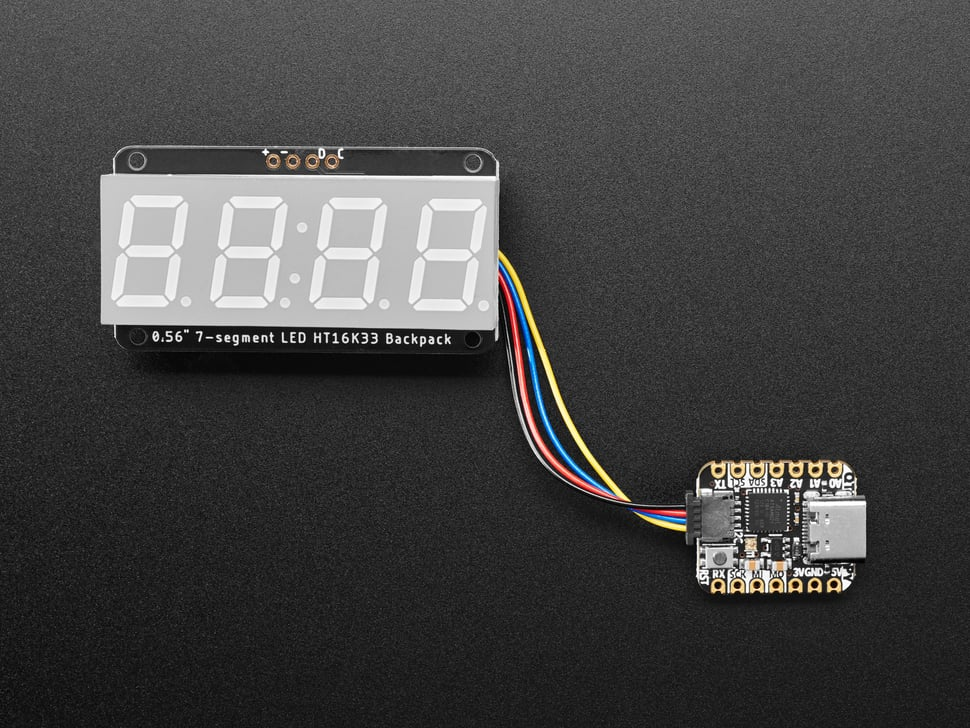
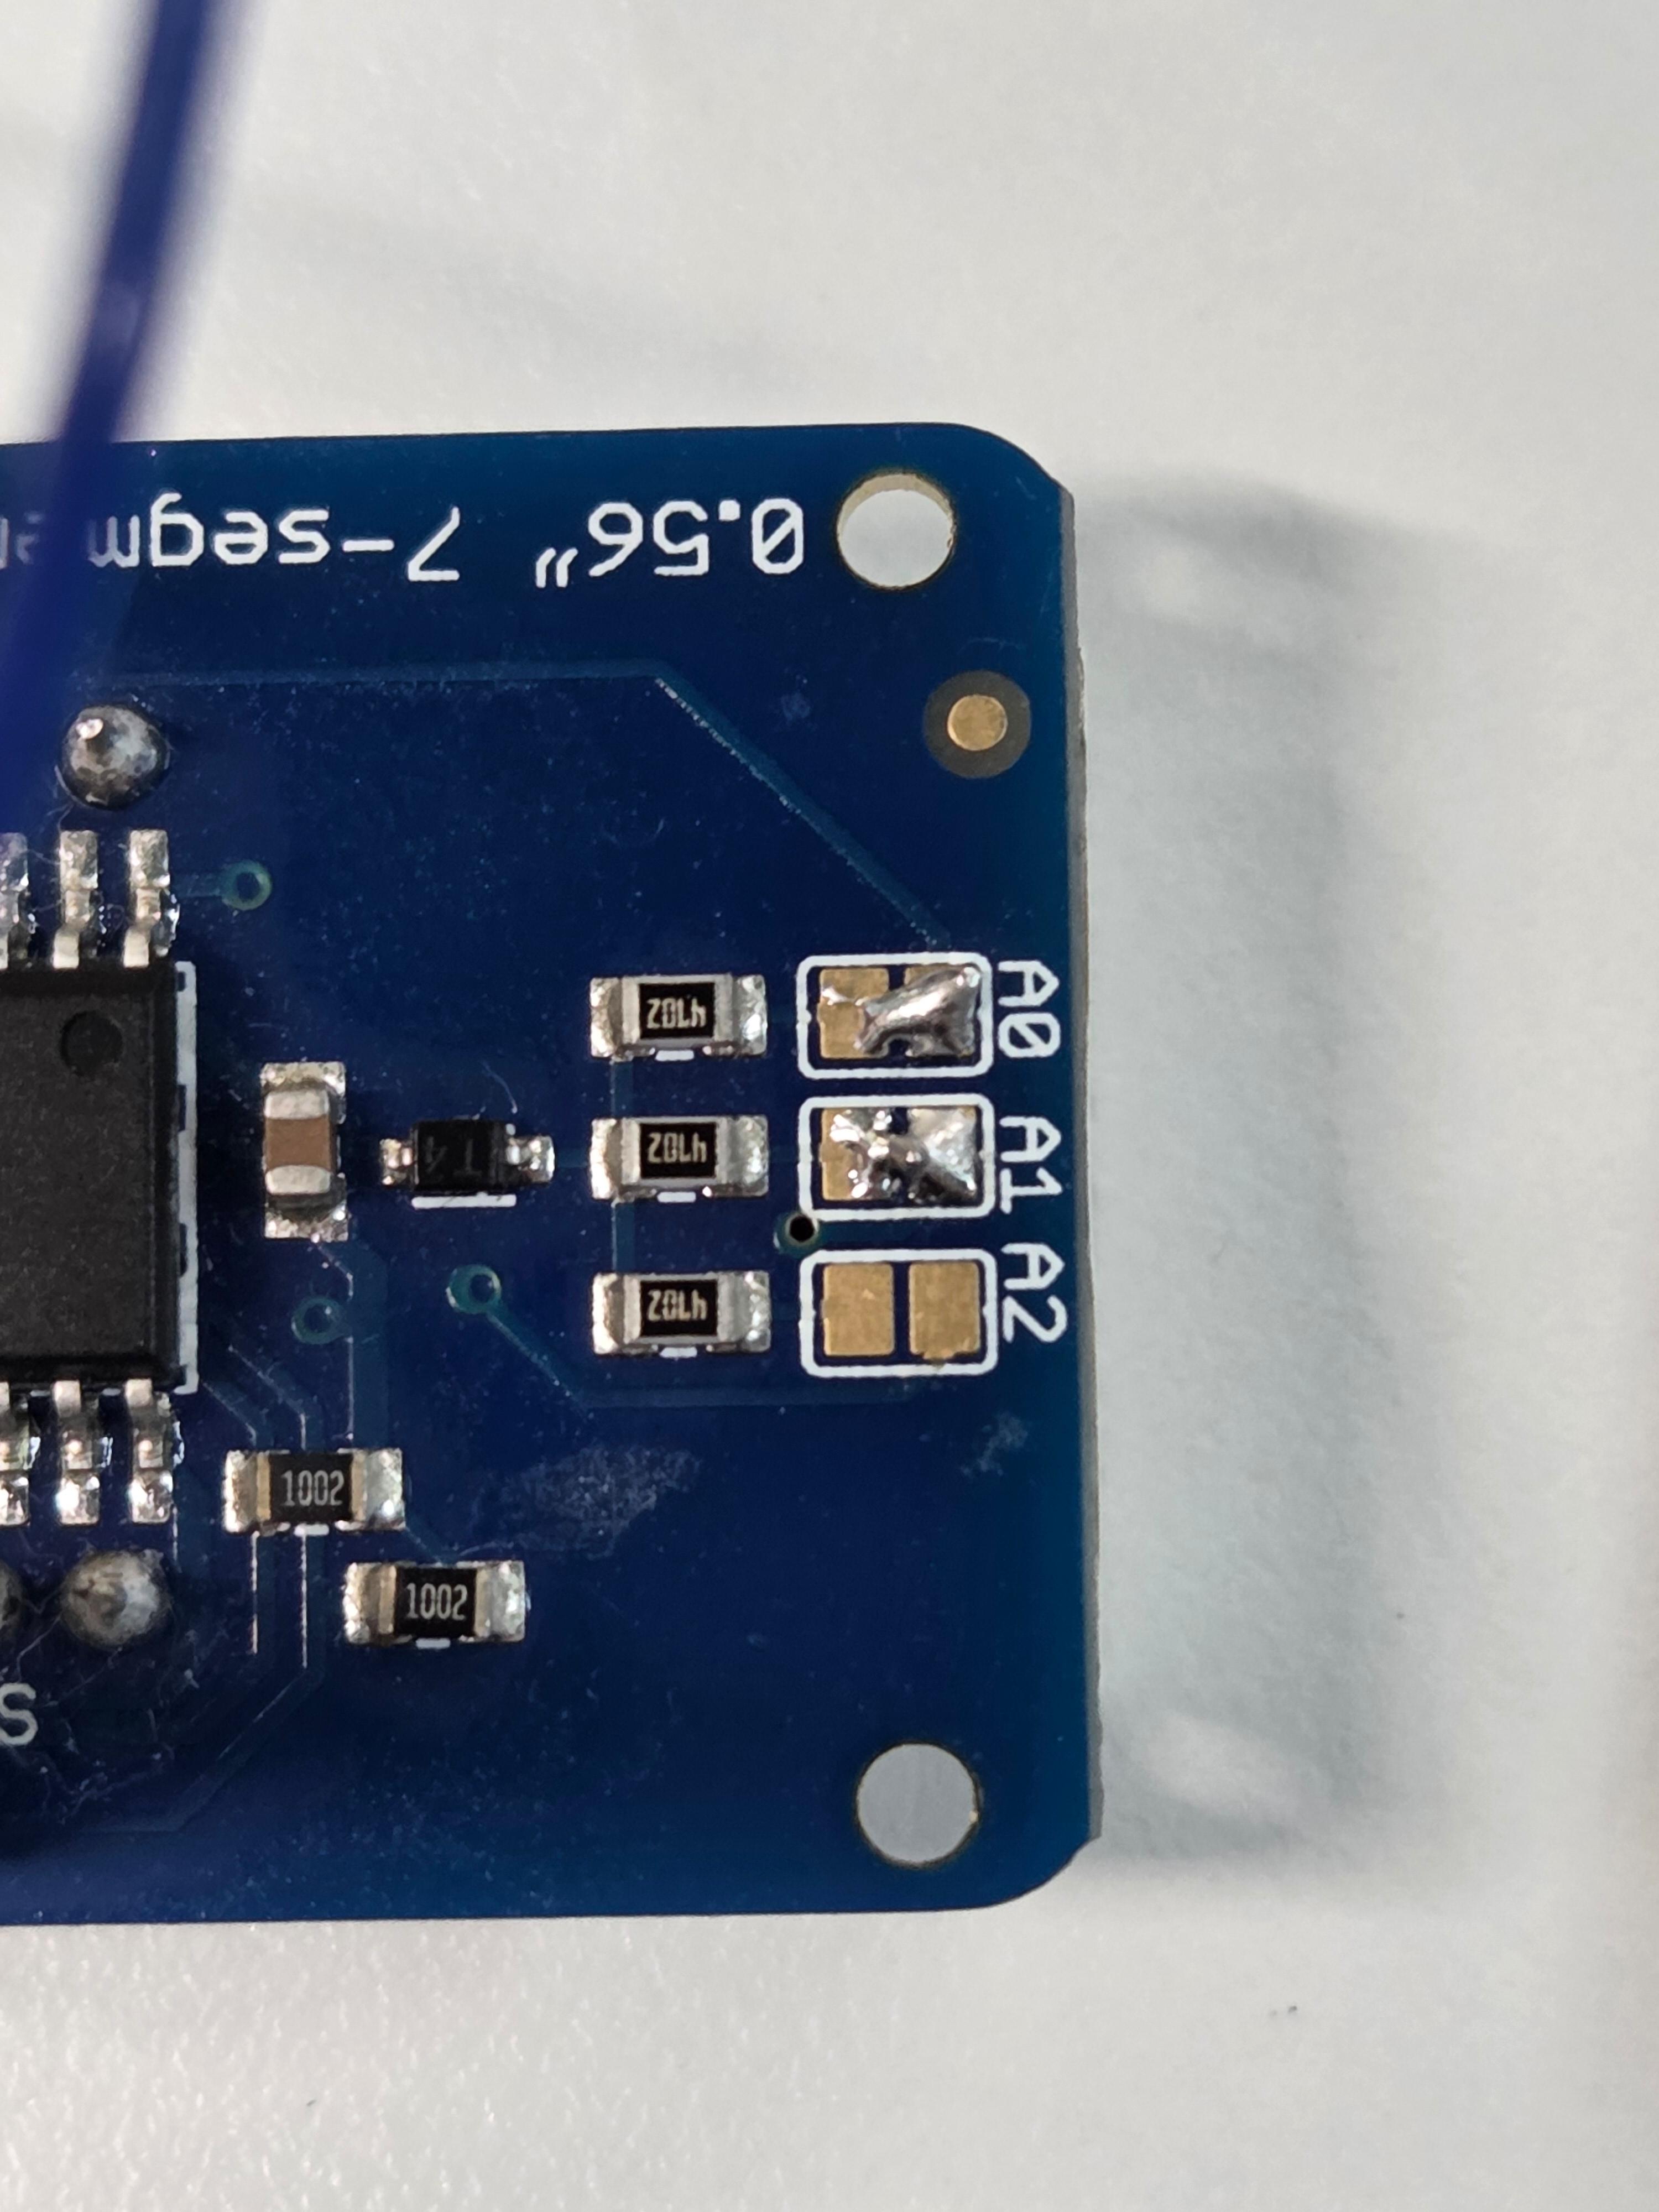
There tutorial,are wethree willaddress use the PWMselect pins so you can select one of 8 addresses to control itup andto have8 itof performthese ison breathinga light.single 2-pin I2C bus (as well as whatever other I2C chips or sensors you like). The seconddriver LEDchip can 'dim' the entire display from 1/16 brightness up to full brightness in this1/16th tutorialsteps. isIt optional.cannot dim individual LEDs, only the entire display at once.
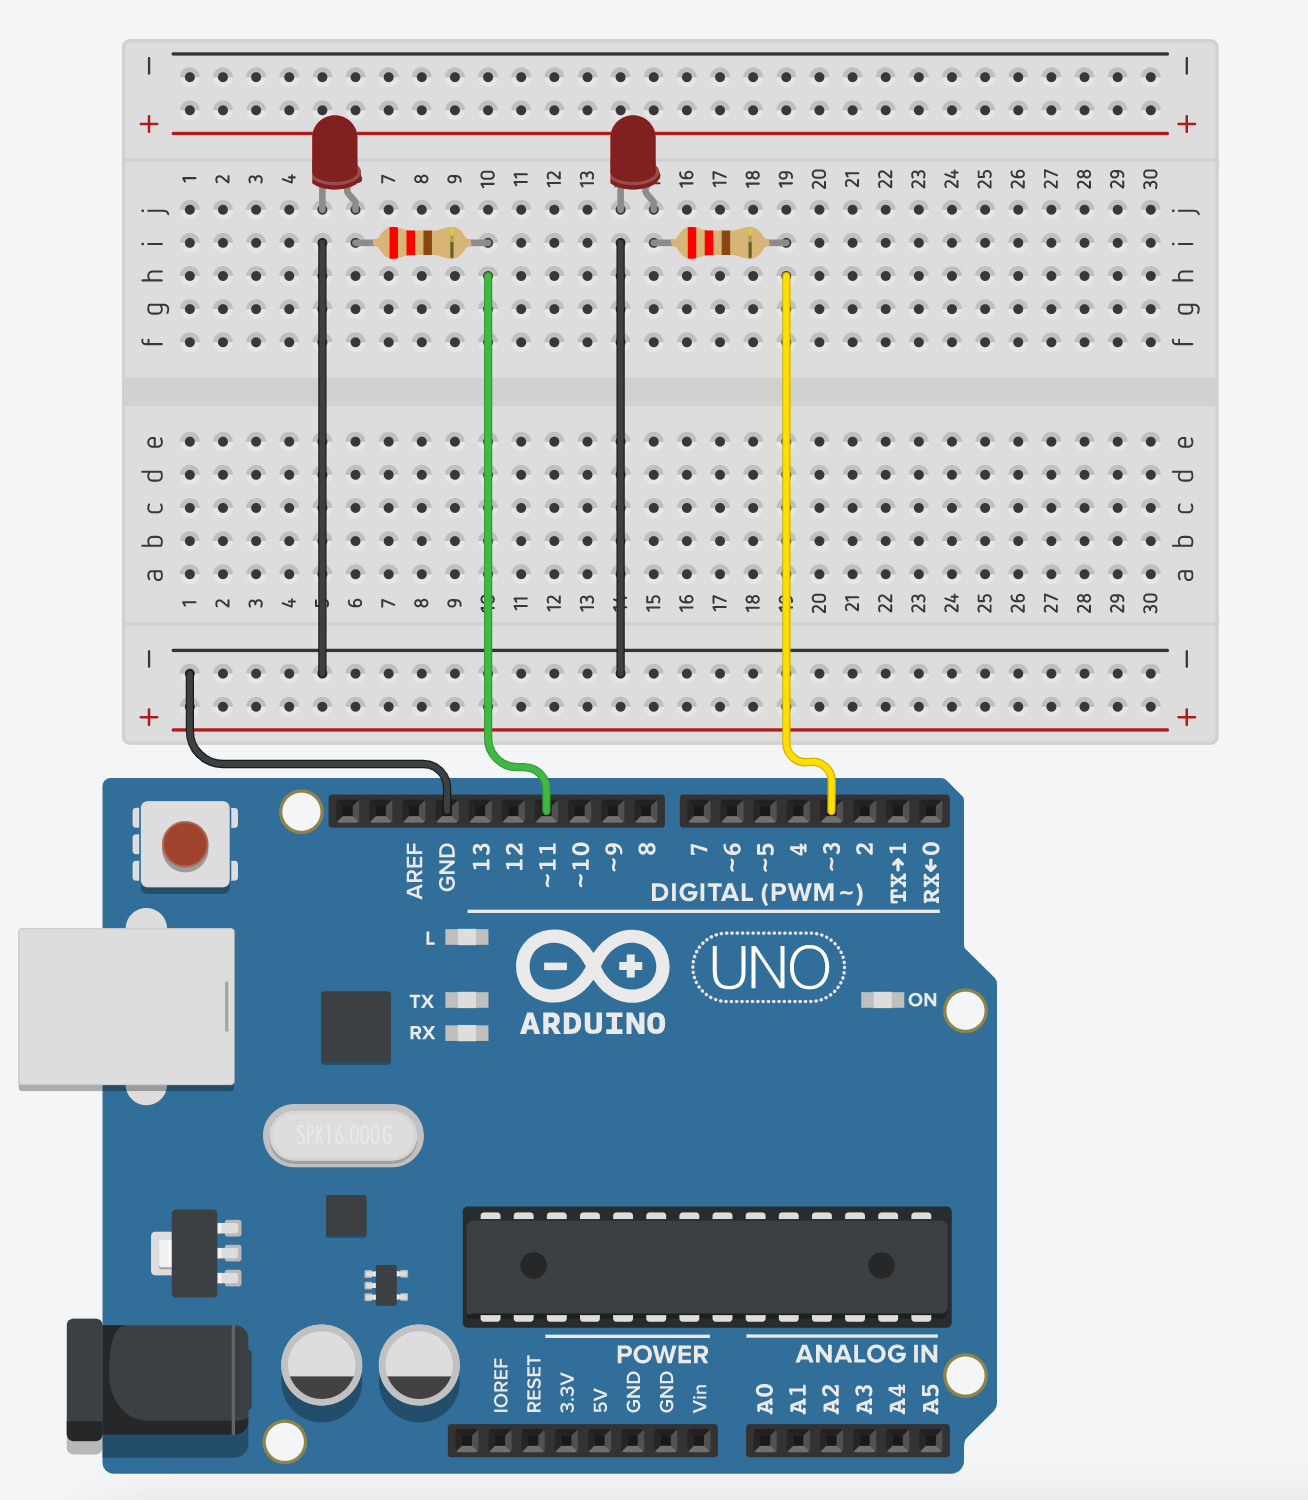
Wiring
Wiring is simple, there are just 24 wires and a resistor.wires.
LED short pin (-)GND to GroundLED long pin (+)VCC toPWM5V- SDA
pinto(D3),SDA - SCL
220ΩtoresistorSCL
Finding i2C address
i2c_scanner example code, which will show the address of the i2c device connecting to Arduino.
Getting started
#define#include led 3 //any PWM pins (~)
#define led2 11 //optional 2nd led

int brightness = 0;    // how bright the LED is
int fadeAmount = 5;<Wire.h>

void setup() {
  pinMode(led, OUTPUT)Wire.begin();

  pinMode(led2,Serial.begin(9600);
  OUTPUT)while (!Serial); //optional Leonardo: wait for 2ndSerial ledMonitor
  Serial.println("\nI2C Scanner");
}

void loop() {
  int nDevices = 0;

  Serial.println("Scanning...");

  for (byte address = 1; address < 127; ++address) {
    // The i2c_scanner uses the return value of
    // the Wire.endTransmission to see if
    // a device did acknowledge to the address.
    Wire.beginTransmission(address);
    byte error = Wire.endTransmission();

    if (error == 0) {
      Serial.print("I2C device found at address 0x");
      if (address < 16) {
        Serial.print("0");
      }
      Serial.print(address, HEX);
      Serial.println("  !");

      ++nDevices;
    } else if (error == 4) {
      Serial.print("Unknown error at address 0x");
      if (address < 16) {
        Serial.print("0");
      }
      Serial.println(address, HEX);
    }
  }
  if (nDevices == 0) {
    Serial.println("No I2C devices found\n");
  } else {
    Serial.println("done\n");
  }
  delay(5000); // Wait 5 seconds for next scan
}
Getting started
This is modified from Adafruit LED Backpack library - sevenseg example.
Make sure to have the correct i2c address.
#include <Wire.h> // Enable this line if using Arduino Uno, Mega, etc.
#include <Adafruit_GFX.h>
#include "Adafruit_LEDBackpack.h"

Adafruit_7segment matrix = Adafruit_7segment();

void setup() {
#ifndef __AVR_ATtiny85__
  Serial.begin(9600);
  Serial.println("7 Segment Backpack Test");
#endif

  //change the address to the one you found in the i2c scanner sketch
  matrix.begin(0x73);
}

void loop() {
  //breathing lighttry analogWrite(led,to brightness)print a number thats too long
  matrix.print(10000, DEC);
  analogWrite(led2,matrix.writeDisplay();
  brightness)delay(500);

  //optional forprint 2nda ledhex brightnessnumber
  =matrix.print(0xBEEF, brightnessHEX);
  + fadeAmount;
  if (brightness <= 0 || brightness >= 255) {
    fadeAmount = -fadeAmount;
  }matrix.writeDisplay();
  delay(50)500);

  //speed ofprint thea pulsingfloating point
  matrix.print(12.34);
  matrix.writeDisplay();
  delay(500);

  // print a string message
  matrix.print("7SEG");
  matrix.writeDisplay();
  delay(10000);
  // print with print/println
  for (uint16_t counter = 0; counter < 9999; counter++) {
    matrix.println(counter);
    matrix.writeDisplay();
    delay(500);
  }

}