How to use 7-Segment LED Backpack
What is 7-Segment LED Backpack?
This version of the LED backpack is designed for these big bright 7-segment displays. These 7-segment displays normally require 13 pins (5 'characters' and 8 total segments each) This backpack solves the annoyance of using 13 pins or a bunch of chips by having an I2C constant-current matrix controller sit neatly on the back of the PCB. The controller chip takes care of everything, drawing all the LEDs in the background. All you have to do is write data to it using the 2-pin I2C interface.
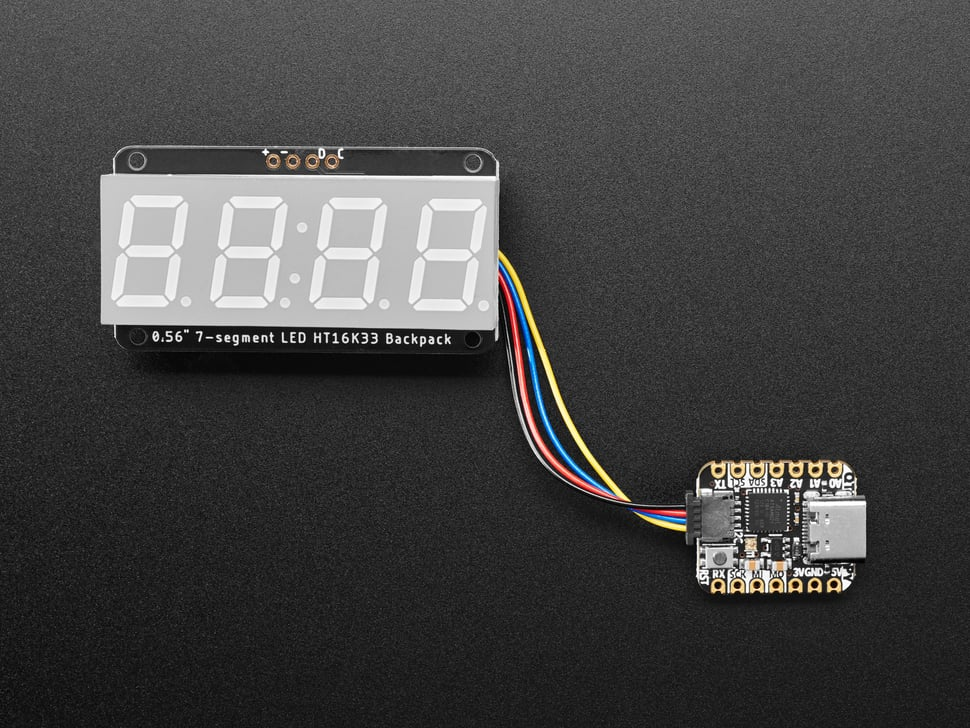
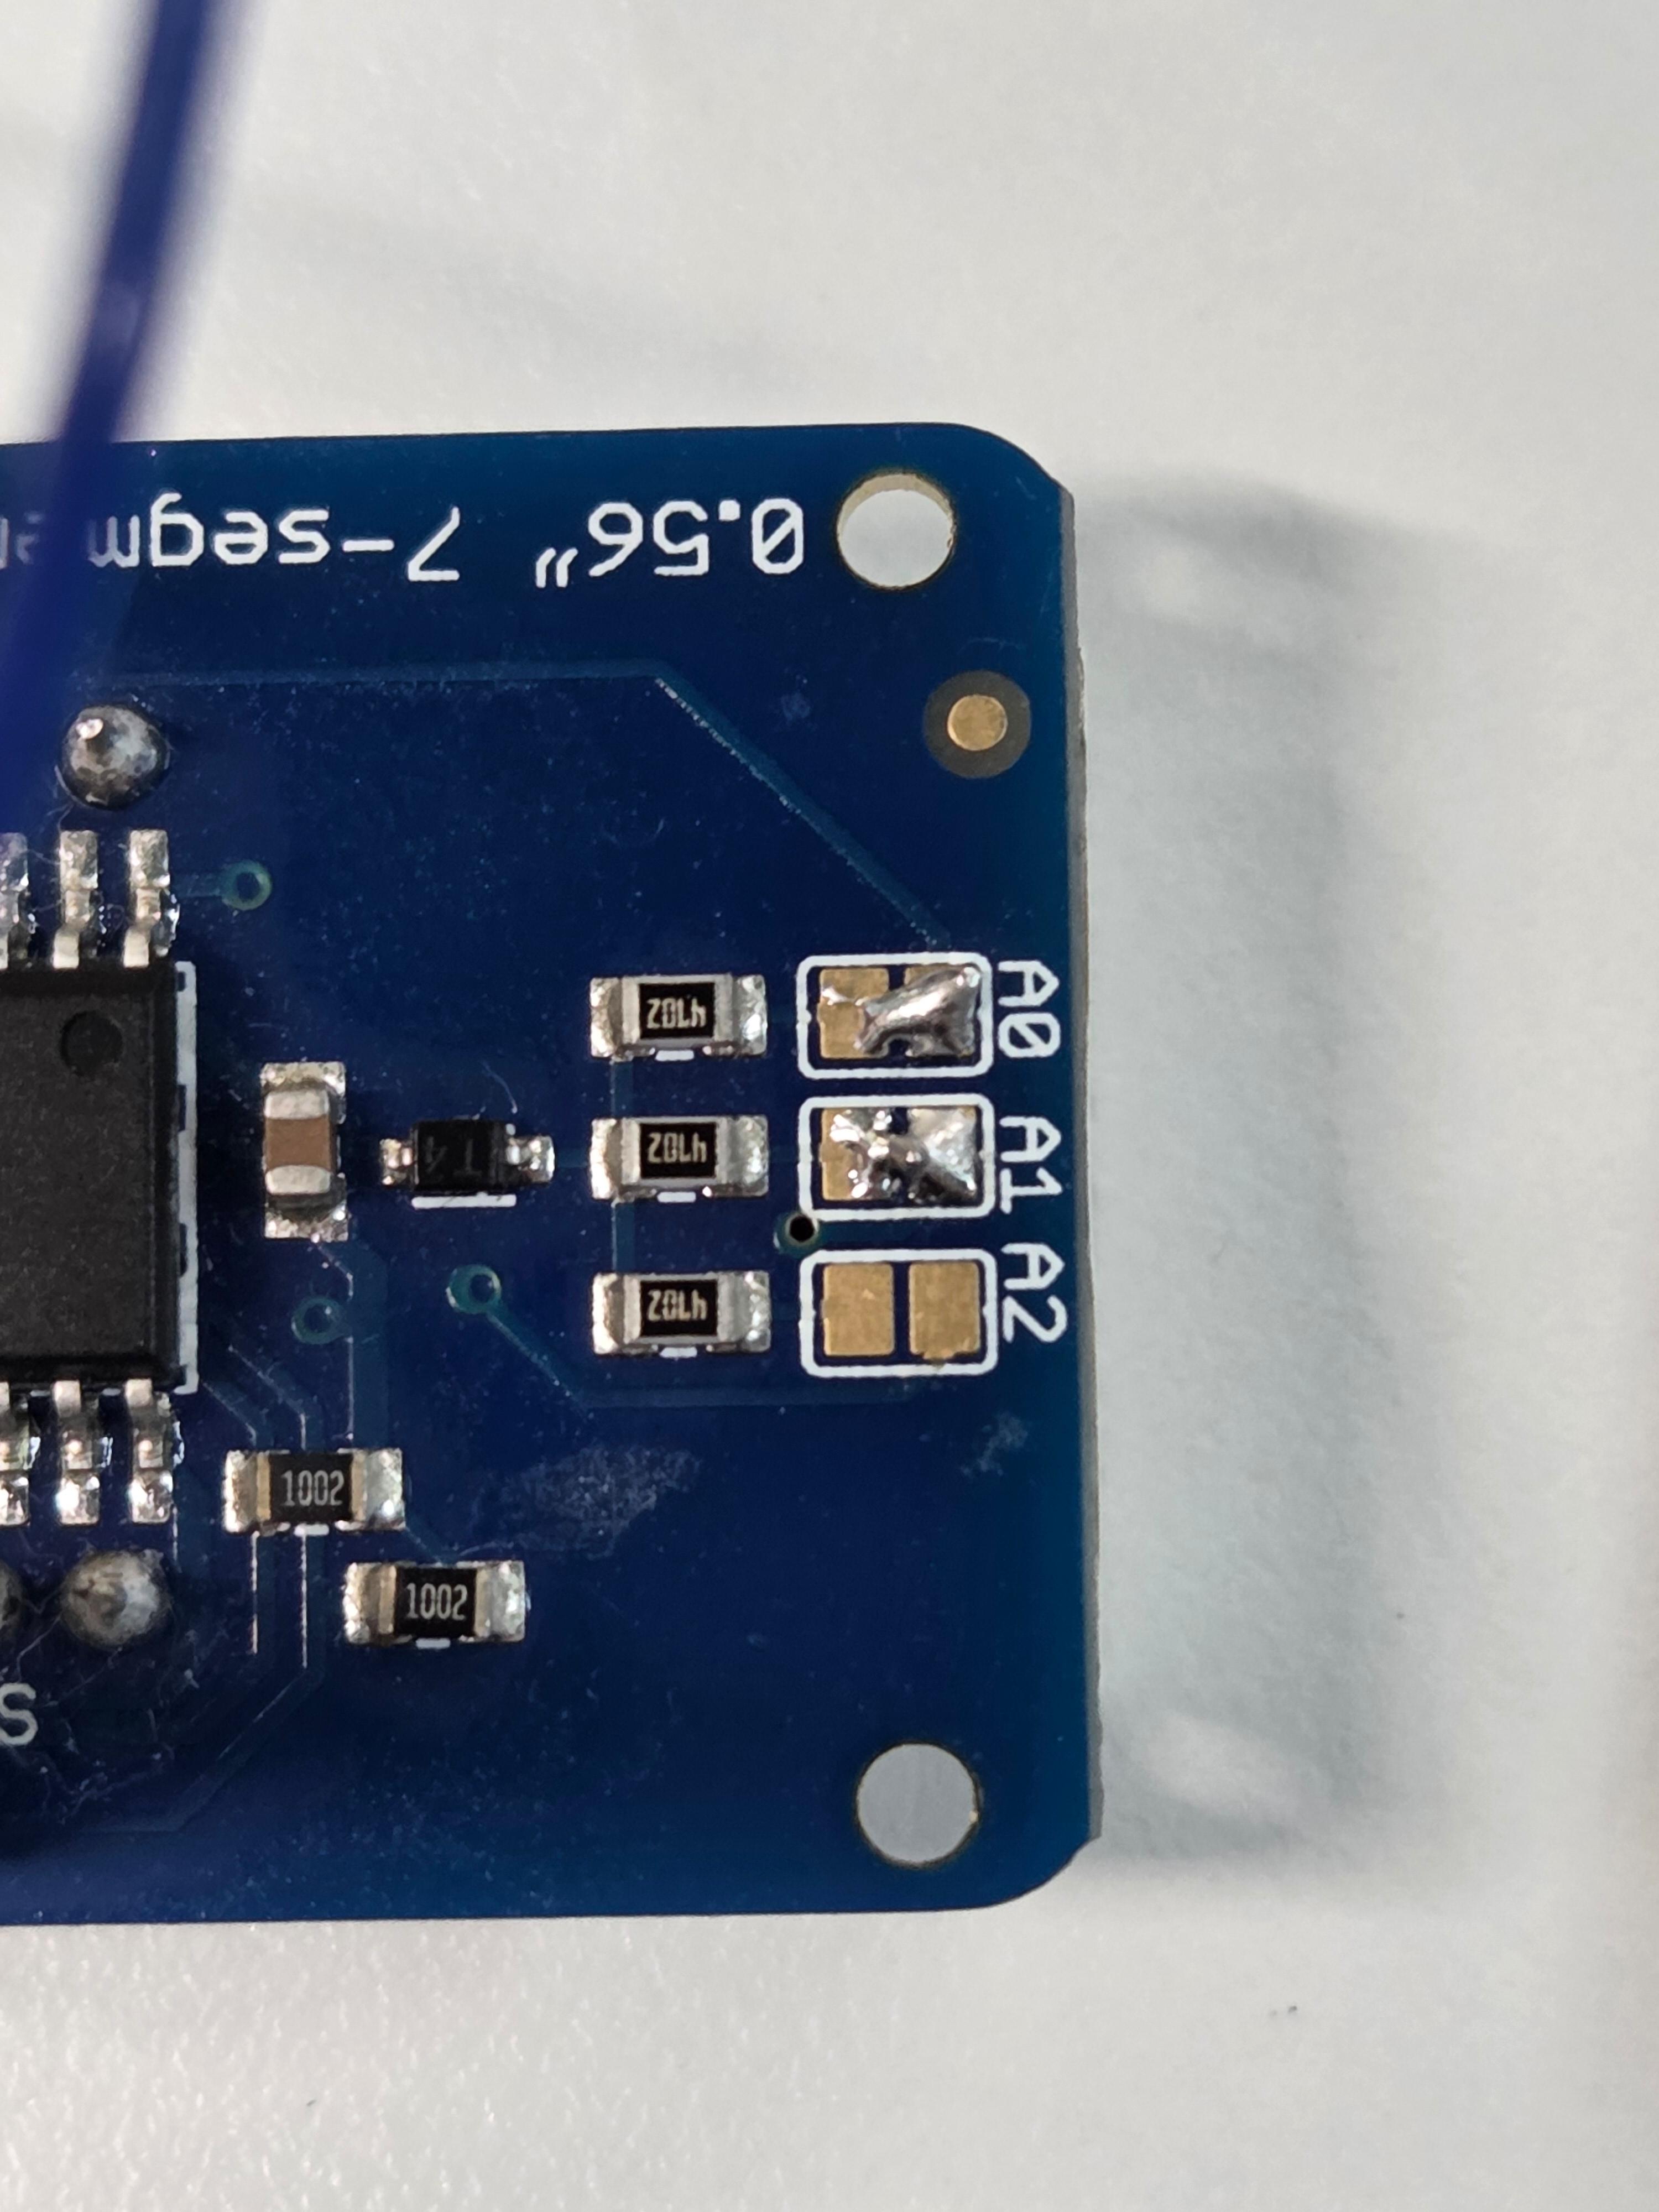
There are three address select pins so you can select one of 8 addresses to control up to 8 of these on a single 2-pin I2C bus (as well as whatever other I2C chips or sensors you like). The driver chip can 'dim' the entire display from 1/16 brightness up to full brightness in 1/16th steps. It cannot dim individual LEDs, only the entire display at once.
Wiring
Wiring is simple, there are just 4 wires.
- GND to Ground
- VCC to 5V
- SDA to SDA
- SCL to SCL
Finding i2C address
Since this component has 8 addresses to choose from, so it is important to double-check which address your component is using. The below sketch is i2c_scanner example code, which will show the address of the i2c device connecting to Arduino.
#include <Wire.h>

void setup() {
  Wire.begin();

  Serial.begin(9600);
  while (!Serial); // Leonardo: wait for Serial Monitor
  Serial.println("\nI2C Scanner");
}

void loop() {
  int nDevices = 0;

  Serial.println("Scanning...");

  for (byte address = 1; address < 127; ++address) {
    // The i2c_scanner uses the return value of
    // the Wire.endTransmission to see if
    // a device did acknowledge to the address.
    Wire.beginTransmission(address);
    byte error = Wire.endTransmission();

    if (error == 0) {
      Serial.print("I2C device found at address 0x");
      if (address < 16) {
        Serial.print("0");
      }
      Serial.print(address, HEX);
      Serial.println("  !");

      ++nDevices;
    } else if (error == 4) {
      Serial.print("Unknown error at address 0x");
      if (address < 16) {
        Serial.print("0");
      }
      Serial.println(address, HEX);
    }
  }
  if (nDevices == 0) {
    Serial.println("No I2C devices found\n");
  } else {
    Serial.println("done\n");
  }
  delay(5000); // Wait 5 seconds for next scan
}
Getting started
This is modified from Adafruit LED Backpack library - sevenseg example.
Make sure to have the correct i2c address.
#include <Wire.h> // Enable this line if using Arduino Uno, Mega, etc.
#include <Adafruit_GFX.h>
#include "Adafruit_LEDBackpack.h"

Adafruit_7segment matrix = Adafruit_7segment();

void setup() {
#ifndef __AVR_ATtiny85__
  Serial.begin(9600);
  Serial.println("7 Segment Backpack Test");
#endif

  //change the address to the one you found in the i2c scanner sketch
  matrix.begin(0x73);
}

void loop() {
  // try to print a number thats too long
  matrix.print(10000, DEC);
  matrix.writeDisplay();
  delay(500);

  // print a hex number
  matrix.print(0xBEEF, HEX);
  matrix.writeDisplay();
  delay(500);

  // print a floating point
  matrix.print(12.34);
  matrix.writeDisplay();
  delay(500);

  // print a string message
  matrix.print("7SEG");
  matrix.writeDisplay();
  delay(10000);
  // print with print/println
  for (uint16_t counter = 0; counter < 9999; counter++) {
    matrix.println(counter);
    matrix.writeDisplay();
    delay(500);
  }

}