(MAC) Automatic printing with Automator
What is Automator?
Apple’s Automator is a built-in Mac feature that allows users to easily “program” their Macs to automatically execute certain repetitive tasks, thus saving time by removing the need to perform said tasks manually.
Automator can be helpful when you don't have much programming knowledge or don't want to do a lot of coding. One of the most common usage is Auto-printing. Unfortunately, the app is not available for other operating systems.
1. Launch Automator
Search for "Automator" in Spotlight and launch.
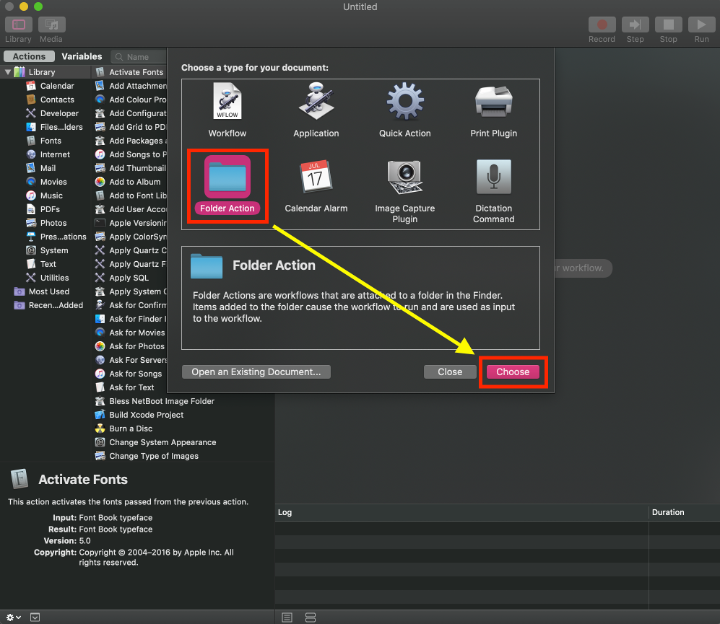
2. Folder Action
You will see this dialogue when you launch Automator and choose Folder Action.
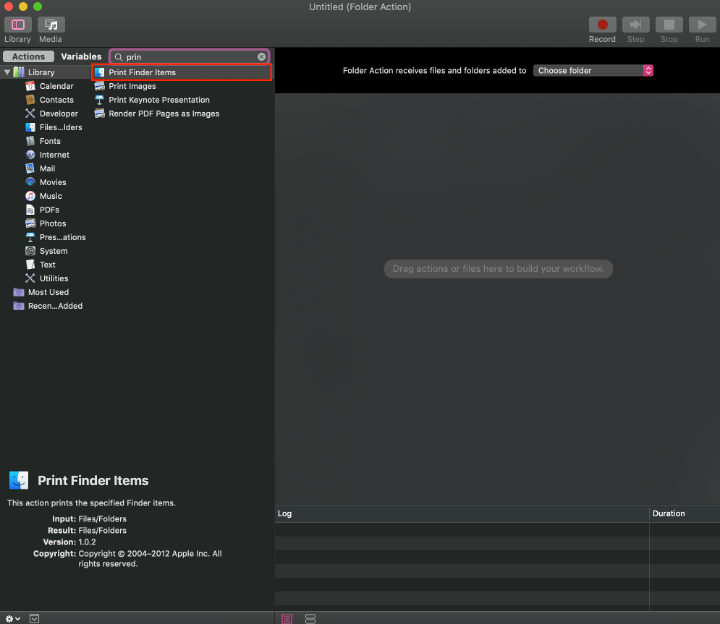
3. Print Finder Items
Drag Print Finder Items to the right side of the window.
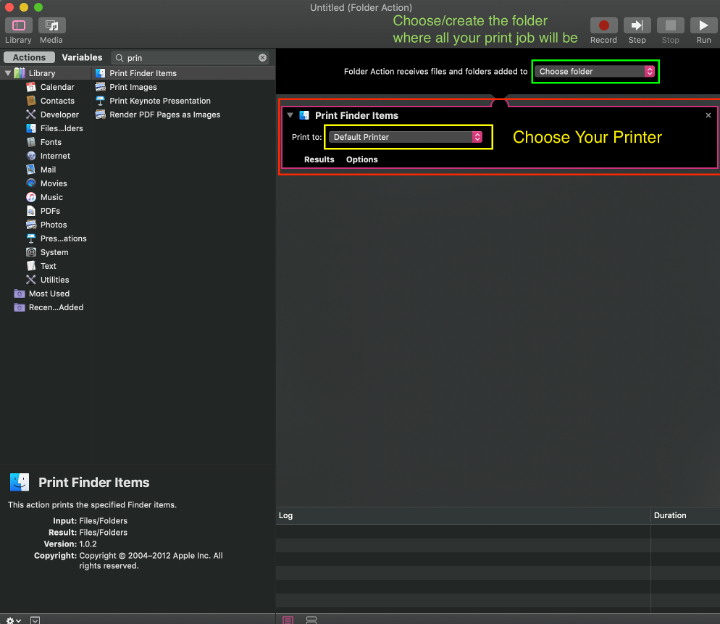
4. Choose Folder & Printer
Choose the folder where you want to put all your printing files and choose the printer that you want to use as the default printer.
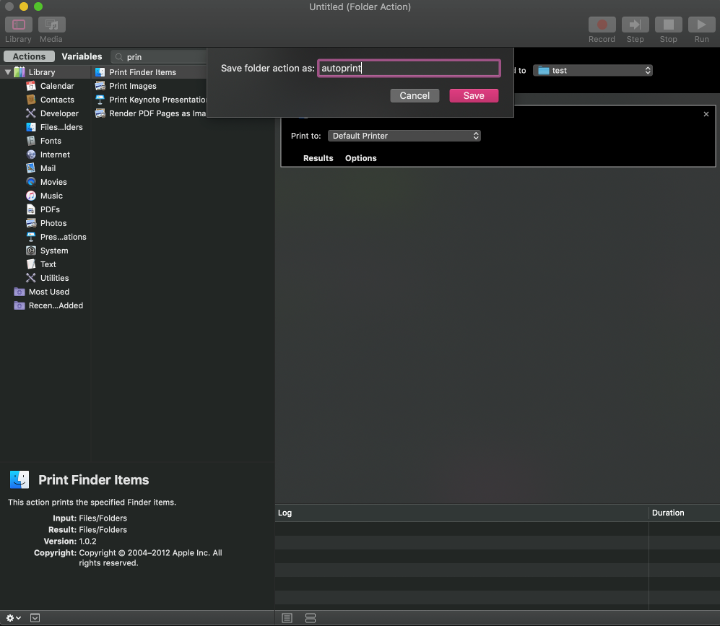
5. Save the Script
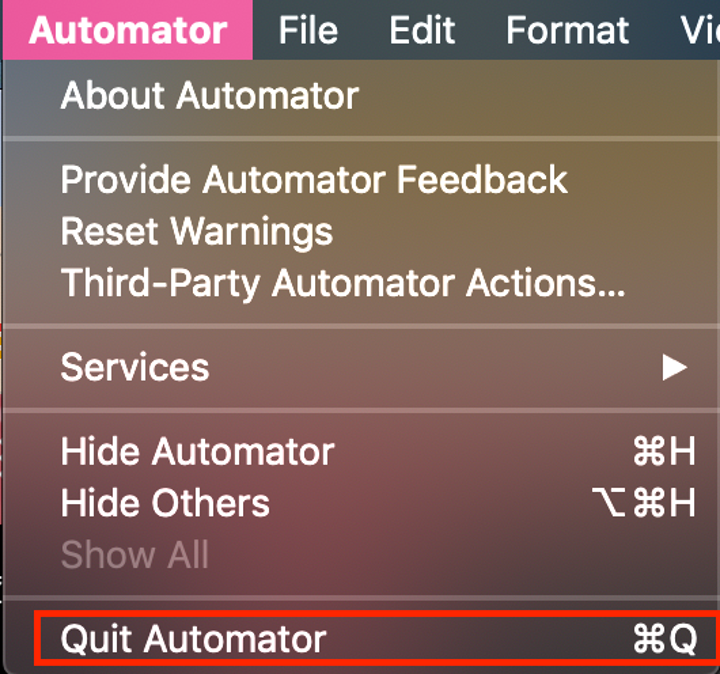
6. Quit Automator
You must quit the Automator for it to work.
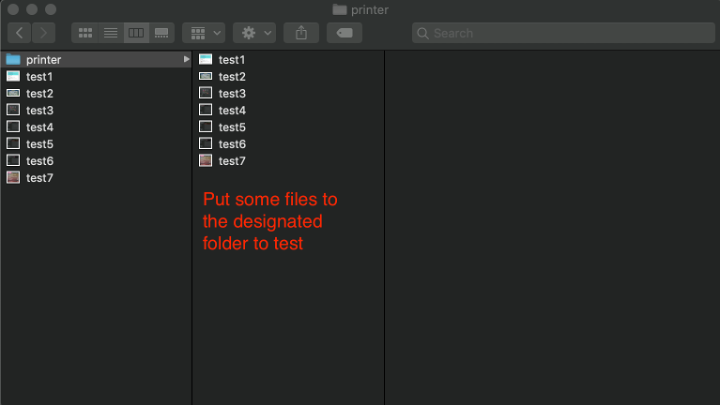
7. Testing
Put some files into the folder you chose above.
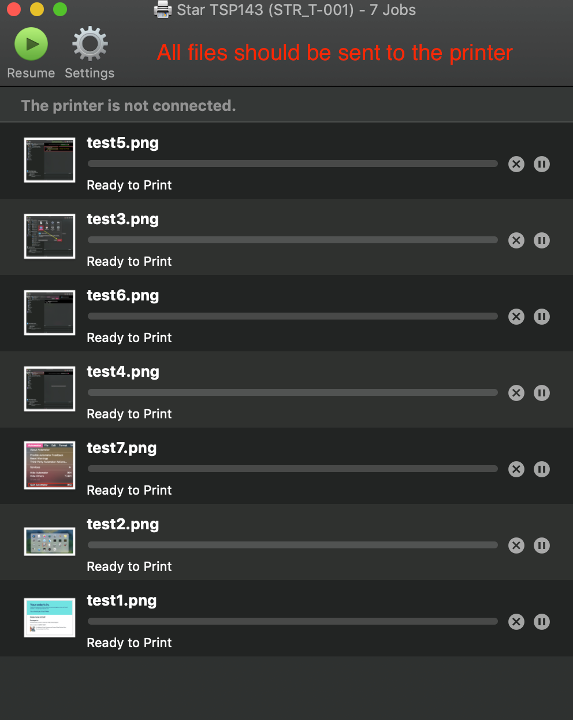
8. Printing
All files should be sent and lined up in the Printer dialogue.
Now that you have set up a auto-print workflow, it can be a great add-on for your project. For example, we have a generative graphic sketch in Processing, we program it to save the graphics every 1 minute in a designated folder and the Automator will print it auotmatically through a thermal printer.