Using built-in example code and Reading the hookup diagram
1. Upload example code
Open a built-in example, Blink, and upload the code.
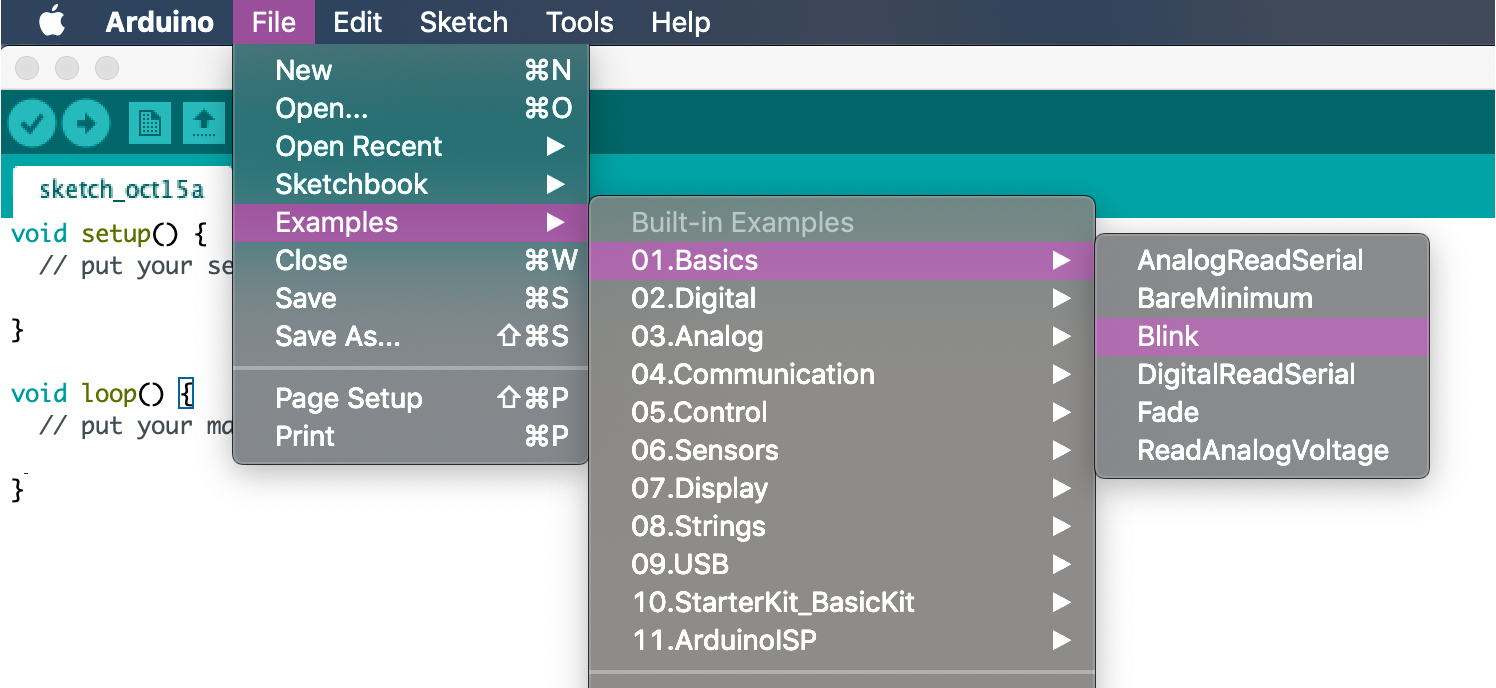
2. Blinking Orange LED
The orange LED labelled as L should be blinking now.

3. Understanding the Code
- First, you will see a lot of light grey coloured text, those are comments, not code. You will find a lot of information from these comments to help you understand the code.
- Arduino is using the langauge C++.
- if you add
//in front of anything, the rest of the line will become a comment as well. - Next, you will see two main parts,
void setup() {}andvoid loop() {}, this is the main structure of Arduino code. - In the
setup(), usually we establish what component we are going to control and what are they. -
pinMode(LED_BUILTIN, OUTPUT);we are using the built-in on-board tiny LED and it is an output as it is a light. - In
loop(), as the name suggested, it will loop forever. -
digitalWrite(LED_BUILTIN, HIGH);means we are writing a command to this component, LED_BUILTIN, digitally, which means on or off only. And we choose HIGH, turn it on. -
delay(1000);delay means whatever you are doing, freeze there for this amount of time, 1000 is 1000 milliseconds, which is 1 second. Therefore, the light stays on for 1 second. -
digitalWrite(LED_BUILTIN, LOW);Again, writing a command digitally, but this time LOW, turn it off.delay(1000);stays off for a second. - Therefore, our orange light is blinking every 1 second.
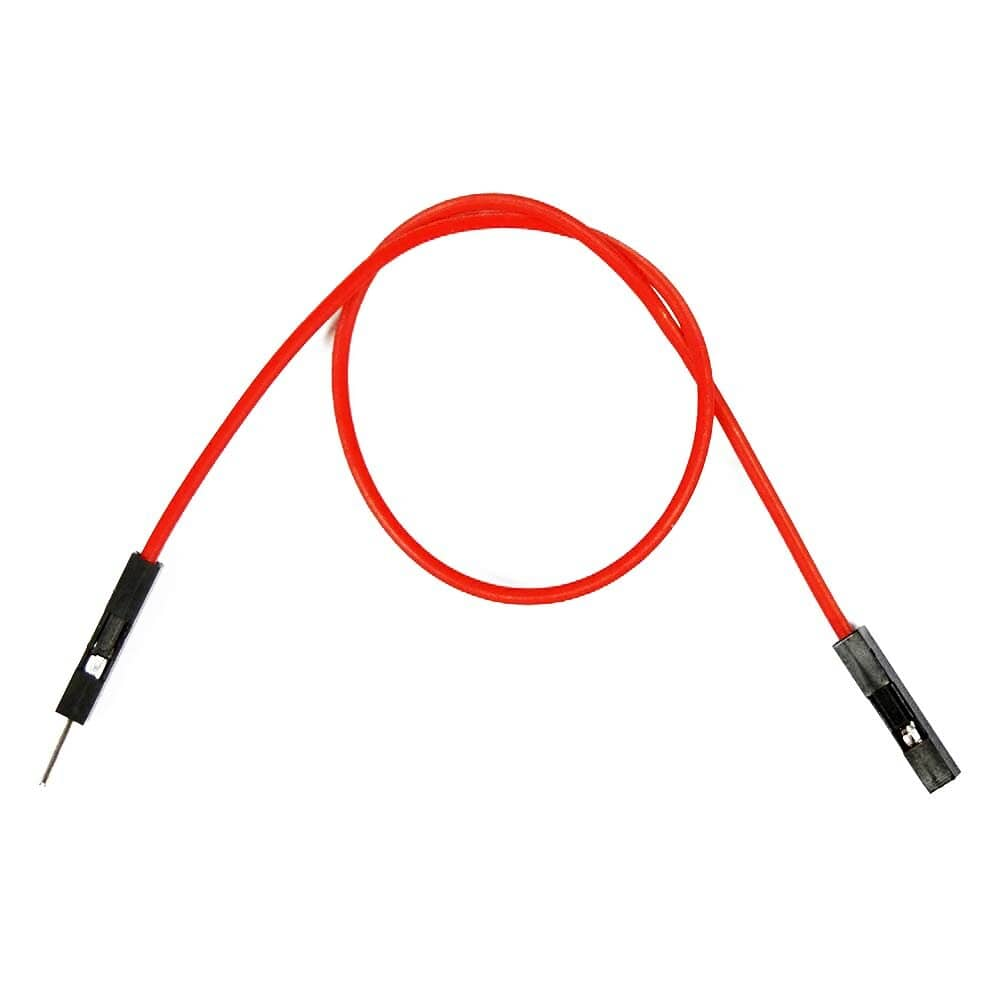
4. Getting ready for the circuit
We will use jumper wire with one pin end and one socket end (male to female) to make the connections.
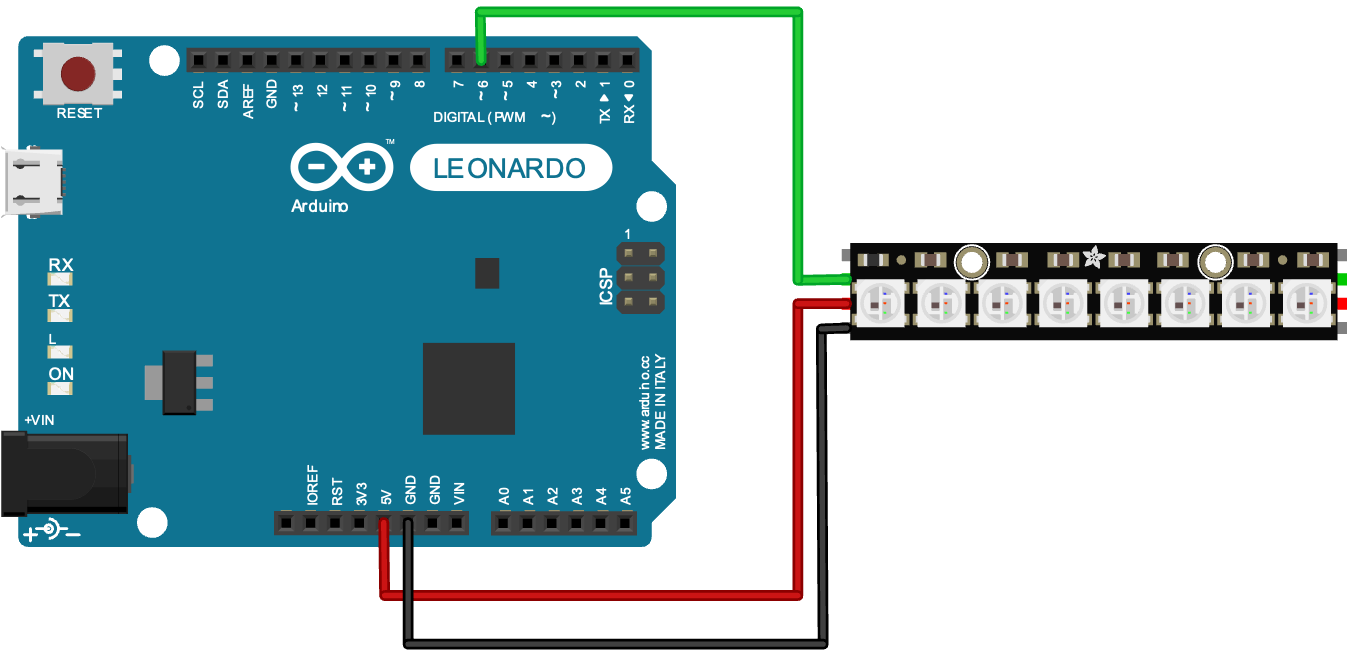
5. Reading the hookup diagram
Whenever you see a diagram like this, it's very tempting to count first goes there, second goes there, Don't do this! Instead, read the labels next to each pin and make the connections based on the pin labels.
For example, now you should have a neopixel stick with you, read the pin label on the back of the stick and the labels on the Arduino board, and try to match the labels.
- neopixel: 5VDC -> Arduino: 5V
- neopixel: GND -> Arduino: GND
- neopixel: DIN -> Arduino: ~6
Next, you will follow some tutorials about installing libraries, finishing learning how to use Neopixel and using the Ultrasonic Distance sensor. After finishing all the tutorials, please come back to the final bit.