How to make Animation on NeoMatrix with Processing
Controlling NeoMatrix with Processing
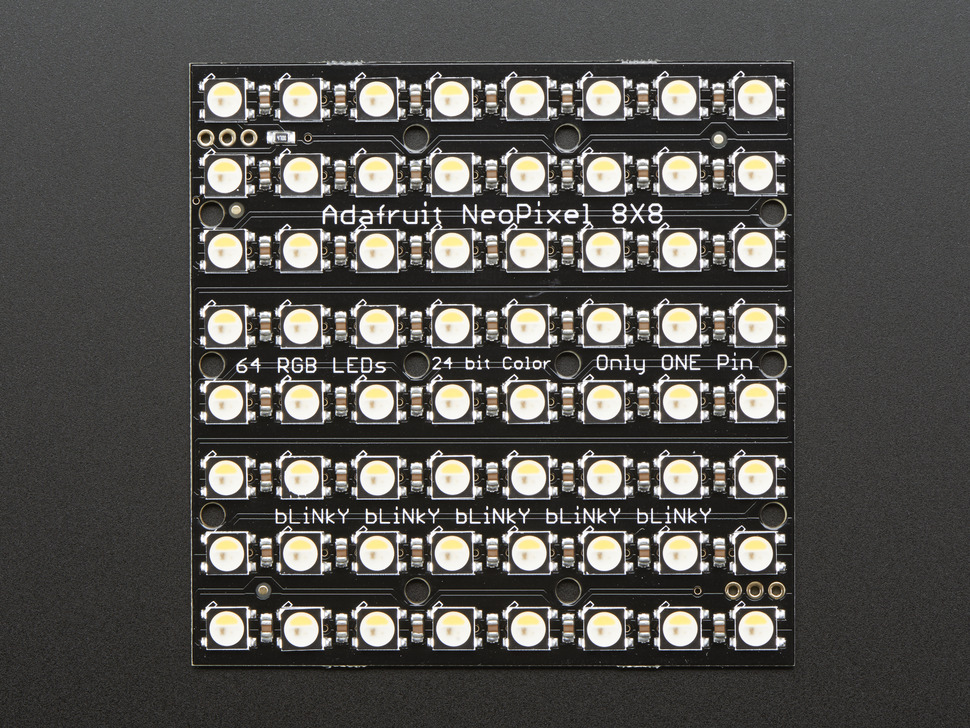
This tutorial is a follow-up to the last NeoMatrix animation tutorial. We are using Processing to create images, videos or realtime interaction and push those to an 8x8 Adafruit NeoMatrix.
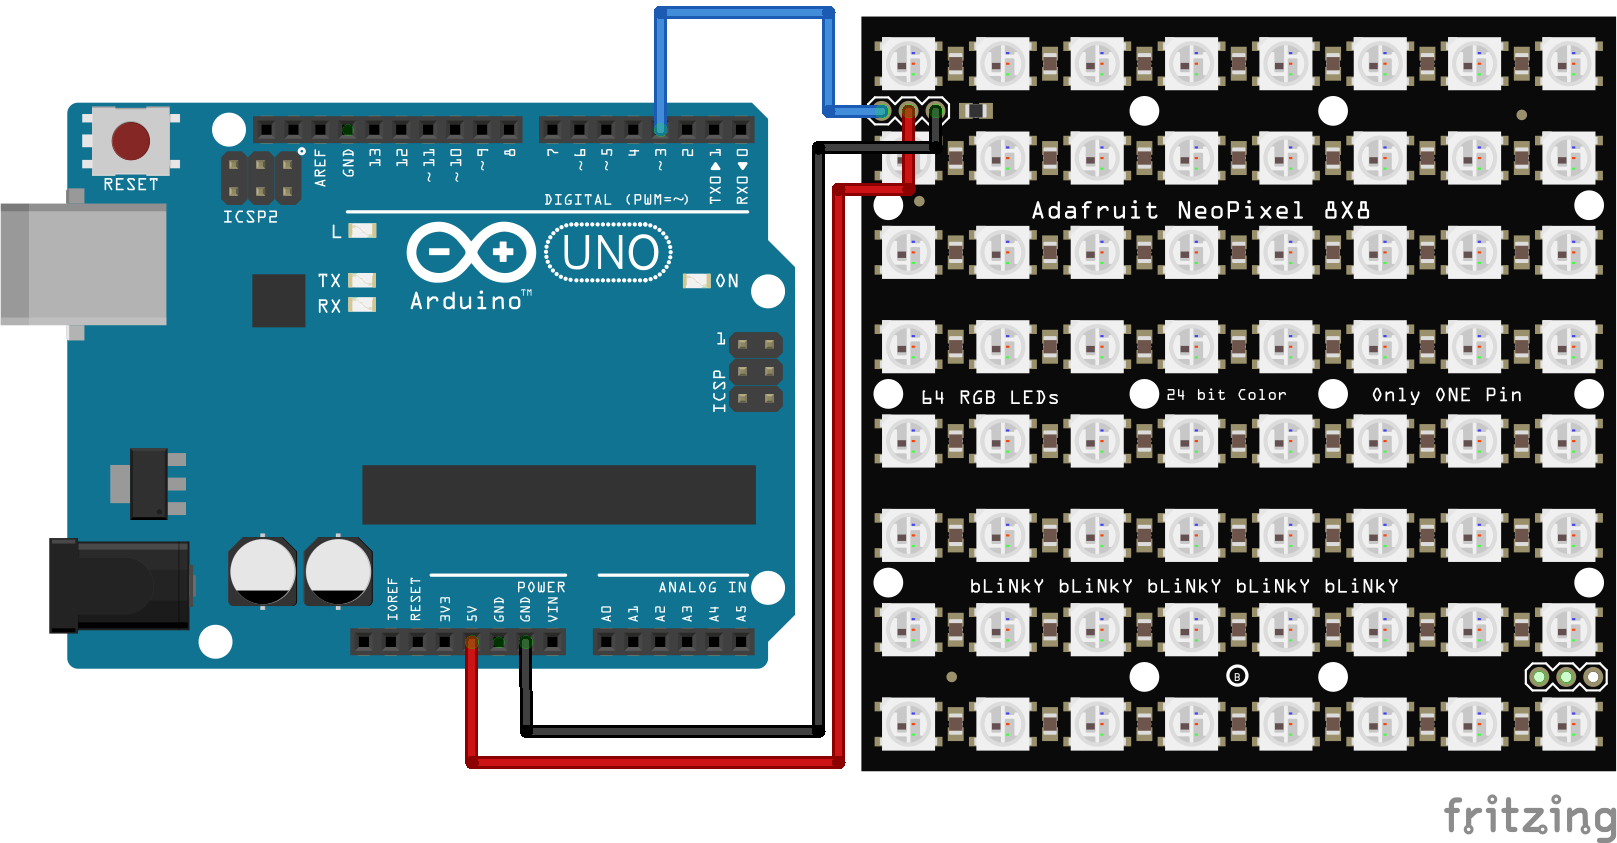
Wiring
Warning
If you have a bigger matrix, you will need an extra power supply. The extra power supply will share the ground with Arduino and the matrix.
- DIN to Pin3
- +5V to 5V
- GND to GND
Library
Warning
Download version 1.9.0 or below of Adafruit Neopixel library for a more stable performance.
We will need three libraries for this tutorial.
We have a tutorial on how to install a library here.
Understand your Matrix
When programming the matrix, it is important to know the configuration of your matrix so that the x and y coordinates sent from Processing can be matched. The most important two are the starting point and the arrangement.
The Starting Point
the starting point: Usually it will be the Top Left. If you are building your own Matrix from scratch, it will be easier to program later if you choose the top left corner as your first pixel as 0,0 in Processing is the top left corner by default.
![]()
The Arrangement
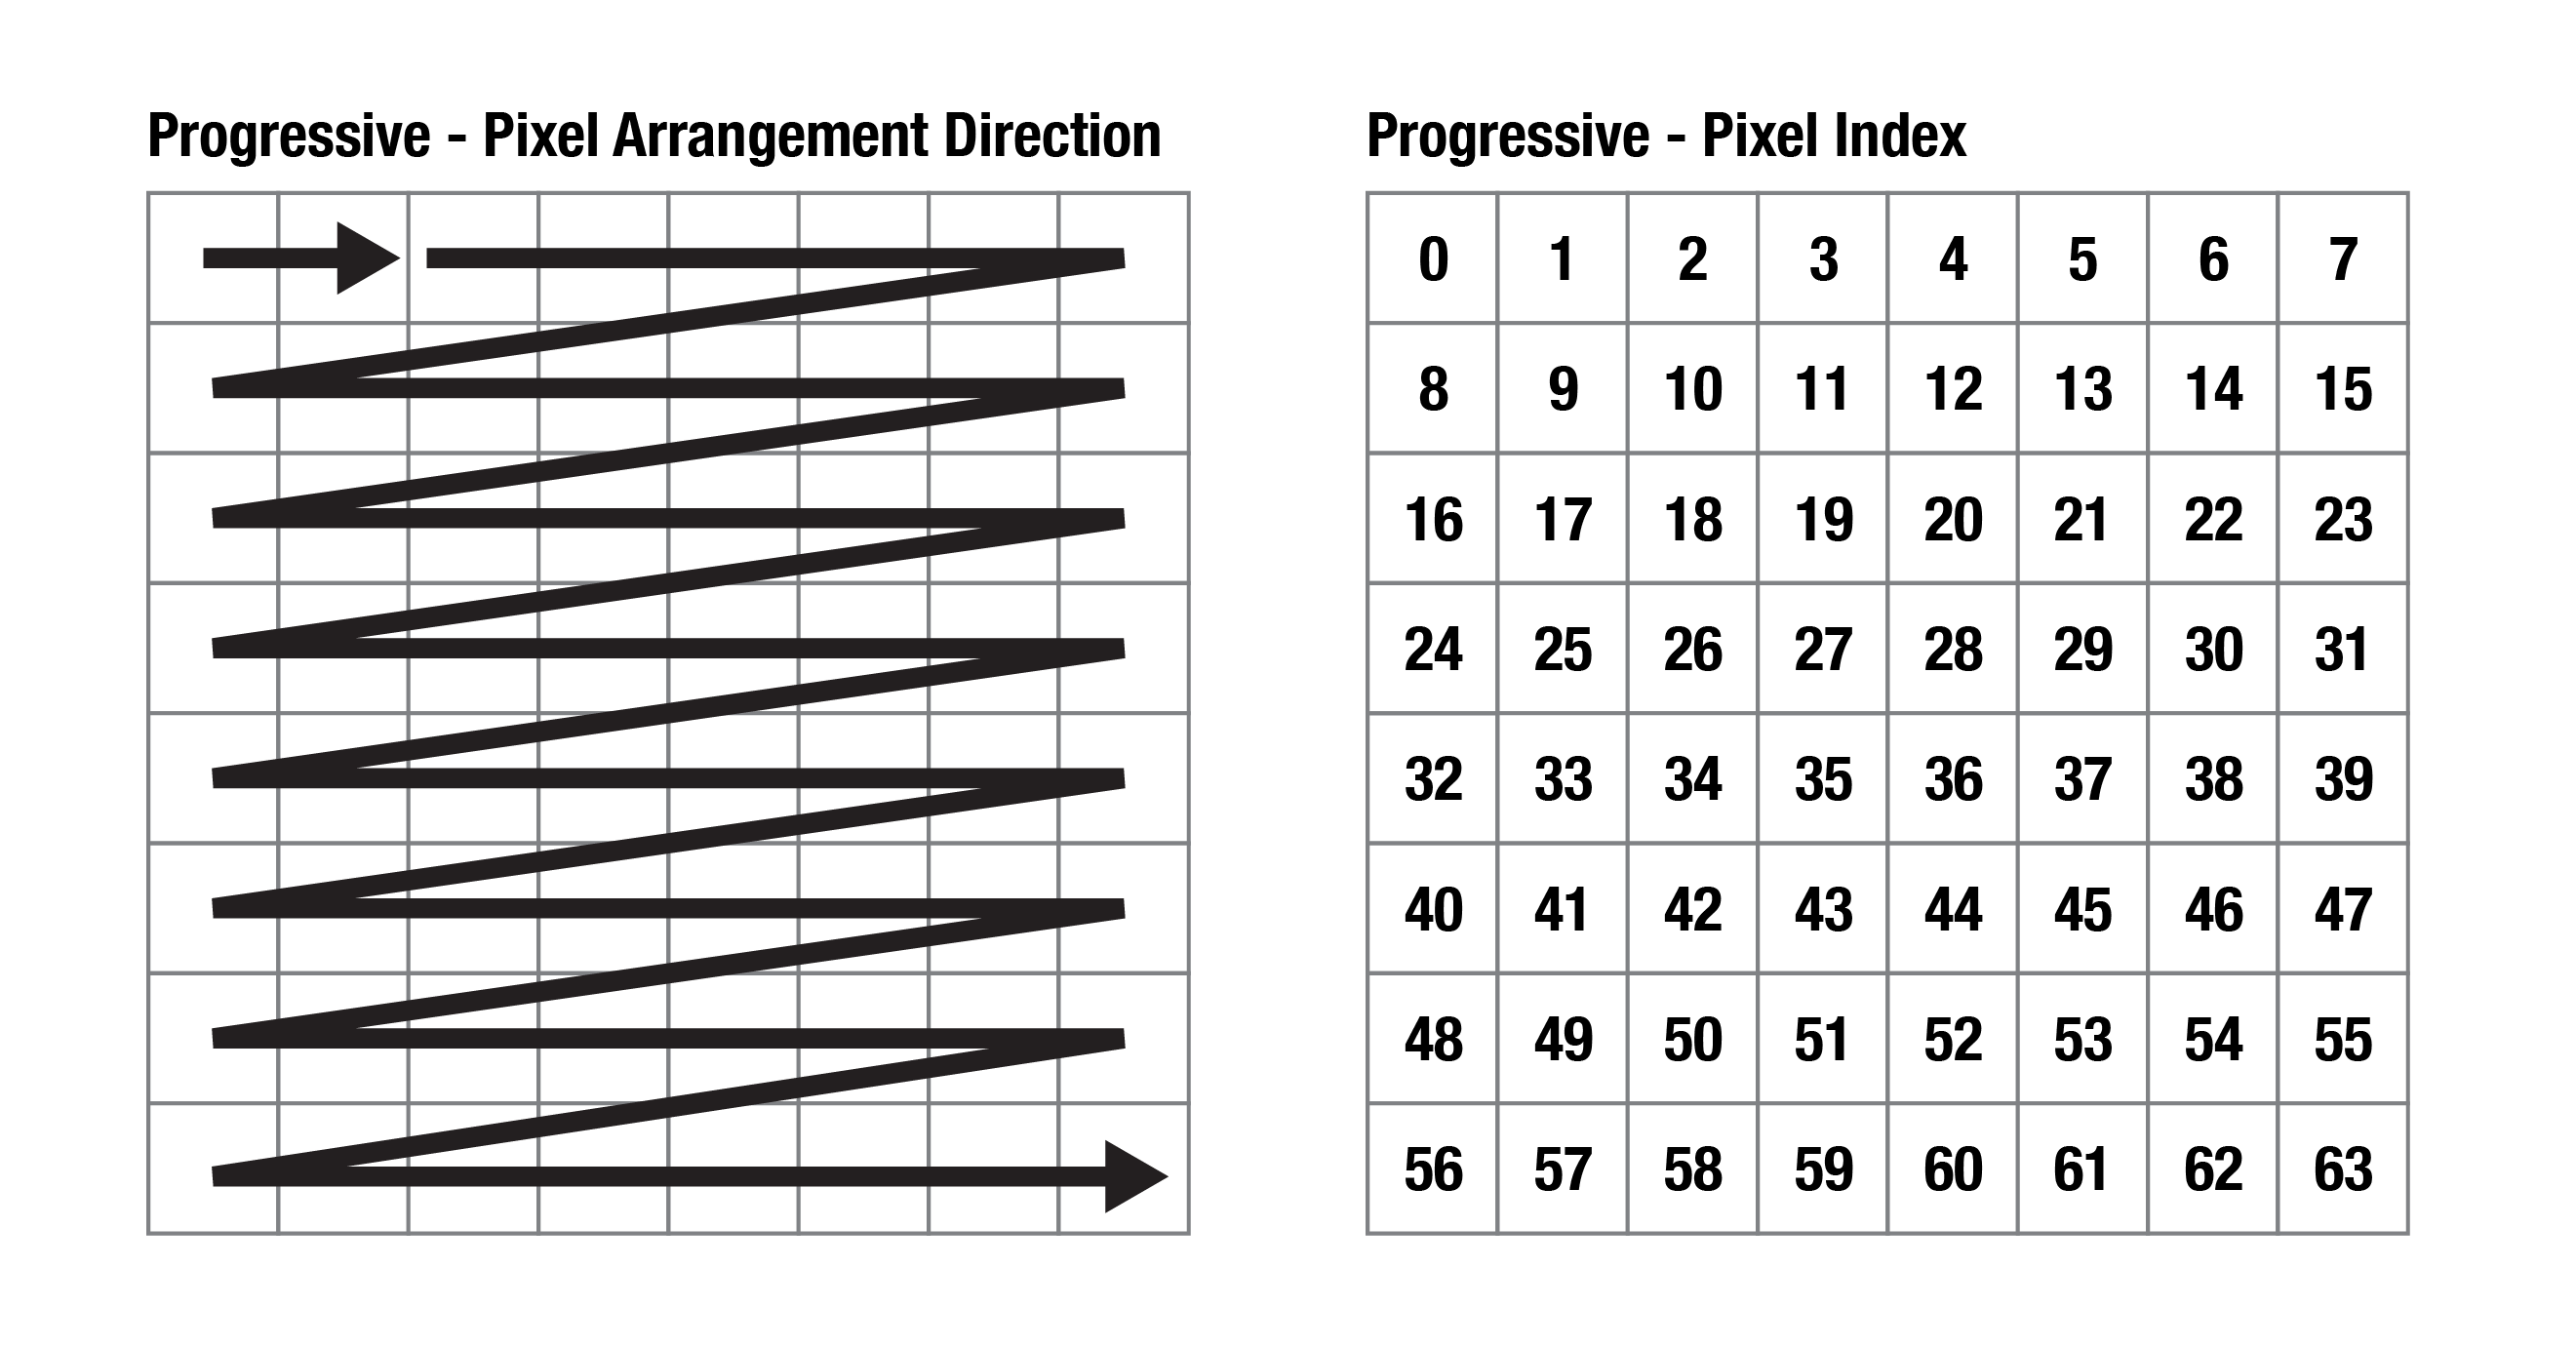
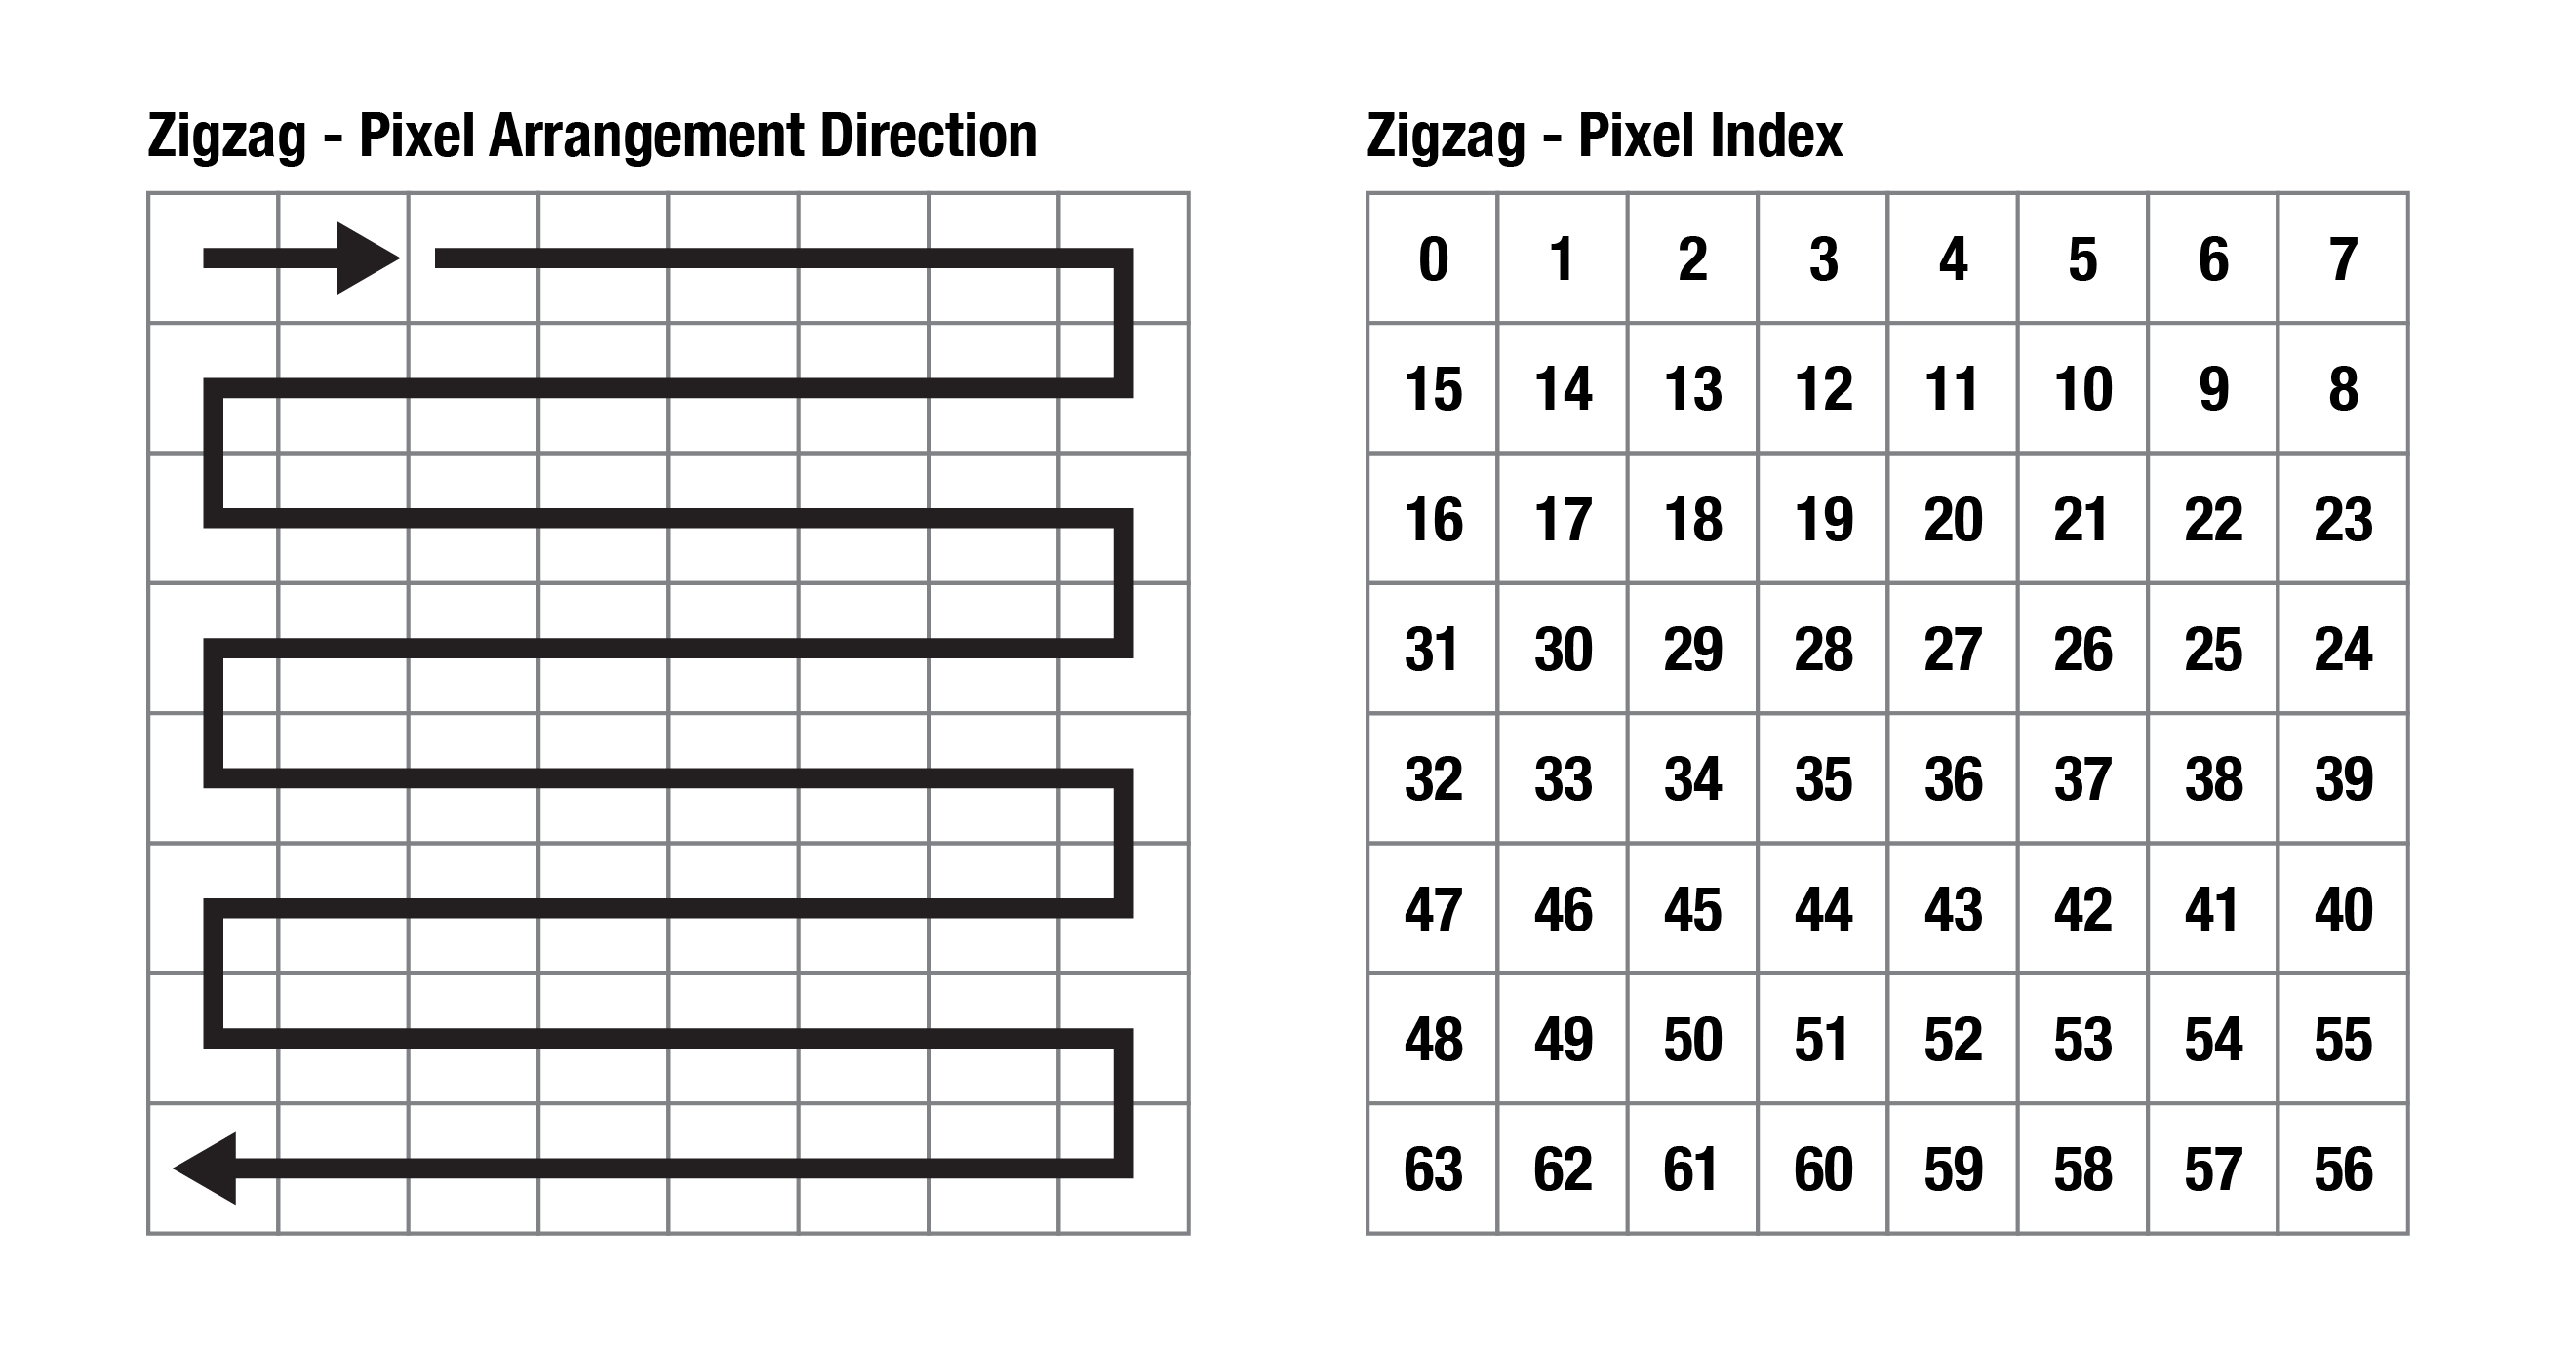
There are two types, Progressive and Zigzag.
Progressive: Adafruit's pre-built matrix is using this arrangement. It will make coding easier as the pixel index in Processing will be exactly the same as the pixel number on the Matrix. You don't have to alternate numbers for even-numbered rows.
Zigzag: It will be a more popular choice of arrangement for building a matrix from scratch as it involves shorter connections and it is easier for soldering.
If you have a second-hand matrix and are not sure about its configuration, you can run the strandtest code to see how the lights light up one by one.
Processing Code
We have a tutorial about serial communication between Processing and Arduino so I will skip it here. In this example code, you can draw with your mouse on the screen and the matrix will light up accordingly.
Before setup(), you will need to change the values of cols, rows, pixelSize and size(cols*pixelSize , rows*pixelSize); to fit your own project. Please read the comments in the code to see what they represent.
You can put the content that you wish to push to the matrix between loadPixels(); and updatePixels();.
loadPixels(); loads the pixel data of the current display window into the pixels[] array. The pixels[] array contains the colour values for all the pixels in the display window.
updatePixels(); is only necessary if the display has changed, e.g. video, interactive/generative graphic.
Learn more about images and pixels in Processing here.
import processing.serial.*;

Serial arduino;
int cols = 8; // Number of NeoPixel matrix columns
int rows = 8; // Number of NeoPixel matrix rows
int totalLEDs = cols * rows;
int pixelSize = 50; // Adjust this based on your webcam's resolution
int i = 0;
int blue = 0;

void setup() {
  size(400, 400); // size(cols*pixelSize , rows*pixelSize);
  background(0);

  // Set up serial communication with Arduino
  printArray(Serial.list());
  arduino = new Serial(this, Serial.list()[1], 115200); // Change baud rate if needed

}

void draw() {

//clear
  if (keyPressed == true) {
    background(0);
  }

  loadPixels(); //load pixel for neomatrix


    int x = i % cols;
    int y = i / cols;
    int loc = x + y * width/pixelSize;
    int cloc = (x*pixelSize + pixelSize/2) + y*pixelSize * width;
    color c = pixels[cloc];

    int r = (c >> 16) & 0xFF;
    int g = (c >> 8) & 0xFF;
    int b = c & 0xFF;
    //println(i);

    arduino.write(loc); //for progressive arrangement
    //arduino.write(x); //for zigzag arrangement
    //arduino.write(y); //for zigzag arrangement
    arduino.write(r);
    arduino.write(g);
    arduino.write(b);

    delay(10); // Small delay for stability
     i++;
      if (i >= totalLEDs){
    i = 0;
    }

  updatePixels();
}

void mouseDragged() {
  noStroke();
  fill(0,125,blue, 50);
  ellipse(mouseX,mouseY,pixelSize, pixelSize);
  blue ++;
  if (blue >= 255){
  blue = 0;
  }
}
Arduino Code
The following code is for an 8x8 Adafruit NeoMatrix with the below configurations.
- the starting point: Top Left
- the arrangement: Progressive
#include <Adafruit_NeoPixel.h>

int w = 8; //width of matrix
int h = 8; //height of matrix
#define PIN            3 // Pin connected to the NeoPixels
#define NUMPIXELS       w*h // Number of NeoPixels (16x16 matrix)

Adafruit_NeoPixel strip = Adafruit_NeoPixel(NUMPIXELS, PIN, NEO_GRB + NEO_KHZ800);

void setup() {
  strip.begin();
  strip.show(); // Initialize all pixels to 'off'
 strip.setBrightness(5); //I set a super low brightness as it's easier for my eyes during prototyping.
  Serial.begin(115200); // Set the baud rate to match Processing
}

void loop() {

//------------------------for progressive arrangement ----------------------------------
  if (Serial.available() >= 4) { // Ensure complete location & RGB data received

    int loc = Serial.read();
    int r = Serial.read();
    int g = Serial.read();
    int b = Serial.read();
//------------------------for progressive arrangement ----------------------------------

/*
//------------------------for zigzag arrangement ----------------------------------
 if (Serial.available() >= 5) { // Ensure complete x,y coordinates & RGB data received

    int x = Serial.read();
    int y = Serial.read();
    int r = Serial.read();
    int g = Serial.read();
    int b = Serial.read();

    // Calculate pixel index based on zigzag layout (adjust the logic as needed)
    int loc;
    if (y % 2 == 0) {
      loc = y * w + x; // If even row, use regular indexing
    } else {
      loc = (y * w) + (w-1 - x); // If odd row, reverse indexing
    }

//------------------------for zigzag arrangement ----------------------------------
*/
    strip.setPixelColor(loc, strip.Color(r, g, b)); // Control NeoPixels using received RGB values
    strip.show(); // Display the updated NeoPixel colors
  }

}
Disadvantage for this Setup
We are only using the bare minimum of components and Serial communication for sending data, so the matrix will not update everything all at once instantly. It will update and light up the pixels one by one which I find to be quite artistic for my taste.
Have fun!