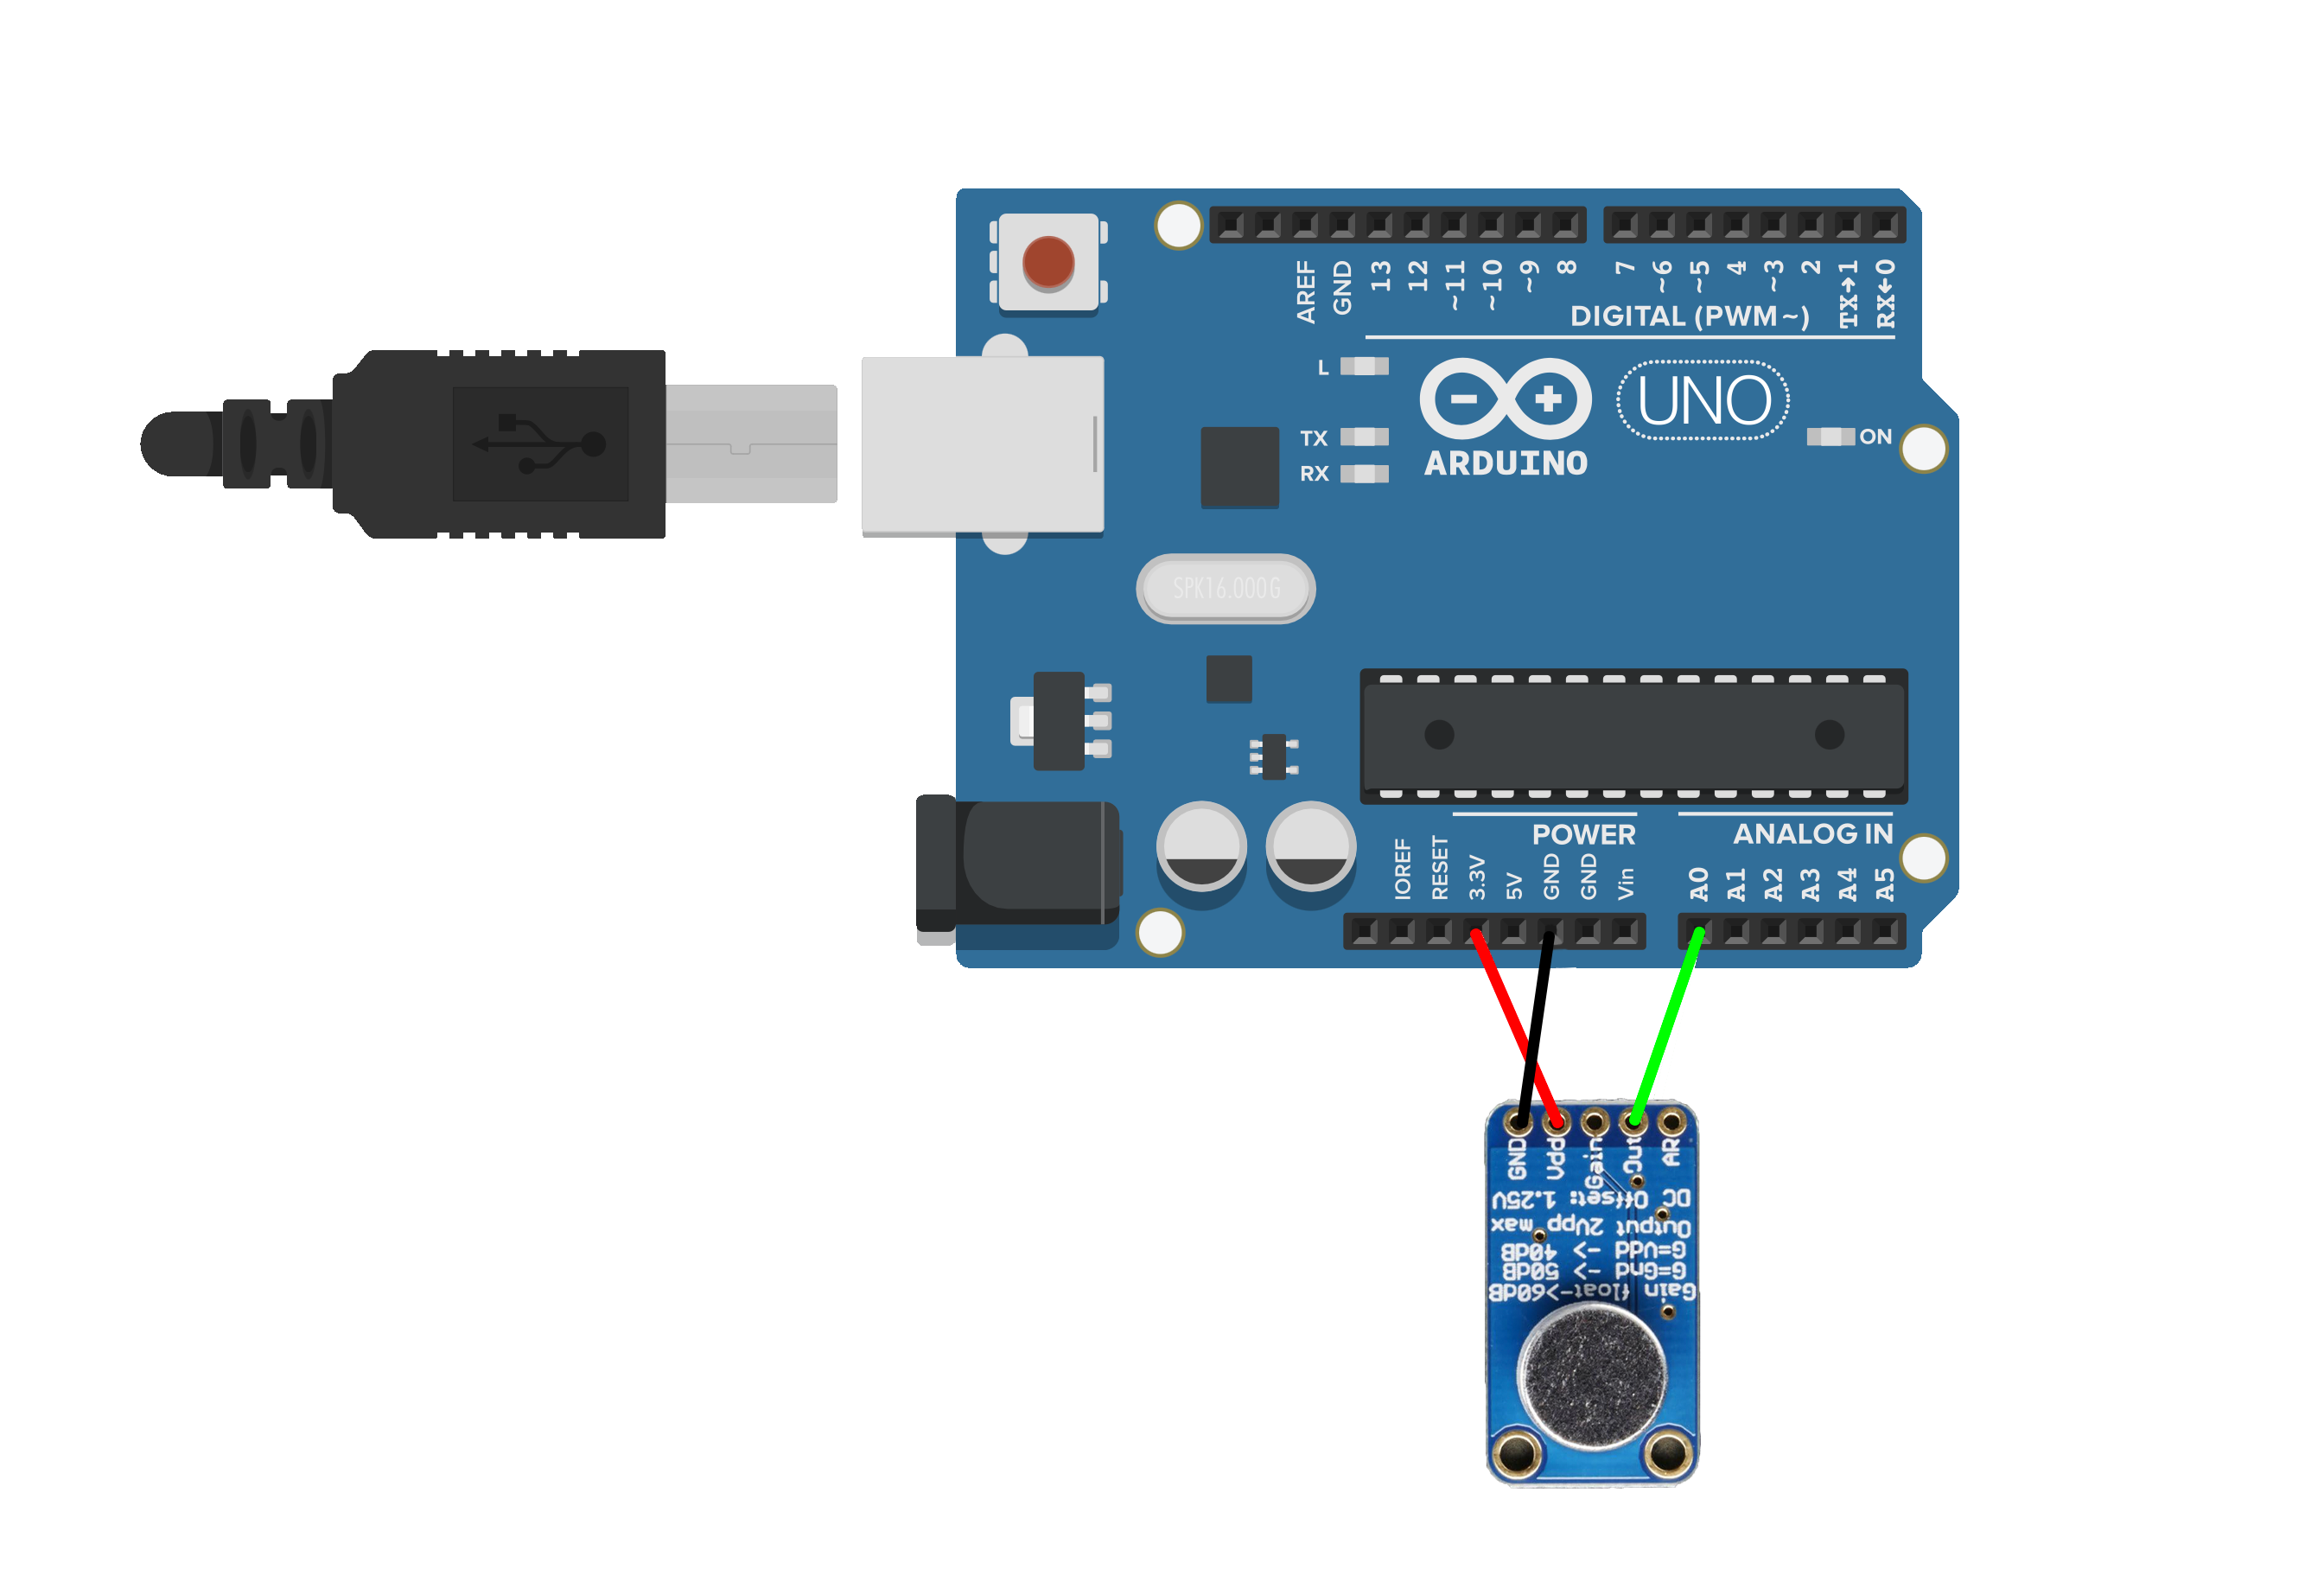
Using the MAX9814 mic amplifier
This Adafruit MAX9814 microphone amplifier allows you to easily detect sound.
There are a total of five connections on this mic, however we will only be using VCC, GND and OUT in our wiring. You can read more about this component here.
Wiring
- Power (VCC to 3.3V)
- Ground (GND to GND)
- Output to analog pin on the Arduino (OUT to A0)
There are three wires:
Retrieving Data
This code allows instructs the mic to detect and prints out values corresponding to the sound's varying volume.
int MicPin = A0;
int MicVolume = 0; // Define a variable MicVolume and initialize it to 0
void setup() {
Serial.begin(115200); // Initialize serial communication
}
void loop() {
MicVolume = analogRead(MicPin);
Serial.println(MicVolume);
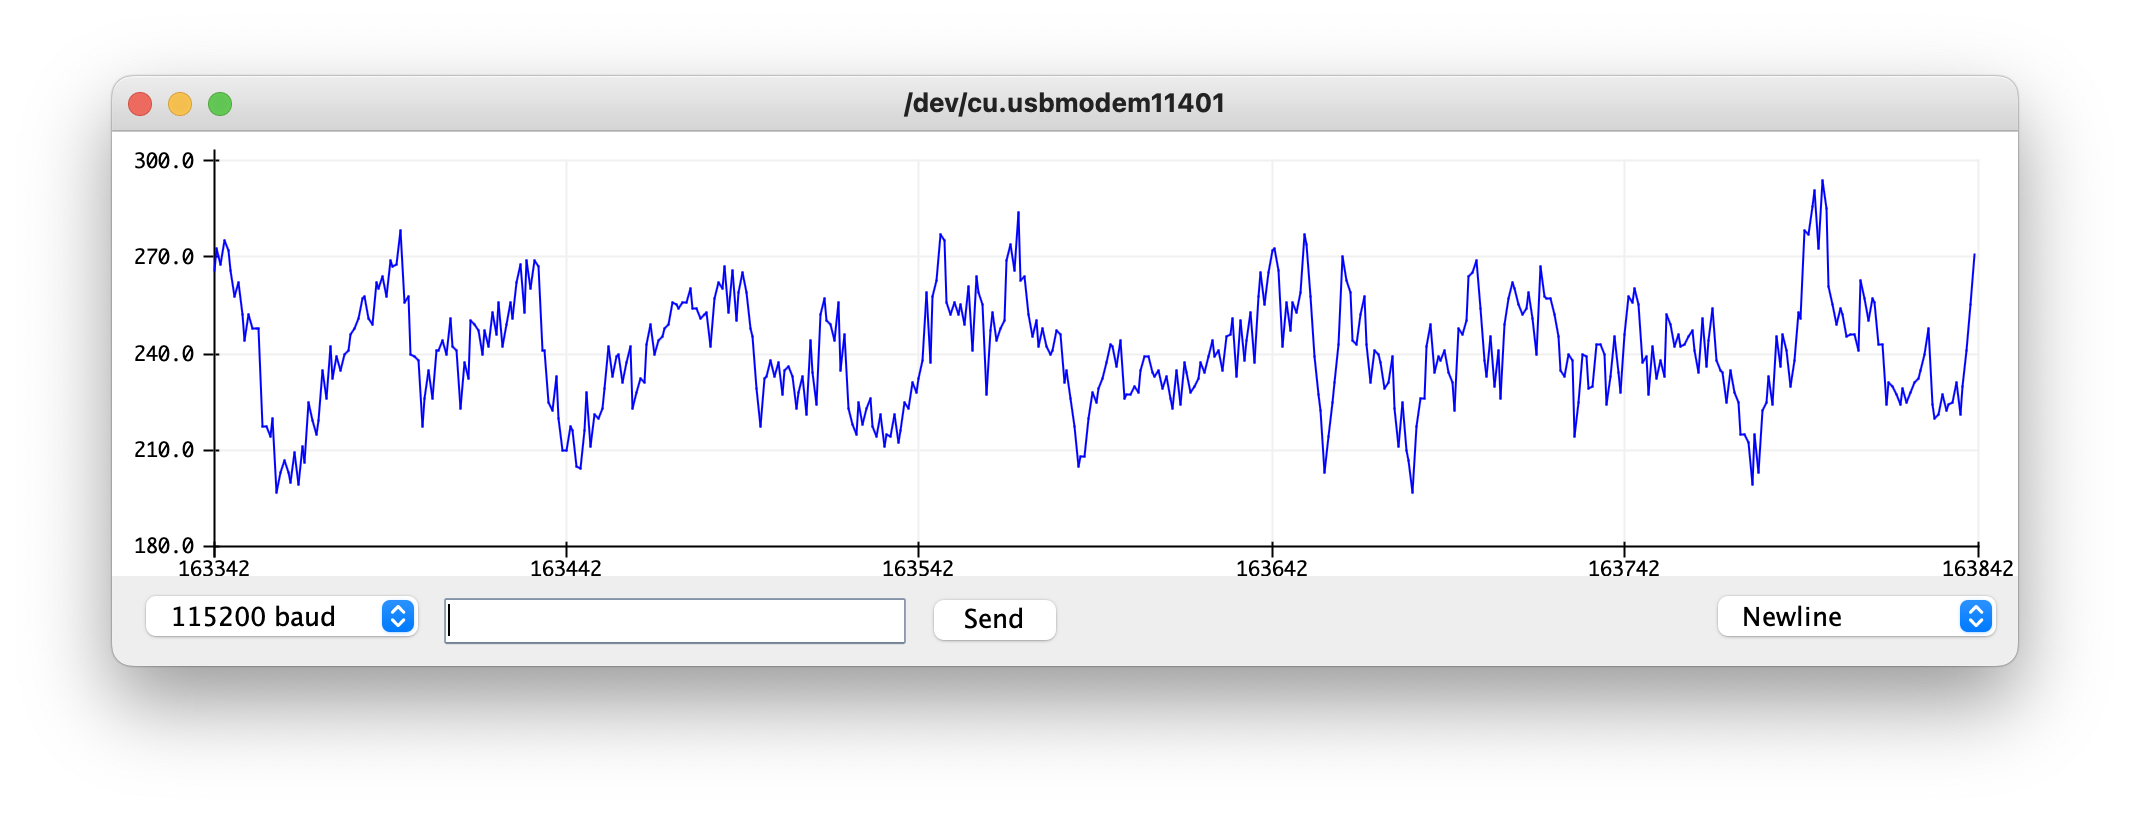
}You can check that your circuit is working by looking at the Serial Plotter; In the menu bar go to Tools > Serial Plotter or press Command + Shift + L on your keyboard. Make sure this is set to 115200 baud.
To utilise this data, you can temporarily slow down the data coming in from the mic and look to the Serial Monitor this time, to set up your own threshold, e.g. :
void loop() {
    MicVolume = analogRead(MicPin);

    if (MicVolume > 400) { // If the volume is above this threshold a warning comes up in the Serial Monitor
      Serial.println("Loud noise");
      delay(500);
    } else {
    Serial.println(MicVolume);
    }
}