How to send data to p5.js from Arduino
What is the Serial Communication?
Serial communication is the process of sending data one bit at a time, sequentially, over a communication channel or computer bus. Simply put, serial communication is the communication between two or more computers with binary data.
In this tutorial, we will use serial communication protocol to send data to p5.js from Arduino using the P5.js WebSerial Library. The p5.js sketch will be controlled by the physical component, the potentiometer, which can be replaced with other sensors, button and etc. Know more about the Web Serial API.
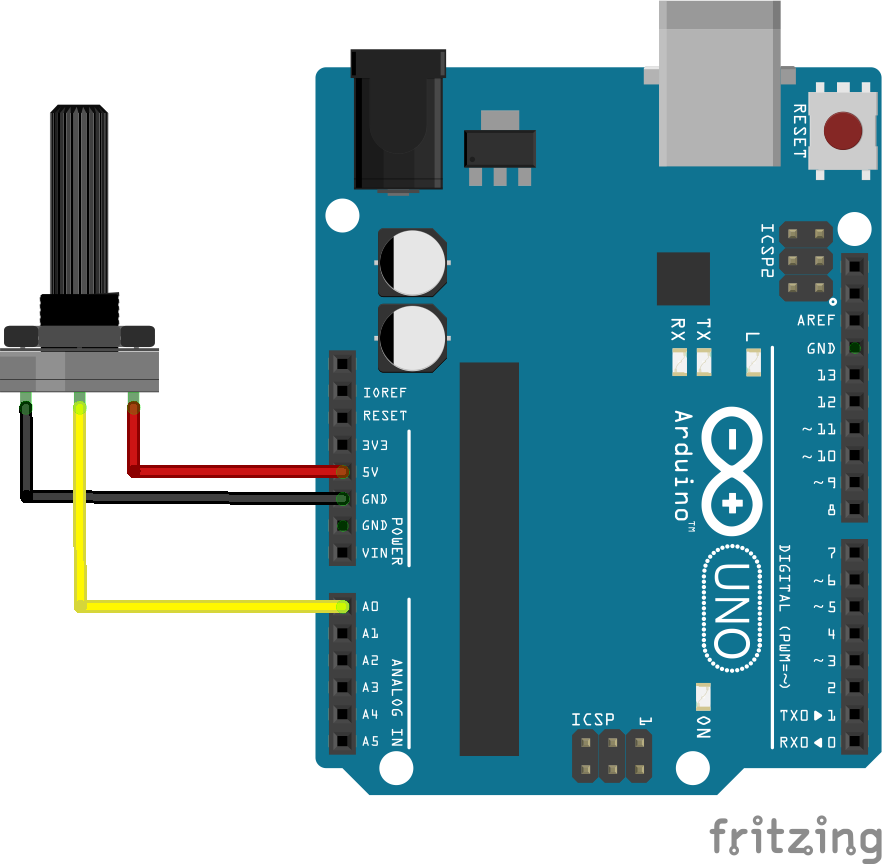
Wiring
- Left pin to 5V
- Right pin to GND
- middle pin to A0
Arduino Code
This example sends the potentiometer value measured from Arduino to p5.js via the serial port, you can read the data from the serial monitor.
#define potPin A0
int value;

void setup() {
  Serial.begin(9600); //intailise Serial communication with 9600 baud rate
  pinMode( potPin, INPUT );
}

void loop() {
  value = analogRead( potPin);
  Serial.println(value); //read the sensor and send the value to the Serial
  delay(100); //little delay to prevent Arduino going crazy
}
p5.js Code
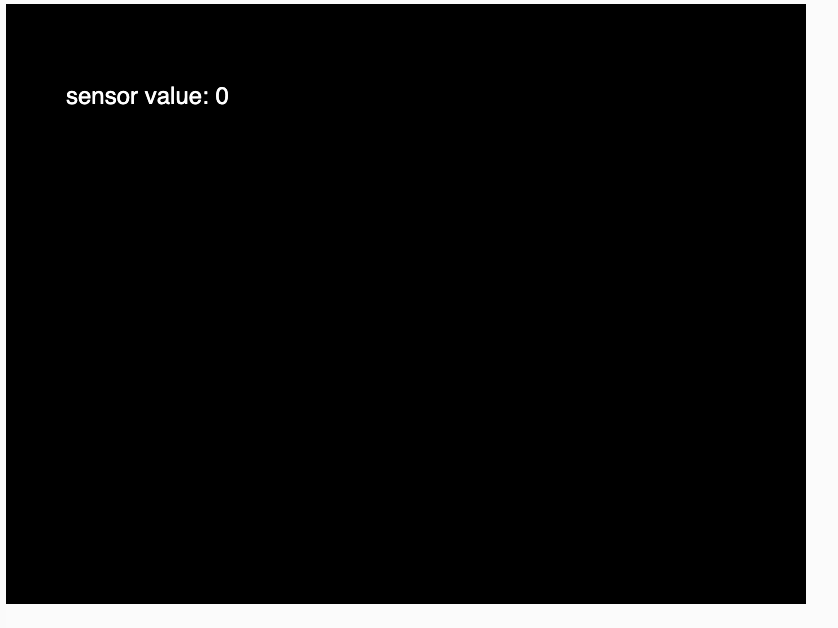
This example will show the incoming data from Arduino on the canvas.
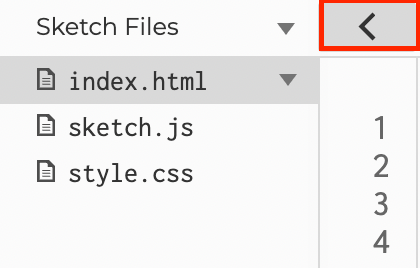
A p5.js sketch is actually a website that consists of a html file, a css file and a java script which makes everything fun. To access different files in your sketch, you can click the arrow and the panel on the left will show the files associated with the sketch.
First we have to install the P5.js WebSerial Library.
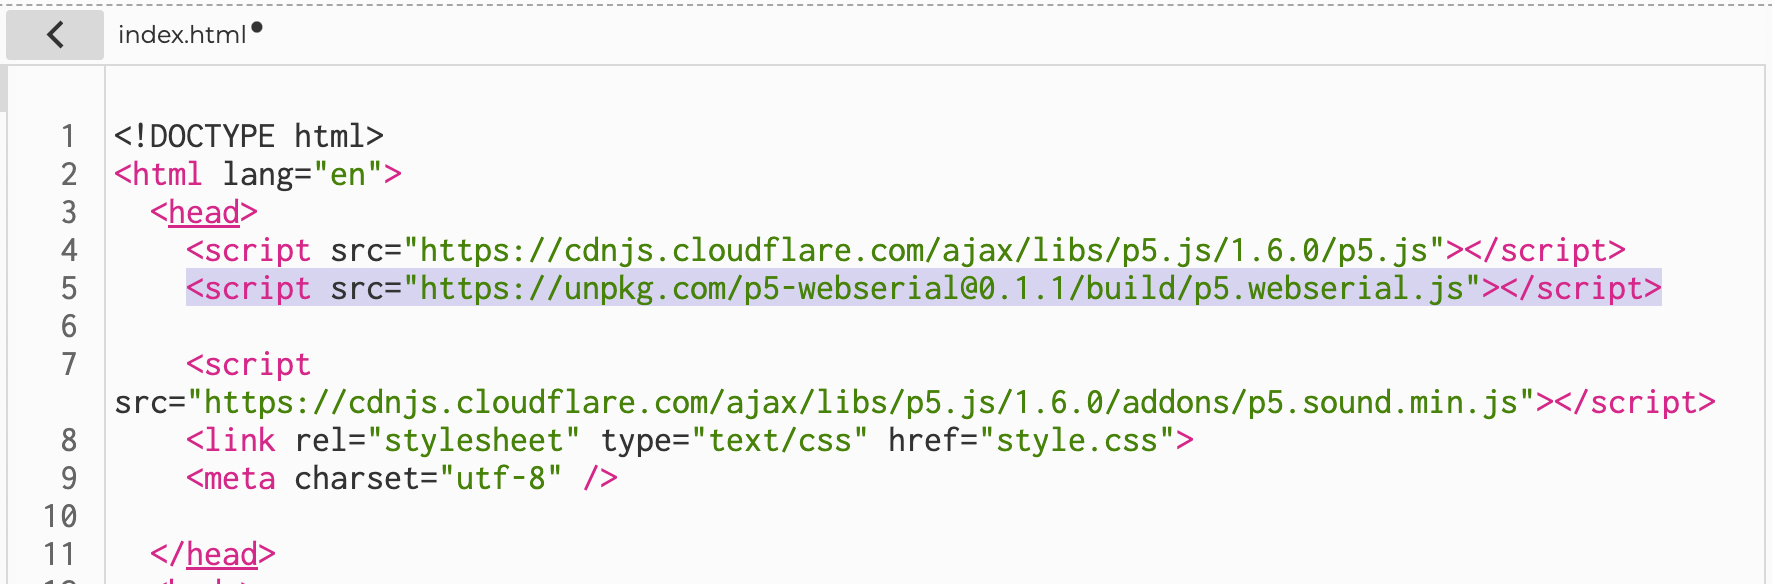
You have to place the below script in the index.html file, inside the <head>.
<script src="https://unpkg.com/p5-webserial@0.1.1/build/p5.webserial.js"></script>
It should look like this.
The below is the example code that should be placed in the sketch.js file. Please read the comments in the code to understand what they do.
// variable to hold an instance of the p5.webserial library:
const serial = new p5.WebSerial();

// HTML button object:
let portButton;
let inData;                   // for incoming serial data
let outByte = 0;              // for outgoing data
let vals = [];

function setup() {
  createCanvas(400, 300);          // make the canvas
  // check to see if serial is available:
  if (!navigator.serial) {
    alert("WebSerial is not supported in this browser. Try Chrome or MS Edge.");
  }
  // if serial is available, add connect/disconnect listeners:
  navigator.serial.addEventListener("connect", portConnect);
  navigator.serial.addEventListener("disconnect", portDisconnect);

  serial.getPorts(); // check for any ports that are available:
  serial.on("noport", makePortButton); // if there's no port chosen, choose one:
  serial.on("portavailable", openPort); // open whatever port is available:
  serial.on("requesterror", portError); // handle serial errors:
  serial.on("data", serialEvent);  // handle any incoming serial data:
  serial.on("close", makePortButton);
}

function draw() {
  background(0);
   fill(255);
   text("sensor value: " + inData, 30, 50);
}

// if there's no port selected,
// make a port select button appear:
function makePortButton() {
  // create and position a port chooser button:
  portButton = createButton("choose port");
  portButton.position(10, 10);
  // give the port button a mousepressed handler:
  portButton.mousePressed(choosePort);
}

// make the port selector window appear:
function choosePort() {
  if (portButton) portButton.show();
  serial.requestPort();
}

// open the selected port, and make the port
// button invisible:
function openPort() {
  // wait for the serial.open promise to return,
  // then call the initiateSerial function
  serial.open().then(initiateSerial);

  // once the port opens, let the user know:
  function initiateSerial() {
    console.log("port open");
  }
  // hide the port button once a port is chosen:
  if (portButton) portButton.hide();
}

// pop up an alert if there's a port error:
function portError(err) {
  alert("Serial port error: " + err);
}

// read any incoming data as a string
// (assumes a newline at the end of it):
function serialEvent() {
  inData = serial.readLine();
  if(inData != null){
  inData = trim(inData);
    vals = int(splitTokens(inData, ","));

    if(vals.length >= 1){
       value1 = vals[0];
      console.log(value1);
    }
}
}

// try to connect if a new serial port
// gets added (i.e. plugged in via USB):
function portConnect() {
  console.log("port connected");
  serial.getPorts();
}

// if a port is disconnected:
function portDisconnect() {
  serial.close();
  console.log("port disconnected");
}

function closePort() {
  serial.close();
}
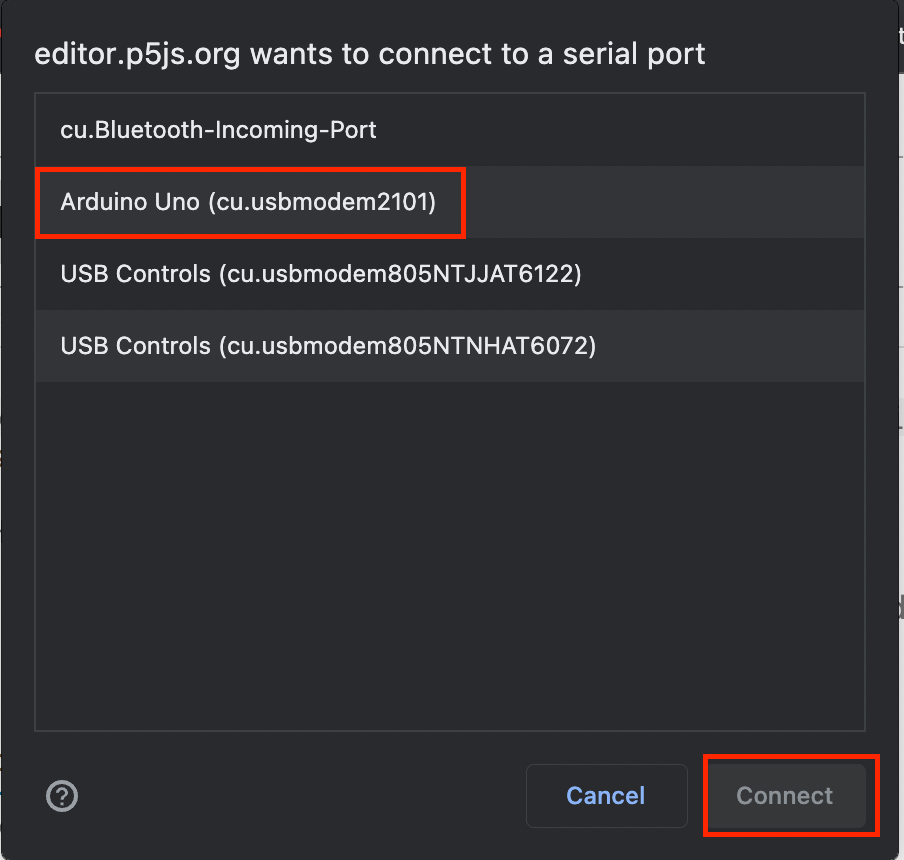
What You Should See
- choose port

- choose Arduino

- DONE!