How to Program an ATtiny85 with an Arduino Uno
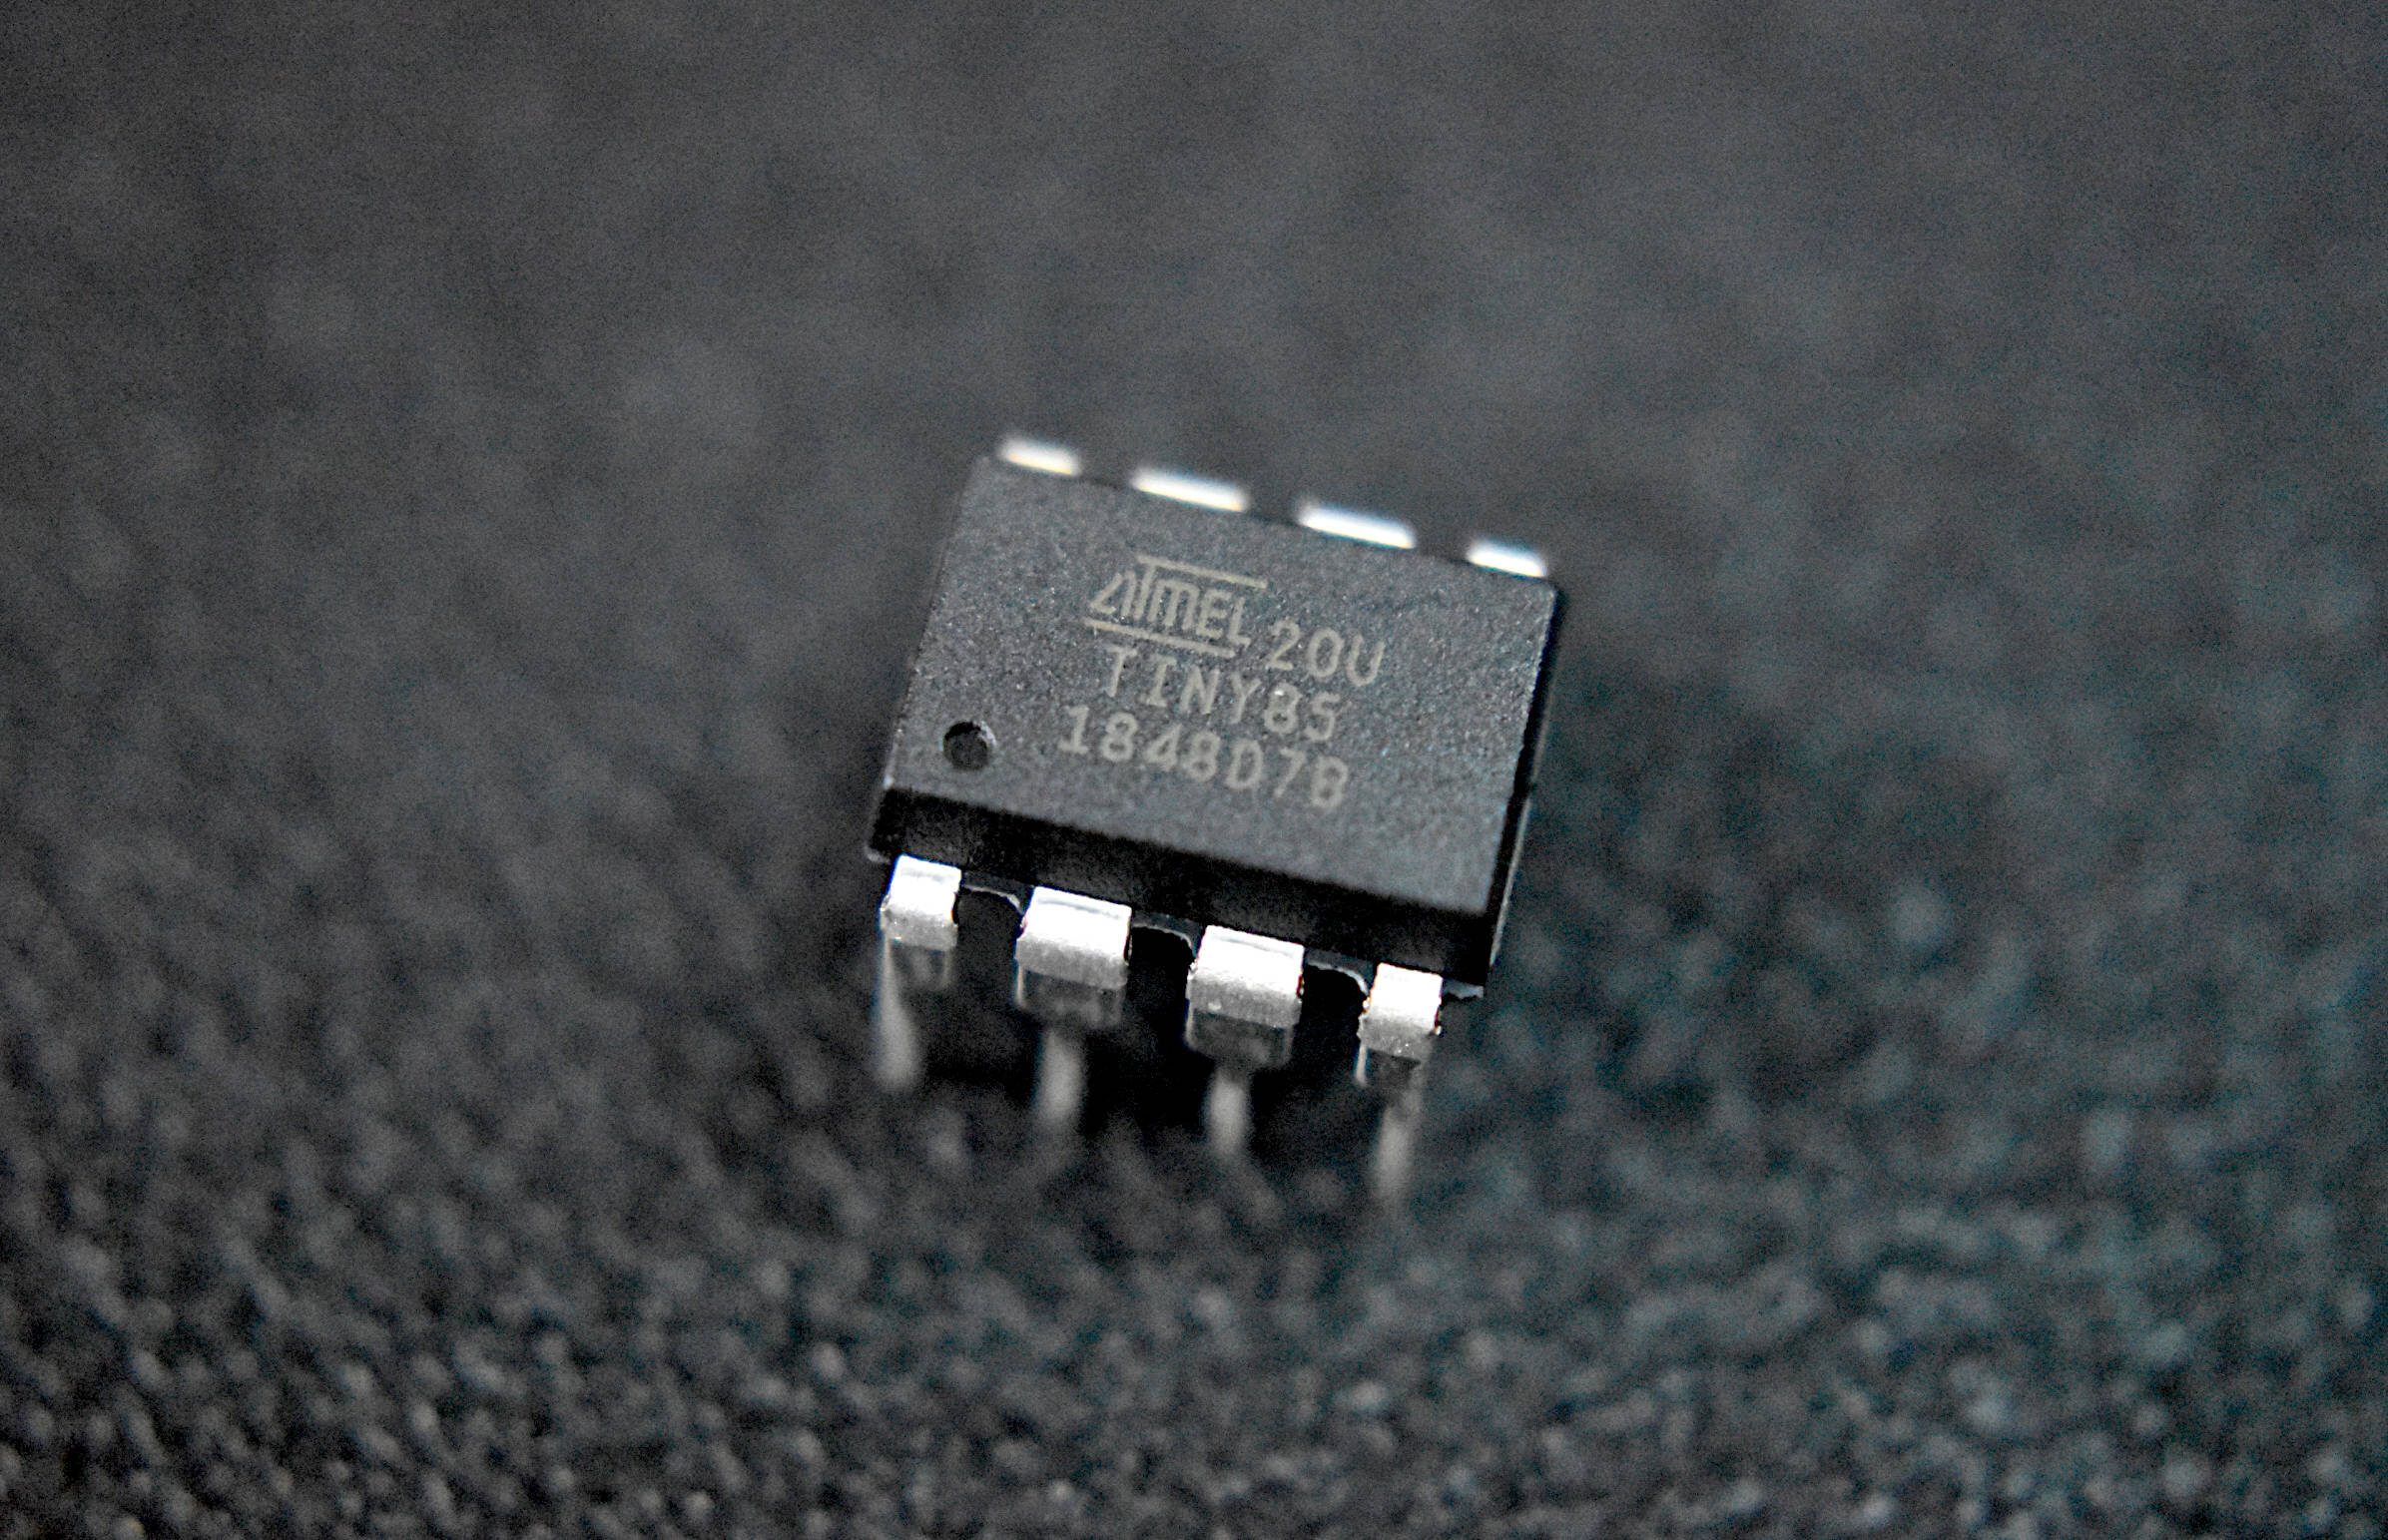
What is an ATtiny85?
ATtiny85 is a 8-bit AVR microcontroller based on AVR enhanced RISC architecture. It has an 8-pin interface (PDIP) and comes in the category of low-power microcontrollers. This microcontroller is designed and manufactured by Microchip. Know More
Set the Arduino Uno Into ISP Mode
So that the Arduino can act as a device to upload code to ATtiny85.
File - Examples - Arduino ISP - ArduinoISP
Add this line #define USE_OLD_STYLE_WIRING to the code before setup()
UPLOAD!
Wiring
The pins are not labelled so you will have to refer to the pinout.
 Arduino --> ATtiny85
- 5V --> Vcc (8)
- GND --> GND (4)
- Pin 13 --> Pin 2 (7)
- Pin 12 --> Pin 1 (6)
- Pin 11 --> Pin 0 (5)
- Pin 10 --> Reset (1)
Only when you are uploading code to ATtiny85
Put a 10uF capacitor between GND and RESET on Arduino
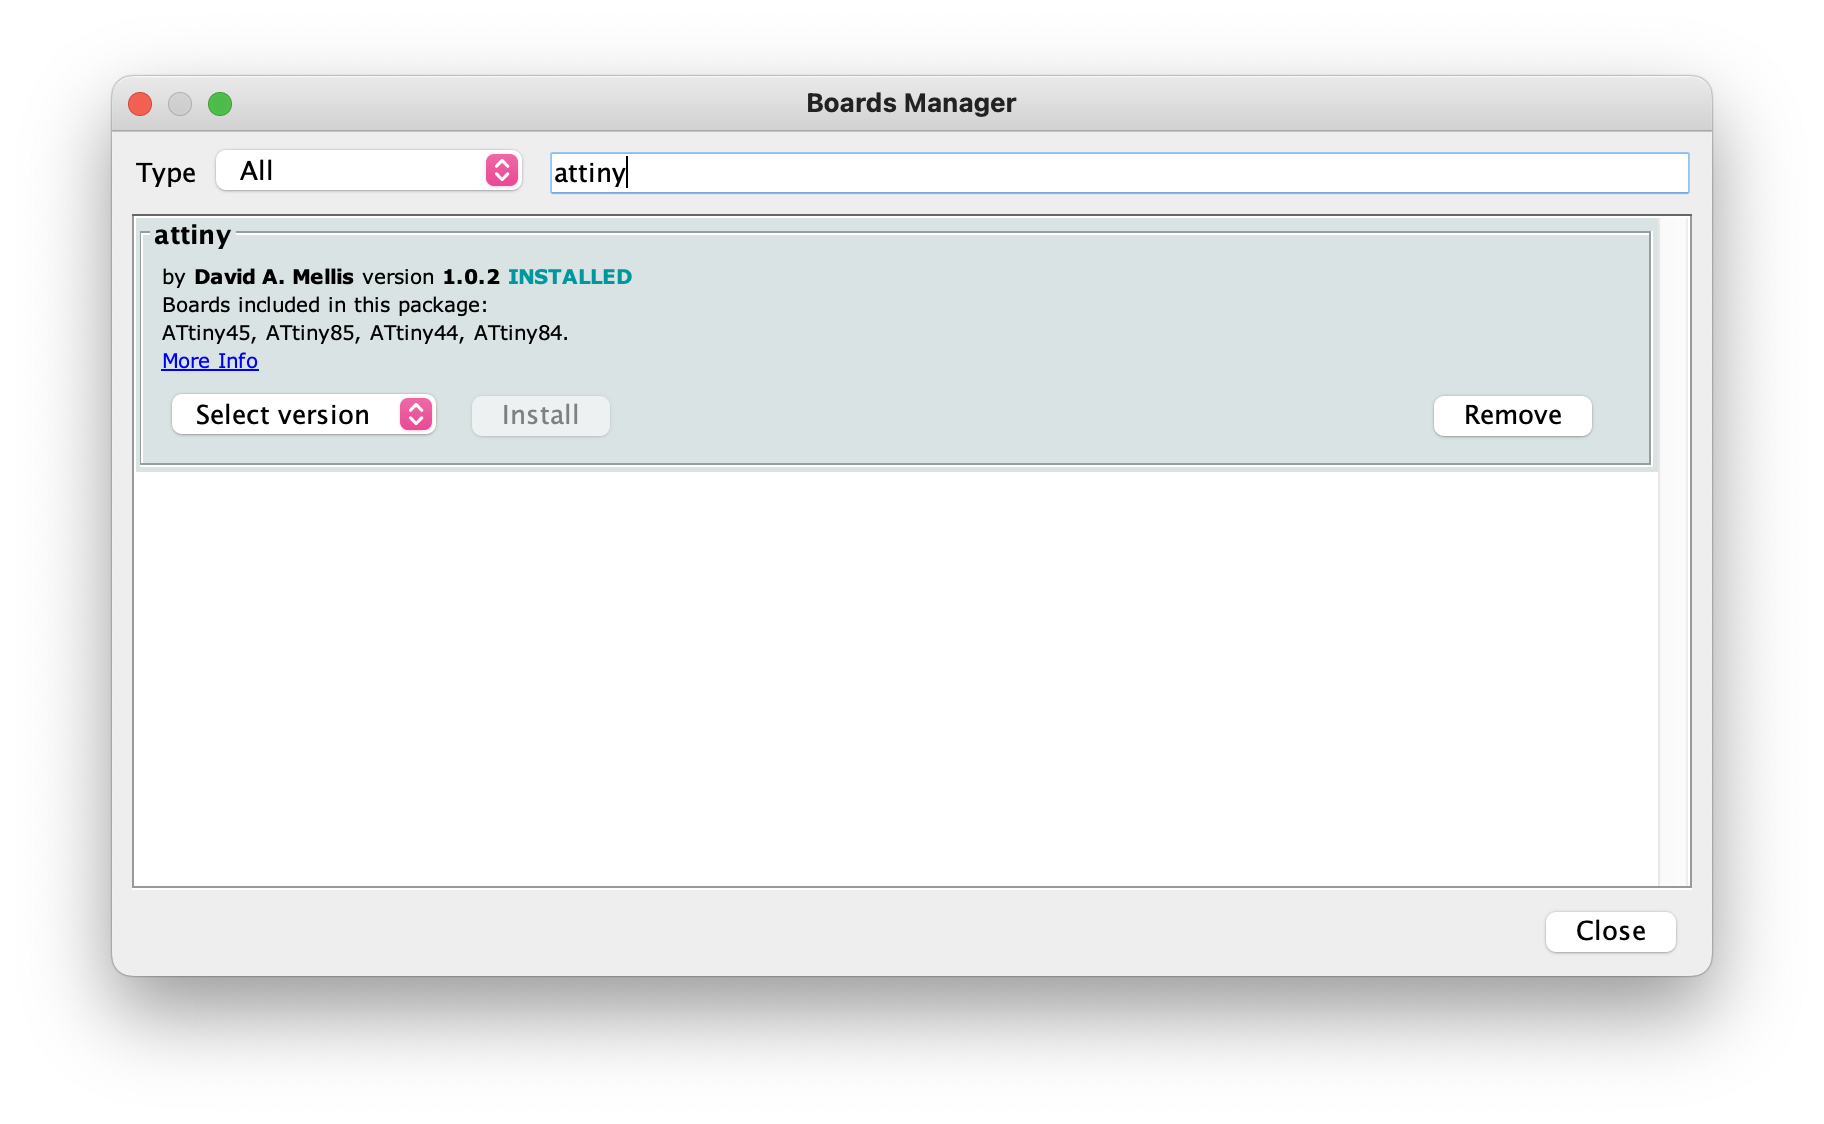
Adding Attiny85 to Boards Manager
We have to make ATtiny compatible with Arduino IDE first, so that we can choose ATting85 from Tools -> Board
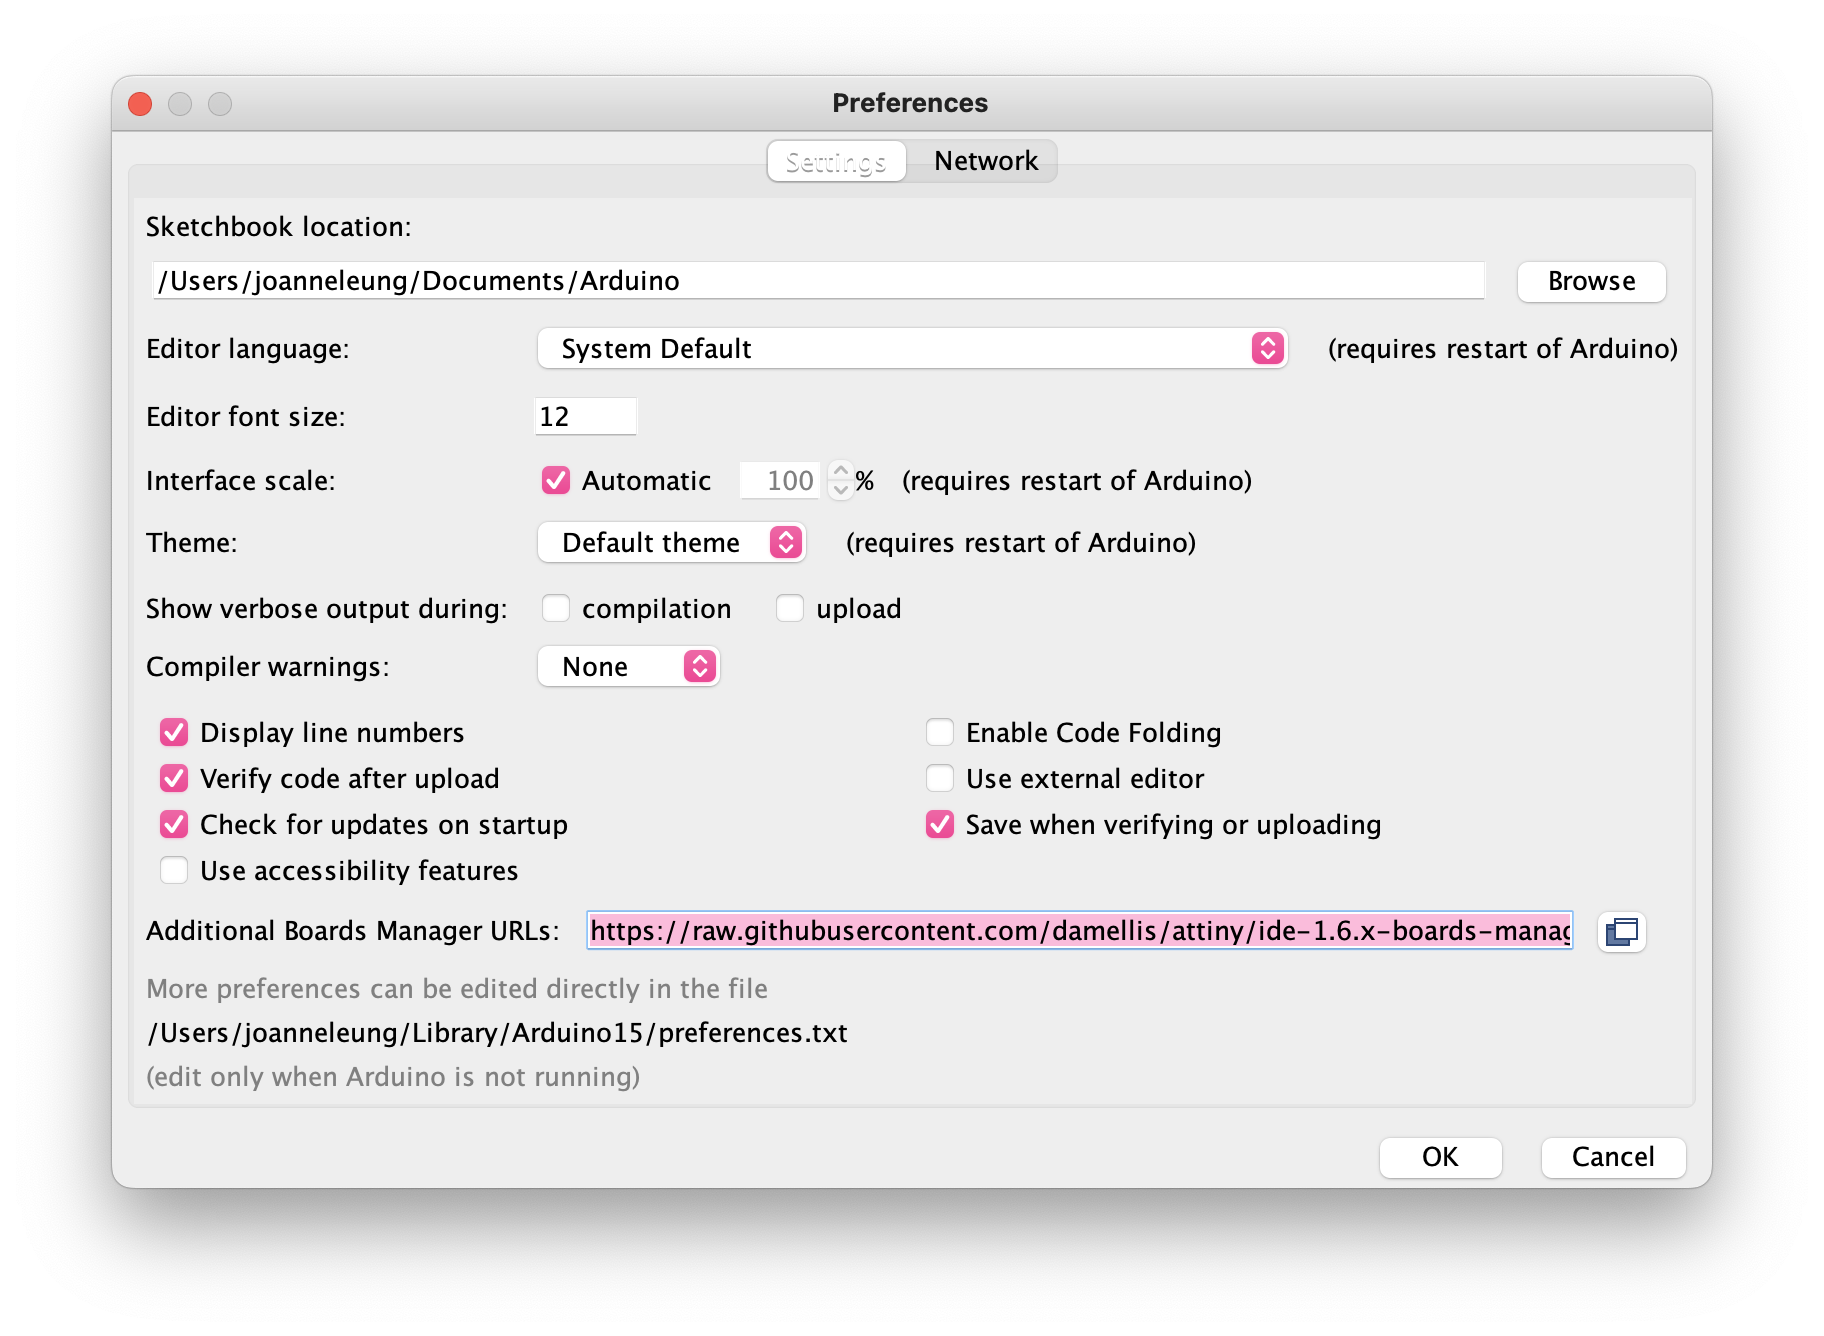
Go to Arduino Preference
Copy the below code and paste it into Additional Boards Manager URLs, if you already have a board manager URL just add a comma before pasting. Click OK and restart Arduino IDE.
https://raw.githubusercontent.com/damellis/attiny/ide-1.6.x-boards-manager/package_damellis_attiny_index.json
Go to Tools - Board - Boards Manager, search for ATtiny, then install!
Get Started
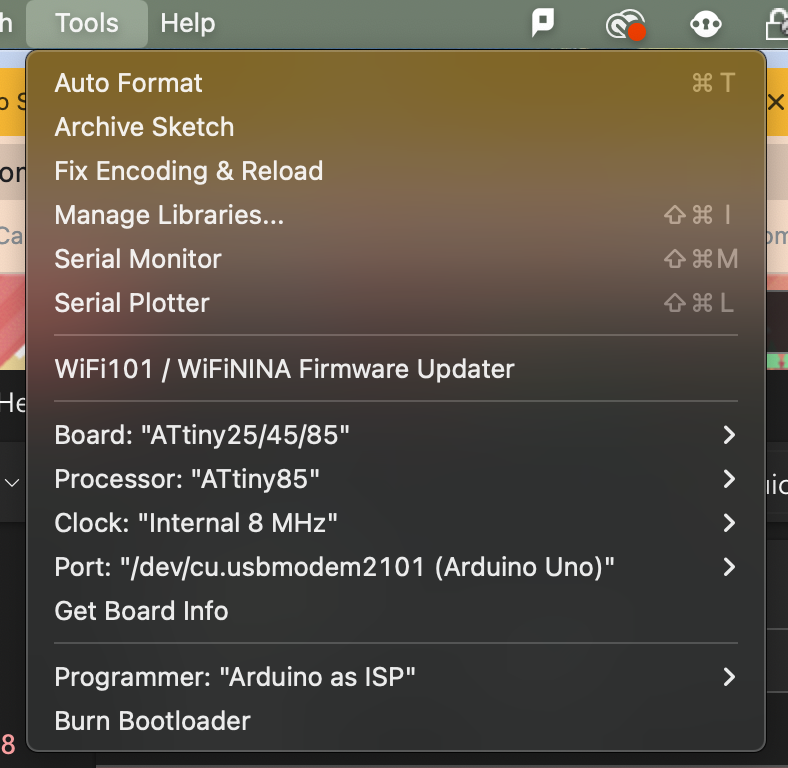
Before uploading the code, we have to change some settings.
- Tools -> Board scroll to the bottom select ATtiny25/45/85
- Tools -> Processor--> 8 MHz (internal)
- Tools-->Programmer-->Arduino as ISP
- Check that all wiring, capacitor, and board selections are correct.
Open up a basic code and upload as usual!
If it doesn't work, try Tools - Burn Bootloader