How to Use Arduino as a Keyboard or Mouse
What is Digitala Inputmouse/keyboard Pull-Up resistor?emulator?
InA Arduino,mouse/keyboard emulator on Arduino means the board pretends to be a Digitalreal InputUSB Pull-Upkeyboard Resistoror mouse when plugged into a computer.
Instead of sending data over serial like a normal Arduino sketch, the board identifies itself as a USB HID device (Human Interface Device), the same category used by real keyboards and mice. Visit here for more information.
This tutorial is an internal resistor that you can enablebased on the circuit of a simple button with a digital input pinsresistor. Please refer to ensure a known default voltage level (HIGH) when the pin is not actively connected to anything (i.e. it’s “floating”).
We have anotherthis tutorial showingfor howthe wiring.
Arduino HID vs Serial Communication
| Feature | HID Emulation | Serial Communication |
|---|---|---|
| Purpose | Pretend to be keyboard/mouse | Send data between devices/programs |
| How PC sees it | Keyboard, mouse, joystick | COM port / serial device |
| Driver needed | Usually no | Usually USB serial driver |
| Human input simulation | Yes | No |
| Can type into apps directly | Yes | No |
| Can move mouse cursor | Yes | No |
| Communication type | HID protocol | UART/USB Serial |
| Typical libraries | Keyboard.h, Mouse.h | Serial.h |
| Data visibility | Acts as user input | Raw data stream |
| Best for | Automation/macros/controllers | Sensors/debugging/device communication |
| Security sensitivity | Higher | Lower |
| Ease of debugging | Harder | Easier |
| Works in BIOS/login screen | Often yes | Usually no |
| Bidirectional communication | Limited | Excellent |
| Speed for data transfer | Lower | Better for data |
| Common boards | Leonardo, Micro, UNO R4 series | Almost all Arduino boards |
In short, if you only need simple interaction (no raw data and two-way communication) to replace the mundane mouse and keyboard, the HID Emulation is easier to set up and more straightforward to use a button the normal way.
Advantage of using a button this way
Fewer External ComponentsNo need for an external resistor—the internal pull-up does the job.Makes circuits simpler and saves space, especially on a breadboard.
Stable Default State (HIGH)Ensures the input pin has a known state (HIGH) when the button is not pressed.Prevents floating inputs, which can cause random or noisy readings.
Simpler WiringYou only need to wire the button between the pin and GND.Ground is often easier to route in a circuitthanVccserial(especially with many buttons).
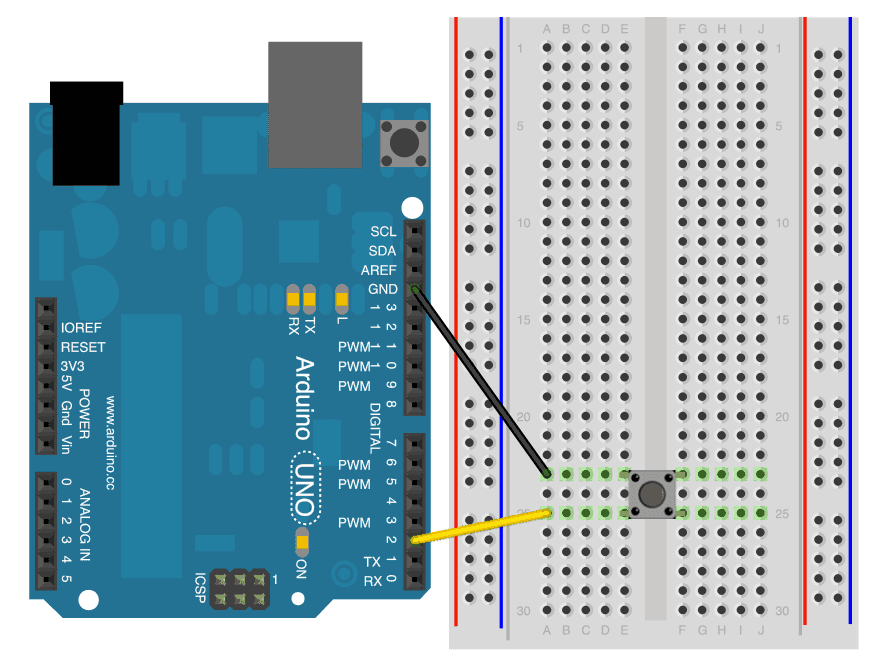
Wiring
one pin to GNDone pin to 2
Getting started
This code will make every button click into pressing a "w" on the keyboard.
#include <Keyboard.h>
boolean prevBtnState = LOW;

void setup() {
  Keyboard.begin();
  delay(1000);

  pinMode(2, INPUT_PULLUP); // Internal pull-up enabled
  Serial.begin(9600);
}

void loop() {
  int buttonStatebtnState = digitalRead(2);
  Serial.println(buttonState);if //( ReadsbtnState == LOW && prevBtnState == HIGH when) not{
      pressed,Serial.println("1");
      LOW when pressed (to GND)Keyboard.press('w');
      delay(100);
      Keyboard.releaseAll();
      delay(1000);

  }
  prevBtnState = btnState;
}
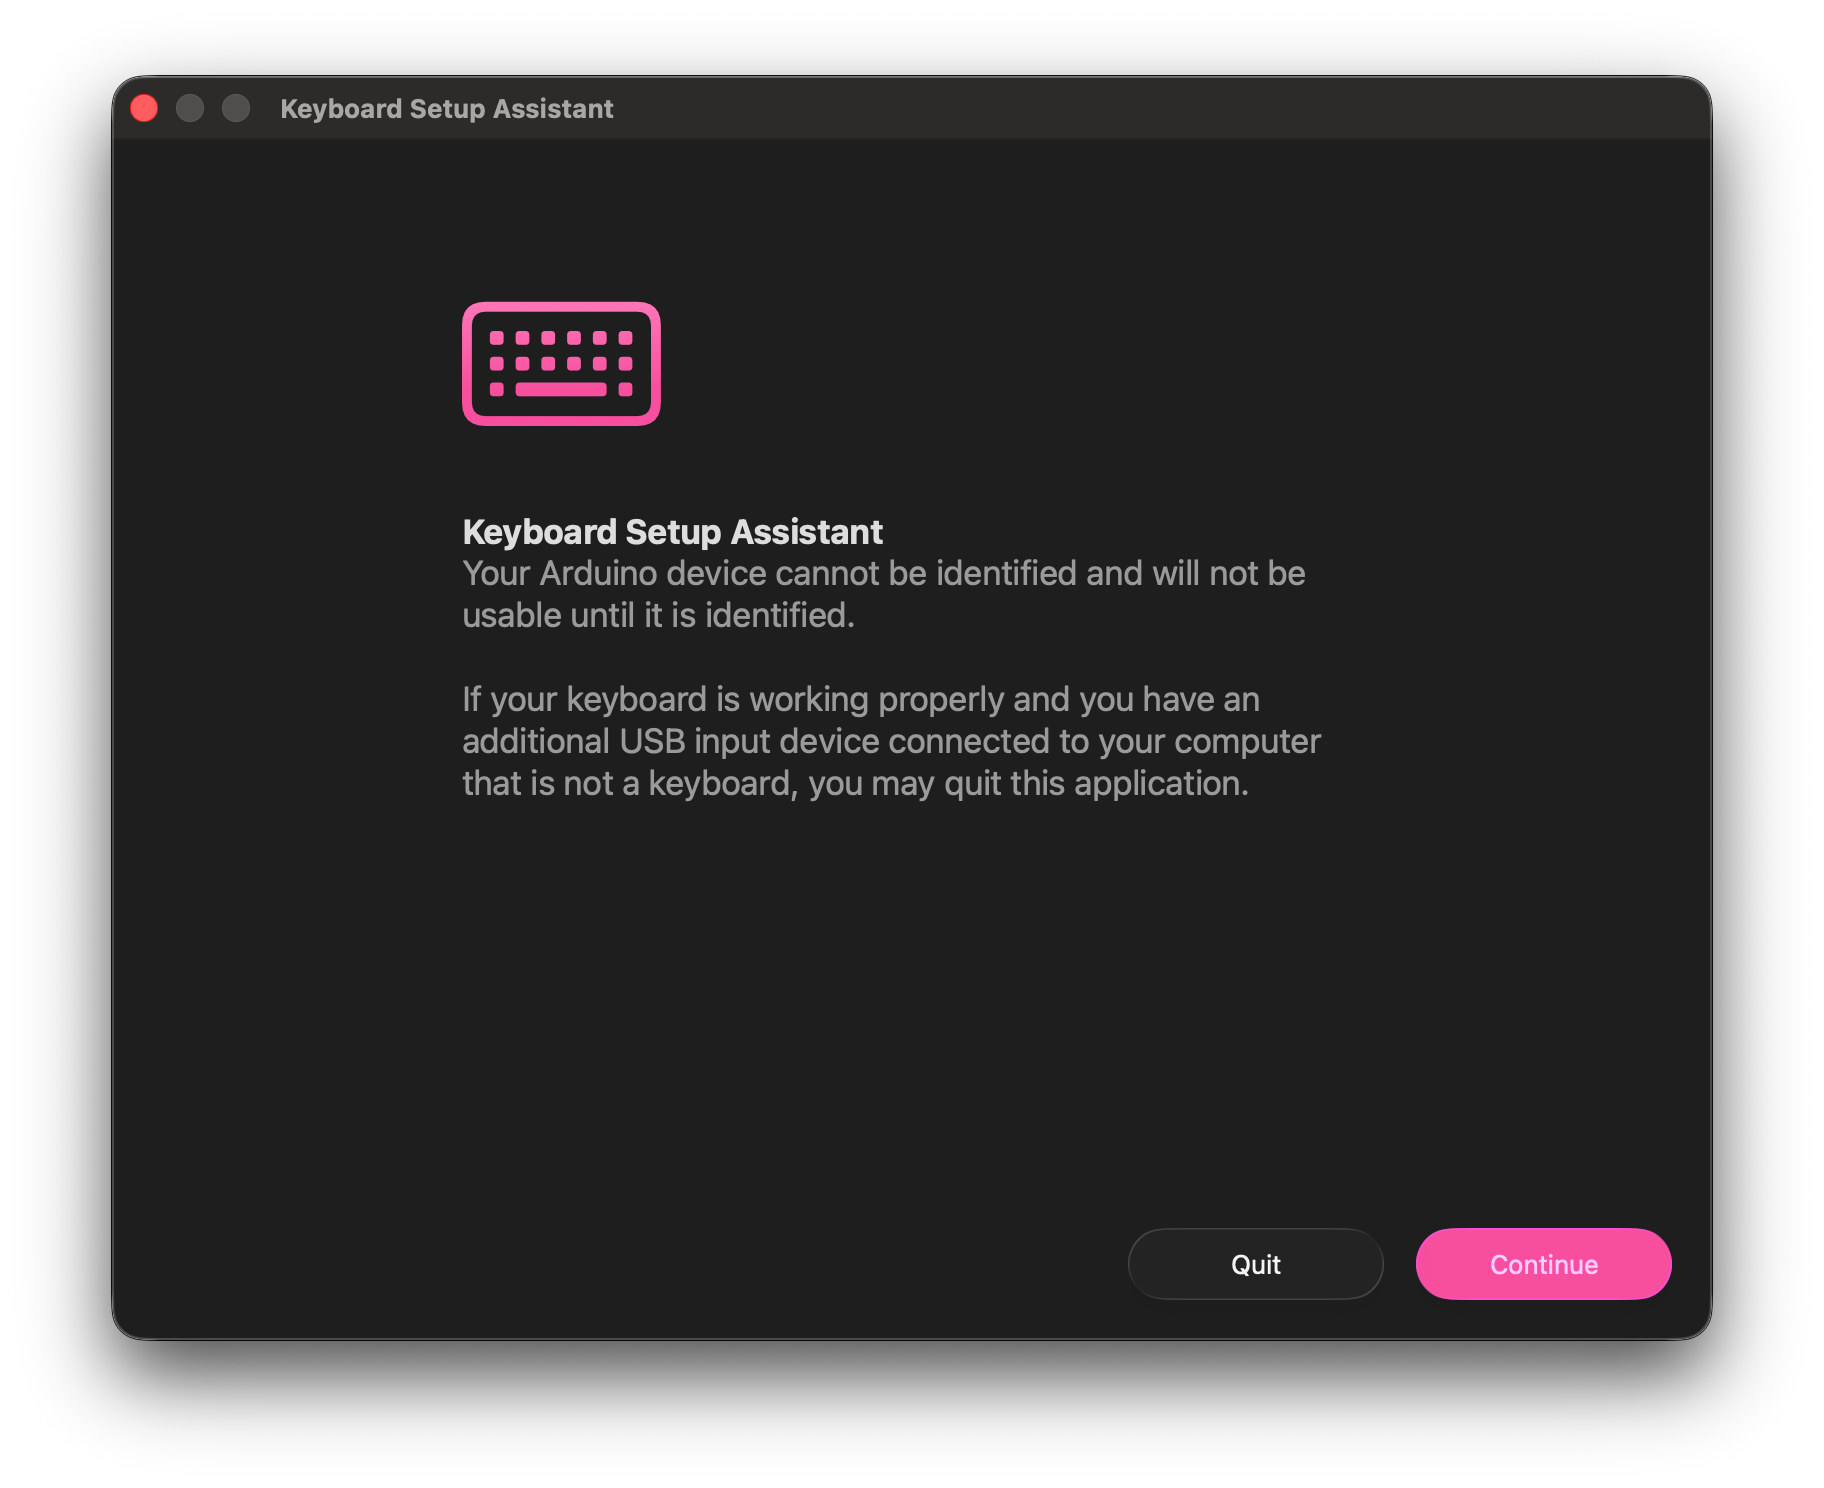
After the code is uploaded, you may see a pop-up like this, as your computer now sees the Arduino as an actual keyboard!