Making a Force Sensor/ a Button with Velostat & Conductive Fabric
What is a ForceVelostat Sensor?and Conductive Fabric?
TheVelostat (a.k.a. Linqstat) is a thin, flexible, pressure-sensitive plastic sheet made with carbon black. It’s a piezoresistive material — its electrical resistance changes when pressure is applied.
Conductive Fabric is a textile material (woven or non-woven) with conductive threads or coatings, like silver, copper, nickel, or carbon. It conducts electricity like a wire but is soft and flexible like fabric.
Assembling the Velostat and Conductive Fabric
- You need 2 pieces of conductive fabrics and 1 piece of velostat.
- Make sure the 2 pieces of conductive fabrics are not touching each other.
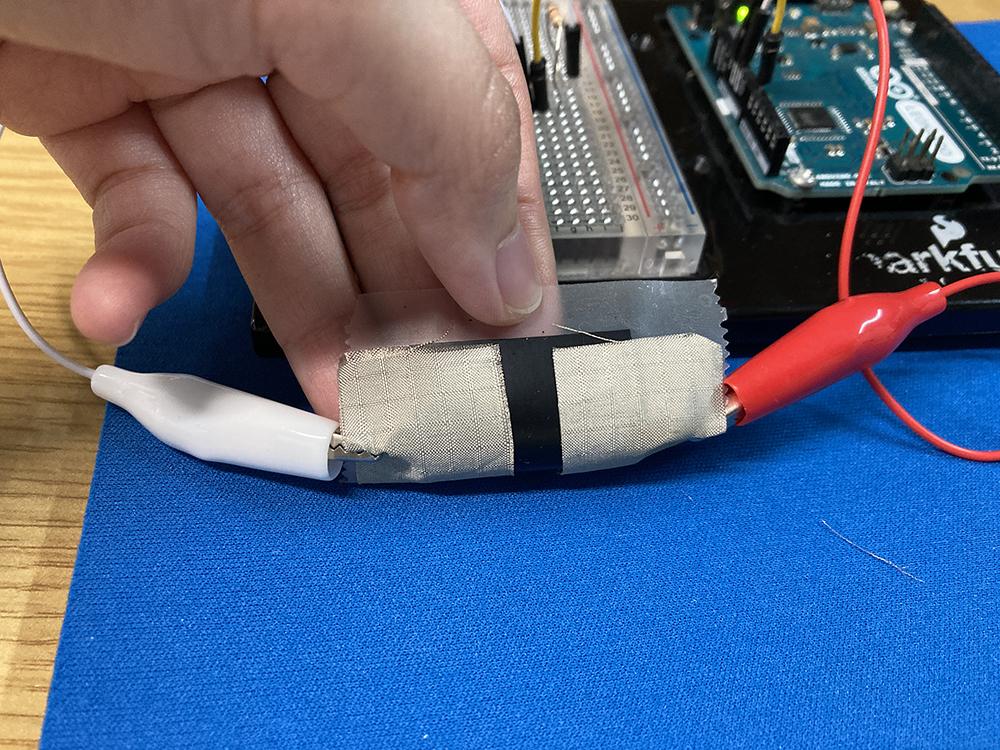
- Tape them down so they are firmly in contact.
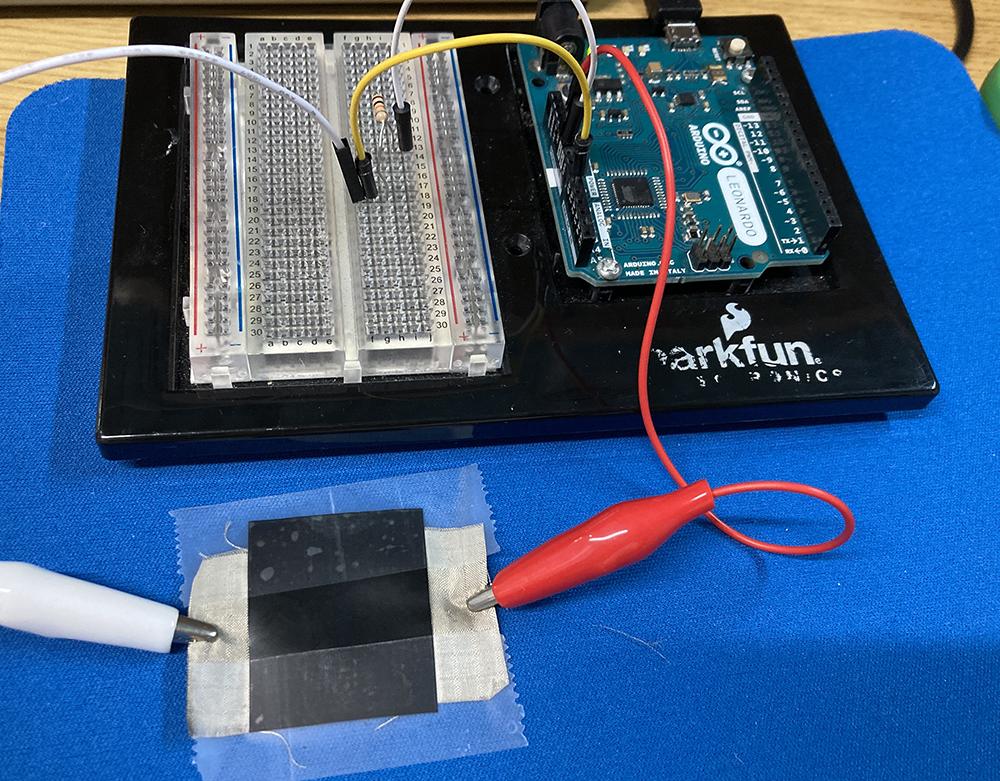
- (Optional) using a piece of non-conductive material as the base to hold everything together, preferably something spongy.


Making a Force Sensor
It is cheap and easy to use. It provides accurate readings for physical pressure but it cannot be used for measuring weight. You can put it underneath most materials, e.g. painting, shoes etc, and it is easy to hide.
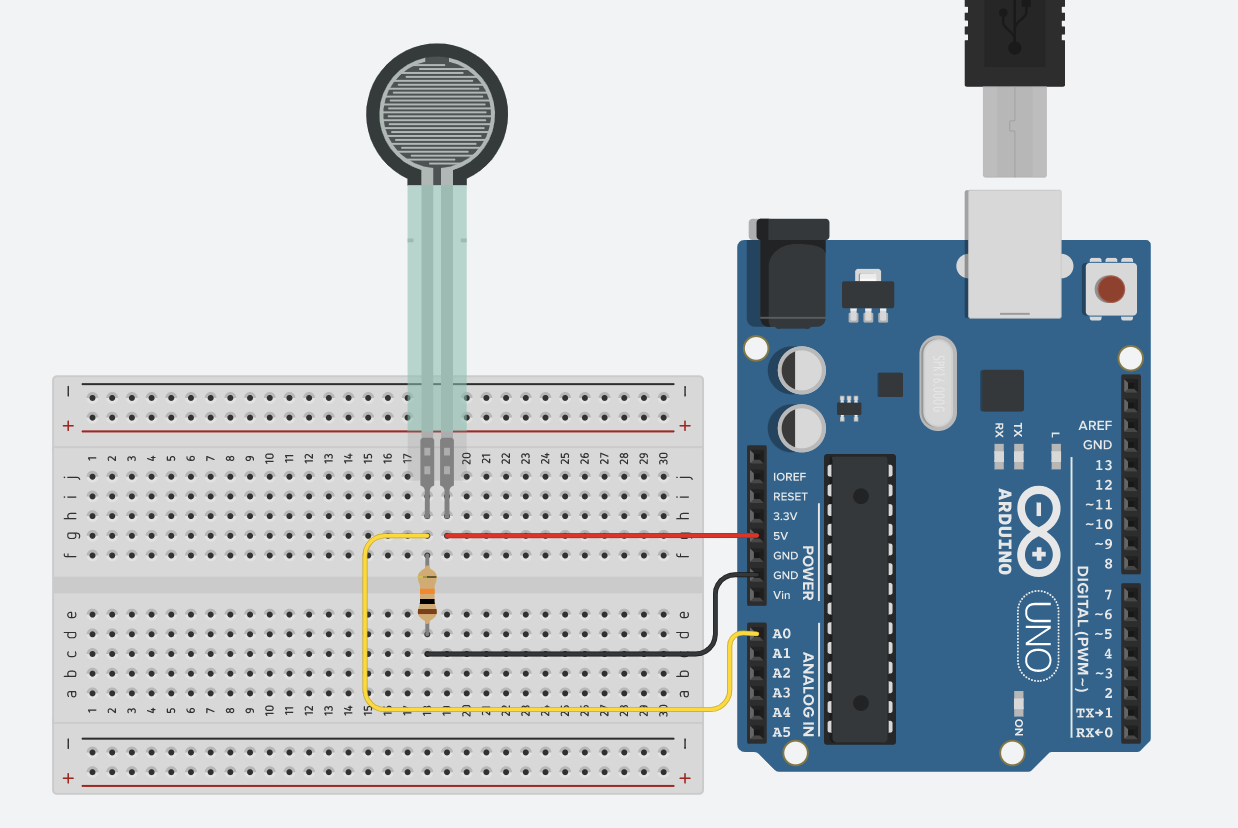
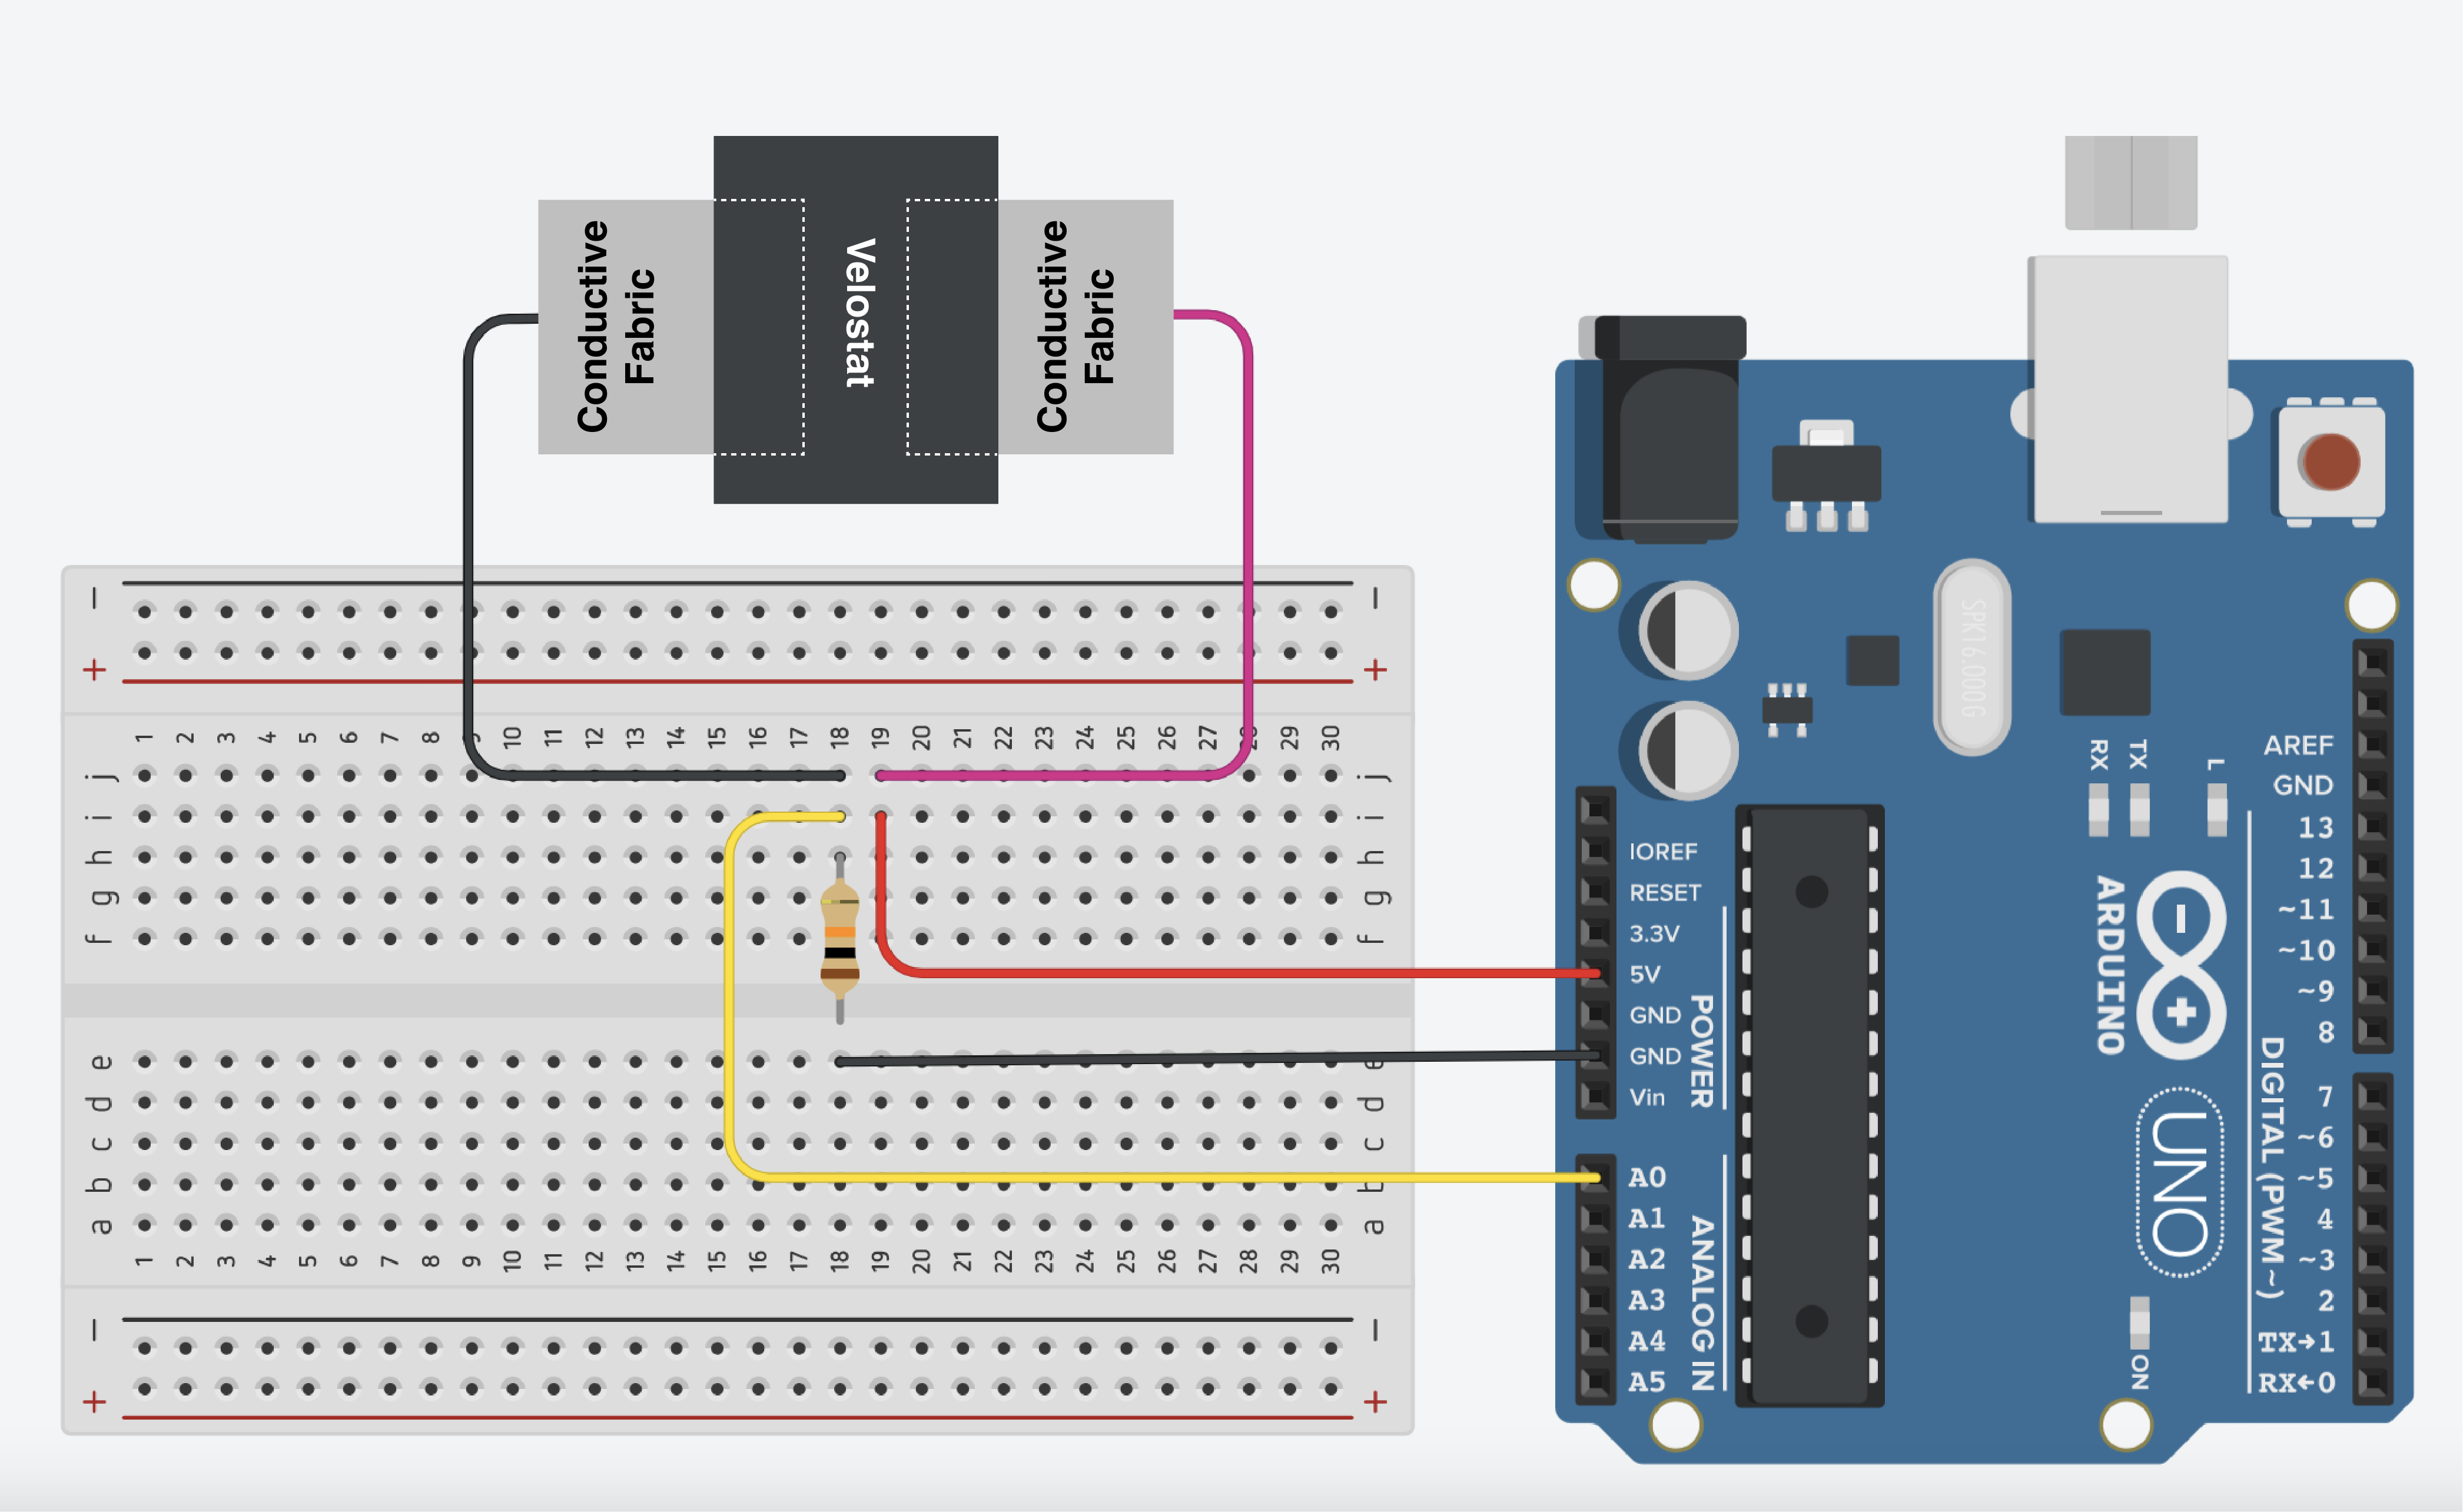
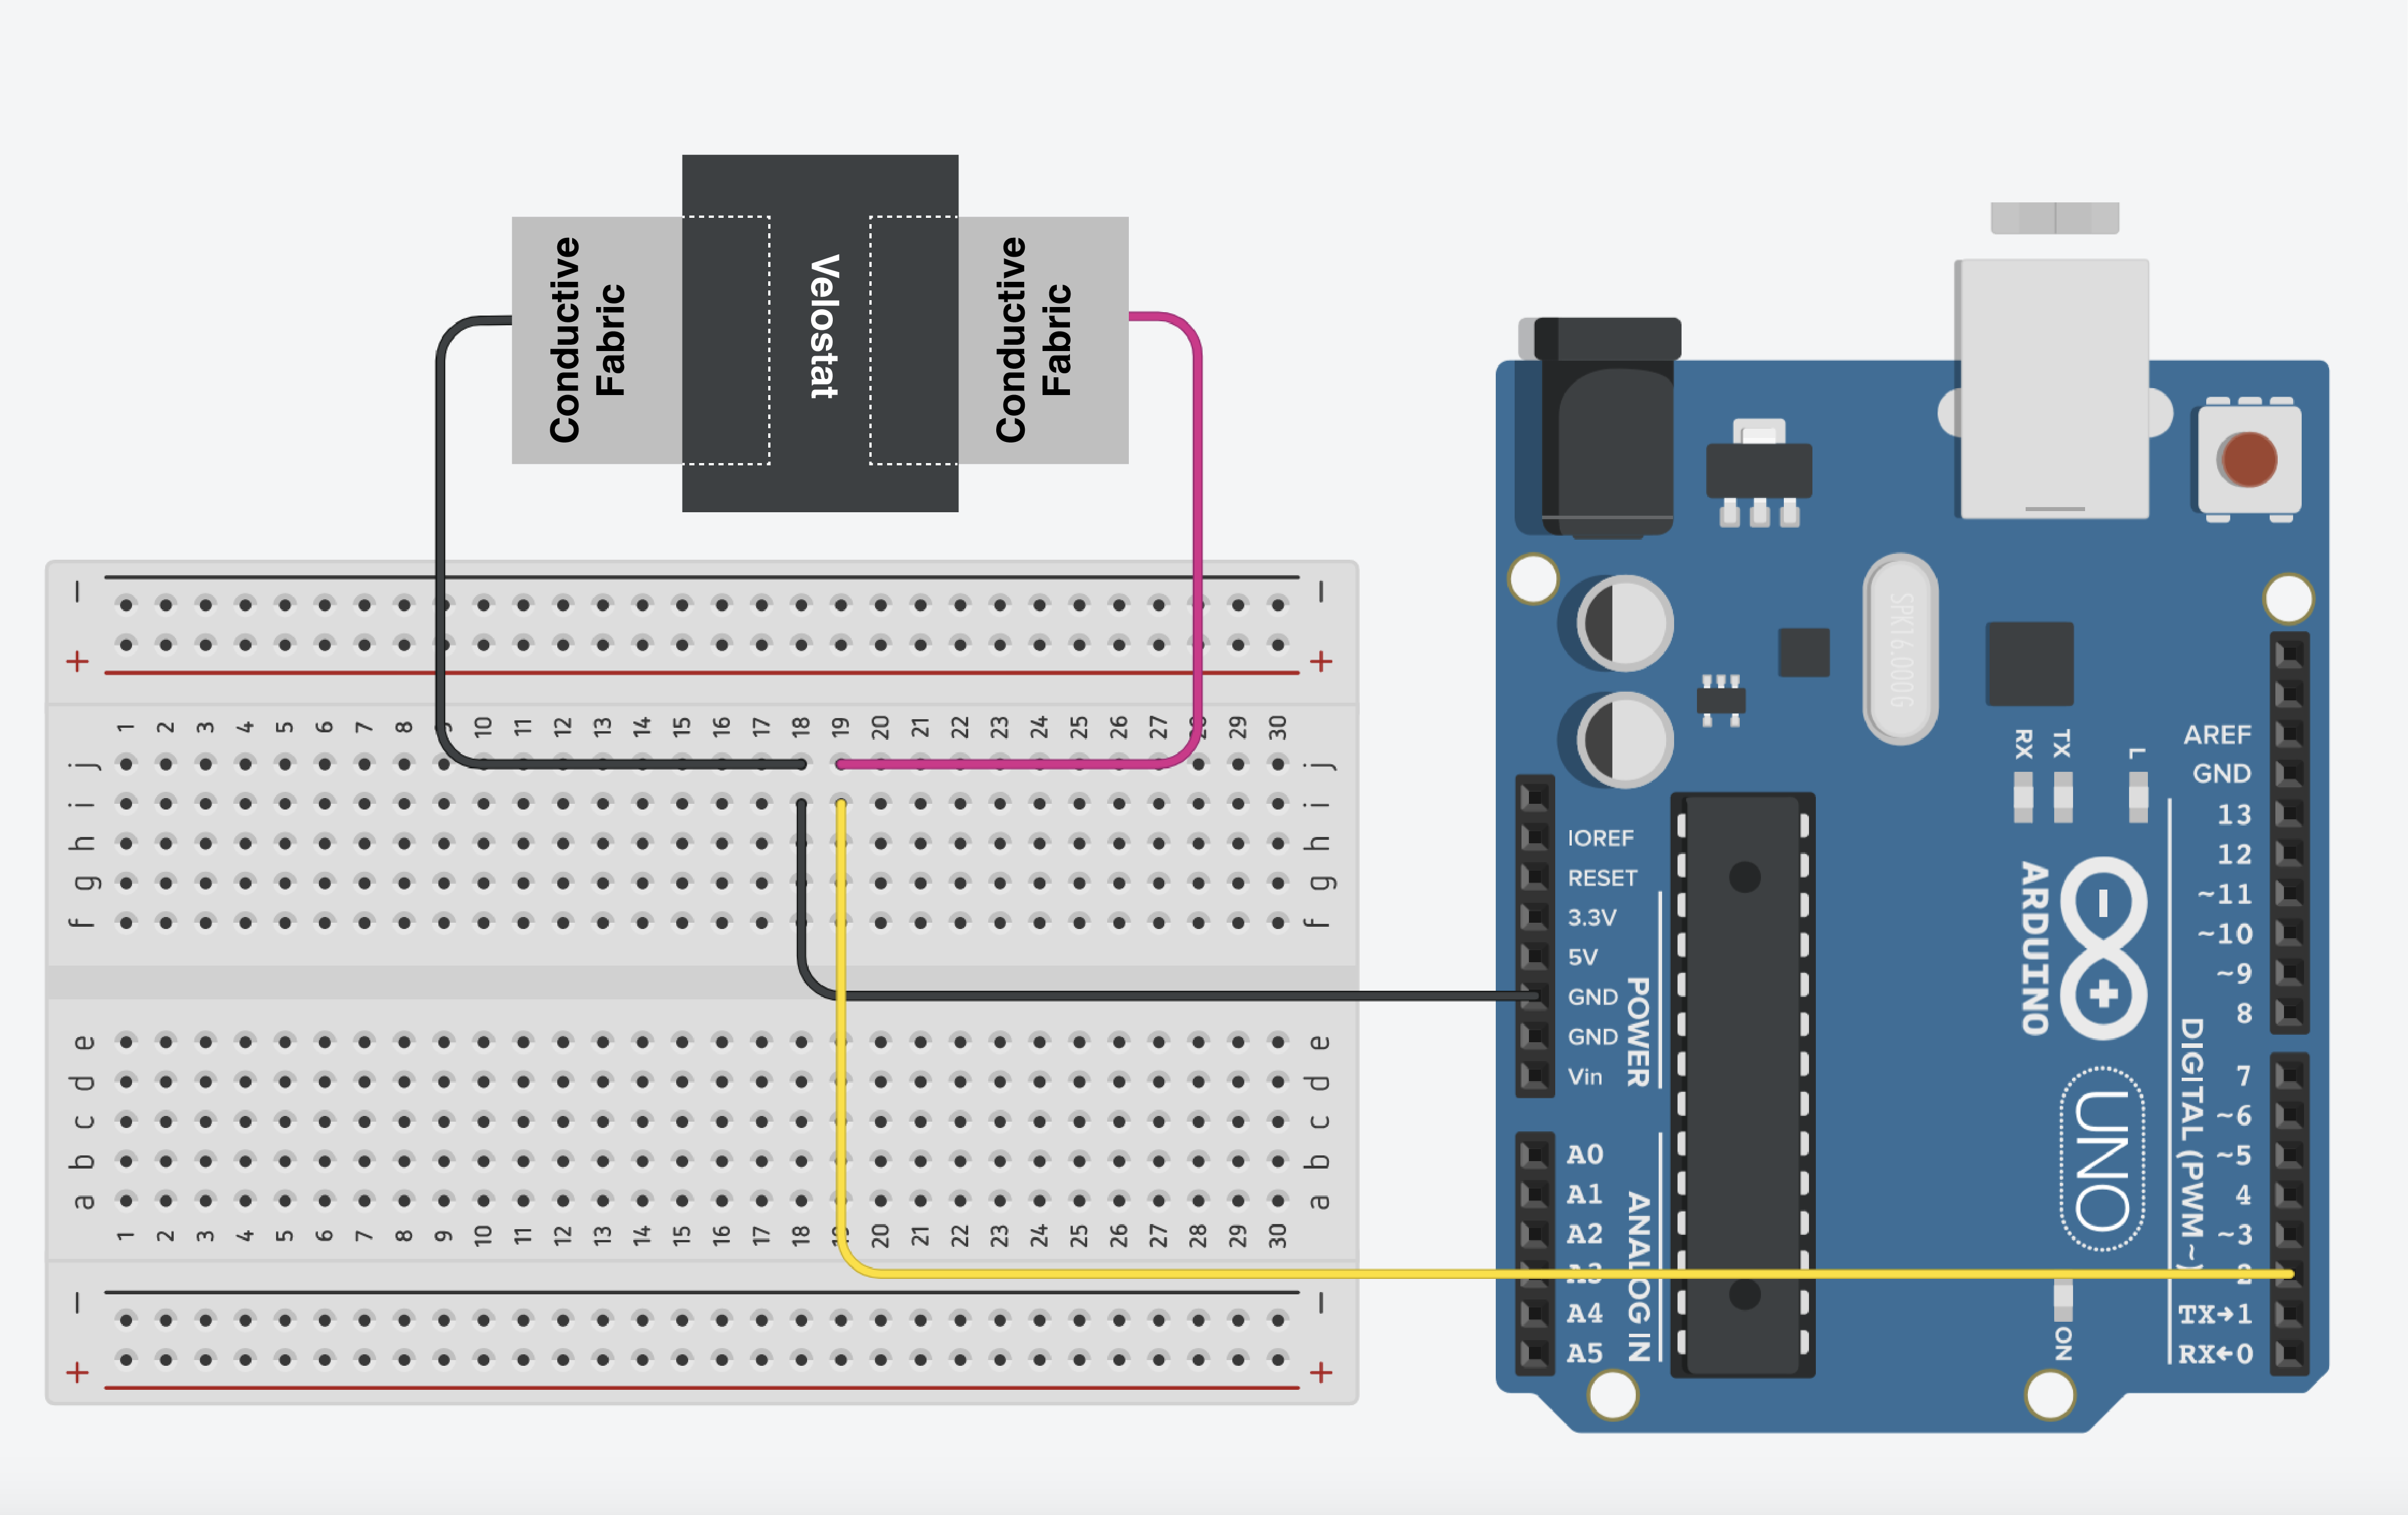
Wiring
Wiring up the sensor is simple, the sensor is unpolarized so it's doesn't matter which pin to 5V or GND.
- Power (one end to 5V)
- Ground (one end to GND with 10K resistor)
- Signal (GND side to A0)
Getting started
Code
This example turns onmeasures the built-inforce LEDapplied whento touchedthe lightly.velostat.
int sensorPin = A0;
int sensorValue;

//sensor value range: 0-1023
//200 is light touch
//500 is medium touch
//800 is hard touch
int limit = 200;

void setup() {
  Serial.begin(9600);
}

void loop() {

  int sensorValue = analogRead(sensorPin); // gives analog values for the sensors
  Serial.println(sensorValue);

  delay (100); // change for the speed of serial monitor
}
Making a Button
Wiring
We are using a Pull-Up Resistor button set up.
- Ground (one end to GND )
- Signal (one end to A0)
Code
This example detects if the velostat is pressed.
int buttonPin = 2;
int buttonState;

void setup() {
  // put your setup code here, to run once:
    Serial.begin(9600);
    pinMode(13,buttonPin, OUTPUT)INPUT_PULLUP);

}

void loop() {
  sensorValue// put your main code here, to run repeatedly:
  buttonState = analogRead(sensorPin);
 Serial.print("Force Level: ")digitalRead(buttonPin);
  Serial.println(sensorValue)buttonState);

  ifdelay (sensorValue > limit) {
 digitalWrite(13, HIGH)100); }// elsechange {for digitalWrite(13,the LOW);speed }of delay(100);serial monitor

}