Understanding Arduino software
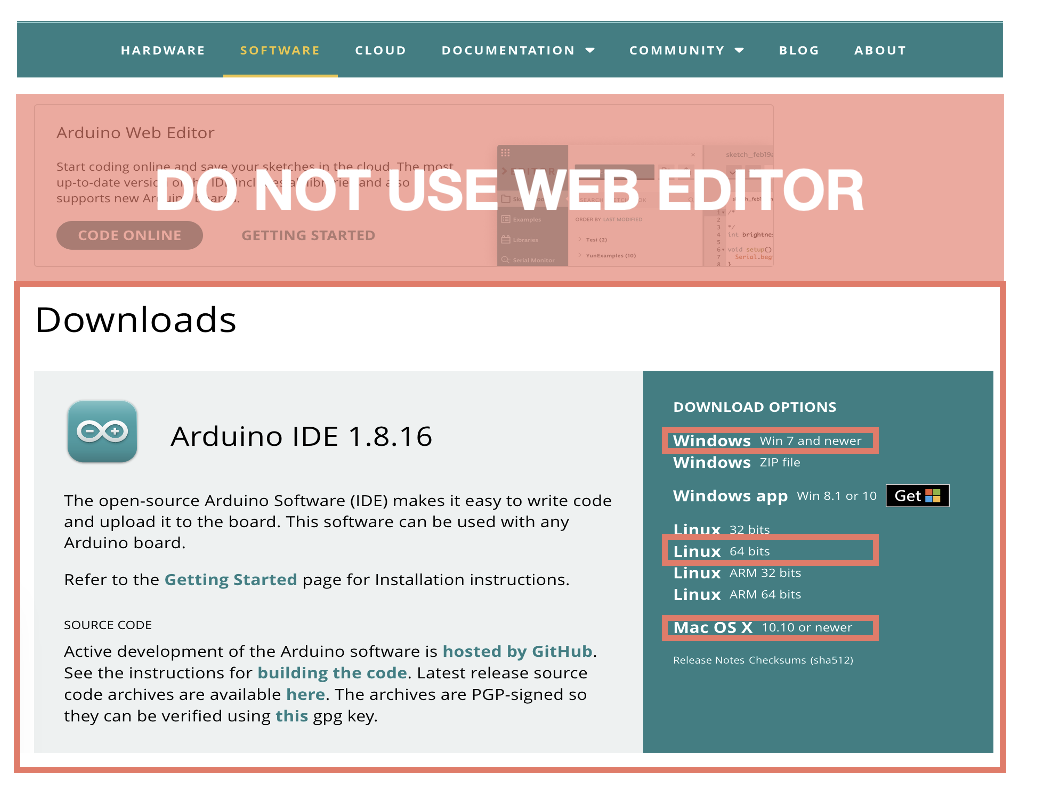
1. Download the software
Go the the official site and dowaload the 1.8.XX version! The latest version, 2.3.X, is not currently supported by all third-party development, so you may encounter unexpected errors. For the time being, please stick with the older version.
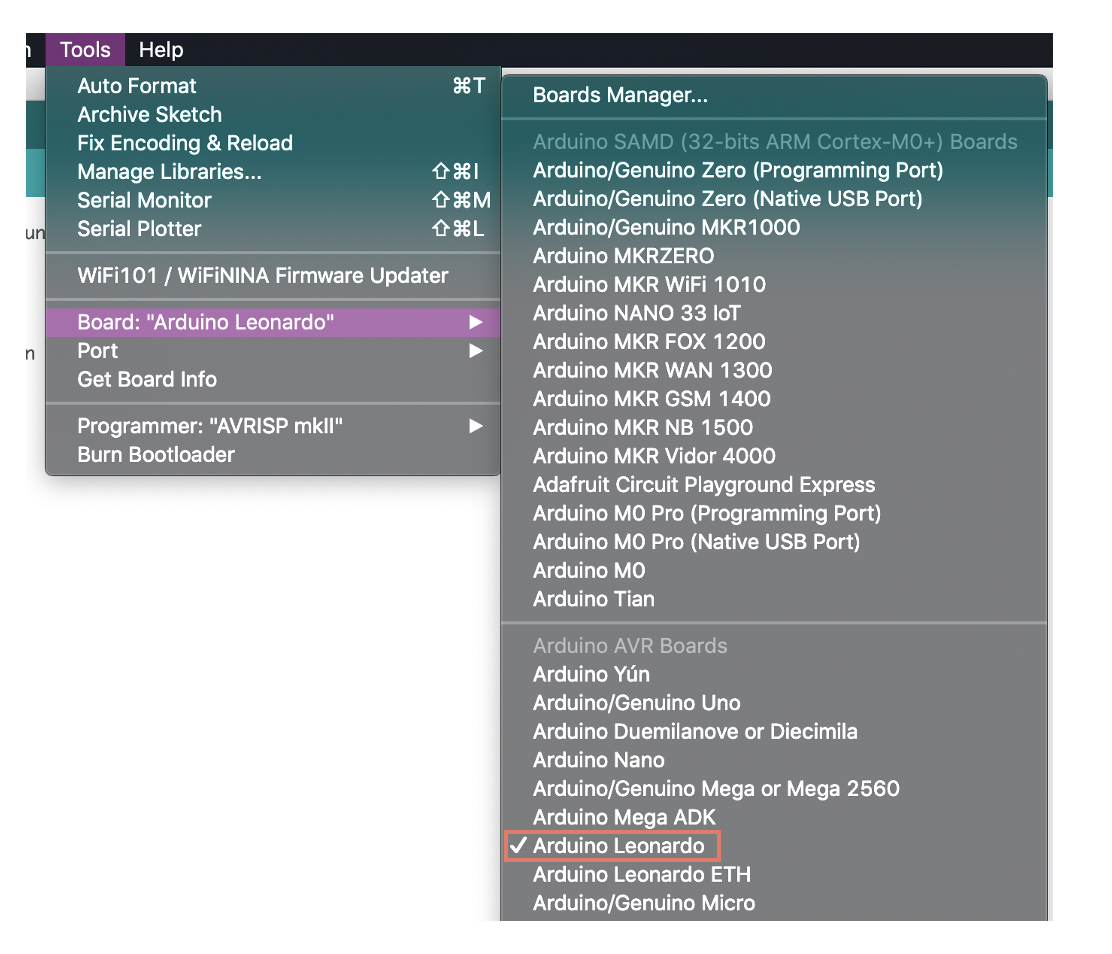
2. Select Arduino Board
We need to tell Arduino IDE which model we are using, so it can configure accordingly.
Tools -> Board -> Arduino Leonardo
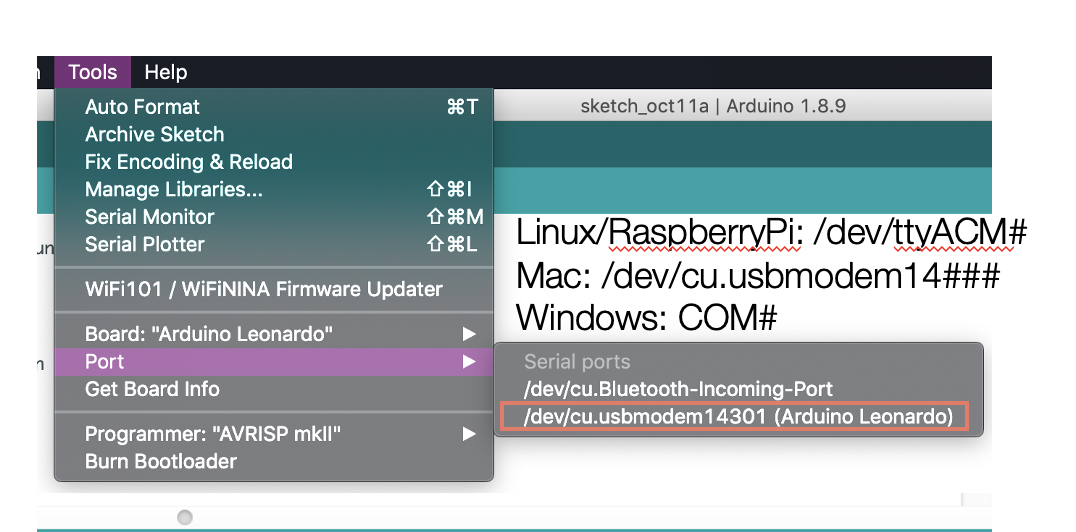
3. Select Serial Port
We are now connecting the Arduino and computer via the USB cable. All USB ports may be the same to use, but they are all unique to the computer, so we have to tell Arduino IDE which one exactly we are using. The one you are using, you will see XXXXXXXXXXX (Arduino Leonardo). In this screencap, you see 14301, yours may not be the same, if you are using a Windows PC, you will see COM# (Arduino Leonardo)
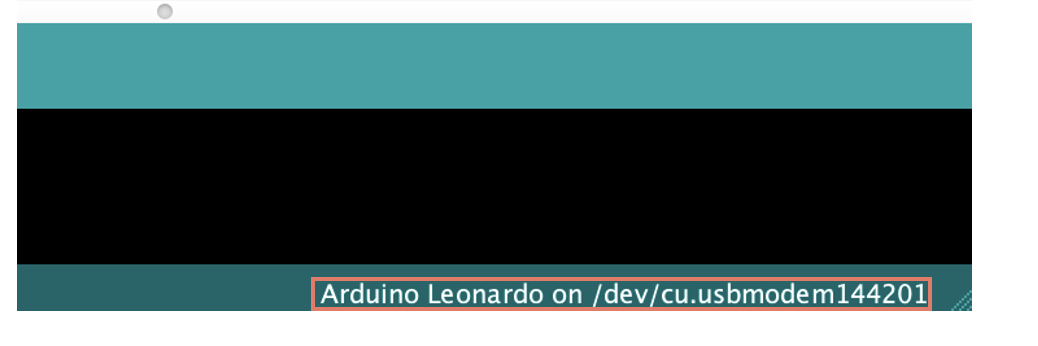
4. Double Check
Now at the bottom of the software, you will see you are using Arduino Leonardo at this specific port.
5. Upload Button
We are not going into the details of each button, but the Arrow button is the upload button to upload the code to the Arduino board. In the later part of this chapter, please use this button to upload the code to the Arduino.

Go to the next part, Using built-in example code and Reading the hookup diagram.