How to Configure a Raspberry Pi for the first time
How
Once your Raspberry Pi is imaged, it is ready to imagego! We have a Raspberrymore Pi?
There is andetailed official videotutorial showingfor howimaging ifthe Pi. Now we can move on to configuration when you prefer.turn on your Pi for the first time.
1. DownloadPower up the Raspberry Pi Imager
GoWhen toyou plug in the Raspbeerypower supply and all other equipment you need, the Pi officialshould sitestart tobooting downloadautomatically. the software. Choose a suitable version for yourself.
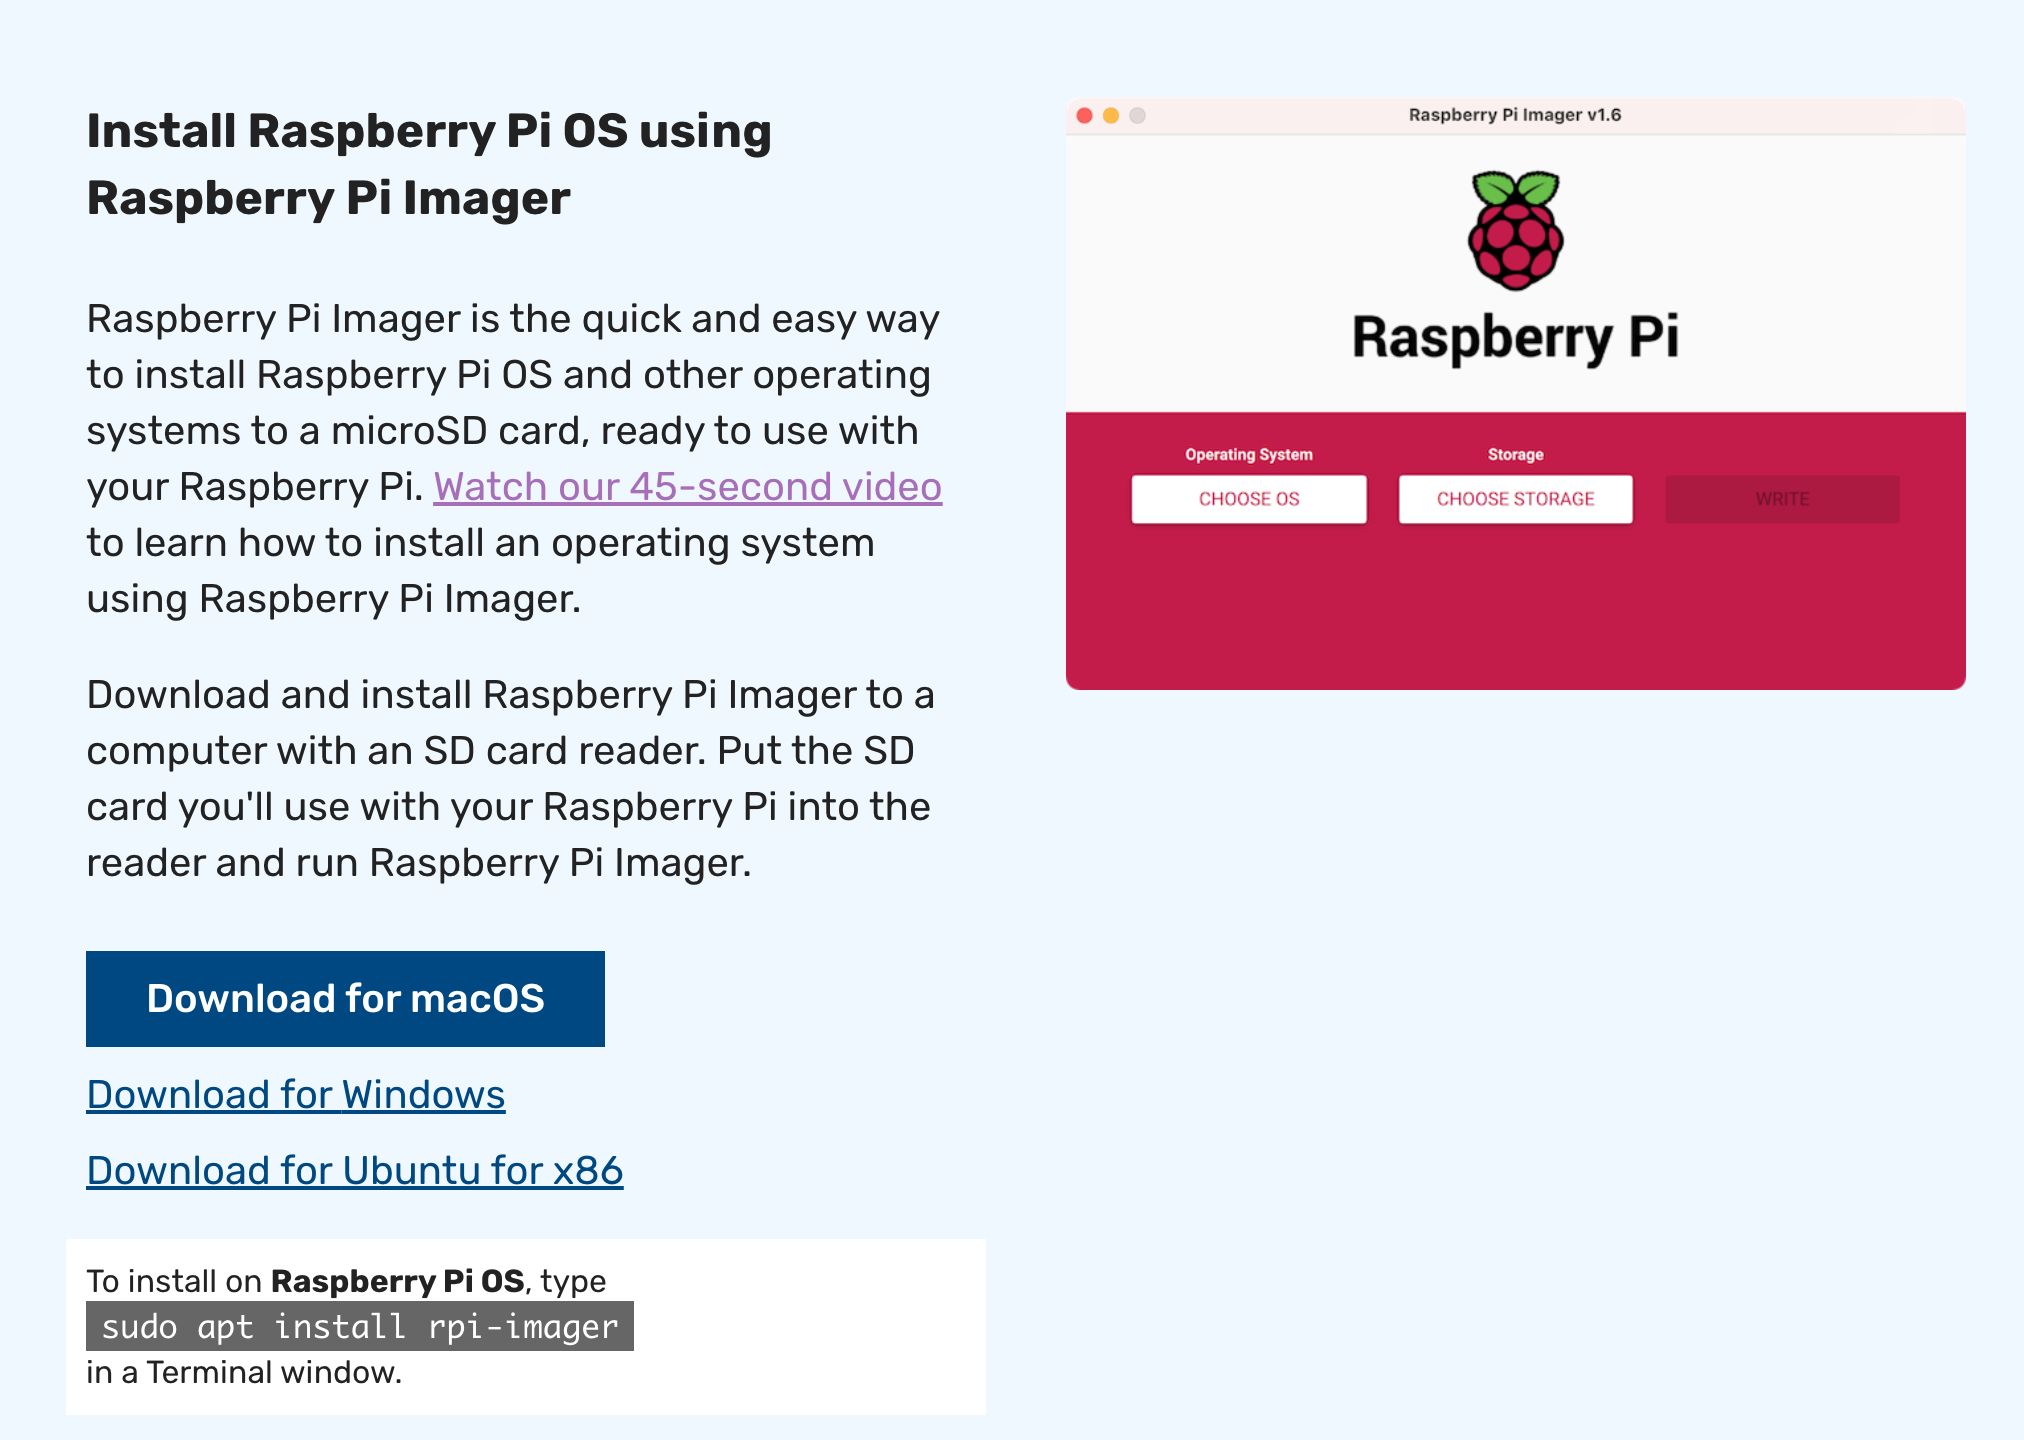
2. InsertIf your SD card
A CTL Pi kit should contain an SD card. Insert the SD card into your computer. It is always a good habit to format the SD card before imaging it. You need the SD card to be in FAT32 format.
Open Raspberry Pi Imager v1.8.4, you can format the SD card directly.
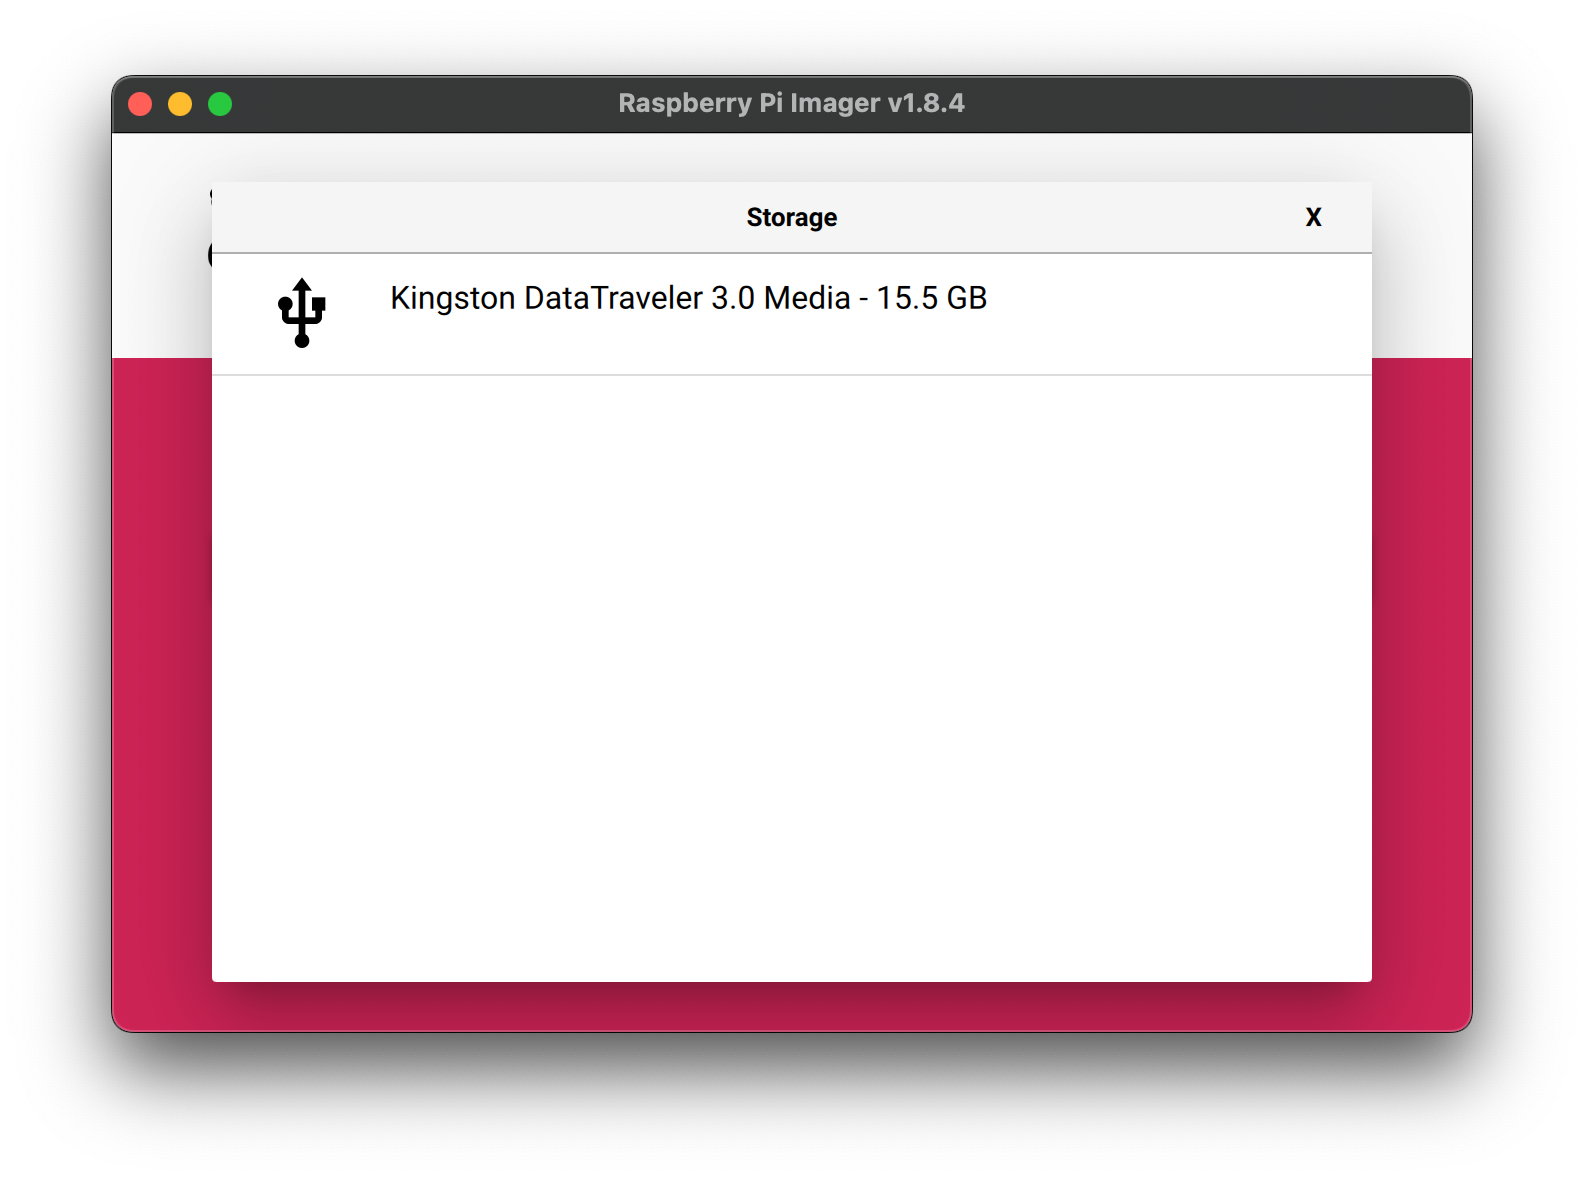
Storage, select the SD cardOperating System-Erase
ClickNextand wait for it to finish.
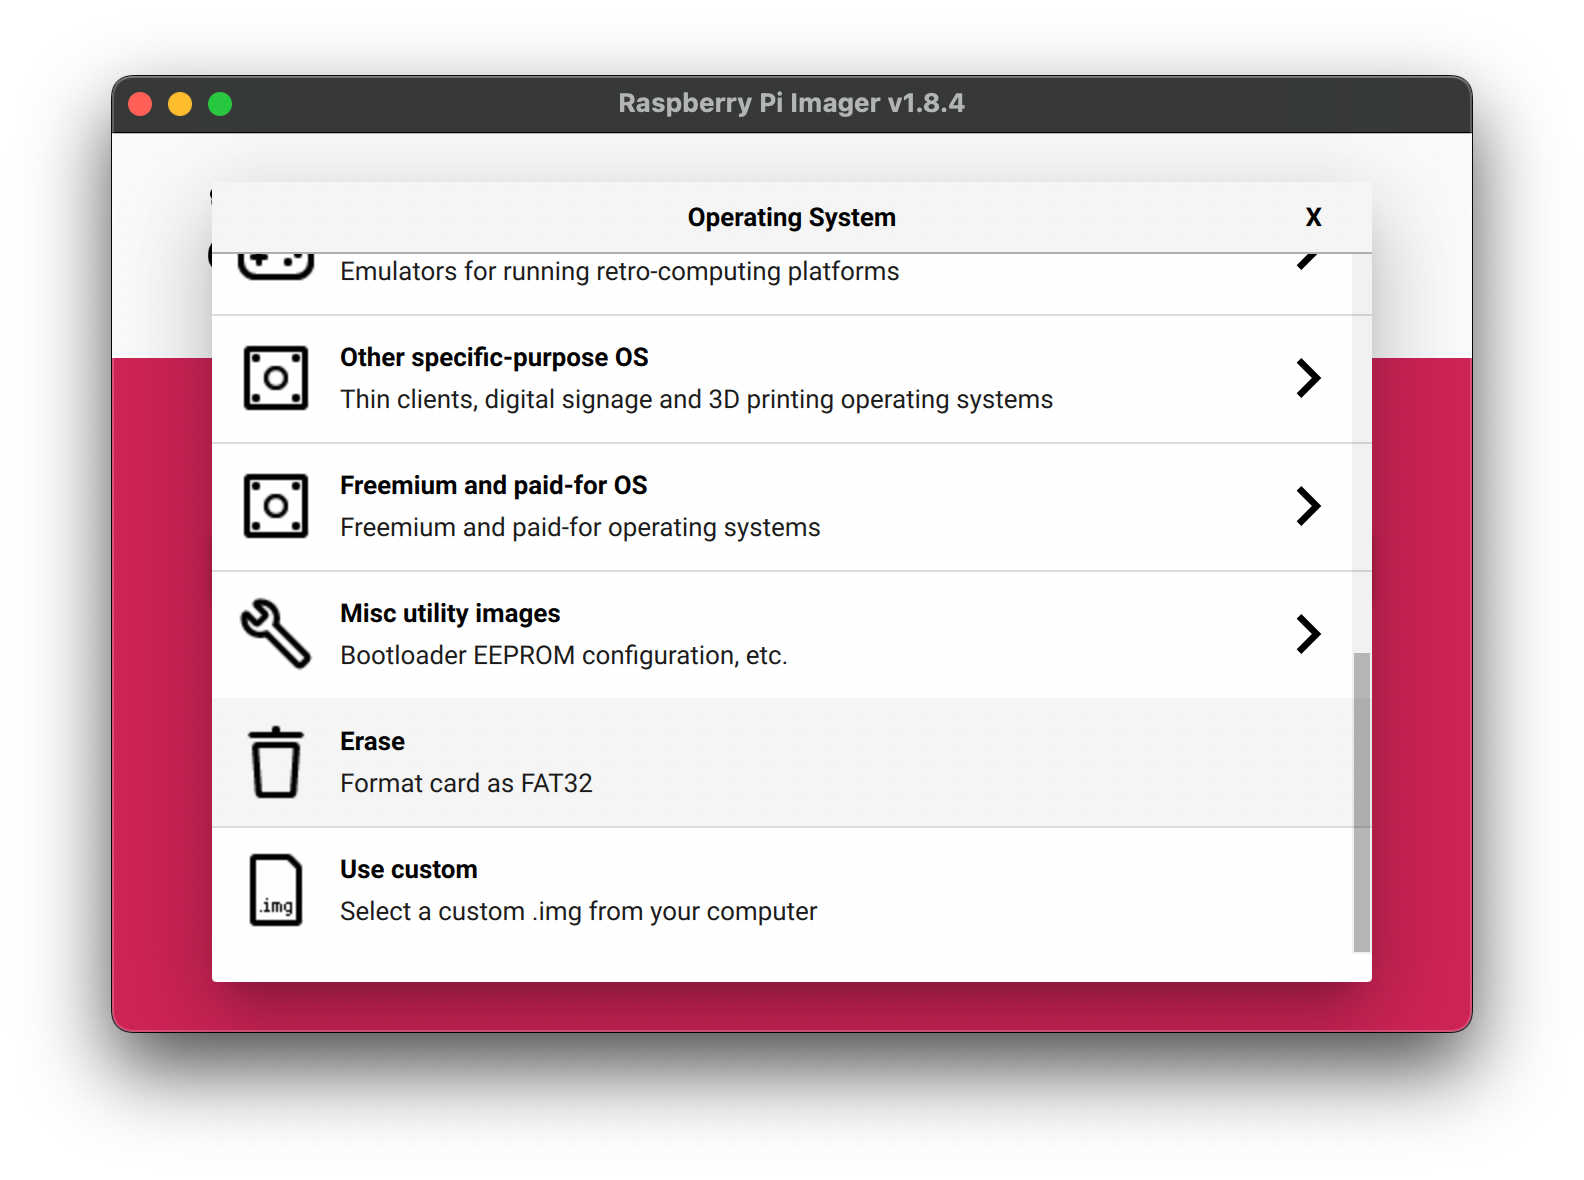
3. Image your Pi
Using Raspberry Pi Imagerdoes softwarenot toturn Installon within 5 minutes, check the Raspberrystatus PiLED, OSand totry re-image the SD card.
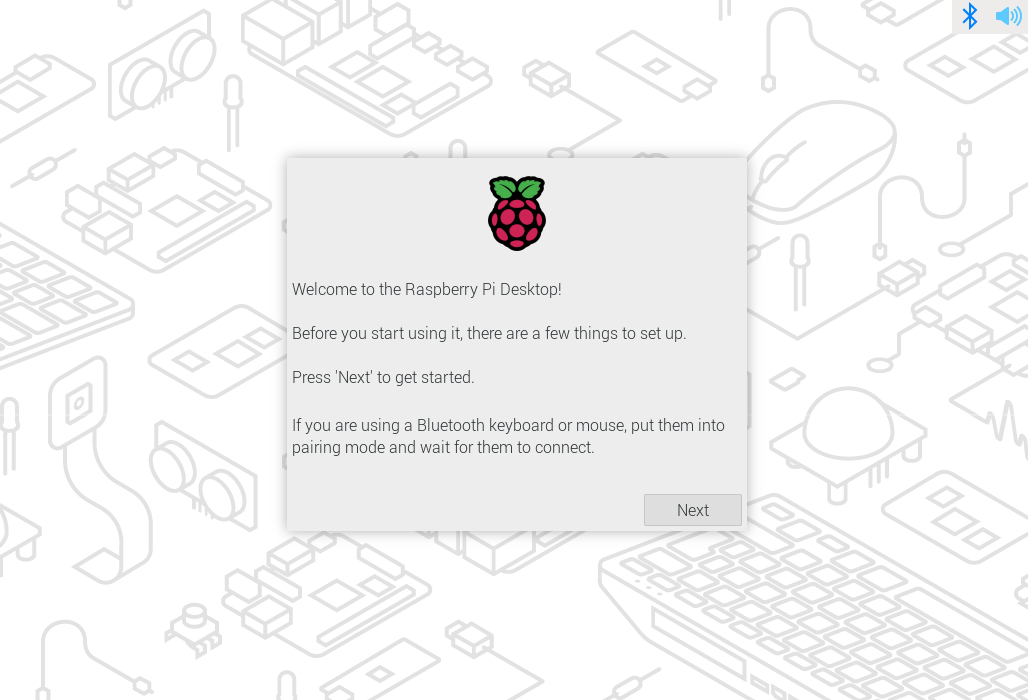
If everything goes right, you should see this.
- Locale
You need to set your country, language, time zone, and keyboard layout.
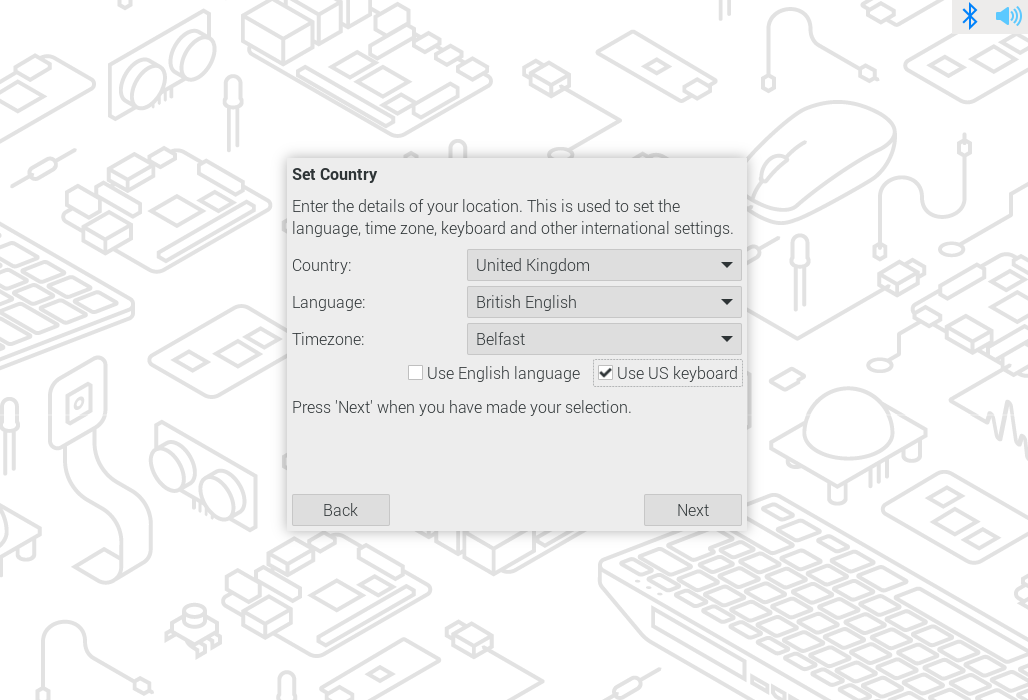
When you are setting up the keyboard, make sure the keyboard is plugged in. If you uncheck the
RaspberryUsePiUSDevicekeyboardselectitRaspberrywillPisetModelup
2.

Country. The main difference between US and UK keyboards is the positions of @,", £ and #. There are many variants of keyboards, even just for US/UK keyboards. You can change that after the initial setup. Check this tutorial for changing the keyboard layout.

3.
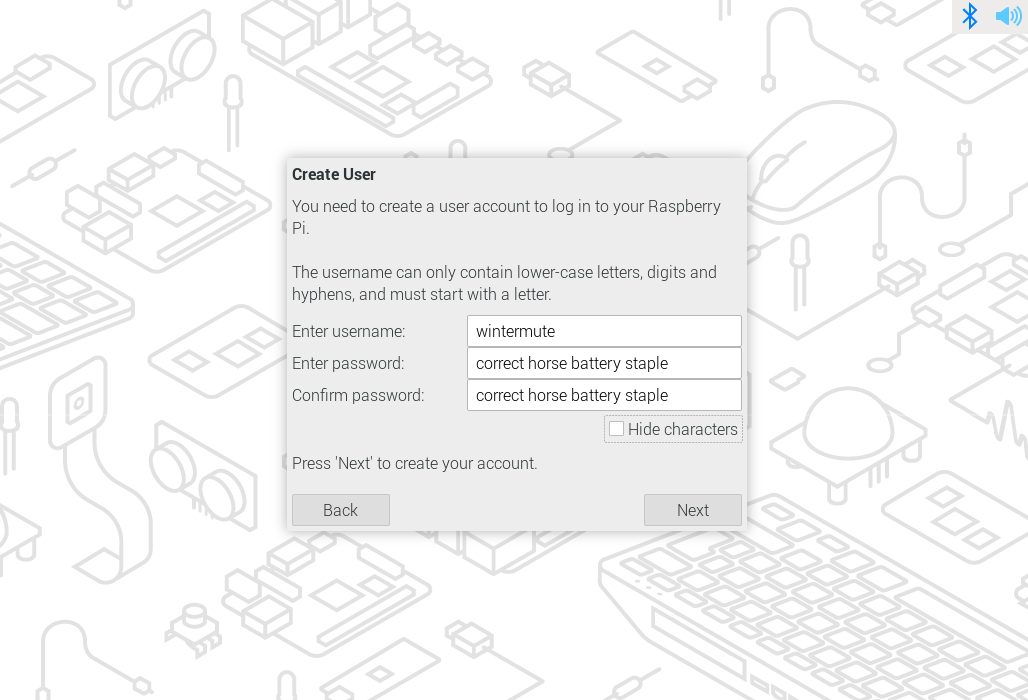
OperationUserSystem,You
selectcan set your username and password here. For some older Raspberry Pi OS,ifit has a default username and password, which is username: [ pi ] ; password: [ raspberry ].
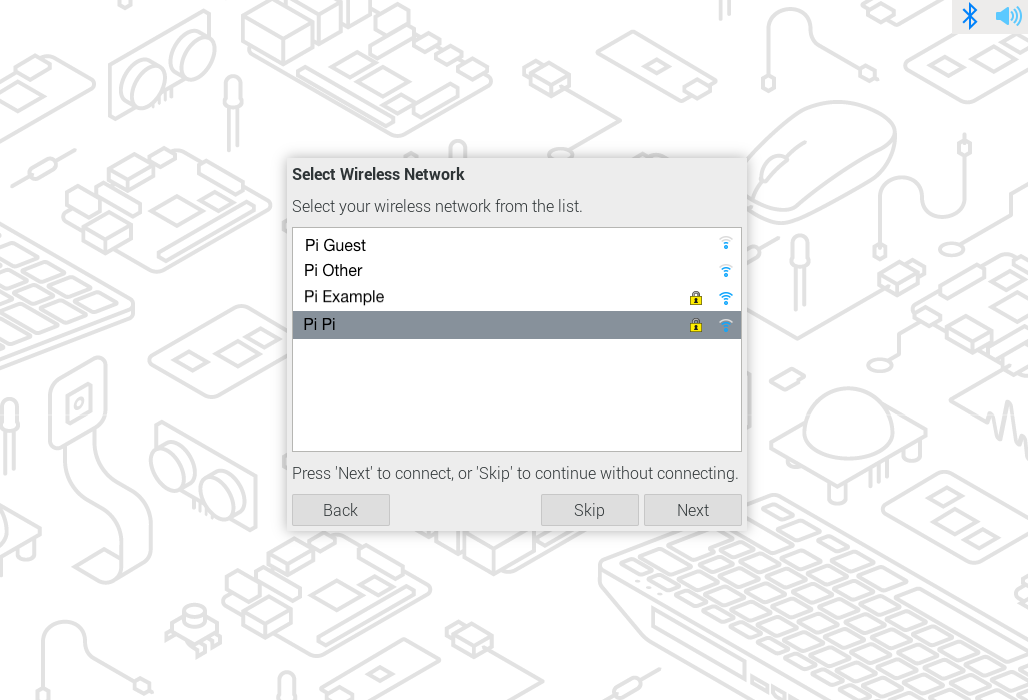
4. Wifi
You can log in to the WIFI as usual with SSID and password. For some networks, such as UAL wifi, you
areneed to sign in with your UAL account, which will notsureworkwhichfortomostchoose,Pi.chooseInthethatrecommendedone.

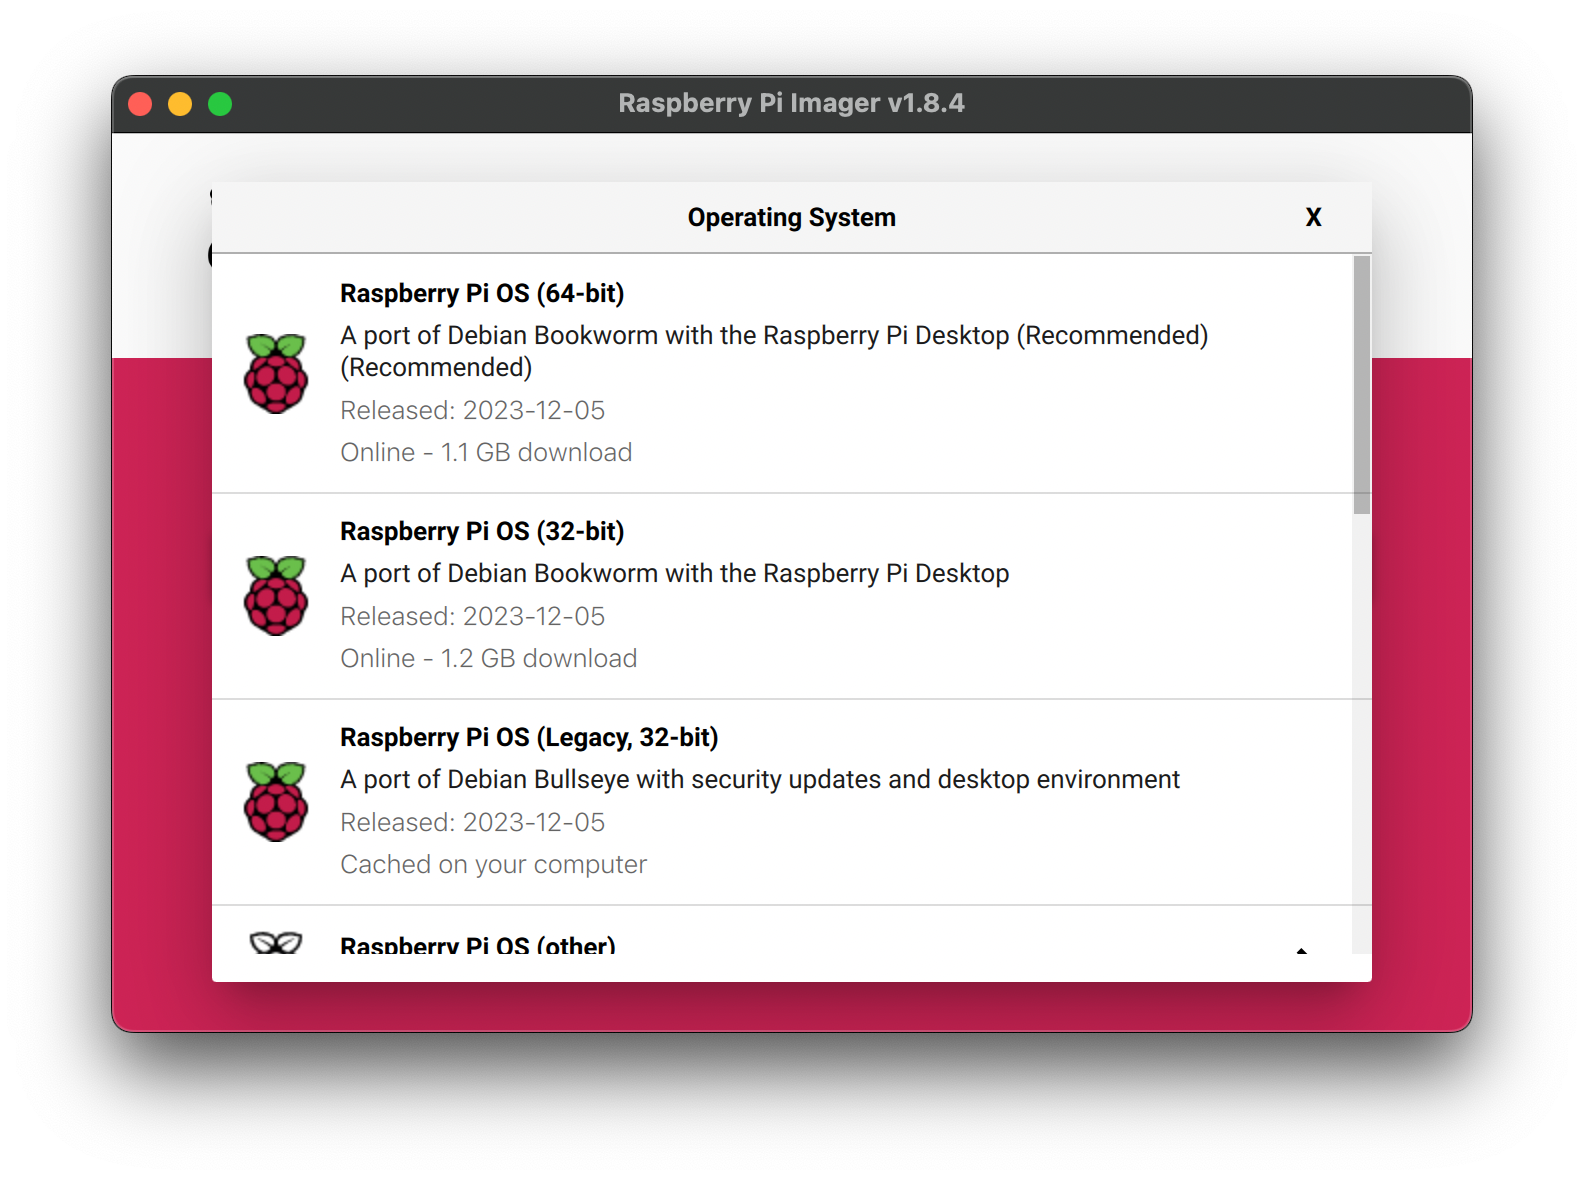
Storage, select the SD card
ClickNext, thencase, you willbeneedpromptedan Ethernet cable to access to the internet.
5. Brower
Google Chrome and Firefox are both preinstalled, you just need to choose one as your default browser. You can still access the other run from the start menu.

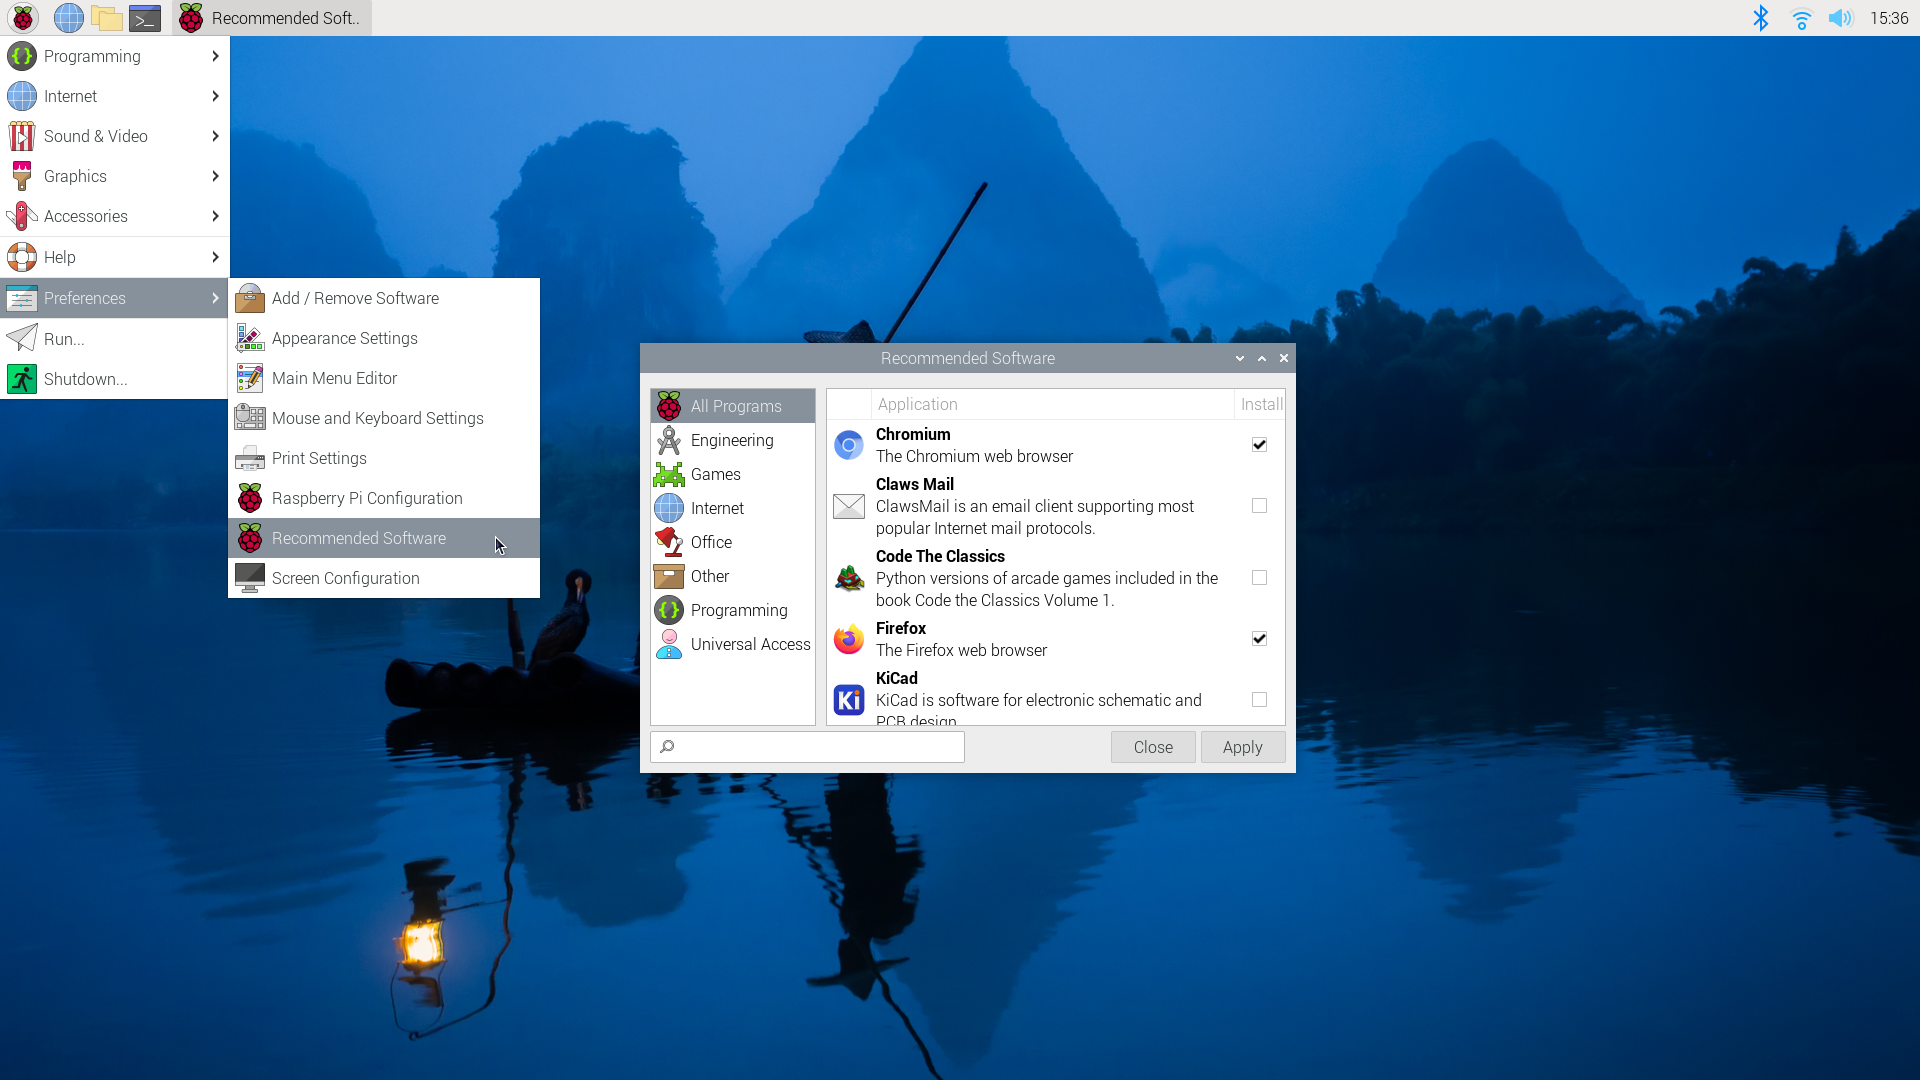
6. Recommended Software
Raspberry Pi comes with
"Wouldmany essential applications pre-installed so youlikecan start using them straight away, such as Thonny. You can go toapplyStartOS-customisationPreferencesettings?"-Recommended Software, explore the list andchoosedownloadNO.the

Once the pi is imaged, it is a ready to go mini computer. Eject the SD card from your computer, plug it into the Pi, power the Pi, it's done!