How to Display Animation on Waveshare E-Paper Display
WhatHow isto ause Waveshare E-Paper Display?
Please follow the previous tutorial for setting up the bacis..basic.
This tutorial assumes you already have an animation ready to use.
ConnectionWhat type of animation will be suitable to display on E-Paper
Disconnection
File Preparation - Adobe Premiere Pro
Power
Premier Disconnectand save them in a folder called ‘animation’
1.jpg to #.jpg, if they are not already
cd /path/to/your/folder

a=1
for file in Sequence*.jpg; do
 mv "$file" "$a.jpg"
 ((a++))
done
animation inside the folder e-Paper.File Preparation - Raspberry Pi
TheWe display comes with an e-paper Driver HAT, so simply plug in.
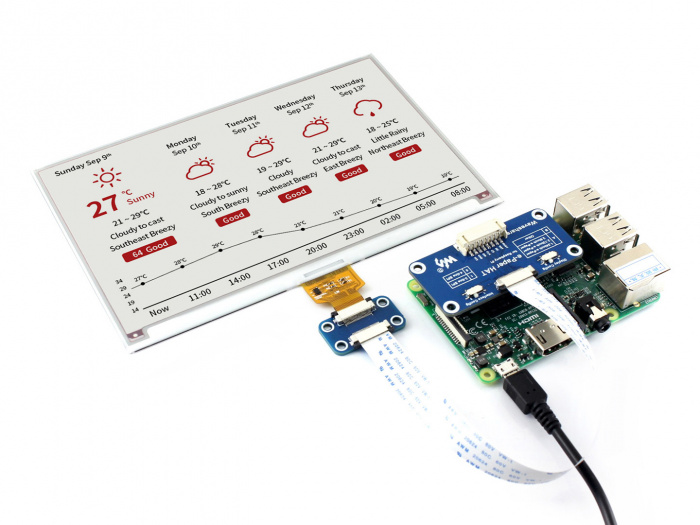
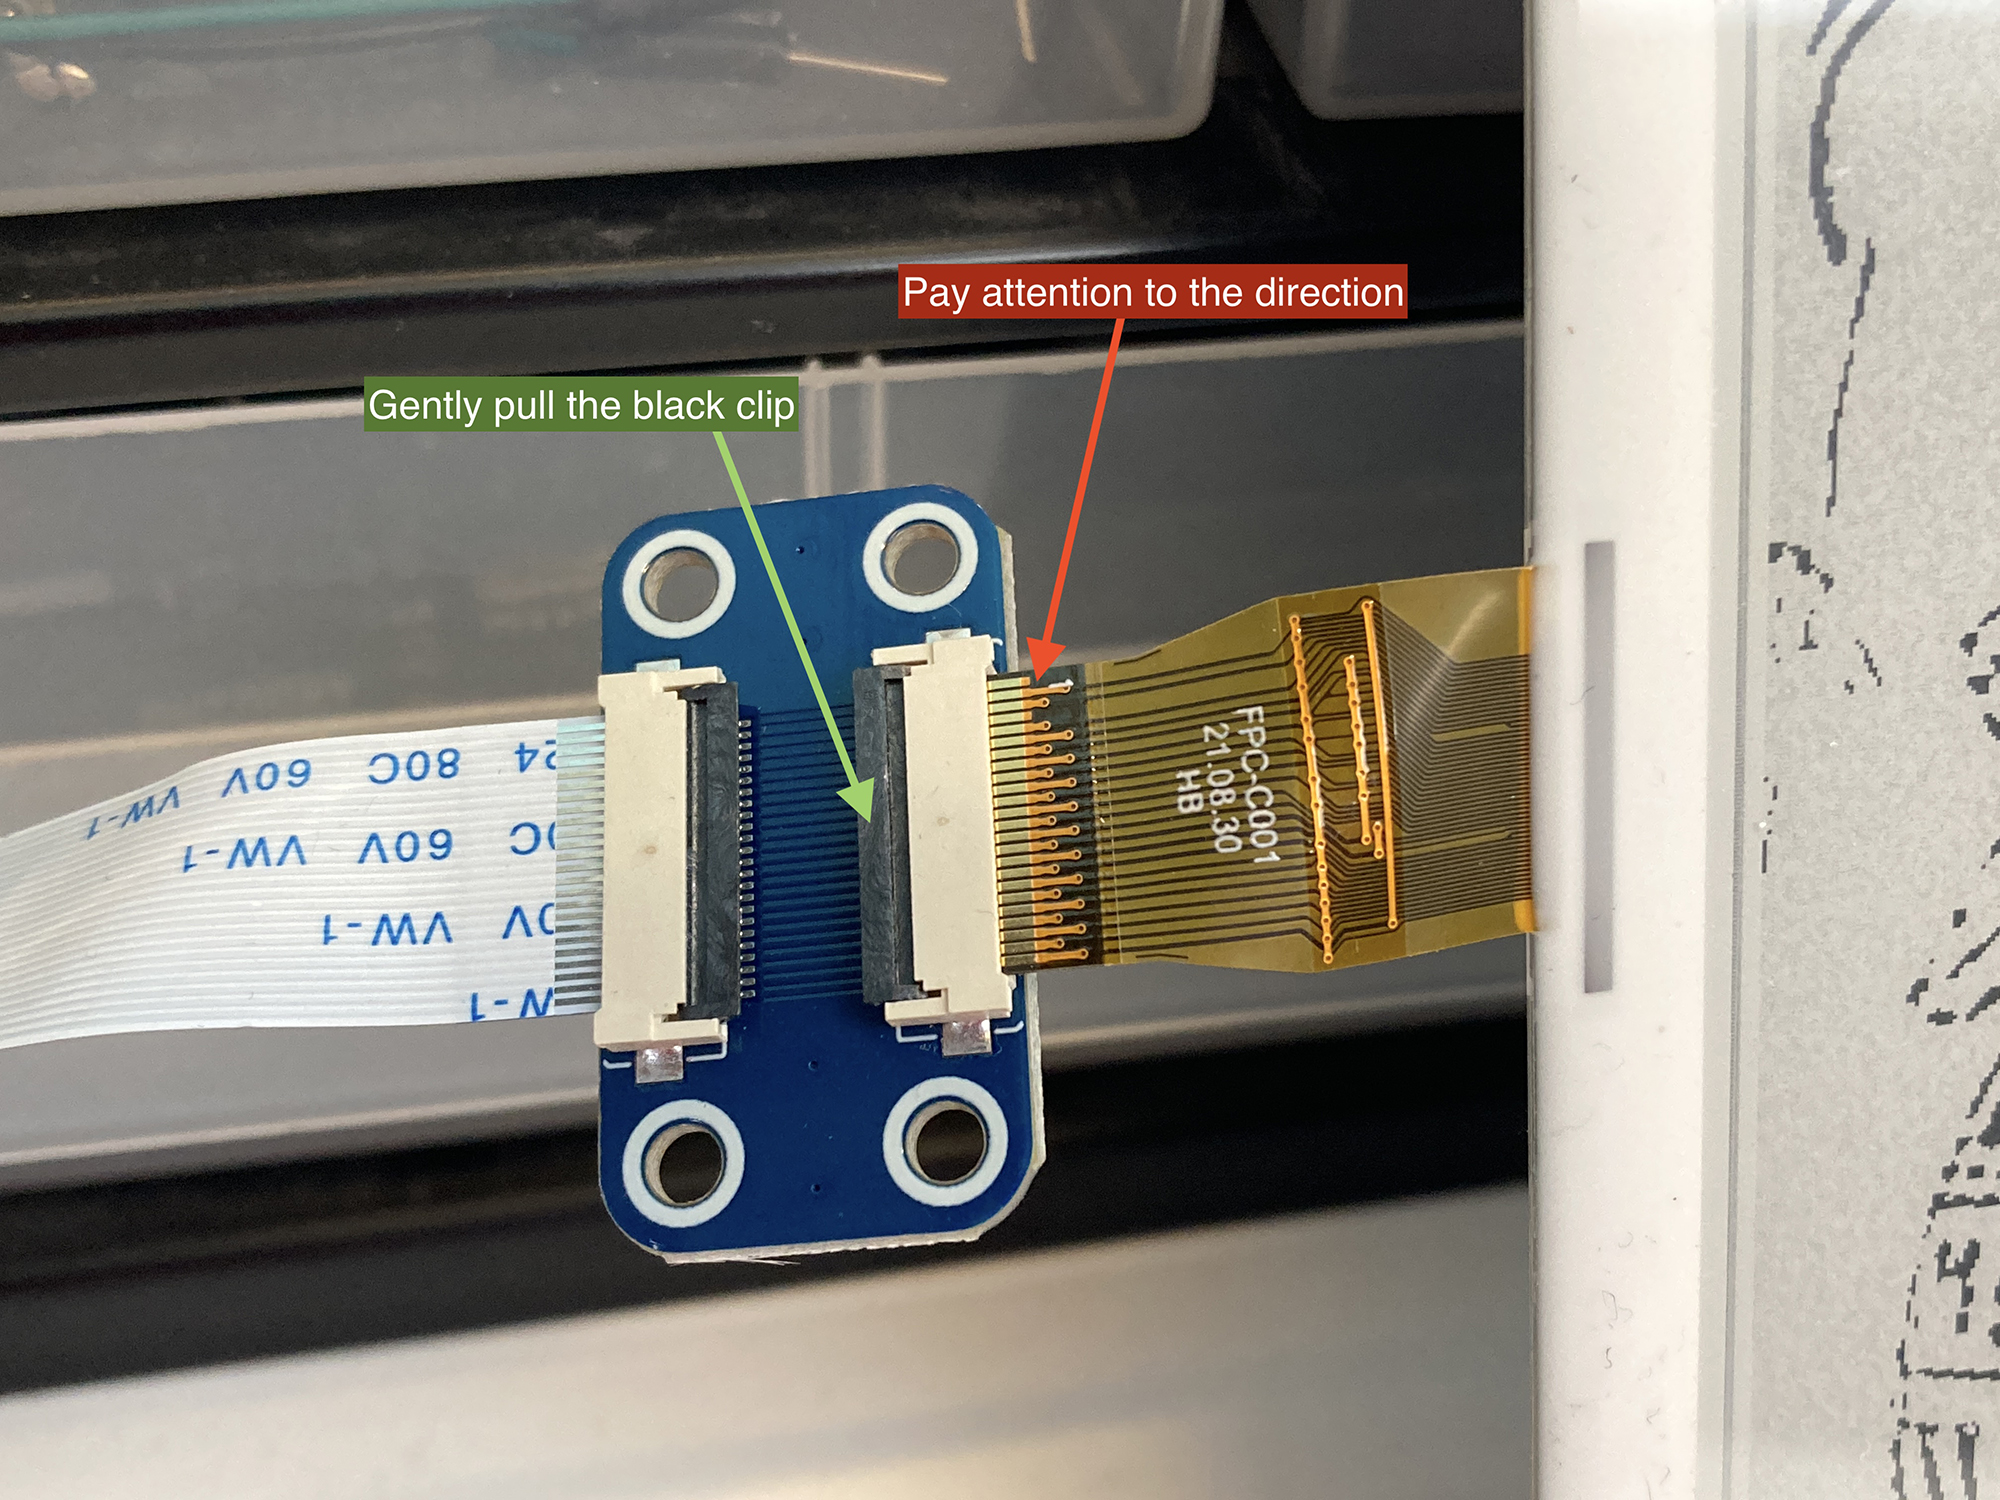
You maywill need to insertconvert the ribbon cable (the golden one) from the displayjpg to thebmp HAT.in Pi using ffmpeg.
GentlyInstallpull up the black clip (green arrow)Insert the golden cable (red arrow, pay attention to the direction)Press down the black clip to secure it.
Setting Up the Pi
Enable SPI in pi
Input this commandffmpeg,sudoraspi-configapt install ffmpeg -y- Start conversion,
for f in *.jpg; do ffmpeg -i "$f" "${f%.jpg}.bmp"; done - Remove old jpg files,
rm *.jpg - Now all images in the
Terminal.animation Navigatefolder should look like1.bmp toInterface Options→SPI→EnableReboot the pi bysudo reboot#.bmp
Install Python Library
sudo apt-get update
sudo apt-get install python3-pip
sudo apt-get install python3-pil
sudo apt-get install python3-numpy
sudo pip3 install RPi.GPIO
sudo pip3 install spidev
Download Python Example code from Github
git clone https://github.com/waveshare/e-Paper.git
Go to the Directory (folder) where the example codes are located
git clone https://github.com/waveshare/e-Paper.git
Run the Python Code
You can either run the code from the Terminal or use a Python-based software such as Visual Studio or Thonny.
In Terminal:
python3 epd_7in5_V2_test.py
The display should now be blinking and have some demos displayed.
Something more
The below code iswill display the animation from frame 1 to draw a rectangle with random size and location on the display.end frame.
#!!/usr/bin/python
# -*- coding:utf-8 -*-
# Display Width: 800, Display height: 480

import sys
import os
picdir = os.path.join(os.path.dirname(os.path.dirname(os.path.realpath(__file__))), 'pic')
libdir = os.path.join(os.path.dirname(os.path.dirname(os.path.realpath(__file__))), 'lib')
if os.path.exists(libdir):
    sys.path.append(libdir)

import logging
import random
from waveshare_epd import epd7in5_V2
import time
from PIL import Image,ImageDraw,ImageFont
import traceback

logging.basicConfig(level=logging.DEBUG)

try:
    logging.info("epd7in5_V2 Demo"Animation")
    epd = epd7in5_V2.EPD()

    logging.info("init and Clear")
    epd.init_fast()
    epd.Clear()

    #print(animation_dir = os.path.join(os.path.dirname(os.path.dirname(os.path.realpath(__file__))), 'animation')
    image_files = sorted(
        [f for f in os.listdir(animation_dir) if f.endswith('.bmp')],
        key=lambda x: int(os.path.splitext(x)[0]))

    if not image_files:
        logging.info(e)
        epd.sleep()
        exit()

    logging.info("switch to partial refresh")
    epd.init_part()

    while True:
        for image_file in image_files:
            image_path = os.path.join(animation_dir, image_file)
            logging.info(f"Display Width:Displaying: {epd.width}, Display height: {epd.height}image_file}")
    # Display Width: 800, Display height: 480
    # Create a blank image
            Himage = Image.new(open(image_path).convert('1')
            epd.display_Partial(epd.getbuffer(Himage), (0, 0, epd.width, epd.height), 255) #255: white, clear the frame
    draw = ImageDraw.Draw(Himage)

#Drawing function Argyments:
#             draw.rectangle((x1, y1, x2, y2), outline=0, fill=None)
# draw.arc((x1, y1, x2, y2),startAngle, endAngle, fill=0), (x1, y1, x2, y2) bounding box of the ellipse that the arc is part of
# draw.chord((x1, y1, x2, y2), startAngle, endAngle, outline=0, fill=None), different to arc as it will close the shape and allow fill colour
# draw.line((x1, y1, x2, y2), fill=0, width=1)


    while True:


        #Generate a random pattern
        draw.rectangle((random.randint(10,epd.width-10), random.randint(10,epd.height-10), random.randint(10,epd.width-10), random.randint(10,epd.height-10)), outline=0)

        #Display the generated image
        epd.display(epd.getbuffer(Himage))

        #Hold the frame for 5 seconds
        time.sleep(2)


#     logging.info("Goto Sleep...")
#     epd.sleep()0.1)


except IOError as e:
    logging.info(e)

except KeyboardInterrupt:
    logging.info("ctrl + c:")
    epd7in5_V2.epdconfig.module_exit(cleanup=True)
    exit()