Raspberry Pi Image: Video Looper
What is Raspberry Pi Video Looper?
Raspberry Pi Video Looper is a simple way to display seamless looping video files, for example in an art exhibition. All you need is a Raspberry Pi, an SD card, a screen and a USB stick.
We are using Raspberry Pi Imager. We have a more detailed tutorial for imaging the Pi.
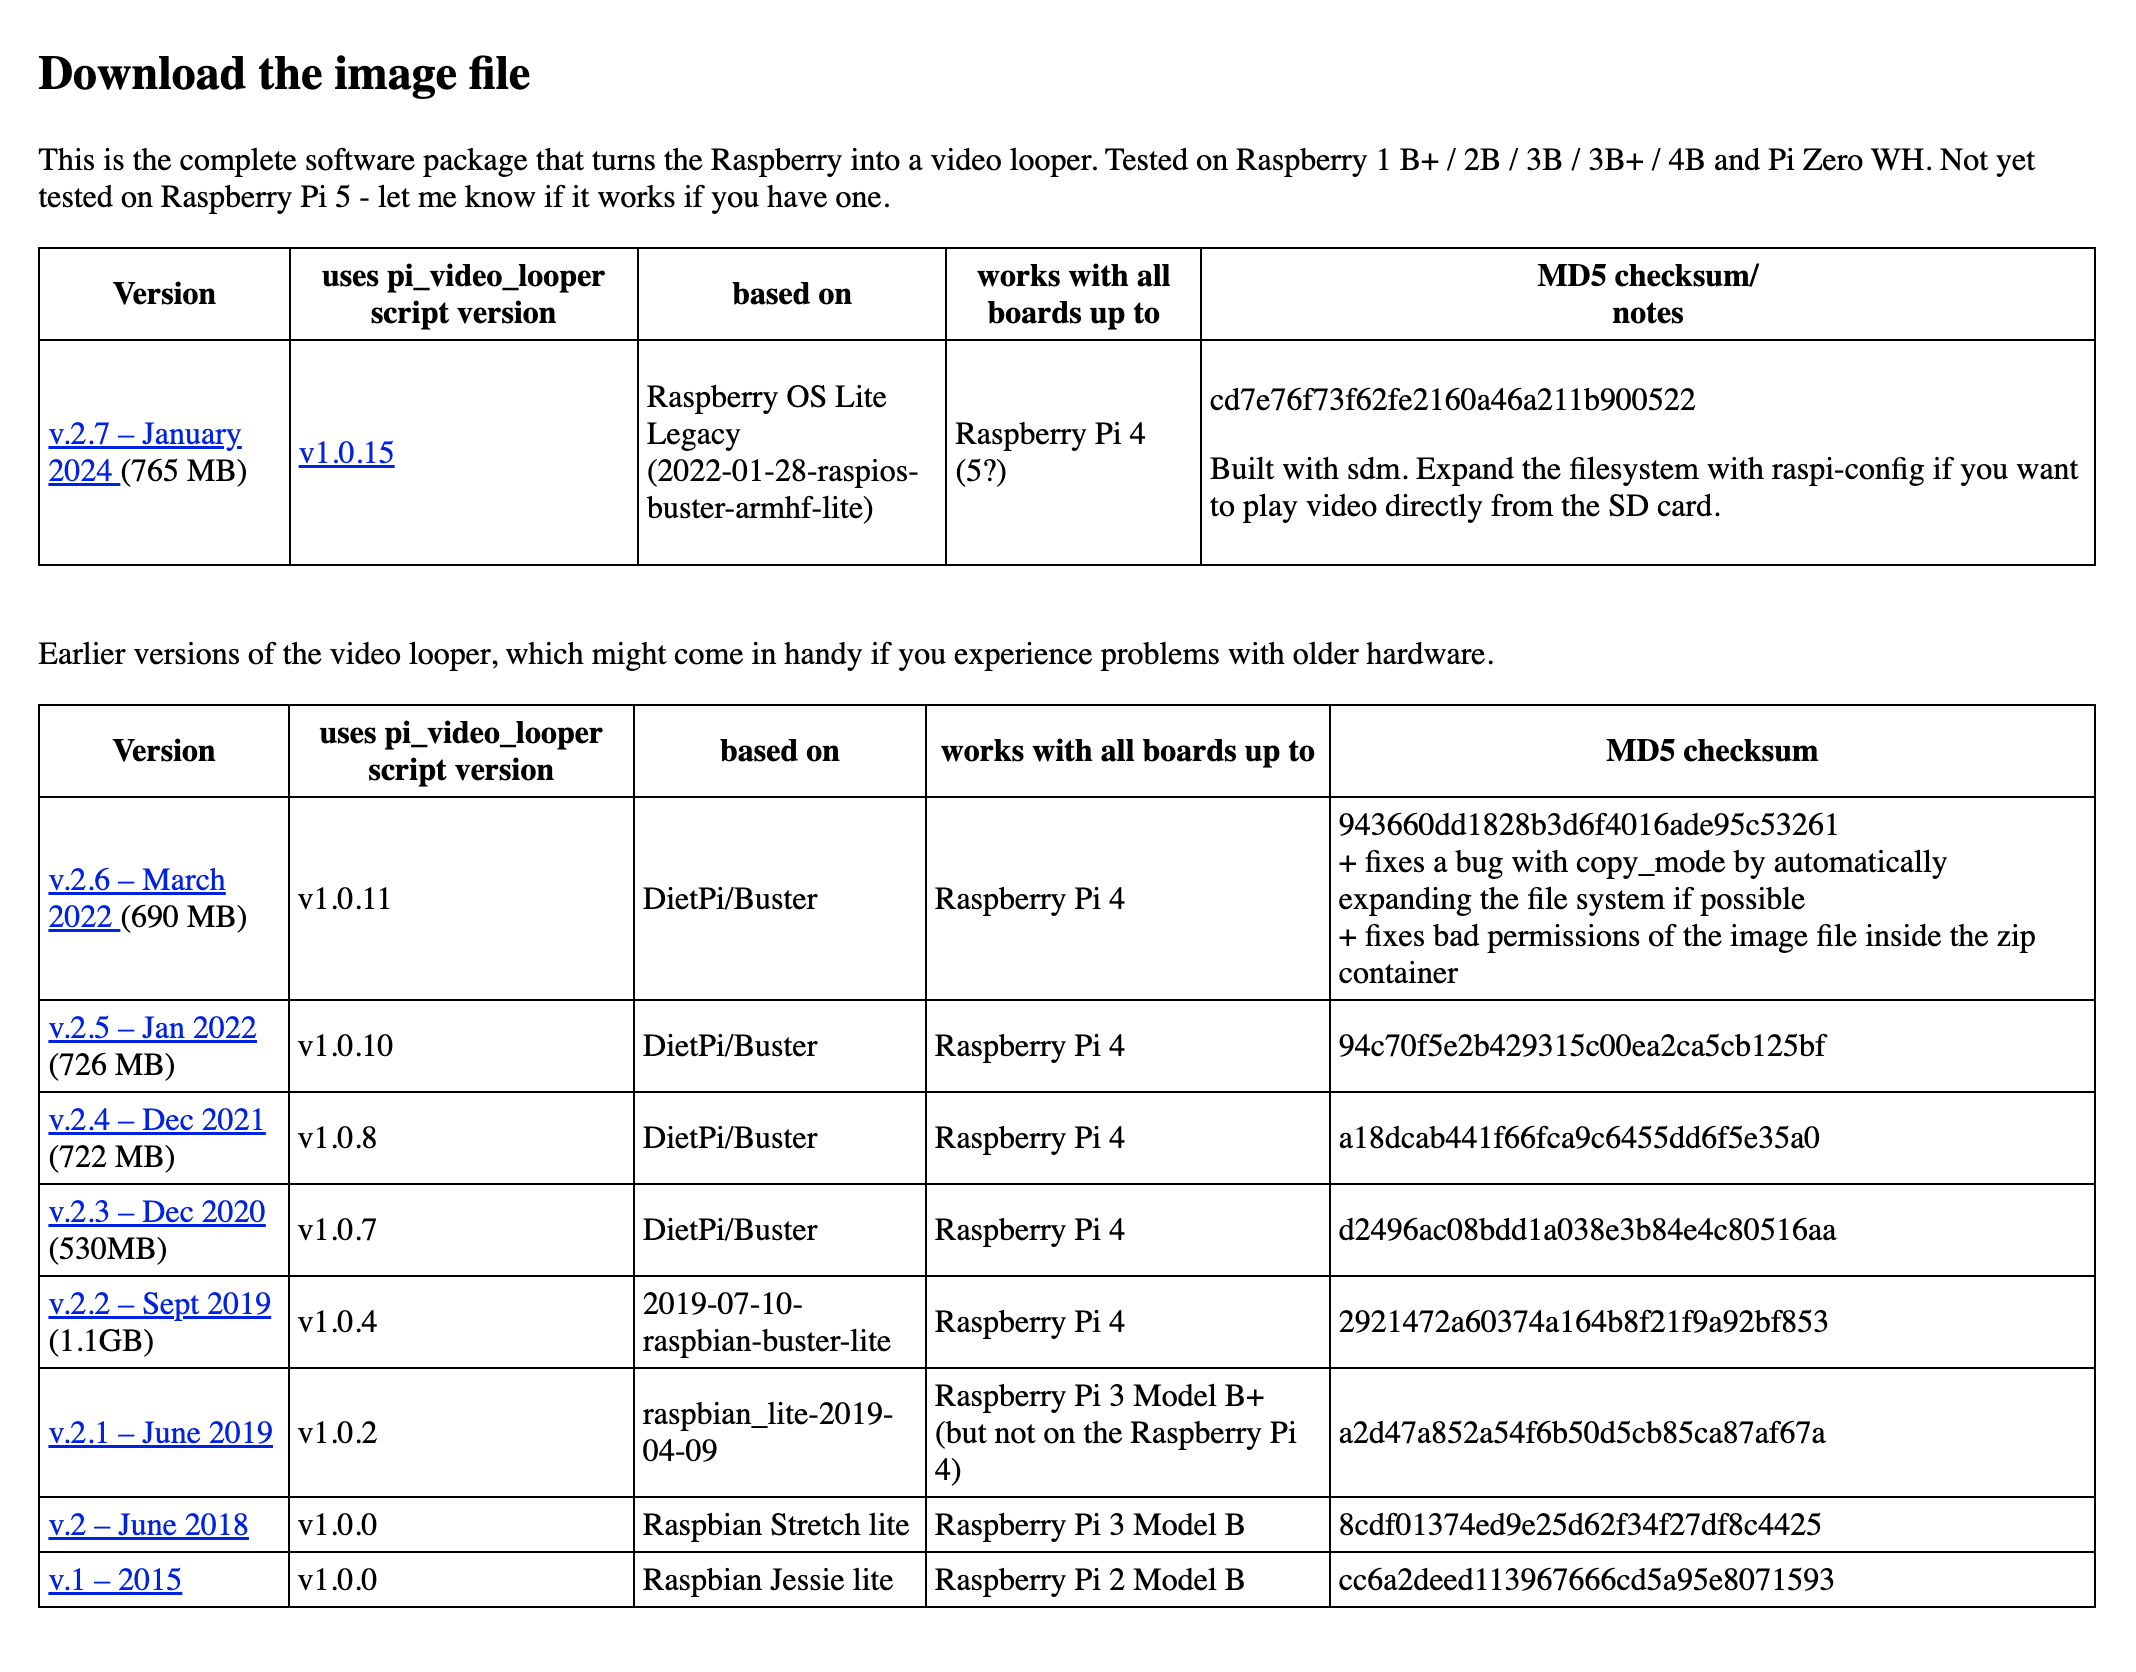
1. Download the Video Looper Image
You can download the Video Looper image here. Choose the latest version that is compatible with the Pi model you are using, please refer to the "works with all boards up to" column.
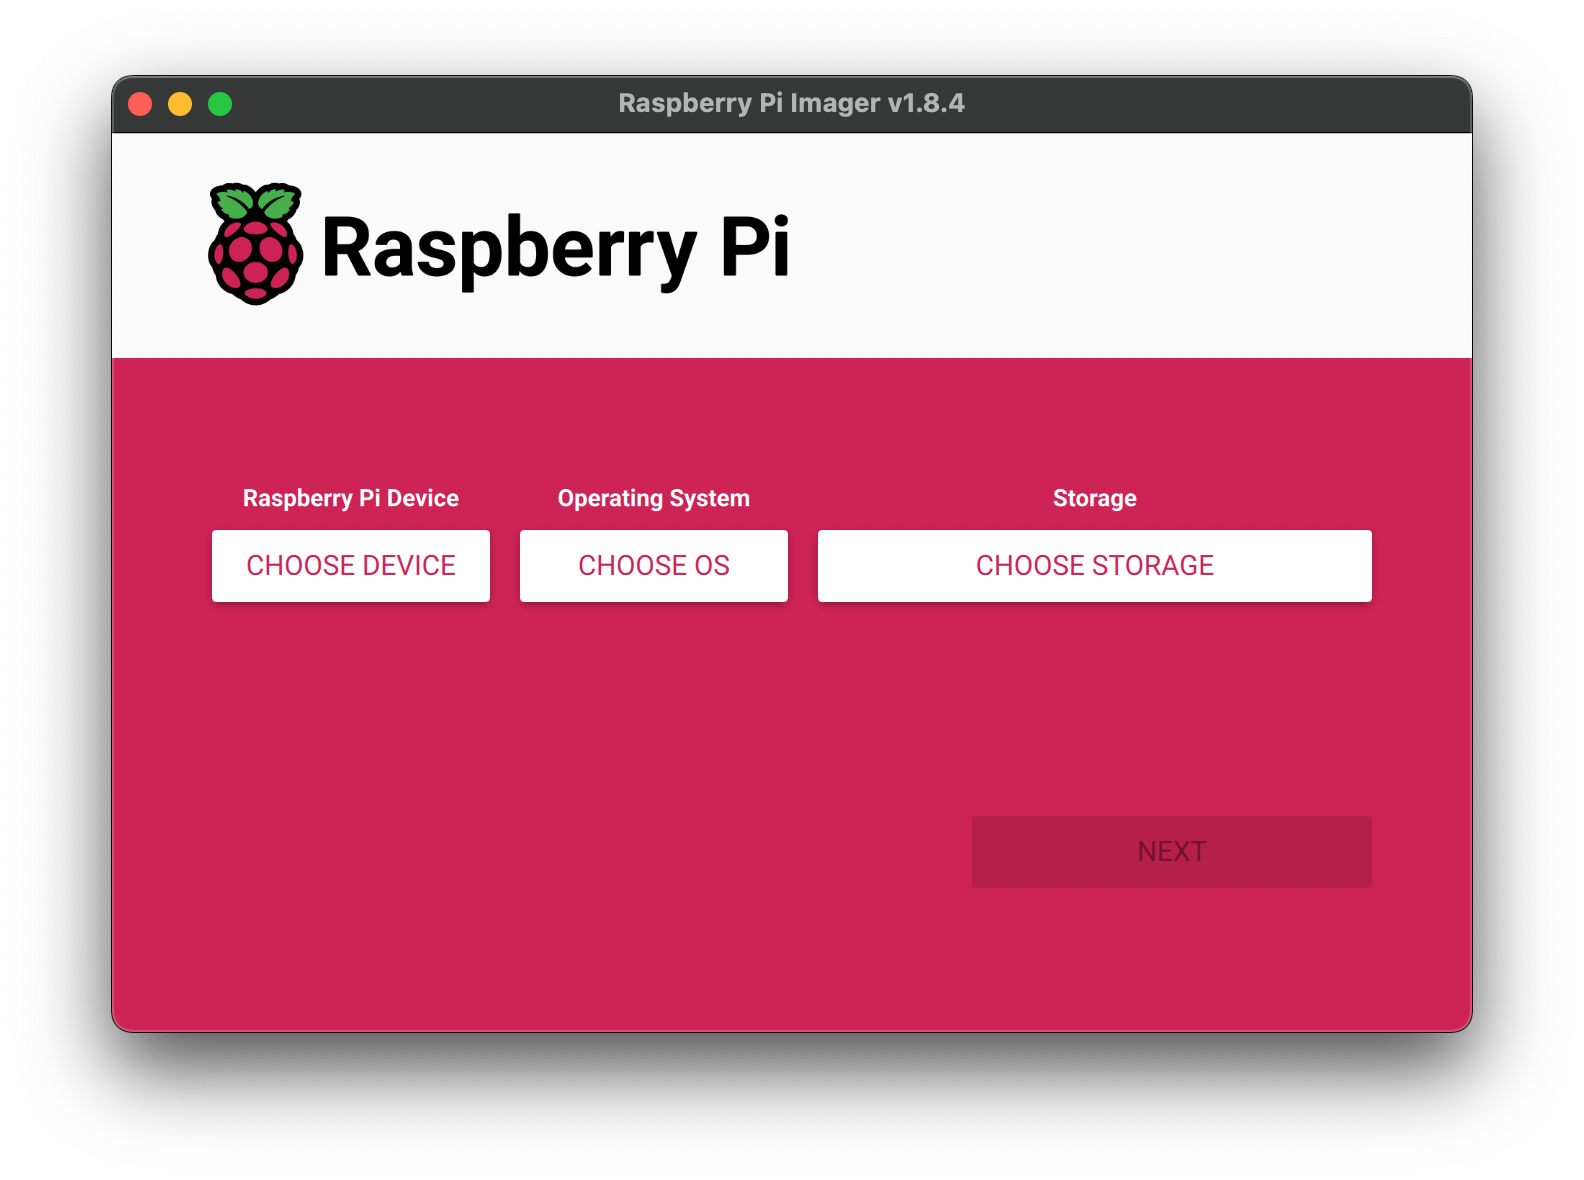
2. Using Raspberry Pi Imager
Raspberry Pi Deviceselect Raspberry Pi ModelStorageselect the SD card
Operation System- selectUse custom- select the newly downloaded Video Looper Image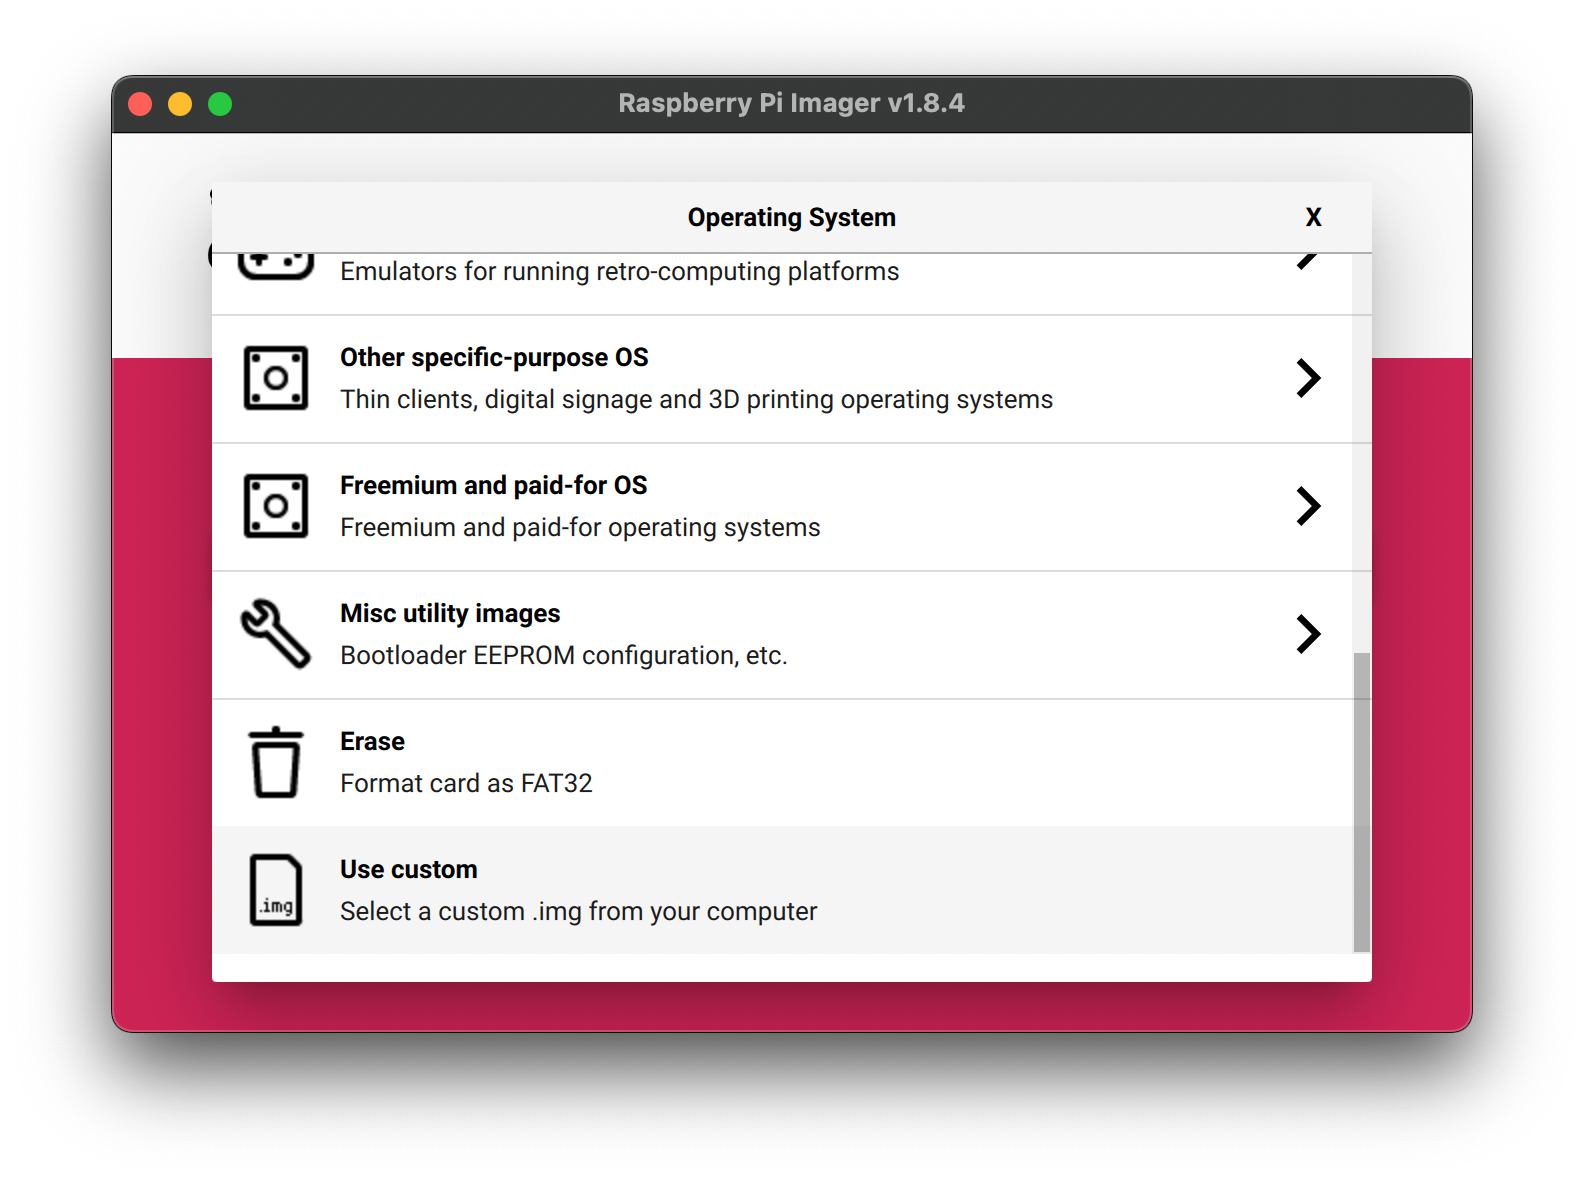

3. Files Format
Video Looper uses the default video player, omxplayer, which can play most videos encoded with the H.264 video codec and in a video format with an extension like .avi, .mov, .mkv, .mp4, or .m4v.
Try to minimize the size of your files and export the video with the exact resolution of your display for better performance. e.g. You shouldn't use an uncompressed 4K video format on a 1080p HD display.
4. Plug and Play
You can put your video on a USB stick and plug it to the pi. Your video(s) is ready to loop!
If only one movie is available it will play continually in a loop.
If multiple movies are found then each movie will be played in alphabetical order by filename and will loop back to the first video and play all videos again in order repeatedly.
5. Note on Raspberry Pi Monitors

If you are using Video Looper OS with a Raspberry Pi Monitor (shown above) you may notice that the monitor will go to sleep rather than display the video. There is an extra setup step required to fix this.
- Open the MicroSD card on your computer/laptop with the Video Looper OS installed. It should appear as a drive with the name
boot. - Place this config.txt in the top-level folder. There is already a config.txt file in the drive, but this new one has the right settings that will encourage the display to wake up. When you are asked if you wish to overwrite the existing file, click Yes/Confirm.
- Place the MicroSD card back in the Raspberry Pi.
The Video Looper OS should now work with the monitor and run with a 1920x1080p resolution.