
How to make a vibration sensor with Piezo Transducer
What is the piezo transducer?
A piezoelectric transducer (or piezo transducer) is a device that uses the piezoelectric effect to convert physical phenomena—such as pressure, acceleration, strain, or force—into electrical signals, or conversely, to convert electrical energy into mechanical motion or sound.
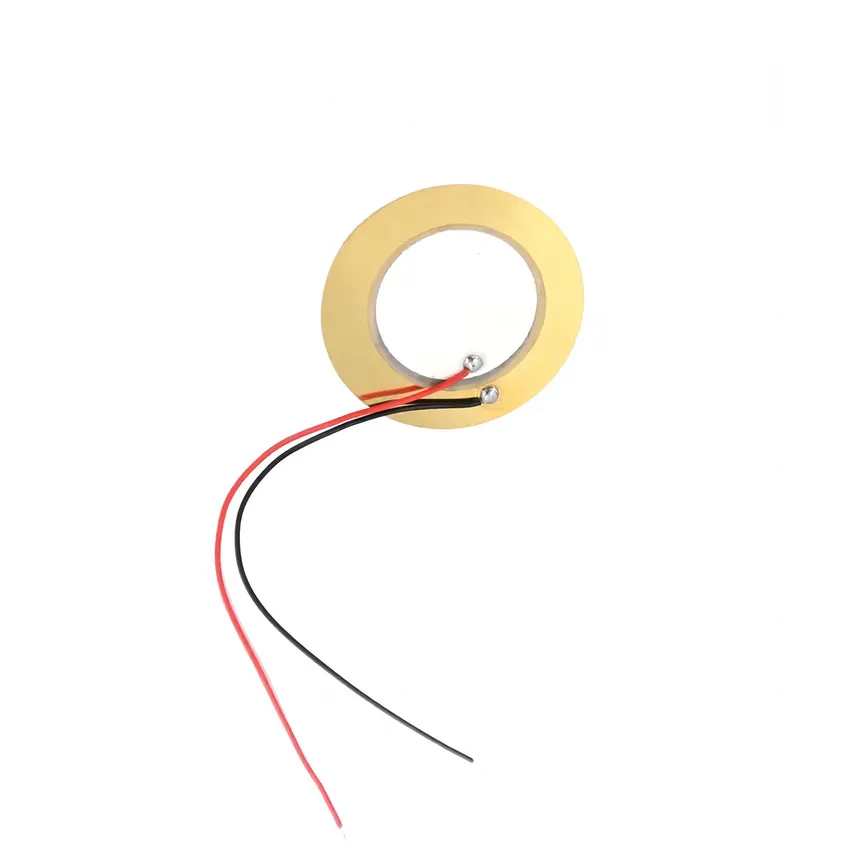
How It Works
Piezo transducers rely on special materials (typically piezoelectric ceramics like lead zirconate titanate [PZT], quartz, or certain polymers) that exhibit two primary properties:
Direct Effect (Sensors): When the material is mechanically stressed, deformed, or compressed, it generates an electrical charge across its surfaces. This makes them ideal for measuring rapid changes in pressure or vibration.
Inverse Effect (Actuators/Sound Emitters): When an electrical voltage is applied across the material, it rapidly expands or contracts, creating physical motion or sound waves (commonly used in buzzers, speakers, and ultrasound equipment).
Wiring
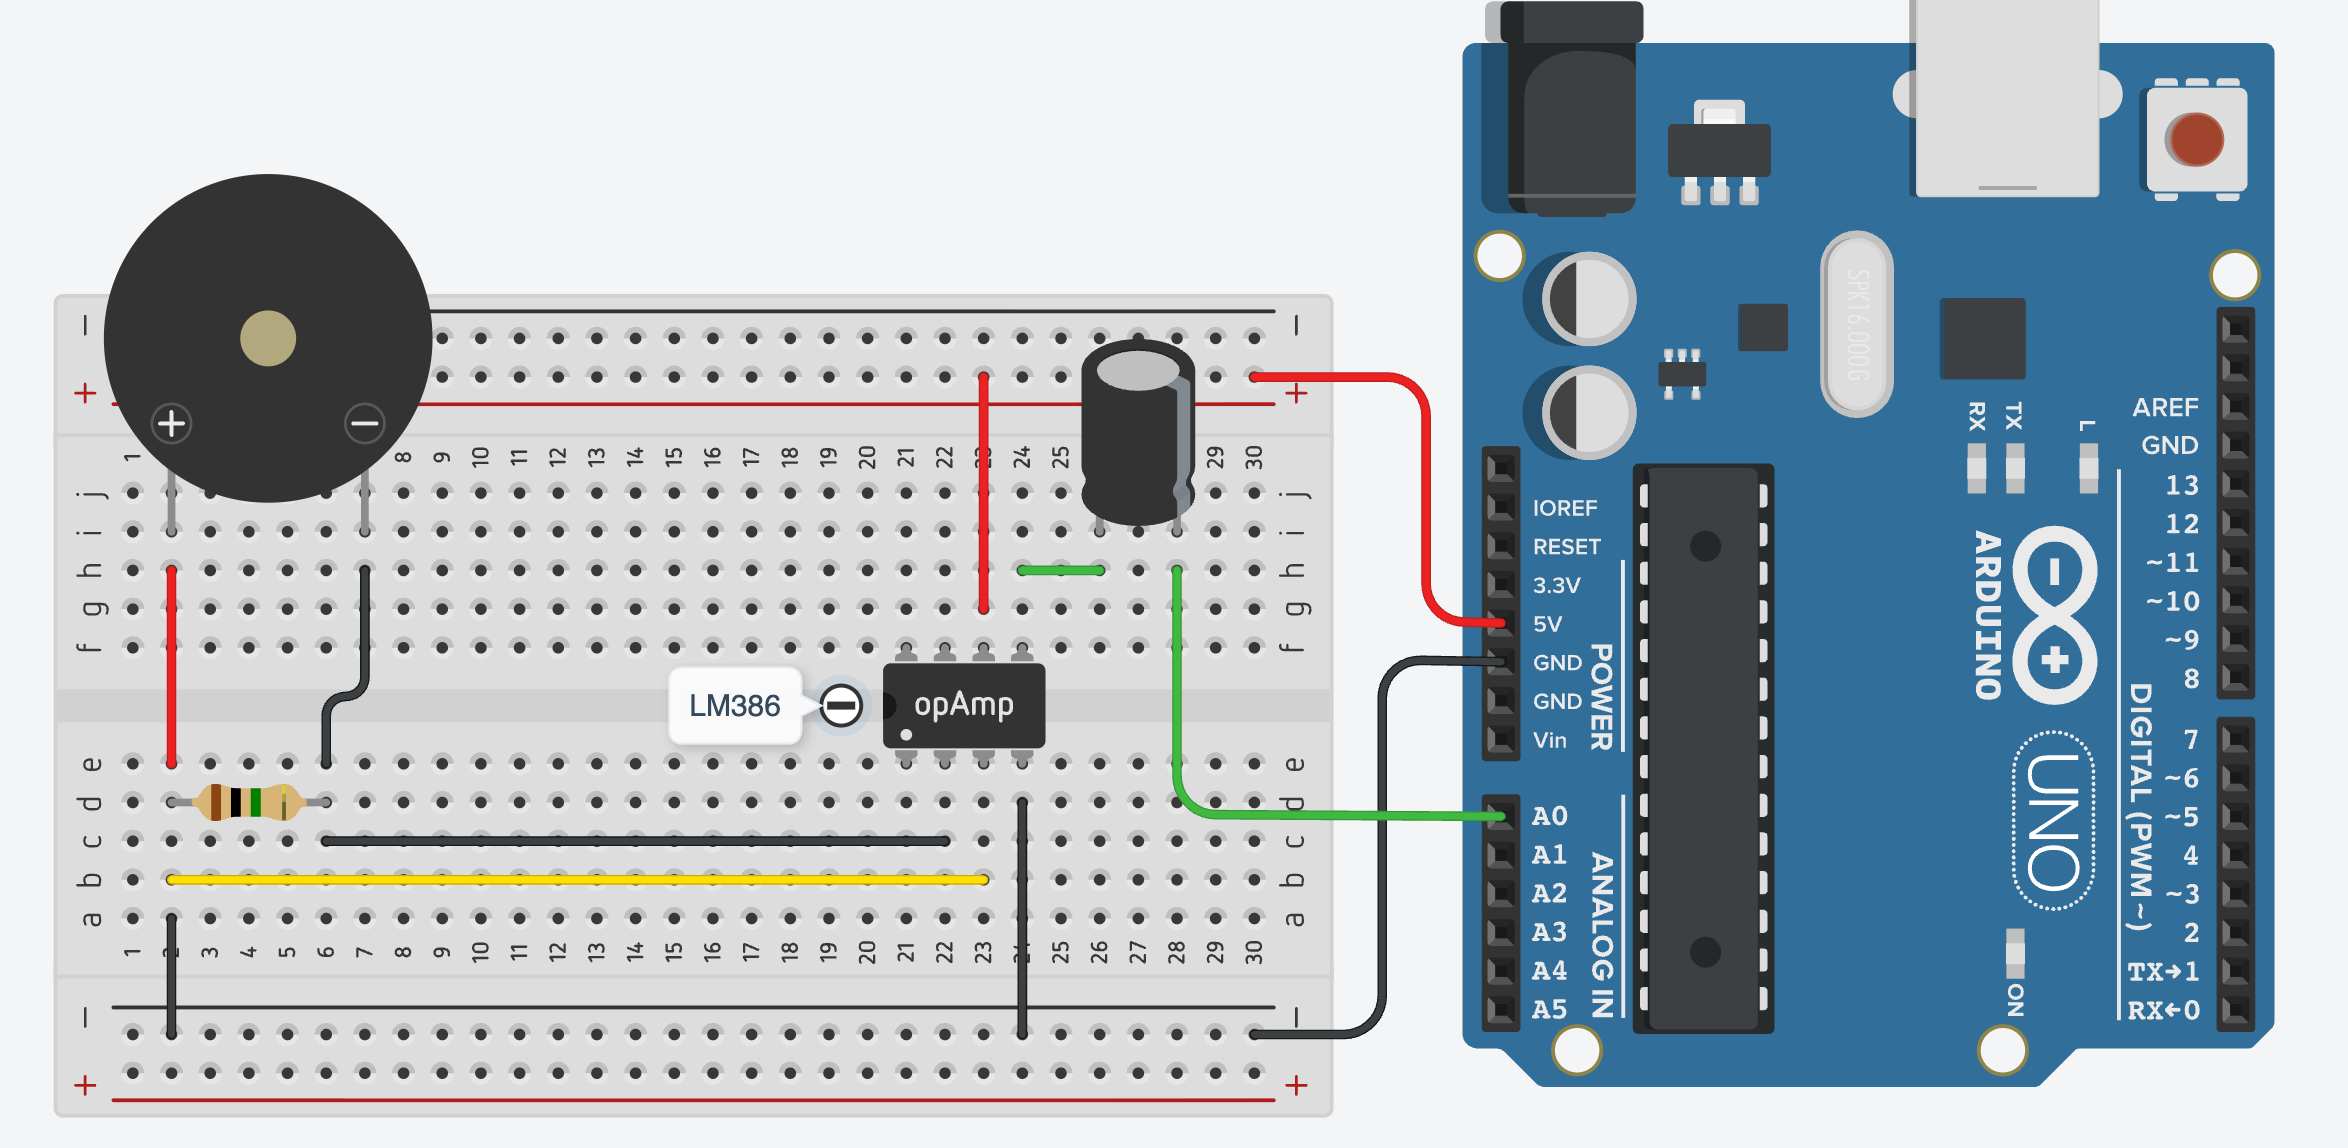
- Piezo + and Piezo - connected with 1M ohm resistor
- Piezo + to LM386 pin3 (IN+)
- Piezo + to GND
- Piezo - to LM386 pin2 (IN-)
- LM386 pin4 to GND
- LM386 pin5 (Vout) via 10uF capacitor to A0
- LM386 pin6 (Vs) to 5V
Arduino Code
This example sends the vibration value measured from Arduino to Processing via the serial port, you can read the data from the serial monitor.
const int piezoPin = A0;

const int samples = 100;
const int noiseThreshold = 5;  // Adjust after observing readings

int restingValue;

void setup() {
Serial.begin(115200);
delay(1000);

// Measure the resting voltage while the sensor is still
long total = 0;

for (int i = 0; i < 500; i++) {
total += analogRead(piezoPin);
delay(2);
}

restingValue = total / 500;

Serial.print("Resting value: ");
Serial.println(restingValue);
}

void loop() {
long totalDeviation = 0;

for (int i = 0; i < samples; i++) {
int reading = analogRead(piezoPin);
totalDeviation += abs(reading - restingValue);
delayMicroseconds(500);
}

int vibration = totalDeviation / samples;

// Ignore small fluctuations
if (vibration < noiseThreshold) {
vibration = 0;
}

Serial.println(vibration);
delay(10);
}
Processing Code
This example used the data received from Arduino to control the sin wave in Processing. You may need to fine tune the lowest and highest values.
import processing.serial.*;
import processing.sound.*;

Serial myPort;
String val;

int datanum = 0; //number of data receiving from Arduino
int value1;

SinOsc[] sineWaves;
int lowest = 30;
int highest = 100;

// The number of oscillators
int numSines = 5;

// A float for calculating the amplitudes
float[] sineVolume;

void setup() {
  size(800, 800);

  printArray(Serial.list()); //show all ports
  String portName = Serial.list()[3];//choose the correct port
  myPort = new Serial(this, portName, 115200);
  myPort.bufferUntil('\n');

  sineWaves = new SinOsc[numSines];
  sineVolume = new float[numSines];

    for (int i = 0; i < numSines; i++) {

    // The overall amplitude shouldn't exceed 1.0 which is prevented by 1.0/numSines.
    // The ascending waves will get lower in volume the higher the frequency.
    sineVolume[i] = (1.0 / numSines) / (i + 1);

    // Create the Sine Oscillators and start them
    sineWaves[i] = new SinOsc(this);
    sineWaves[i].play();
  }
}

void draw() {

    // Convert vibration strength to sound frequency
    float frequency = map(value1, lowest, highest, 100, 1000);
    frequency = constrain(frequency, 100, 1000);

    // Convert vibration strength to sound volume
    float volume = map(value1, lowest, highest, 0, 0.5);
    volume = constrain(volume, 0, 0.5);

    for (int i = 0; i < numSines; i++) {
    sineWaves[i].freq(frequency * (i + 1));
    sineWaves[i].amp(volume * sineVolume[i]);
    }
}


void serialEvent( Serial myPort){
  val = myPort.readStringUntil('\n');
  if (val != null)
  {
    val = trim(val);
    int[] vals = int(splitTokens(val, ","));

    if(vals.length >= datanum){
       value1 = vals[0];

      //multiple data from arduino if needed
      //value2 = vals[1] ;

      println(value1);
    }
  }
}